
Painting ceramic cups is a fun and rewarding craft that allows you to turn ordinary drinkware into personalized works of art. Whether you’re looking to create custom coffee mugs, handmade gifts, seasonal décor, or unique kitchen accessories, ceramic cup painting offers endless opportunities for creativity.
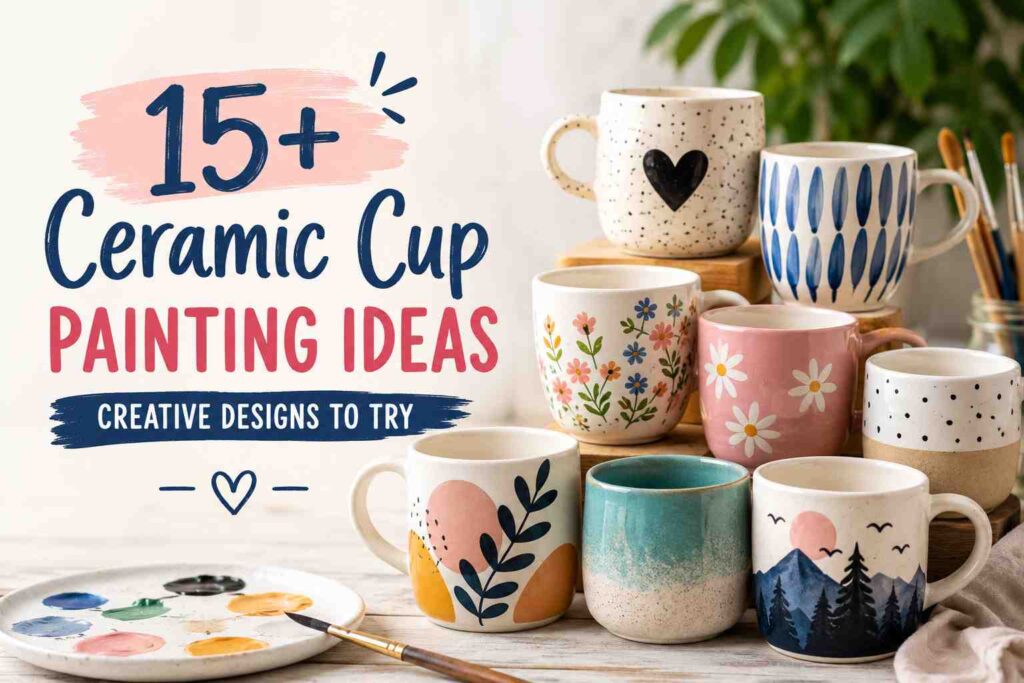
The best part is that you don’t need to be a professional artist to get started. Many beautiful designs can be created using simple painting techniques, paint pens, and a little patience. From minimalist patterns to colorful floral artwork, there’s a ceramic cup painting idea for every skill level.
This guide covers everything you need to know before you start, along with 17 creative ceramic cup painting ideas and step-by-step instructions for each design.
Why Paint Ceramic Cups?
Ceramic cup painting is more than just a fun DIY project. It allows you to create functional artwork that can be used every day.
Express Your Creativity
Painting ceramic cups gives you complete freedom to experiment with colors, patterns, lettering, and artistic styles. Each cup becomes a reflection of your personal taste.
Create Personalized Gifts
Hand-painted cups make thoughtful gifts for birthdays, holidays, weddings, Mother’s Day, Father’s Day, teacher appreciation gifts, and special occasions.
Upgrade Plain Drinkware
Instead of purchasing expensive decorative mugs, you can transform inexpensive ceramic cups into custom pieces that perfectly match your home décor.
Enjoy a Relaxing Hobby
Painting can be calming and therapeutic. Many people enjoy ceramic painting as a creative way to unwind and reduce stress.
Make Seasonal Decorations
You can customize cups for every season and holiday, creating unique collections throughout the year.
Supplies You’ll Need for Ceramic Cup Painting
Before starting your project, gather the necessary materials.
Plain Ceramic Cups
White ceramic cups are often the easiest to paint because colors appear brighter and more vibrant.
Ceramic Paint or Paint Pens
Choose products specifically designed for ceramic surfaces. These paints provide better adhesion and durability.
Paintbrushes
Having several brush sizes makes painting easier.
Useful brushes include:
- Fine detail brush
- Small round brush
- Medium flat brush
Pencil
A pencil allows you to lightly sketch designs before painting.
Painter’s Tape
Perfect for geometric patterns and straight lines.
Cotton Swabs
Helpful for correcting small mistakes while paint is still wet.
Paper Towels
Useful for cleaning brushes and managing excess paint.
Water Container
Needed for rinsing brushes between colors.
Protective Sealant (Optional)
Some ceramic projects benefit from an additional protective coating.
How to Prepare a Ceramic Cup Before Painting
Proper preparation helps paint adhere better and creates cleaner results.
Wash Thoroughly
Clean the cup with warm water and dish soap to remove dirt, oils, and fingerprints.
Dry Completely
Allow the ceramic surface to dry fully before painting.
Wipe With Rubbing Alcohol
This helps remove any remaining residue and improves paint adhesion.
Sketch Your Design
Lightly outline your design with a pencil.
Protect Your Workspace
Cover your table with newspaper or a craft mat to prevent accidental stains.
Tips for Successful Ceramic Cup Painting
Start With Simple Designs
Beginners should begin with dots, hearts, leaves, or basic floral patterns.
Apply Thin Paint Layers
Several thin coats usually produce smoother results than one thick layer.
Allow Paint to Dry Between Layers
This helps prevent smudging and uneven finishes.
Follow Curing Instructions
Always follow the manufacturer’s instructions for drying and curing.
Avoid Painting the Drinking Rim
Unless the paint is specifically labeled food-safe, avoid painting areas that come into direct contact with your mouth.
15+ Ceramic Cup Painting Ideas
1. Floral Ceramic Cup Design
Floral designs are classic, versatile, and suitable for all skill levels. You can create anything from delicate wildflowers to bold sunflower arrangements.
How to Paint This Design
Step 1: Sketch the Flowers
Lightly draw flowers around the cup. Consider placing a bouquet on one side or wrapping a vine around the mug.
Step 2: Paint the Petals
Use soft shades such as pink, lavender, yellow, or white.
Step 3: Paint the Centers
Add small circular flower centers using brown, black, or golden yellow paint.
Step 4: Add Leaves and Stems
Paint green stems and leaves connecting the flowers.
Step 5: Add Final Details
Use a fine brush to create highlights and delicate outlines.
Design Variation
Try painting daisies, roses, tulips, lavender, or wildflowers depending on your preferred style.
2. Minimalist Line Art Cup
Minimalist designs are modern, elegant, and surprisingly easy to create.
How to Paint This Design
Step 1: Choose a Subject
Popular options include abstract faces, flowers, hands, or continuous-line illustrations.
Step 2: Sketch Lightly
Keep the drawing simple and clean.
Step 3: Trace With a Paint Pen
Use a black ceramic paint pen for smooth, consistent lines.
Step 4: Refine the Design
Correct any uneven areas before curing.
Design Variation
Use metallic gold or silver paint instead of black for a luxurious look.
3. Botanical Leaf Cup
Botanical artwork remains one of the most popular trends in home décor.
How to Paint This Design
Step 1: Draw Leaf Shapes
Sketch eucalyptus branches, monstera leaves, fern leaves, or tropical foliage.
Step 2: Apply the Base Color
Paint the leaves using medium green tones.
Step 3: Add Veins
Use darker green paint to create realistic leaf details.
Step 4: Highlight the Leaves
Add lighter green or white accents for dimension.
Design Variation
Combine several leaf varieties for a lush botanical arrangement.
4. Personalized Name Cup
Personalized cups make wonderful gifts and keepsakes.
How to Paint This Design
Step 1: Plan the Layout
Sketch the name, initials, or monogram lightly with pencil.
Step 2: Paint the Lettering
Use a paint pen or fine brush for crisp lettering.
Step 3: Decorate Around the Text
Add stars, flowers, leaves, hearts, or geometric accents.
Step 4: Refine the Details
Ensure lettering remains neat and readable.
Design Variation
Use calligraphy-style lettering for a more elegant appearance.
5. Polka Dot Cup
Polka dots are cheerful, timeless, and beginner-friendly.
How to Paint This Design
Step 1: Plan Dot Placement
Visualize an even pattern around the cup.
Step 2: Create the Dots
Use a dotting tool or the end of a brush handle.
Step 3: Add Color Variety
Alternate colors or use different dot sizes.
Step 4: Fill Empty Spaces
Add smaller dots between larger ones if desired.
Design Variation
Create a gradient effect by gradually changing colors.
6. Heart Pattern Cup
Heart-themed cups are perfect for Valentine’s Day, anniversaries, or gifts.
How to Paint This Design
Step 1: Sketch Small Hearts
Scatter hearts evenly across the surface.
Step 2: Paint the Shapes
Use red, pink, burgundy, or pastel shades.
Step 3: Add Decorative Elements
Paint tiny stars, dots, or sparkles between hearts.
Step 4: Outline for Extra Definition
Optional outlines can make the design stand out more.
7. Abstract Art Cup
Abstract painting allows unlimited creativity.
How to Paint This Design
Step 1: Choose a Color Palette
Select three to five coordinating colors.
Step 2: Paint Large Shapes
Create organic blobs, brushstrokes, or geometric blocks.
Step 3: Layer the Colors
Allow each layer to dry before adding another.
Step 4: Add Fine Details
Use paint pens for lines, dots, or patterns.
Design Variation
Try modern earth tones or vibrant contemporary colors.
8. Sunflower Cup
Sunflowers create a bright and cheerful design.
How to Paint This Design
Step 1: Paint the Flower Center
Create a dark brown circular center.
Step 2: Add Petals
Paint yellow petals around the center.
Step 3: Add Leaves
Paint green leaves and stems.
Step 4: Add Shading
Use darker yellows and browns for depth.
Design Variation
Create a field of small sunflowers wrapping around the cup.
9. Galaxy-Themed Cup
Galaxy designs are dramatic and visually stunning.
How to Paint This Design
Step 1: Paint a Dark Base
Use black, navy, or deep purple paint.
Step 2: Blend Cosmic Colors
Sponge pink, blue, and purple shades onto the surface.
Step 3: Add Stars
Use white paint to splatter tiny star effects.
Step 4: Paint Planets
Add circular planet designs throughout the cup.
Design Variation
Use metallic paints for a magical galaxy effect.
10. Fruit-Themed Cup
Fruit patterns are fun, colorful, and perfect for summer.
How to Paint This Design
Step 1: Choose Your Fruit
Strawberries, cherries, lemons, and oranges work especially well.
Step 2: Sketch Repeating Shapes
Create a balanced pattern around the cup.
Step 3: Paint Bright Colors
Fill the fruit with vibrant shades.
Step 4: Add Details
Include seeds, stems, and highlights.
11. Rainbow Cup
Rainbow designs add color and positivity.
How to Paint This Design
Step 1: Draw Rainbow Arches
Sketch evenly spaced curved lines.
Step 2: Paint Each Section
Fill each arch with a different color.
Step 3: Add Clouds
Paint small clouds at the rainbow ends.
Step 4: Add Decorative Details
Include stars, hearts, or sparkles.
12. Inspirational Quote Cup
Motivational quotes make everyday coffee breaks more enjoyable.
How to Paint This Design
Step 1: Choose a Quote
Select a short phrase that fits comfortably on the cup.
Step 2: Plan the Layout
Sketch the text lightly.
Step 3: Paint the Lettering
Use a fine-tip paint pen.
Step 4: Add Decorative Elements
Include leaves, borders, or small illustrations.
13. Animal Illustration Cup
Animal-themed cups are playful and customizable.
How to Paint This Design
Step 1: Select an Animal
Cats, dogs, rabbits, foxes, and birds are popular options.
Step 2: Sketch the Outline
Keep the drawing simple and recognizable.
Step 3: Paint Base Colors
Apply the primary colors first.
Step 4: Add Facial Details
Paint eyes, noses, ears, and other features.
14. Mandala Cup
Mandalas create intricate and beautiful patterns.
How to Paint This Design
Step 1: Establish a Center Point
Choose a focal area for the design.
Step 2: Build Circular Layers
Work outward using repeating shapes.
Step 3: Add Dots and Details
Use dotting tools to create decorative patterns.
Step 4: Fill Empty Areas
Balance the design with smaller details.
15. Boho Sun and Moon Cup
Celestial designs are trendy and stylish.
How to Paint This Design
Step 1: Sketch a Sun or Moon
Position the main symbol prominently.
Step 2: Paint the Shape
Use warm yellows, golds, or soft neutral tones.
Step 3: Add Decorative Elements
Paint rays, stars, moon phases, and dots.
Step 4: Add Fine Details
Enhance the design with line work and patterns.
16. Ocean-Inspired Cup
Bring beach-inspired beauty to your ceramic artwork.
How to Paint This Design
Step 1: Paint the Background
Blend shades of blue and turquoise.
Step 2: Create Waves
Paint flowing white wave patterns.
Step 3: Add Sea Elements
Include shells, starfish, coral, or fish.
Step 4: Highlight Details
Use white paint for foam and reflections.
17. Checkerboard Pattern Cup
Checkerboard designs are trendy and eye-catching.
How to Paint This Design
Step 1: Create a Grid
Use a ruler and pencil to mark squares.
Step 2: Paint Alternating Squares
Fill every other square with color.
Step 3: Let Dry
Allow the first color to dry completely.
Step 4: Paint Remaining Squares
Fill the remaining spaces carefully.
Design Variation
Use pastel colors, retro shades, or monochrome palettes.
Frequently Asked Questions
What Paint Works Best for Ceramic Cups?
Ceramic paints and ceramic paint pens specifically designed for non-porous surfaces usually provide the best results.
Do Painted Ceramic Cups Need to Be Baked?
Many ceramic paints require baking or curing. Always follow the manufacturer’s instructions.
Can Painted Cups Be Used for Drinking?
Yes, provided the paint is food-safe and is not applied to areas that come into direct contact with food or drinks.
How Long Does Ceramic Paint Last?
When properly cured and cared for, ceramic paint can last for years.
Final Thoughts
Ceramic cup painting is an enjoyable DIY project that combines creativity with functionality. Whether you’re painting floral bouquets, trendy checkerboard patterns, personalized names, or celestial artwork, each design allows you to create something truly unique.
Start with simple designs if you’re a beginner, experiment with different colors and techniques, and most importantly, have fun throughout the creative process. With a little practice, you’ll be able to transform ordinary ceramic cups into beautiful handmade pieces that you’ll enjoy using every day.