The hibiscus flower is one of the most recognizable blooms in the world. With its bold petals, tropical flair, and symbolic meaning across cultures, it makes a stunning subject for artists of all levels. Whether you want to draw it for botanical illustration, tattoos, digital art, or simple sketch practice, learning how to draw a hibiscus flower in different ways allows you to explore style, detail, and creativity.
This complete guide will show you how to draw hibiscus flowers step by step in a variety of methods—from realistic and detailed, to cartoonish and minimalist, to watercolor and digital. You’ll discover tools, techniques, and pro tips for mastering this beautiful bloom.
Contents
- Why Learn to Draw a Hibiscus Flower
- Materials You’ll Need for Drawing Hibiscus Flowers
- Understanding the Anatomy of a Hibiscus Flower
- How To Draw a Realistic Hibiscus Flower
- How To Draw a Simplified Line Art Hibiscus
- How To Draw a Cartoon or Kawaii Hibiscus
- How To Draw a Hibiscus Flower in Watercolor
- How To Draw a Digital Hibiscus Flower
- How To Draw a Hibiscus Flower in Colored Pencil
- How To Draw a Hibiscus Flower with Ink or Pen
- Different Composition Ideas for Hibiscus Drawings
- Practice Exercises for Drawing Hibiscus Flowers
- Common Mistakes to Avoid
- Final Thoughts on Drawing Hibiscus Flowers
Why Learn to Draw a Hibiscus Flower
Symbolic Meaning and Beauty
The hibiscus is a symbol of femininity, summer, joy, and fleeting beauty in many cultures. Its large, open petals and prominent stamen make it ideal for stylized or detailed floral illustrations.
Great for Practice
Because the hibiscus has clear structural elements—five petals, central stamen, radial symmetry—it serves as a great botanical subject for practicing line, shading, and form.
Versatile Across Mediums
You can draw hibiscus flowers in pencil, ink, watercolor, colored pencil, digital software, and even markers. Each medium lends a different personality to the flower.
Materials You’ll Need for Drawing Hibiscus Flowers
Traditional Drawing Tools
- HB, 2B, and 4B pencils
- Erasers (kneaded and standard)
- Fineliner pens or ink pens
- Colored pencils or watercolor paints
- Sketchbook or mixed-media paper
Digital Drawing Tools
- iPad with Procreate or Android tablet with drawing app
- Photoshop, Krita, or Clip Studio Paint
- Stylus with pressure sensitivity
- Custom flower or inking brushes
Optional Add-Ons
- Ruler and compass (for layout accuracy)
- Lightbox or tracing paper (for refining sketches)
- Botanical reference books or photos
Understanding the Anatomy of a Hibiscus Flower
Before drawing the hibiscus in different styles, it helps to understand its basic structure.
Key Parts of the Flower
- Petals: Usually five broad petals that slightly overlap.
- Sepals: Green outer petals that support the bloom.
- Stamen Tube: A long, central stalk covered in pollen-bearing anthers.
- Pistil/Style: The tip of the stamen tube with bulbous stigma heads.
- Leaves: Often jagged or lobed with visible veins.
Observing Real Hibiscus Flowers
Use photo references or real flowers to study the curvature, overlap, and symmetry of petals. The hibiscus has a trumpet-like openness, often with a visible depth between the central stamen and outer petals.
How To Draw a Realistic Hibiscus Flower
Step-by-Step Guide
- Start with a light circle
This helps guide the overall size of the bloom. - Divide into five equal segments
Lightly sketch five pie-slice segments to guide petal placement. - Sketch petal outlines
Each petal should be rounded at the edge and slightly ruffled. Add folds for realism. - Draw the central stamen
From the center, draw a long stem with a fuzzy texture and bulbous ends for the stigma. - Add the base and sepals
Under the petals, draw small pointed sepals, tucked between gaps. - Draw the stem and leaves
Add a curving stem and two to three leaves with serrated edges and prominent veins. - Shade and add texture
Use 2B or 4B pencils for shadows between petals and in folds. Add fine lines to show petal texture.
Tips for Realism
- Add veins with light strokes
- Make the stamen slightly fuzzy for texture
- Shade where petals overlap or fold inward
How To Draw a Simplified Line Art Hibiscus
Line art hibiscus flowers are great for tattoo design, logos, or minimalist art.
Steps to Create a Clean Line Drawing
- Draw five petals in a circular pattern
Use clean, flowing lines and slight variation in edges for a natural look. - Add a long central stamen
Keep it thin and simple, ending in five small dots. - Outline leaves with fewer details
Use stylized serrated edges without vein details. - Use consistent line weight
Make all lines equal thickness for clean vector-style art.
Ideas for Styling Line Art
- Add a frame (circle, square, or diamond)
- Use just black and white, or add a single color fill
- Combine with text for decorative designs
How To Draw a Cartoon or Kawaii Hibiscus
For a cute or animated approach, cartoon hibiscus flowers are simple and fun.
How to Draw a Kawaii Hibiscus Flower
- Draw a large circular petal base
Use five rounded petals, evenly spaced and slightly overlapping. - Add big eyes and a smile
Place them in the center or base of a petal. - Draw a simplified stamen
A single line with a small heart or star at the end. - Use bright colors
Pink, red, orange, and yellow work well.
Style Tips
- Use thick outlines
- Exaggerate features like petal roundness
- Add sparkles or hearts for added charm
How To Draw a Hibiscus Flower in Watercolor
Watercolor adds softness and transparency, perfect for a tropical flower like hibiscus.
Step-by-Step Watercolor Tutorial
- Sketch lightly with pencil
Draw the flower as outlined in previous sections. - Wet the petal area
Use clean water to dampen each petal before painting. - Add base color
Drop in a mix of pink and red. Let it spread naturally. - Darken the center
Add deeper red near the flower’s core while wet. - Paint the stamen in yellow and orange
Use a fine brush and bright tones. - Use green for leaves
Blend two shades (light and dark green) for depth.
Watercolor Techniques to Try
- Wet-on-wet for soft petals
- Dry brush for texture in the stamen
- Salt for interesting petal patterns
How To Draw a Digital Hibiscus Flower
Digital hibiscus drawings allow for high detail, clean outlines, or stylized color.
Setting Up Your Canvas
- Choose a reference photo or sketch
Import it to your digital app and lower the opacity. - Inking the outline
Use a smooth inking brush with variable pressure. - Add color layers
Separate petals, leaves, and stamen onto different layers for better control. - Add highlights and shading
Use soft airbrush tools for gradients and lighting.
Digital Tips
- Try multiply layers for shading
- Use custom texture brushes for petals
- Save line art separately for coloring pages
How To Draw a Hibiscus Flower in Colored Pencil
Colored pencils allow for detailed layering and vibrant colors.
Color Suggestions
- Petals: Crimson, magenta, coral, pink, yellow
- Stamen: Golden yellow, burnt orange
- Leaves: Olive, sap green, forest green
Drawing Tips
- Light base layer
Start with a light layer of the main color using circular strokes. - Build up color gradually
Add darker tones toward the base and center. - Blend using a colorless blender or white pencil
Smooth transitions between shades. - Use layering for richness
Go over shadow areas multiple times to deepen contrast.
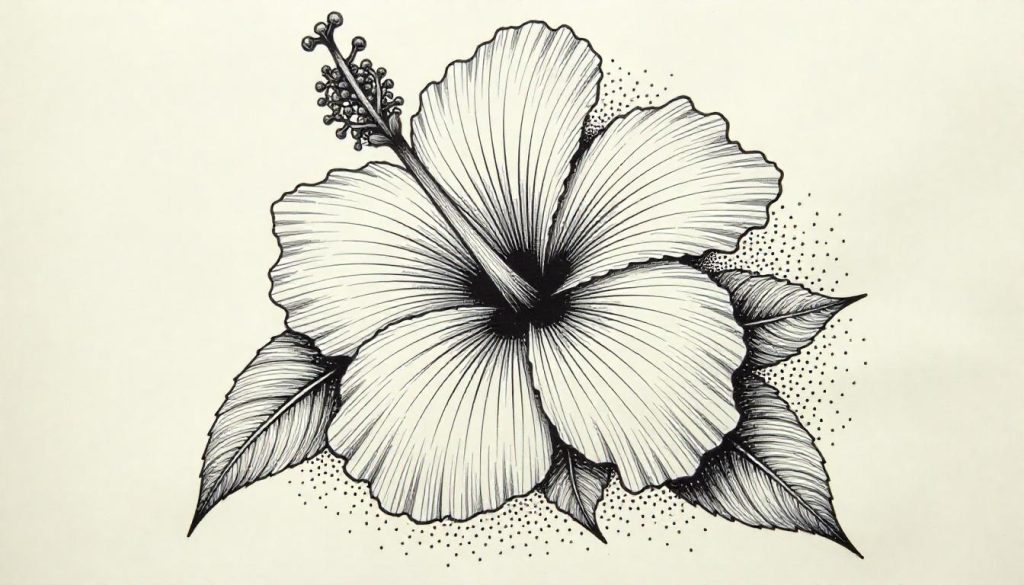
How To Draw a Hibiscus Flower with Ink or Pen
Pen and ink hibiscus illustrations are ideal for tattoo designs and botanical art.
Inking Steps
- Start with a light pencil sketch
Plan all major lines and forms. - Ink with fine liner or fountain pen
Use thin lines for petal edges and stippling for texture. - Add cross-hatching
This technique works well for shading and folds in petals. - Outline stamen and veins
Keep them detailed but controlled.
Blackwork or Mandala Styles
- Incorporate geometric backgrounds
- Add mandala details in the petals
- Use symmetrical floral repetition
Different Composition Ideas for Hibiscus Drawings
Single Bloom
Focus on one flower with full detail. Ideal for studies or realism.
Bouquet Arrangement
Combine hibiscus with other tropical flowers like plumeria, orchid, or monstera leaves.
Frame or Wreath
Circle your hibiscus with foliage or vines for a boho or nature-inspired layout.
Pattern Design
Use multiple simplified hibiscus flowers for repeat patterns in stationery or fabric design.
Practice Exercises for Drawing Hibiscus Flowers
Petal Shape Variations
Practice drawing petals with different curves, ruffles, or twists.
Stamen Practice
Draw the stamen tube and anthers from different angles and positions.
Leaf Studies
Focus on hibiscus leaf shape and vein pattern.
Shading Drills
Use grayscale values to understand petal depth and light placement.
Common Mistakes to Avoid
- Drawing perfectly round petals (real petals have irregular edges)
- Skipping petal overlap—depth is key to realism
- Forgetting the stamen—it’s a crucial identifier
- Using flat color without shading or texture
Final Thoughts on Drawing Hibiscus Flowers
Drawing a hibiscus flower is a rewarding experience for any artist. It challenges your understanding of floral anatomy while offering creative freedom through various styles. Whether you aim for botanical realism, playful cartoons, detailed ink art, or fluid watercolors, there’s always a new way to explore this tropical bloom.
With practice, patience, and observation, your hibiscus drawings will grow more confident and expressive. Keep sketching from life, experimenting with mediums, and don’t be afraid to try new angles or compositions.
So grab your pencil—or stylus—and start drawing your perfect hibiscus today.