Drawing anime faces can be both exciting and intimidating for beginners. Anime and manga styles are known for their expressive eyes, clean lines, and unique facial proportions. Whether you’re aiming to draw your first anime girl or experiment with stylized male characters, learning to sketch anime faces is the essential first step to entering the world of Japanese-style illustration.
This detailed step-by-step guide is tailored specifically for beginners. It breaks down the entire process into manageable stages—from sketching the basic head shape to adding details like eyes, nose, and mouth. Along the way, you’ll learn helpful techniques, proportions, expressions, and character variation tips that will elevate your drawing skills and confidence.
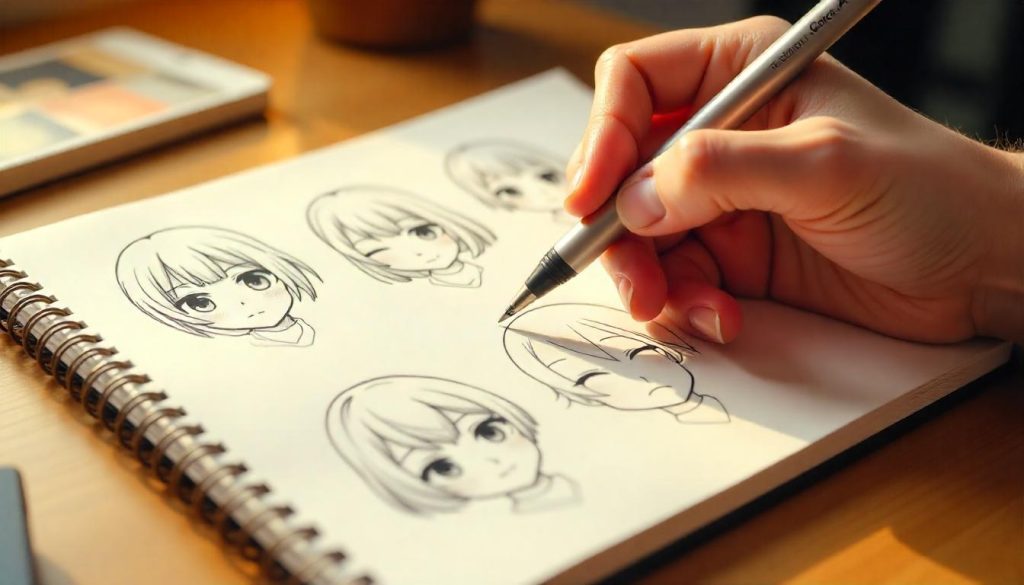
Let’s explore the art of drawing anime faces in a way that’s fun, beginner-friendly, and easy to follow—even if you’ve never picked up a pencil before.
Contents
- Why Drawing Anime Faces Is Different from Realistic Faces
- Tools You’ll Need to Get Started
- Step 1: Draw the Basic Head Shape
- Step 2: Add Guidelines for Facial Features
- Step 3: Sketch the Eyes
- Step 4: Draw the Eyebrows
- Step 5: Add the Nose
- Step 6: Draw the Mouth
- Step 7: Draw the Ears
- Step 8: Add Hair to the Head
- Step 9: Clean Up the Drawing
- Step 10: Add Neck, Shoulders, and Clothing
- Tips for Drawing Different Anime Face Types
- How to Show Emotions in Anime Faces
- Common Mistakes to Avoid
- Practice Exercises to Improve Faster
- Final Thoughts
Why Drawing Anime Faces Is Different from Realistic Faces
Anime characters often feature exaggerated facial proportions that differ significantly from realistic portraits. Understanding these stylized differences will help you adjust your approach as you learn to draw.
Key Differences Between Anime and Realistic Faces
- Larger, more expressive eyes
- Smaller nose and mouth
- Simplified jaw and chin structure
- Less focus on facial muscle details
- Stylized proportions based on emotion and personality
Unlike realism, anime faces prioritize emotion and clarity over anatomical accuracy. This makes them both approachable and creative for new artists.
Tools You’ll Need to Get Started
Before diving into sketching, gather your drawing tools. You don’t need anything fancy to start—basic supplies will do just fine.
Suggested Tools
- Pencil (HB or mechanical)
- Eraser (soft white eraser preferred)
- Paper or sketchbook
- Ruler (optional for guidelines)
- Fine-liner or black pen (for inking)
- Colored pencils or markers (for finishing)
Digital artists can use drawing tablets with apps like Procreate, Clip Studio Paint, or Adobe Fresco. Traditional or digital, the steps remain the same.
Step 1: Draw the Basic Head Shape
Every face starts with a base structure. The head is typically drawn as a circle with guidelines that help place the features symmetrically.
How to Draw the Head
- Draw a circle as the top of the head.
- Extend a vertical line down from the center of the circle. This will be the symmetry line.
- Add a horizontal line halfway down the circle. This is the eye level.
- From the bottom of the circle, draw lines tapering down to form the jaw and chin. For a male character, use sharper angles. For a female, use softer curves.
- Connect the sides of the circle to the chin to complete the outline.
At this stage, you should have a basic anime head shape, similar to an upside-down egg.
Step 2: Add Guidelines for Facial Features
Guidelines are crucial for keeping facial elements aligned and proportional. These lines also help keep symmetry in check as you draw both sides of the face.
Guideline Placement
- Draw a horizontal line through the middle of the circle for eye placement.
- Divide the area between the eye line and chin into thirds:
- The first line below the eyes is for the nose.
- The second (closer to the chin) is for the mouth.
- Draw vertical guidelines across the face to divide the placement of the eyes and ears.
Use light pressure so you can erase these lines later. These guidelines set the stage for accurate and balanced features.
Step 3: Sketch the Eyes
Anime eyes are one of the most recognizable and expressive features. Their size and shape often define the character’s mood, gender, and age.
Drawing Anime Eyes Step by Step
- Start with a horizontal oval or almond shape along the eye line.
- Add a thicker top eyelid line and thinner bottom eyelid.
- Draw a large iris that touches the top and bottom eyelids. Don’t complete the full circle—it gets covered.
- Add highlights inside the iris: large circles near the top for light reflection.
- Fill in the pupil and shade the iris for depth.
- Repeat for the second eye, maintaining distance and symmetry.
For a female character, make the eyes larger and rounder. For a male character, draw them narrower and more angular.
Step 4: Draw the Eyebrows
Eyebrows communicate subtle emotions and complete the eye expression. Their shape can change based on mood, gender, and age.
How to Draw Eyebrows
- Place the eyebrows above the eyes, following the shape of the brow bone.
- Use a slight arch for females or a straighter line for males.
- Adjust thickness and angle to convey mood—angry eyebrows slant downward, surprised ones rise up.
Always sketch eyebrows in relation to the eye curve for a natural look.
Step 5: Add the Nose
Anime noses are usually minimal, especially in front-facing views. Their purpose is mostly to suggest form rather than capture detail.
Drawing Anime Noses
- Place the nose on the lower guideline, halfway between the eyes and chin.
- For a front view, use a small dot, curved line, or short vertical stroke.
- For side views or 3/4 angles, draw a triangle or “L” shaped line to show the bridge and tip.
Keep the nose light and subtle unless you’re aiming for a realistic or dramatic style.
Step 6: Draw the Mouth
The anime mouth is simple yet expressive. It varies depending on the emotion being shown and the character’s personality.
How to Draw the Mouth
- Draw a short horizontal line along the bottom facial guideline.
- For a neutral or smiling expression, curve the line slightly upward.
- Add a second short curve below it to suggest the bottom lip (optional).
- For open mouths, use an oval or triangle with visible teeth or tongue depending on emotion.
Make sure the mouth aligns vertically with the nose and is proportional to the eyes.
Step 7: Draw the Ears
The ears are usually aligned between the eye and nose lines and are visible only when hair does not cover them.
Drawing the Ears
- Start by drawing a vertical oval shape on each side of the head.
- Add inner ear details like the tragus and helix with simple curves.
- Keep the ears symmetrical and sized appropriately.
For chibi or younger characters, ears can be simplified or omitted entirely.
Step 8: Add Hair to the Head
Hair gives anime characters their iconic personalities. There are limitless styles to choose from, but the approach remains similar.
Steps to Draw Anime Hair
- Draw the hairline just above the eyebrows.
- Choose a hairstyle: long, short, ponytail, spiky, bangs, etc.
- Draw hair in large sections, not individual strands.
- Let some hair overlap the face and forehead.
- Use curved, dynamic lines for volume and motion.
- Add details like flyaways, highlights, and layered textures.
Make sure the hair fits the skull shape and flows naturally.
Step 9: Clean Up the Drawing
Once you’ve completed the main features, it’s time to refine and finalize the sketch.
Cleanup Tips
- Erase all unnecessary guidelines.
- Smooth out jawlines and facial outlines.
- Refine eyes, nose, and mouth as needed.
- Adjust any symmetry errors.
- Lightly outline final lines for inking or coloring.
You now have a complete base anime face sketch ready for inking, coloring, or digital editing.
Step 10: Add Neck, Shoulders, and Clothing
To give your drawing context, add a simple neck and shoulder structure.
Finishing Touches
- Draw two lines down from below the ears for the neck.
- Sketch gentle shoulder slopes.
- Add a basic collar, t-shirt, or school uniform depending on your theme.
This creates a complete upper-body anime portrait.
Tips for Drawing Different Anime Face Types
Every character is different. Here’s how to tweak your base face for various types of characters.
Female Characters
- Softer jawline
- Larger, rounder eyes
- Thinner eyebrows
- Shorter nose and smaller mouth
Male Characters
- Sharper chin
- Narrower eyes
- Thicker brows
- More defined neck and jaw
Chibi or Childlike Characters
- Huge eyes
- Small face and features
- Round head and body
- Minimal details
Villains or Mature Characters
- Narrow eyes with sharp angles
- Thin lips or smirks
- Wrinkles or shadows
- Higher nose bridge
Use these visual cues to differentiate personalities and roles.
How to Show Emotions in Anime Faces
Facial expressions make characters feel alive. Here are the most common expressions and how to draw them.
Happy
- Upturned mouth
- Uplifted eyebrows
- Wide, shining eyes
Sad
- Downturned mouth
- Eyebrows tilted inward
- Droopy or teary eyes
Angry
- Furrowed brows
- Frowning or clenched teeth
- Squinted or glaring eyes
Surprised
- Wide open eyes
- Raised eyebrows
- Small open mouth
Experiment with eyebrows and mouth shapes to capture subtle emotions.
Common Mistakes to Avoid
Avoid these pitfalls that many beginners fall into:
- Misaligned eyes
- Eyes too far apart
- Nose and mouth too high or low
- Flat or shapeless hair
- Overuse of details
Use reference images and redraw the same face from different angles to improve consistency.
Practice Exercises to Improve Faster
Practice is the key to mastering anime drawing. Here are some daily drills:
- Draw 10 eyes in different styles
- Sketch 5 head shapes from different angles
- Copy facial expressions from anime stills
- Redraw your character with different hairstyles
- Time yourself doing quick 5-minute sketches
Make it a habit, and your progress will come fast.
Final Thoughts
Drawing anime faces is a fun and rewarding skill that opens the door to a wide range of artistic possibilities. Whether you’re sketching an original character or trying to recreate your favorite anime hero, this step-by-step guide gives you the foundation to succeed.
Remember, improvement comes with practice. Don’t worry if your first sketches don’t look perfect. Keep drawing, experiment with styles, and enjoy the creative process.