Imagine capturing the perfect summer vibe with just a pencil and paper. Drawing sandals can be a delightful way to express your creativity and bring a touch of sunshine to your artwork.
Whether you’re a seasoned artist or someone who loves doodling in your free time, learning how to draw sandals can be both fun and rewarding. But why sandals? These comfortable and iconic pieces of footwear symbolize relaxation and adventure. By mastering the art of drawing them, you can create scenes that transport you to a sandy beach or a bustling boardwalk.
Plus, the skills you gain from drawing sandals can enhance your ability to sketch other types of footwear and accessories. In this guide, you’ll discover simple techniques and tips that make drawing sandals easy and enjoyable. We’ll walk you through each step, offering insights that will help you bring your sketches to life. Get ready to unleash your artistic potential and add a new dimension to your drawing repertoire. Are you ready to dive in and create your own masterpiece? Let’s get started!

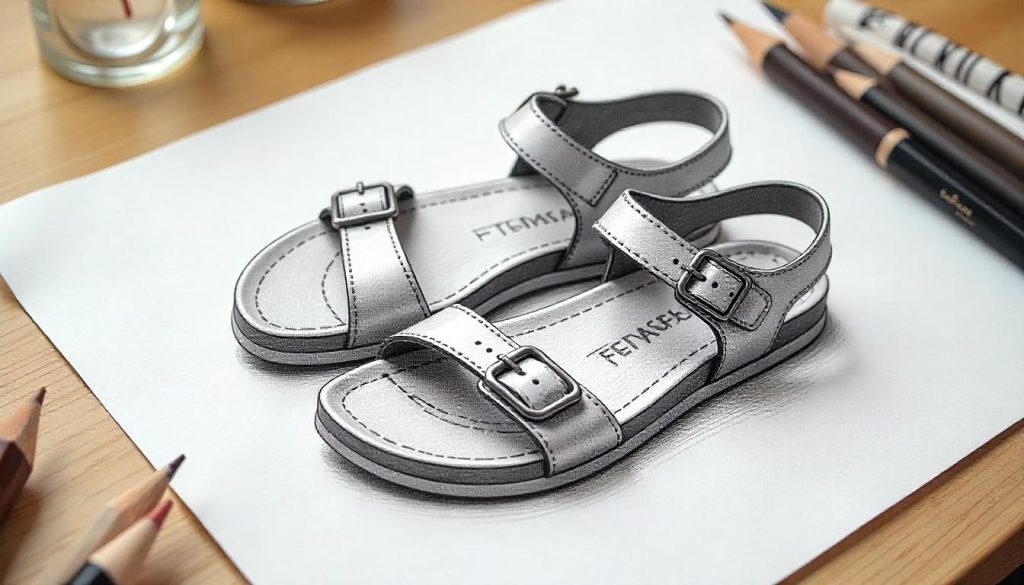
Credit: www.pinterest.com
Contents
Materials Needed
Before you start drawing sandals, gather the right materials. Having the proper tools makes the process enjoyable. It also helps you achieve better results. Below, you’ll find a list of essential materials.
1. Pencils
Use a range of pencils for different effects. A 2B pencil is good for light sketches. For darker lines, a 4B or 6B pencil works well. Pencils give you control over shading and detail.
2. Erasers
Keep a good eraser handy. Mistakes happen when drawing. A kneaded eraser is perfect for precise corrections. A vinyl eraser is great for larger areas.
3. Paper
Choose high-quality drawing paper. It should be sturdy and smooth. A4 or A3 sizes are ideal for sandal sketches. Good paper enhances your drawing experience.
4. Ruler
A ruler helps you draw straight lines. It ensures accurate proportions. Use it for straps and sole details. A clear plastic ruler is a great choice.
5. Reference Images
Collect reference images of sandals. They inspire and guide your design. Look for different styles and angles. This helps you understand sandal structure better.
6. Coloring Tools
Coloring tools add life to your drawing. Use colored pencils or markers. Choose colors that match your design vision. Experiment to find your unique style.
Choosing Your Sandal Style
Discovering your sandal style begins with learning how to draw them. Start by sketching the outline. Add details like straps and buckles. Experiment with different shapes and designs. Practice makes perfect. Unleash your creativity and find inspiration in everyday life.
Soon, you’ll craft unique sandal designs.
Choosing the right sandal style is the first step to creating a drawing that truly stands out. It’s not just about copying a design; it’s about finding a style that resonates with you. Are you drawn to the sleek elegance of strappy sandals, or do you lean towards the comfort and practicality of flip-flops? The choice of style sets the tone for your entire drawing and helps you define your artistic voice. Let’s dive deeper into the various styles you can choose from and how each can inspire your creativity.
Understanding Different Sandal Styles
Before you put pencil to paper, it’s essential to familiarize yourself with various sandal styles. Think about the classic gladiator sandals with their intricate lace-ups. They can add complexity and interest to your drawing. Compare that with the simplicity of a slip-on sandal, which might be less detailed but offers a great canvas for experimenting with textures and patterns.
Identifying Your Personal Style
What speaks to you? Do you find yourself gravitating towards bold, chunky sandals or the delicate lines of minimalist designs? Consider your wardrobe or sandals you admire. This can provide insight into your preferences. You’ll find that identifying your personal style will make the drawing process more enjoyable and authentic.
Analyzing Popular Trends
While your personal style is crucial, being aware of current trends can offer fresh inspiration. Are slides making a comeback in fashion circles, or are platform sandals stealing the show? Keeping up with trends can introduce you to new styles you might not have considered.
Experimenting With Style Combinations
Why settle for one style when you can mix elements from several? Combining the elegance of wedges with the casual vibe of espadrilles could result in a unique drawing. Experiment with mixing and matching to see what unexpected combinations you can create. This approach often leads to the most innovative designs.
Seeking Feedback And Inspiration
Once you’ve chosen a style, share your work with friends or fellow artists. Their feedback can open your eyes to new ideas and improvements. Additionally, exploring art books or online galleries can offer a wealth of inspiration. Remember, every artist learns and grows from the community around them.
Choosing your sandal style is not just a preliminary step; it’s a chance to explore and express your artistic personality. Have you found your style yet? Let your creativity guide you, and see where it takes you on this artistic journey.
Sketching The Basic Shape
Start by sketching a simple outline of the sandal’s sole. Add two curved lines for the straps. This basic shape helps guide the details and ensures proportionate design.
Sketching the basic shape of sandals is a crucial first step in bringing your footwear illustrations to life. This foundational stage sets the tone for your entire drawing. With a clear basic shape, you can add details and textures more effectively.
###
Drawing The Sole
Start by drawing an oval shape to represent the sole. This will be the base of your sandal. Make sure it’s slightly elongated to mimic a foot’s natural shape.
Consider the size and proportion relative to the foot. A larger oval can represent a more relaxed style, while a slimmer one suggests something more fitted.
If you’re stuck, look at your own feet for reference. How do they curve? Where do they seem flat? Let this real-world observation guide your drawing.
###
Outlining The Straps
Next, sketch the straps that hold the sandal to the foot. Begin with simple lines to map out where each strap will sit.
Think about the style you want—are these delicate, thin straps or bold, chunky ones? The choice affects the overall vibe of the sandal.
Visualize how the straps interact with the sole. Do they cross over, or are they parallel? Each design choice changes the sandal’s character.
When I first started drawing sandals, I often forgot how the straps wrapped around the ankle. This detail can make or break the realism of your drawing, so pay attention to it.
Does this inspire you to pick up your pencil and try sketching a sandal? Remember, each line you draw brings you closer to mastering the art of footwear illustration.
Adding Details
Adding details to your sandal drawings is where the magic happens. This is the stage where your artwork transforms from simple outlines to captivating pieces of art. It’s all about embracing creativity and focusing on the elements that make sandals unique. You’ll be surprised at how adding texture and buckles can elevate your drawing to a new level. Let’s dive into the specifics!
Creating Texture
Texture brings life to your drawings. Think about the materials sandals are made from, like leather, fabric, or rubber. Each material has distinct characteristics that you can illustrate.
Start by observing real sandals. Notice how light reflects off different surfaces. Add shading and small lines to mimic these effects. You might find that a few simple strokes can convey a lot.
Experiment with different techniques. Try cross-hatching for a woven look or stippling for a grainy texture. It’s all about trial and error. Don’t be afraid to make mistakes; they often lead to creative breakthroughs.
Incorporating Buckles And Fastenings
Buckles and fastenings are more than functional elements; they add flair to your design. Think about the variety available—classic metal buckles, Velcro straps, or intricate tie-ups.
Sketch the basic shape first. Then, focus on tiny details like holes in the strap or the curve of the buckle. These small additions can make your sandals look realistic.
Consider how these elements interact with the sandal. Do the straps hug the foot snugly or dangle loosely? Visualize these dynamics and incorporate them into your drawing.
Why not challenge yourself to add a unique fastening? Perhaps a decorative button or an unusual clasp. This personal touch could make your drawing stand out.
As you add these details, ask yourself: how do they change the overall look of the sandal? This reflection can guide your artistic choices and keep your drawing aligned with your vision.
Shading Techniques
Shading techniques are crucial in bringing drawings to life. They add realism and depth to your artwork. When drawing sandals, shading defines curves and textures. It helps to convey materials and light direction. Mastering shading can enhance your drawing significantly. Below, explore essential shading techniques for sandals.
Highlighting And Shadows
Highlighting captures light on the sandal’s surface. Use a light pencil or eraser to add highlights. This creates a shiny effect on leather or rubber straps. Shadows are equally important. They give dimension and suggest weight. Darken areas under straps and around the sole. Use a softer pencil for shadows. This adds contrast and makes the sandal stand out.
Creating Depth
Creating depth involves varying tones. Light tones suggest raised areas on a sandal. Darker tones suggest recessed parts. Blend gradually for smooth transitions between light and dark. Use cross-hatching or stippling for texture. These techniques simulate rough surfaces or fabric. Depth gives sandals a realistic appearance.

Credit: www.youtube.com
Final Touches
Drawing sandals involves the final touches, adding details like straps and buckles. These elements bring your sandal sketches to life. Attention to small features enhances the overall design, making them more realistic.
As you approach the final touches of your sandal drawing, it’s time to breathe life into your artwork. These last steps are crucial in transforming a simple sketch into a vivid representation. By refining lines and adding color, your sandals will start to pop off the page. Let’s dive into these essential steps that will make your drawing stand out.
Refining Lines
Refining your lines is an essential part of creating a polished drawing. Start by closely examining your initial sketch. Identify any lines that need to be smoothed or defined more clearly.
Use a fine-tip pen or pencil to trace over the lines you want to emphasize. This helps in creating a clean, crisp look that makes your drawing more professional.
Consider the thickness of your lines. Varying the line weight can add depth and dimension to your sandals. For instance, the straps might have bolder lines, while the sole could have softer edges.
Adding Color
Color brings your sandals to life, adding personality and flair. Choose colors that reflect the style you want to convey. Bright colors can suggest a fun, casual vibe, while neutral tones might indicate elegance.
Use colored pencils, markers, or digital tools to fill in your sandals. Begin with lighter shades and gradually build up to darker tones for a more dynamic look.
Don’t forget to add highlights and shadows. These small touches can make your sandals appear more realistic and three-dimensional. Think about where the light source is coming from and apply lighter colors accordingly.
Have you ever noticed how a splash of unexpected color can change the whole feel of an outfit? The same goes for your drawing. Experiment with different hues and see which combinations appeal to you.
Remember, the goal is to create a pair of sandals that you would be excited to wear. So, let your creativity flow and have fun with the final touches! What unique features will your sandals have that make them truly yours?
Common Mistakes To Avoid
Avoid focusing too much on minor details early. Begin with the sandal’s basic shape. Sketching quickly helps capture essential lines and proportions. Over-complicating the design can lead to frustration.
Drawing sandals can be a fun and rewarding experience, but it’s easy to make mistakes that can derail your progress. Understanding these common pitfalls can help you improve your sketches and achieve a more realistic and appealing result. Let’s delve into the typical errors you should steer clear of when drawing sandals.
1. Misjudging Proportions
It’s crucial to get the proportions right in your sandal sketches. A common mistake is drawing the sole too long or too short compared to the straps. This can make your sandals look unrealistic and awkward.
To avoid this, use reference images and pay close attention to the proportion of different parts. Measure with your eyes and adjust as you go. Remember, practice makes perfect, and refining your proportions will lead to a more convincing drawing.
2. Overlooking Perspective
Ignoring perspective is another frequent mistake. Sandals, like all objects, need to be drawn in a way that reflects their three-dimensional form.
Consider the angle from which you’re drawing. If you’re looking at the sandals from above, the straps and sole will appear differently than if you’re viewing them from the side. Use perspective lines to guide you and ensure your sandals appear grounded and realistic.
3. Neglecting Details
Details can make or break your drawing. Failing to add the small elements like stitching or buckles can result in a bland sketch.
Start by sketching the basic shape, then gradually add details as you refine your drawing. Pay attention to the unique features of the sandals you’re drawing. These details can bring your sketch to life and make it stand out.
4. Choosing The Wrong Materials
The materials you use can greatly impact the outcome of your drawing. Opting for the wrong paper or pens can lead to frustration.
Choose a paper that suits your medium, whether it’s pencils, pens, or markers. Experiment with different tools to find what works best for you. The right materials can enhance your drawing and make the process more enjoyable.
5. Skipping The Rough Sketch
Jumping straight into the final drawing without a rough sketch can lead to errors. A rough sketch acts as a roadmap for your final piece.
Take the time to outline your ideas lightly before committing to the final lines. This step can help you spot mistakes early and make necessary adjustments. A rough sketch is a valuable tool that can save you time and improve your results.
Are there any other mistakes you’ve encountered while drawing sandals? How did you overcome them? Share your experiences in the comments below. Your insights might help someone else on their drawing journey.

Credit: www.youtube.com
Practicing Your Skills
Practicing your drawing skills can be a fun journey. It helps in refining your artistic techniques. With sandals, practice opens up various creative avenues. You can explore different styles and textures. Each practice session brings you closer to mastery. Let’s delve into ways to enhance your skills.
Trying Different Styles
Sandals come in numerous styles. Start with basic flip-flops. Then, draw gladiator sandals with intricate straps. Sketch wedge sandals to practice different heel shapes. Each style teaches new design elements. This diversity builds your creative range.
Experimenting With Textures
Textures add depth to your sandal drawings. Begin with smooth surfaces like leather. Transition to rough textures like canvas. Use light strokes for detailed textures. Experiment with shading techniques. Shadows bring life to your artwork. Practice capturing different material feels. This enhances realism in your drawings.
Frequently Asked Questions
How Can I Start Drawing Sandals?
Begin by sketching the basic shape of the sandal. Focus on the sole and strap placement. Use light strokes to outline the design.
What Tools Do I Need To Draw Sandals?
You’ll need pencils, erasers, and drawing paper. For detailing, use fine-tipped pens or colored pencils. Consider using a ruler for precision.
How Do I Add Details To Sandals?
Add stitching, buckle, and texture details with fine lines. Use shading for depth and realism. Enhance with colors for vibrancy.
Can Beginners Draw Realistic Sandals?
Yes, beginners can start with simple designs. Practice basic shapes and gradually add details. Use reference images for guidance.
Conclusion
Drawing sandals can be a fun and rewarding activity. Start with basic shapes. Add details like straps and buckles. Practice makes perfect, so keep trying. Each sketch helps you improve. Use your creativity to add unique designs. Experiment with colors and patterns.
Share your drawings with friends or family. Enjoy the process and learn from each attempt. Remember, every artist starts as a beginner. Keep your enthusiasm alive. Soon, you’ll be sketching sandals with confidence. Happy drawing!