
Learning how to seal acrylic paint on ceramic is an important step when you want your painted project to stay attractive, durable, and protected from everyday wear. Acrylic paint is versatile and easy to use on many ceramic surfaces, but decorative paint can still scratch, chip, or fade if it is left unprotected. Applying the right sealer can create an additional protective layer while also giving your project the finish you want.
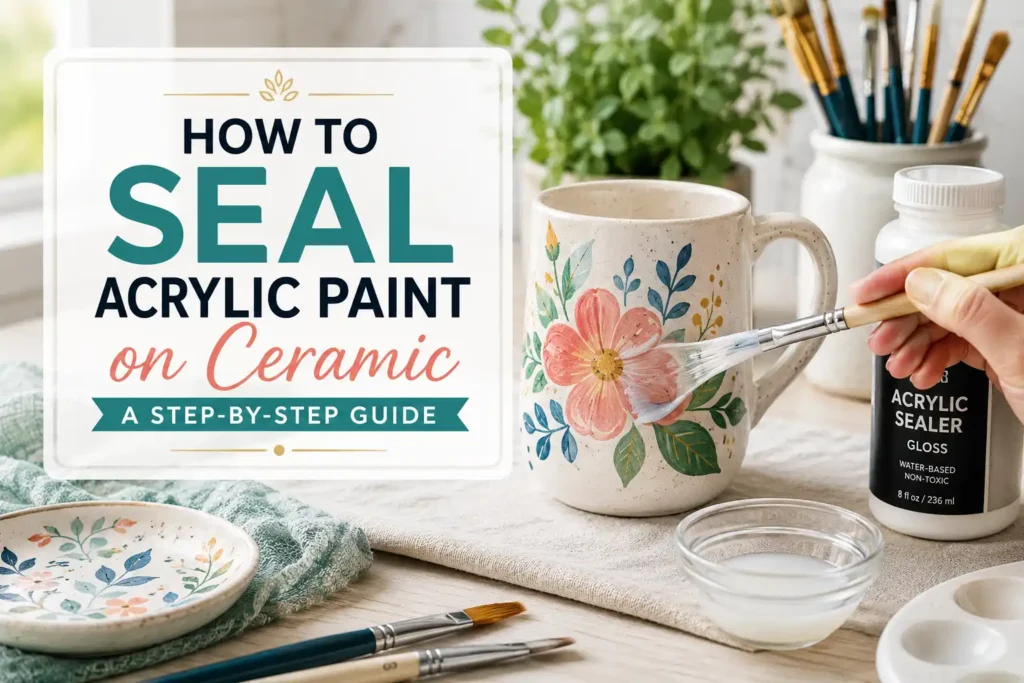
The best sealing method depends on the ceramic item’s purpose, the type of acrylic paint you used, and how much handling or moisture it will experience. A decorative ceramic figurine may need a different finish from a frequently handled planter or mug. With proper preparation, adequate curing time, and a compatible clear coat, you can give your painted ceramic project a smoother and more durable finish.
Items to Buy
- Painted ceramic item
- Mild dish soap
- Soft sponge
- Microfiber cloth
- Rubbing alcohol
- Fine-grit sandpaper
- Acrylic sealer
- Ceramic-compatible clear coat
- Water-based polyurethane
- Acrylic varnish
- Spray sealer
- Foam brush
- Soft paintbrush
- Small detail brush
- Painter’s tape
- Drop cloth
- Disposable gloves
- Safety goggles
- Dust mask or respirator
- Clean cardboard or newspaper
Can You Seal Acrylic Paint on Ceramic?
Yes, acrylic paint on ceramic can be sealed with a compatible clear protective coating.
Sealing can help protect decorative paint from:
- Scratches
- Dust
- Minor abrasion
- Handling
- Moisture exposure
- Fading
- General wear
However, sealing does not automatically make every painted ceramic item food-safe, dishwasher-safe, or suitable for prolonged water exposure. Always check the specific sealer’s intended use and safety instructions.
Why Should You Seal Acrylic Paint on Ceramic?
Acrylic paint can create beautiful colors on ceramic, but the painted surface may not withstand heavy handling on its own.
A suitable sealer can provide an additional protective barrier and may also improve the finished appearance.
Depending on the product, you can choose a:
- Matte finish
- Satin finish
- Gloss finish
The right finish depends on the look you want and the intended use of the ceramic piece.
What Is the Best Sealer for Acrylic Paint on Ceramic?
There isn’t one universal best sealer for every ceramic project.
Common options include:
Acrylic Varnish
Acrylic varnish is a popular choice for decorative painted ceramics because it is designed to protect painted surfaces.
Water-Based Polyurethane
A compatible water-based polyurethane can provide a durable protective layer for some decorative projects.
Clear Acrylic Spray
A clear acrylic spray can create an even finish and is useful for irregularly shaped ceramic pieces.
Ceramic-Specific Sealer
Some products are specifically formulated for ceramic and may be appropriate when their instructions match your project.
Always check that the sealer is compatible with both your acrylic paint and the ceramic surface.
Matte, Satin, or Gloss Sealer?
The finish you choose can significantly change the appearance of your project.
Matte
Matte sealer produces a soft, low-reflection finish.
It works well when you want the painted ceramic to have a natural or understated appearance.
Satin
Satin provides a moderate amount of sheen.
It can be a good middle ground when you want some visual depth without a highly reflective surface.
Gloss
Gloss creates a shiny, polished appearance and can make colors look more vibrant.
It is particularly attractive on decorative ceramic pieces where you want a smooth, glass-like appearance.
How to Seal Acrylic Paint on Ceramic Step by Step
Step 1: Allow the Acrylic Paint to Dry
Before applying any sealer, make sure the acrylic paint is completely dry.
Drying and curing are not always the same thing.
Acrylic paint may feel dry on the surface while remaining softer underneath. Follow the paint manufacturer’s recommended drying and curing time before sealing.
Step 2: Inspect the Painted Surface
Examine the ceramic carefully.
Look for:
- Uneven paint
- Brush marks
- Dust particles
- Loose paint
- Cracks
- Smudges
- Areas with insufficient coverage
Correct any problems before applying the sealer.
Step 3: Clean the Surface Carefully
If the painted surface has collected dust, gently wipe it with a soft, clean microfiber cloth.
Avoid aggressive cleaning that could damage the acrylic paint.
If necessary, follow the paint manufacturer’s recommendations for cleaning before sealing.
Step 4: Choose the Right Sealer
Select a product compatible with:
- Ceramic
- Acrylic paint
- The intended use of the finished item
Read the label carefully.
A sealer designed for decorative artwork should not automatically be assumed to be suitable for food contact or continuous water exposure.
Step 5: Test the Sealer
Before coating the entire ceramic item, test the sealer on an inconspicuous area or a separate painted ceramic sample.
This lets you check:
- Adhesion
- Color changes
- Cloudiness
- Sheen
- Compatibility
- Drying behavior
Testing is especially useful when combining products from different manufacturers.
Step 6: Prepare Your Workspace
Choose a clean, dry, well-ventilated workspace.
Cover your work surface with cardboard, newspaper, or a drop cloth.
If you’re using a spray sealer, follow the manufacturer’s ventilation and respiratory-protection instructions.
Step 7: Mask Unwanted Areas
If some sections should remain unsealed, protect them with painter’s tape.
For example, you may want to avoid coating:
- Threads
- Moving parts
- Mounting areas
- Electrical contacts
- Areas designed to remain unpainted
Step 8: Apply the First Thin Coat
Use a soft brush, foam brush, or spray application depending on the sealer.
Apply a thin, even layer.
Don’t try to create the entire protective coating in one application.
Thin layers generally dry more evenly and are less likely to produce drips or cloudy areas.
Step 9: Avoid Overworking the Sealer
Once you’ve applied the sealer, avoid repeatedly brushing over the same area.
Overworking can create:
- Brush marks
- Uneven sheen
- Cloudiness
- Surface texture
Apply the product smoothly and allow it to settle.
Step 10: Let the First Coat Dry
Follow the manufacturer’s recommended drying time.
Avoid touching the surface while it dries.
Dust can become trapped in a wet clear coat, so keep the project in a clean area.
Step 11: Inspect the First Coat
Once dry, examine the surface under good lighting.
Look for:
- Missed areas
- Bubbles
- Drips
- Uneven sheen
- Cloudy sections
- Dust particles
If everything looks good, proceed with additional coats if recommended.
Step 12: Apply Additional Coats
Many sealers perform better when applied in multiple thin coats.
Allow each layer to dry for the manufacturer’s specified period before applying another.
Avoid making the coating excessively thick.
Step 13: Lightly Smooth Between Coats if Recommended
Some products recommend very light sanding between coats.
If the manufacturer’s instructions allow it, use fine-grit sandpaper carefully.
Remove all sanding dust before applying the next coat.
Do not automatically sand every sealer because some products are designed to be recoated without sanding.
Step 14: Apply the Final Coat
Apply the final thin layer evenly.
Pay attention to edges, raised details, and recessed areas.
Don’t allow the sealer to pool in grooves.
Step 15: Let the Sealer Cure
This is one of the most important steps.
The sealer may feel dry long before it reaches its final hardness.
Allow the ceramic piece to cure according to the product’s instructions before handling it extensively or exposing it to moisture.
How to Seal Acrylic Paint on Ceramic With a Brush
Brush-on sealer provides good control and works especially well for smaller projects.
Use a clean, soft brush and apply thin coats.
A foam brush can be useful when you want to minimize visible brush marks on smooth surfaces.
Avoid repeatedly brushing an area after the sealer begins to become tacky.
How to Seal Acrylic Paint on Ceramic With Spray Sealer
Spray sealer can provide a smooth, even coating when used correctly.
Place the ceramic item on a protected surface.
Hold the can at the distance specified by the manufacturer and apply light, consistent passes.
Avoid spraying heavily in one location.
Several light applications are generally easier to control than one thick layer.
Always use spray products in an appropriate, well-ventilated environment and follow the product’s safety directions.
How to Seal Acrylic Paint on Glazed Ceramic
Glazed ceramic has a smooth surface, so preparation and product compatibility are particularly important.
Make sure the acrylic paint has properly adhered before sealing.
Avoid aggressively sanding painted areas simply to prepare for the sealer unless the product instructions call for it.
Instead, focus on using a compatible acrylic sealer and testing it before applying it to the entire piece.
How to Seal Acrylic Paint on Unglazed Ceramic
Unglazed ceramic is porous and can absorb coatings differently from glazed ceramic.
Make sure the acrylic paint is fully dry and inspect the surface for areas where the paint may have absorbed unevenly.
A compatible sealer can help create a more consistent protective finish.
Multiple thin coats may be necessary depending on the product.
How to Seal Painted Ceramic Mugs
Mugs require special care because they come into contact with food, beverages, moisture, heat, and frequent washing.
Do not assume that an ordinary acrylic sealer makes a painted mug food-safe.
If you’re decorating a mug for actual food or beverage use, choose a product specifically labeled and tested for that purpose and follow its curing and application instructions.
For purely decorative mugs that will not be used for drinking, a conventional decorative sealer may be appropriate if compatible with the paint and ceramic.
Can You Make Sealed Ceramic Dishwasher-Safe?
Not necessarily.
A clear coat can improve surface durability, but dishwasher exposure involves heat, water, detergent, and repeated mechanical stress.
Only treat a painted ceramic item as dishwasher-safe if the complete paint-and-sealer system is specifically rated for dishwasher use and the manufacturer provides appropriate instructions.
Otherwise, hand washing is the safer approach for preserving decorative paint.
Can You Seal Acrylic Paint on Ceramic Plates?
Yes, for decorative purposes.
If the plate will be used for food, however, the situation is different.
Food-contact areas require products specifically intended and approved for that use. A general-purpose acrylic varnish or clear coat should not automatically be considered food-safe.
For decorative plates, keep the piece clearly intended for display rather than food service.
How to Make Acrylic Paint More Durable on Ceramic
Sealing is only one part of creating a durable finish.
For better results:
- Clean the ceramic before painting
- Prepare glossy surfaces appropriately
- Use compatible acrylic paint
- Apply thin paint layers
- Allow the paint to cure
- Choose a compatible sealer
- Apply several thin sealing coats when recommended
- Allow complete curing
- Avoid harsh cleaning products
Proper preparation and curing can be just as important as the final clear coat.
Common Mistakes to Avoid
Sealing Wet Acrylic Paint
If the paint hasn’t properly dried or cured, the sealer may disturb it or trap moisture underneath.
Applying the Sealer Too Thickly
Heavy coats can create drips, cloudiness, uneven texture, or extended drying times.
Using an Incompatible Product
Not every clear coat works over every acrylic paint.
Test compatibility first.
Skipping the Test Area
A sealer can slightly change the color or sheen of acrylic paint.
Testing first helps prevent surprises.
Touching the Surface While It Dries
Fingerprints and dust can become permanently trapped in the coating.
Rushing the Curing Process
Dry does not always mean fully cured.
Give the project enough time before handling or using it.
Assuming It Is Food-Safe
A decorative sealer should never automatically be considered suitable for food contact.
Tips for a Professional-Looking Finish
For a smooth result:
- Work in a clean environment
- Use good lighting
- Apply thin coats
- Keep brush strokes consistent
- Avoid over-brushing
- Follow recommended drying times
- Test products before full application
- Keep dust away while drying
- Apply the appropriate number of coats
- Allow complete curing
Patience is particularly important when working with clear finishes because imperfections can become more visible after sealing.
How to Fix a Cloudy Sealer
If the sealer becomes cloudy, don’t immediately apply another coat.
First determine why it happened.
Possible causes include:
- Excessive humidity
- Thick application
- Incompatible products
- Insufficient drying
- Moisture trapped beneath the coating
Allow the project to dry fully and consult the sealer manufacturer’s instructions before attempting a repair.
How to Remove Sealer From Ceramic
Removing a clear coat can be difficult, especially after it has fully cured.
If you need to correct a project, avoid using aggressive solvents without first checking their compatibility with the ceramic, acrylic paint, and underlying surface.
For valuable or delicate pieces, carefully testing any removal method in an inconspicuous area is important.
FAQs
Do I need to seal acrylic paint on ceramic?
Not always, especially for lightly handled decorative pieces. However, sealing can provide additional protection against scratches and general wear.
What is the best clear coat for acrylic paint on ceramic?
Acrylic varnish, compatible clear acrylic spray, and other ceramic-compatible protective coatings can work. The best choice depends on the intended use and the manufacturer’s compatibility instructions.
How long should acrylic paint dry before sealing?
Follow the paint manufacturer’s recommended drying or curing period. Surface dryness alone may not mean the paint is ready for a clear coat.
Can I use Mod Podge to seal acrylic paint on ceramic?
Some Mod Podge products can be used for decorative projects, but suitability depends on the specific formula and intended use. Check the product label and test compatibility first.
Can I use polyurethane over acrylic paint on ceramic?
A compatible water-based polyurethane may work for some decorative applications. Always test the combination first and follow the manufacturer’s instructions.
Can I spray clear coat over acrylic paint?
Yes, provided the spray sealer is compatible with the acrylic paint and ceramic surface.
Does sealing acrylic paint make ceramic waterproof?
A compatible sealer can add water resistance, but that does not automatically mean the item is completely waterproof or suitable for prolonged water exposure.
Can sealed painted ceramic go in the dishwasher?
Only if the complete coating system is specifically rated for dishwasher use. Otherwise, hand washing is generally the safer option for decorative painted pieces.
Can I use a painted and sealed ceramic mug?
For a mug intended for drinking, use only products specifically suitable for food-contact applications and follow their instructions. General-purpose decorative sealers should not be assumed to be food-safe.
How many coats of sealer should I apply?
The appropriate number depends on the specific product. Several thin coats may be recommended, but always follow the manufacturer’s directions.
Final Words
Learning how to seal acrylic paint on ceramic is a simple way to add an extra layer of protection to your painted projects. The key is to let the acrylic paint dry and cure properly, select a sealer compatible with both the paint and ceramic, and apply thin, even coats without rushing the drying process.
For decorative ceramic pieces, acrylic varnish, compatible clear acrylic sprays, and other suitable protective coatings can provide attractive results. Just remember that sealing a ceramic item does not automatically make it food-safe, dishwasher-safe, or completely waterproof. Match the sealer to the intended use, allow the finish to cure fully, and your painted ceramic project can maintain its color and appearance for much longer.