Painting bathroom wall tile is an easy and affordable way to refresh outdated tile and give your bathroom a whole new vibe. Whether you’re tired of pink and beige tiles from decades past or simply want a crisp, modern update, this DIY project can deliver dramatic results without the need for demolition. With proper preparation, the right paint, and a little patience, you can transform old tile into a clean, stylish surface that holds up well to humidity and daily use.
This guide will walk you through every step of the process—from cleaning and prepping the tiles to applying primer, choosing paint types, sealing for durability, and troubleshooting common issues. Whether you want a minimalist matte finish or a bold pop of color, you’ll learn how to get a professional-looking finish even as a beginner.
Contents
- Why Paint Bathroom Wall Tile
- Is Your Bathroom Tile Paintable?
- Tools and Materials You’ll Need
- Step-by-Step: How to Paint Bathroom Wall Tile
- Step 1: Clean the Tiles Thoroughly
- Step 2: Sand the Tile Surface
- Step 3: Mask Off Areas
- Step 4: Apply a Bonding Primer
- Step 5: Paint the Tile
- Step 6: Paint or Touch Up Grout Lines
- Step 7: Seal the Painted Tile
- Step 8: Let It Cure Properly
- Design Ideas for Painted Bathroom Tile
- Maintenance Tips for Painted Bathroom Tile
- Common Mistakes and How to Avoid Them
- Frequently Asked Questions
- Final Thoughts
Why Paint Bathroom Wall Tile
Replacing tile is messy, expensive, and time-consuming. But painting tile offers a smart alternative with much less hassle.
Benefits of Painting Bathroom Wall Tile
- Cost-effective: A gallon of paint and primer is far cheaper than replacing tile
- Time-saving: Can be completed in a weekend or less
- Customizable: Choose any color or finish to match your bathroom aesthetic
- Less mess: No need for demolition, dust, or tile saws
- DIY-friendly: Great project for beginners with basic tools
It’s the ideal solution if your tile is still in good structural condition but just looks outdated.
Is Your Bathroom Tile Paintable?
Not all tiles are created equal. Before diving in, evaluate your surface to make sure it’s a good candidate for paint.
Tile Types You Can Paint
- Ceramic wall tiles
- Porcelain tiles (with proper adhesion methods)
- Natural stone tiles (require specialty primers and sealers)
Surfaces You Should Avoid Painting
- Floor tiles in wet zones
- Cracked or loose tiles
- Glossy tiles without sanding or etching
- Tiles with mildew, mold, or water damage
If your tile is chipped, crumbling, or in constant contact with running water, replacement might be a better long-term solution.
Tools and Materials You’ll Need
Gathering the right supplies is essential for a smooth and successful project.
Basic Supplies List
- Heavy-duty tile cleaner or degreaser
- Sponge, rags, or scrub brush
- 220-grit sandpaper or sanding block
- Painter’s tape and plastic sheeting
- Primer (bonding or epoxy primer)
- Tile paint (epoxy, urethane, or specialty acrylic)
- Paint tray and liners
- Foam roller (4″–6″) and angled brush
- Respirator or mask (for ventilation)
- Latex or nitrile gloves
Optional: Grout pen or contrasting grout paint for final detailing.
Step-by-Step: How to Paint Bathroom Wall Tile
This section covers the full process from preparation to sealing so your painted tile lasts and looks great.
Step 1: Clean the Tiles Thoroughly
Any soap scum, mildew, or grease on the tile will prevent paint from adhering.
Cleaning Tips
- Use a tile-safe degreaser or a mix of vinegar and dish soap
- Scrub the tile and grout lines with a stiff-bristle brush or sponge
- Rinse thoroughly and let dry completely
- For stubborn spots, use a baking soda paste or TSP cleaner
Don’t skip this step—paint won’t stick to dirty tiles.
Step 2: Sand the Tile Surface
Shiny glazed tiles need a bit of roughness to help primer grip the surface.
How to Sand Properly
- Use 220-grit sandpaper or a sanding block
- Lightly scuff the surface without removing the glaze entirely
- Focus on corners and grout lines
- Wipe off dust with a damp microfiber cloth
If sanding is not an option, look for a chemical etching product suitable for tile surfaces.
Step 3: Mask Off Areas
Protect everything you don’t want painted.
Masking Techniques
- Use painter’s tape along the edges of tiles, trim, mirrors, and fixtures
- Cover sinks, bathtubs, and floors with plastic sheeting
- Tape off grout lines if you plan to paint them a different color later
Take your time—clean lines now will save hours of touch-ups later.
Step 4: Apply a Bonding Primer
This step ensures that your paint won’t peel or chip prematurely.
Choosing the Right Primer
- For glossy tile: Use an epoxy-based or urethane bonding primer
- For porous stone: Use a masonry or stone primer
- For standard ceramic: Look for a multi-surface bonding primer labeled for tile
How to Apply Primer
- Use a foam roller for large areas
- Use an angled brush for edges and grout lines
- Apply thin, even coats
- Let dry completely as per the label (typically 4–6 hours)
Don’t skip primer, even if using “paint and primer in one” products.
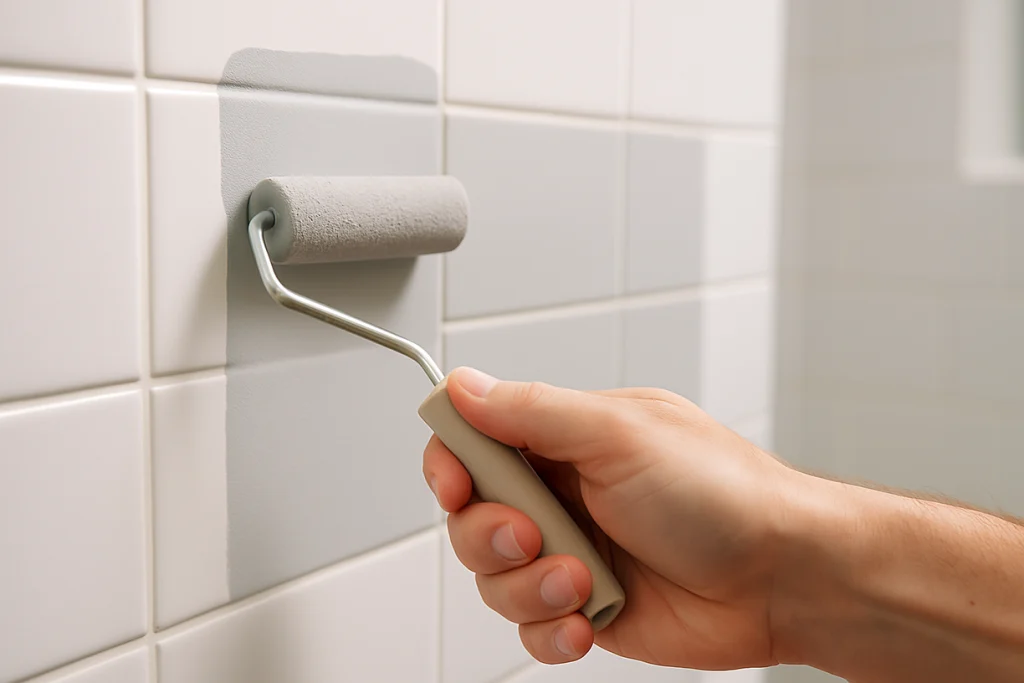
Step 5: Paint the Tile
Now comes the fun part—applying your chosen color.
Best Paint Types for Bathroom Tile
- Epoxy paint: Durable, water-resistant, and best for high-moisture zones
- Acrylic urethane: More flexible and easy to apply
- Chalk paint (sealed): Great for matte finishes, but needs a waterproof topcoat
Application Tips
- Start at the top and work your way down
- Use light, even strokes with a foam roller
- Backroll each section to remove bubbles
- Allow 6–8 hours drying time between coats
Two coats are usually sufficient for full coverage. Use a brush to detail around fixtures and corners.
Step 6: Paint or Touch Up Grout Lines
You can leave grout lines the same color or enhance them for contrast.
How to Paint Grout
- Use a small brush or grout paint pen
- Apply carefully to avoid overlap
- Wipe excess with a damp cloth
You can also tape over tiles and only paint the grout if you want a dramatic change.
Step 7: Seal the Painted Tile
A topcoat helps resist moisture, soap, and daily wear.
Recommended Sealers
- Water-based polyurethane (for matte and satin finishes)
- Clear epoxy topcoat (for high-gloss durability)
- Acrylic sealers (for quick-dry projects)
Let the final paint layer cure fully (usually 24–48 hours) before sealing. Apply 1–2 thin coats of sealer with a clean foam roller or brush.
Step 8: Let It Cure Properly
Patience pays off when it comes to long-lasting results.
Curing Guidelines
- Avoid touching or cleaning the tile for 3–5 days
- Keep the bathroom well-ventilated
- Don’t expose to heavy water contact during curing
- Avoid using harsh cleaners for the first two weeks
Full curing can take up to 7 days depending on the product.
Design Ideas for Painted Bathroom Tile
Your painted tile can match any style you love.
Creative Design Options
- Classic white: Brightens and modernizes any space
- Two-tone: Paint the top half one shade and the bottom another
- Stencils: Add patterns like Moroccan tiles or botanical prints
- Color blocking: Paint alternating squares for a checkerboard look
- Neutral tones: Beige, slate, and soft gray work with almost any decor
Painted tile doesn’t have to be boring—customize it to reflect your personal style.
Maintenance Tips for Painted Bathroom Tile
With proper care, your tile makeover will last for years.
Cleaning Do’s and Don’ts
- Use non-abrasive cleaners like dish soap or vinegar
- Avoid bleach, ammonia, or abrasive scrubbing pads
- Reapply sealer every 1–2 years for best results
- Wipe water splashes after showers to prevent streaks
Treat your painted tiles gently, and they’ll look fresh much longer.
Common Mistakes and How to Avoid Them
Mistake: Skipping Primer
- Fix: Always use a bonding primer before paint
Mistake: Using Wall Paint
- Fix: Use paint specifically designed for tile or high-moisture areas
Mistake: Painting Over Mold
- Fix: Clean thoroughly with mildew remover and let dry before painting
Mistake: Thick Paint Coats
- Fix: Apply multiple thin layers to avoid bubbling or peeling
Mistake: Poor Ventilation
- Fix: Keep windows open and fans running during and after painting
Avoiding these mistakes will keep your bathroom looking like a professional upgrade.
Frequently Asked Questions
Can You Paint Over Cracked Tile?
You can, but it won’t look seamless. Fill the crack with caulk or filler first, or replace the damaged tile.
Will Painted Tile Peel?
Only if the surface isn’t cleaned, primed, and sealed properly. Follow the steps closely and use tile-friendly products.
How Long Will Painted Tile Last?
With correct prep and sealing, painted bathroom tile can last 3–5 years or more with proper care.
Can You Paint Over Old Painted Tile?
Yes, but you’ll need to sand the surface lightly and clean it thoroughly before repainting.
Final Thoughts
Painting your bathroom wall tile is one of the most cost-effective and dramatic upgrades you can make without a renovation crew. It brings dated spaces into the modern era and gives you control over your color palette and mood. With the right tools, preparation, and paint, this project becomes a rewarding DIY makeover.
Whether you’re going for a clean spa-like feel, a vintage charm, or a bold creative statement, painting your wall tile offers a satisfying transformation you can complete over a weekend. Stick to the step-by-step process, be patient through the drying stages, and you’ll enjoy a fresh new bathroom look for years to come.