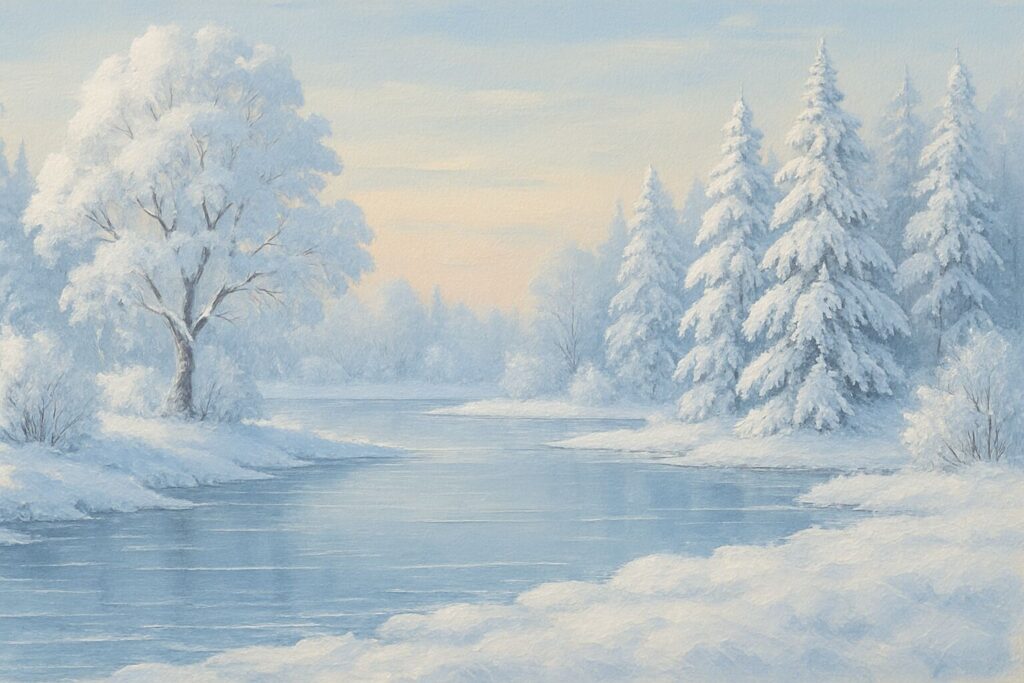
Snow-covered landscapes carry a beauty that is both serene and dramatic. Whether you want to capture the soft glow of fresh snowfall, the sparkling brightness of a sunny winter day, or the moody tones of a stormy blizzard, painting snow requires more than just reaching for white paint. It’s about understanding color, texture, and light to make snow look realistic and alive on canvas.
In this guide, you’ll learn everything you need to know about how to paint snow — from the basics of color mixing to advanced techniques for creating depth and atmosphere. Whether you’re working with acrylics, oils, or watercolors, this comprehensive guide will help you create stunning snowy scenes step by step.
Contents
- Understanding the Nature of Snow
- Essential Materials for Painting Snow
- Preparing Your Snow Painting
- Color Mixing for Snow
- Techniques for Painting Snow with Acrylics
- Techniques for Painting Snow with Oils
- Techniques for Painting Snow with Watercolors
- Adding Depth and Perspective
- Painting Snow in Different Environments
- Capturing Light in Snow
- Creating Falling Snow
- Adding Texture to Snow
- Common Mistakes to Avoid
- Practicing Snow Painting Techniques
- Creative Snow Painting Ideas
- Final Words
Understanding the Nature of Snow
Snow is not just white
While snow may appear white at first glance, it reflects and absorbs colors from its surroundings. Shades of blue, gray, lavender, and even yellow can appear depending on lighting conditions.
Light and shadow in snowy scenes
Snow interacts with light in unique ways. Highlights can appear brilliant and almost glowing, while shadows are often soft and colorful rather than harsh and black.
Mood and atmosphere
- Morning snow often has warm, golden undertones.
- Midday snow reflects strong, cool blues.
- Evening snow captures purples, pinks, and oranges from the setting sun.
- Stormy snow scenes lean toward muted grays and deep blues.
Essential Materials for Painting Snow
Paint types
- Acrylic: Quick-drying and versatile for layering.
- Oil: Ideal for blending smooth gradients and adding texture.
- Watercolor: Perfect for soft, transparent effects.
Brushes
- Flat brushes for broad strokes and skies.
- Round brushes for detail work.
- Fan brushes for creating soft snow textures.
- Palette knives for adding raised, textured snow.
Canvas or paper
Sturdy surfaces work best for snowy textures. Pre-primed canvases or heavyweight watercolor paper help prevent warping.
Additional tools
- Sponges for dabbing soft effects.
- Toothbrushes for snow splatter.
- Modeling paste or gel for three-dimensional snow.
Preparing Your Snow Painting
Step 1: Plan your composition
Decide what kind of snowy scene you want to create: a winter forest, a mountain landscape, or a cozy snow-covered village.
Step 2: Sketch lightly
Use a pencil to map out key elements like trees, buildings, and horizon lines. Keep lines faint to avoid muddying your paint.
Step 3: Underpainting
Apply a base layer of muted color, such as pale blue or gray. This sets the tone and ensures that your whites appear more vibrant later.
Color Mixing for Snow
Creating realistic whites
Pure white rarely looks natural. Mix small amounts of blue, gray, or even yellow into your whites to create depth.
Shadow colors
- Use ultramarine blue with a touch of burnt sienna for cool shadows.
- Add violet or green tones for more dynamic shadows in natural settings.
Highlight colors
Use warmer whites with touches of yellow ochre or light pink for sunlit snow.
Techniques for Painting Snow with Acrylics
Layering for depth
Start with darker base layers and gradually build up lighter tones on top. This gives the snow a sense of volume.
Dry brushing
Use a dry brush with minimal paint to create soft, powdery snow textures.
Splattering
Dip a toothbrush in diluted white paint and flick it over the canvas to create falling snow.
Techniques for Painting Snow with Oils
Blending gradients
Oils allow smooth blending, perfect for snowy skies and soft shadows. Work wet-on-wet for seamless transitions.
Palette knife textures
Use a palette knife to apply thick layers of paint for raised snow on rooftops, tree branches, or ground surfaces.
Glazing for atmosphere
Apply thin, transparent layers of color to create mist, fog, or glowing light effects.
Techniques for Painting Snow with Watercolors
Wet-on-wet method
Paint a wet surface with diluted blues or grays to create soft snowy backgrounds.
Negative painting
Leave areas of the paper unpainted to represent snow highlights.
Salt texture
Sprinkle salt on wet watercolor to create organic, crystalline textures resembling frost.
Adding Depth and Perspective
Foreground, middle ground, and background
Use darker tones and more detail in the foreground, while keeping the background lighter and softer.
Atmospheric perspective
Add hints of mist or haze to distant areas to create a sense of depth.
Leading lines
Use paths, fences, or tree lines to guide the viewer’s eye through the snowy scene.
Painting Snow in Different Environments
Snowy forests
Layer greens, browns, and blues beneath white highlights to show snow resting on branches and ground.
Snow-covered mountains
Focus on sharp contrasts between sunlit peaks and deep blue shadows.
Urban snow scenes
Add reflections of streetlights, windows, and vehicles in slushy snow to bring a cityscape to life.
Capturing Light in Snow
Morning light
Use warm tones like peach, gold, and soft pink to suggest sunrise.
Midday light
Emphasize strong contrasts between bright whites and cool blue shadows.
Evening light
Incorporate purples, oranges, and deep blues to reflect the drama of sunset.
Artificial light
For scenes with lamps or windows, use glowing yellows and oranges surrounded by cool shadows for a cozy effect.
Creating Falling Snow
Soft snowfall
Use a sponge or large brush to gently dab translucent white paint over the scene.
Heavy blizzard
Apply thick, overlapping layers of splattered paint, gradually increasing density toward the foreground.
Sparkling snow
Add tiny highlights with a fine brush or white gel pen once the painting is dry.
Adding Texture to Snow
Impasto snow
Mix modeling paste with white paint and apply it thickly with a palette knife for raised effects.
Frosted surfaces
Drag a dry brush lightly over textured areas to highlight edges.
Powdery snow
Layer thin, translucent whites over darker tones to create a soft, fluffy look.
Common Mistakes to Avoid
Using pure white everywhere
Snow loses its depth when only one shade is used. Vary tones for realism.
Ignoring the light source
Always decide where the light is coming from and keep shadows consistent.
Overworking details
Snow often looks better with simplicity. Too much detail can make it appear muddy.
Flat shadows
Use color in shadows instead of black or gray to keep the snow vibrant.
Practicing Snow Painting Techniques
Create a snow color chart
Experiment with different white mixes to see how they appear on your canvas.
Small winter studies
Practice painting snow on small panels or sketchbooks before moving to larger works.
Copying from reference photos
Study how snow behaves under different lighting conditions to improve accuracy.
Creative Snow Painting Ideas
Abstract snow art
Play with bold colors, textures, and unconventional tools to create modern snowy compositions.
Storytelling scenes
Add characters, animals, or buildings to give your snowy landscape a narrative.
Mixed media snow
Combine acrylics, pastels, and textured elements like tissue paper or fabric for dimensional effects.
Final Words
Painting snow is about more than just applying white paint. It’s about capturing the interplay of color, light, and texture that makes winter scenes so captivating. By experimenting with different techniques — whether using acrylics, oils, or watercolors — you can bring your snowy landscapes to life with depth and emotion.
With patience and practice, you’ll develop your own approach to painting snow, creating artworks that reflect both the chill and the beauty of winter. Grab your brushes, mix your colors, and let your canvas sparkle with the magic of snow.