Teddy bears are one of the most beloved and nostalgic symbols of childhood. Whether you’re a beginner artist, a teacher preparing a fun lesson, or someone creating personalized cards or gifts, learning how to draw a teddy bear is a heartwarming and creative activity. From cuddly plush-style teddy bears to more stylized or cartoonish versions, this guide will show you multiple ways to draw your own adorable bear with confidence.
This comprehensive step-by-step guide will walk you through every detail—from sketching basic shapes to adding facial expressions and textures. You’ll explore different teddy bear styles and learn how to customize your drawing with accessories, poses, and even seasonal themes.
Contents
- Why Draw a Teddy Bear
- What You’ll Need to Draw a Teddy Bear
- Understanding the Basic Shapes of a Teddy Bear
- How To Draw a Teddy Bear: Basic Sitting Pose
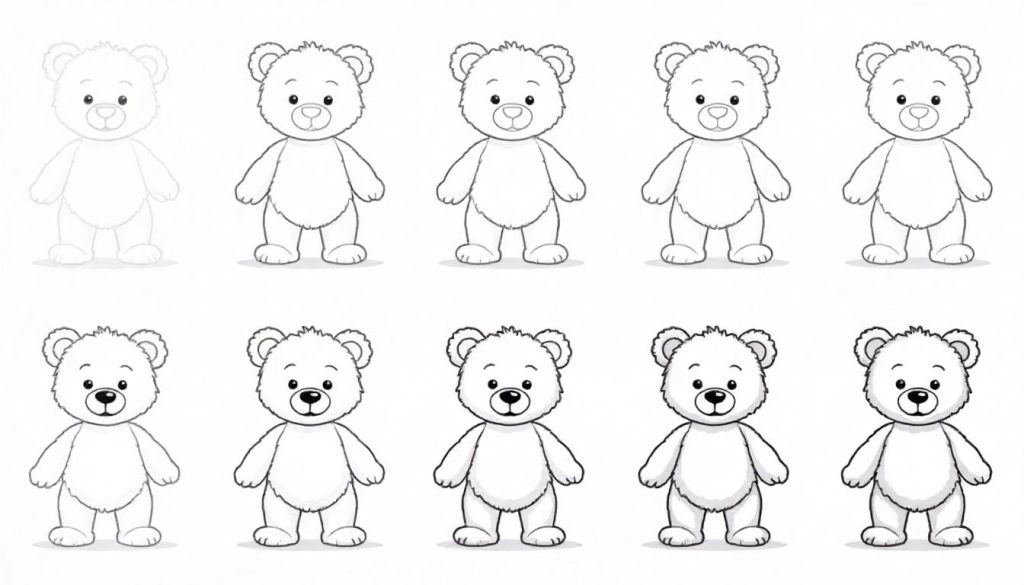
- How To Draw a Teddy Bear from the Front
- How To Draw a Teddy Bear Hugging a Heart
- How To Draw a Cute Chibi Teddy Bear
- How To Draw a Realistic Teddy Bear
- How To Add Accessories to Your Teddy Bear Drawing
- Coloring Ideas for Your Teddy Bear
- Tips for Improving Your Teddy Bear Drawings
- Common Mistakes to Avoid
- Fun Ideas to Use Your Teddy Bear Drawing
- Final Thoughts: Bring Your Teddy Bear Drawing to Life
Why Draw a Teddy Bear
A Familiar and Fun Subject
Teddy bears are simple, recognizable, and offer a lot of room for creative interpretation. They’re also a great starting point for learning how to draw rounded forms, proportions, and personality through expression.
Suitable for All Ages
Whether you’re drawing with kids or practicing as an adult, the teddy bear is a universal favorite. It allows beginners to build drawing confidence while offering experienced artists a chance to explore various styles.
Versatile for Different Projects
You can use teddy bear drawings in greeting cards, nursery art, fabric designs, scrapbooks, wall art, stickers, coloring books, and more. This guide provides enough variety to help you adapt your drawing for any purpose.
What You’ll Need to Draw a Teddy Bear
Before you begin, gather your drawing tools. You can use traditional or digital tools depending on your preference.
Traditional Drawing Tools
- Pencil (HB or 2B for sketching)
- Eraser (kneaded or soft rubber)
- Drawing paper or sketchbook
- Fineliner pens (for outlining)
- Colored pencils, markers, or crayons (for coloring)
- Blending stump or tissue (optional for shading)
Digital Drawing Tools
- Tablet (iPad with Procreate, Android with sketching app, or drawing tablet with PC)
- Stylus with pressure sensitivity
- Drawing software like Procreate, Photoshop, or Clip Studio Paint
- Layers and brushes for outlining, shading, and coloring
Understanding the Basic Shapes of a Teddy Bear
Every teddy bear drawing begins with a few simple shapes. Think of it as building a soft structure made of circles and ovals. Here’s how to break it down:
Head
A large circle or slightly oval shape forms the head. It should be slightly wider than the body for a baby-bear look.
Body
An oval or rounded rectangle, placed under the head, forms the main torso. This shape can be short and round for a cuddly style or elongated for a more traditional teddy.
Arms and Legs
Use rounded cylinders or ovals angled outward from the body. Teddy bears often sit with arms and legs spread outward or bent at soft angles.
Ears
Two small circles or ovals on the upper corners of the head. These can be small and rounded or large and plush.
Snout and Nose
A small oval or circle at the lower center of the face, often slightly protruding from the head.
Eyes
Use small circles for eyes, placed evenly on each side of the snout. Large eyes make the teddy appear more childlike and expressive.
How To Draw a Teddy Bear: Basic Sitting Pose
This is the most classic and beginner-friendly teddy bear pose—soft, plush, and seated.
Step 1: Draw the Head
Start by drawing a large circle in the upper half of your page. This will be the teddy bear’s head. Keep your lines light so you can erase later if needed.
Step 2: Add the Body
Draw a slightly smaller oval underneath the head. Overlap it slightly for a natural connection between head and body. Make sure it’s centered and symmetrical.
Step 3: Sketch the Legs
At the bottom sides of the body, draw two oval shapes angled outward like a “V.” These form the sitting legs or feet. Make the bottom of the ovals slightly flat to indicate the bear is resting on a surface.
Step 4: Add the Arms
Draw two curved ovals or jellybean shapes on the sides of the body. These arms should droop downward or rest on the legs to create a cozy pose.
Step 5: Draw the Ears
On the top sides of the head, draw two rounded ears. Place them symmetrically and give them small inner ear circles for detail.
Step 6: Outline the Face
Draw a small oval snout at the lower center of the head. Inside, place a tiny triangle for the nose and a curved “W” shape beneath it for a smile.
Add two round eyes above the snout. If you want a cute look, place them far apart. Add eyebrows or tiny circles for highlights to increase expression.
Step 7: Add Paw Pads and Stitching (Optional)
Draw small ovals on the hands and feet to represent paw pads. You can also add dashed lines for stitching along the arms, belly, or head for a handmade feel.
Step 8: Refine the Outline
Go over your lines with a pen or darker pencil. Erase the guidelines and overlapping shapes. Adjust any symmetry or shapes as needed.
Step 9: Add Texture
Use short, curved lines or soft shading around the edges to show fuzziness or fur. Light hatching or dotting can give the bear a plush appearance.
Step 10: Color Your Teddy Bear
Use brown, tan, gray, or pastel tones to color your teddy. Add blush to the cheeks or color the paw pads a contrasting shade. You can use warm yellows for a vintage bear or soft pinks and blues for a nursery style.
How To Draw a Teddy Bear from the Front
A front-facing teddy bear is ideal for cards and posters.
Step-by-Step Front View
- Start with a large circle for the head.
- Add a vertical centerline and a horizontal eye-line.
- Place two eyes on either side of the vertical line.
- Add a nose, smile, and snout centered along the vertical guideline.
- Draw rounded ears directly across the top horizontal section of the head.
- Below the head, add a large U-shape for the torso.
- Extend arms out like wings, curving downward.
- Place feet at the bottom with oval shapes.
- Add details like a bow tie or heart on the chest for extra charm.
How To Draw a Teddy Bear Hugging a Heart
Perfect for Valentine’s cards, nursery art, or Pinterest pins.
Drawing a Hugging Teddy
- Draw the basic teddy bear sitting shape.
- In the center of the body, sketch a large heart.
- Adjust the arms so they curve over the heart.
- Draw paw pads or claws over the heart edges.
- Add a smiling face and blushing cheeks.
- Color the heart red or pink, and the teddy in soft brown or beige.
How To Draw a Cute Chibi Teddy Bear
Chibi is a Japanese term for super-cute, small versions of characters.
Features of Chibi Teddy Bears
- Oversized head compared to the body
- Large, expressive eyes
- Tiny arms and legs
- Simple snout and minimal details
How to Draw It
- Draw a huge circle for the head.
- Add a small bean shape for the body.
- Place two round eyes and blush dots.
- Draw small round ears, stubby limbs, and a happy mouth.
- Color in pastel shades like baby pink, sky blue, or mint green.
How To Draw a Realistic Teddy Bear
For artists looking to explore texture, light, and form.
Steps for Realism
- Use a photo reference of a real teddy bear.
- Sketch the basic structure: head, torso, limbs.
- Add folds, stuffing bulges, and seams.
- Use directional hatching for fur texture.
- Shade with layers to add dimension.
- Highlight key areas like the nose and glass eyes.
- Use warm browns, grays, or aged tones for authenticity.
How To Add Accessories to Your Teddy Bear Drawing
Bow Tie
Draw a small rectangle under the chin. Add two triangles on either side and a circle in the center.
Hat
Top hats or beanies work well. Place a cylinder or dome on the head, aligned with the perspective.
Scarf
Wrap a ribbon around the neck with one end falling over the chest and the other behind.
Balloon
Have your teddy hold a string that leads to a heart or star-shaped balloon.
Gift Box
Draw a box with a lid in front of the bear. Adjust the arms to rest on the edges.
Coloring Ideas for Your Teddy Bear
Natural Color Palettes
- Chocolate brown with cream details
- Soft beige with tan ears and paws
- Golden honey tones
Pastel Color Palettes
- Blush pink with white paws
- Baby blue with navy accents
- Lavender with gray ears
Bold and Whimsical Styles
- Rainbow patchwork teddy
- Teddy with star patterns or polka dots
- Contrasting color schemes for a modern twist
Tips for Improving Your Teddy Bear Drawings
Use Reference Images
Study real teddy bears or cartoon bears to understand shape and posture. Pinterest and toy stores offer endless inspiration.
Practice Expressions
Draw multiple faces—happy, sleepy, surprised—to explore the personality of your bear.
Experiment with Poses
Try drawing the bear standing, lying down, holding a flower, or reading a book.
Keep It Soft
Teddy bears are soft and round. Avoid sharp angles and keep curves smooth for a plush look.
Common Mistakes to Avoid
- Making the limbs too thin or rigid
- Drawing the eyes too close together (loses charm)
- Forgetting the overlapping shapes—teddy bears are layered
- Using straight lines for arms or ears (round is better)
- Over-shading—keep lighting soft and fuzzy
Fun Ideas to Use Your Teddy Bear Drawing
- Print and use it on handmade greeting cards
- Turn it into a digital sticker for chats
- Frame it for nursery wall art
- Create a series of bears for the seasons (summer bear, winter bear, etc.)
- Make a coloring book for kids or students
Final Thoughts: Bring Your Teddy Bear Drawing to Life
Drawing a teddy bear is more than just a technical skill—it’s about capturing warmth, emotion, and nostalgia. With just a few shapes and a creative touch, you can design your very own cuddly companion, whether it’s realistic, cartoonish, cute, or decorative.
Practice with different styles, play with accessories, and explore expressions until your teddy bear truly feels like your own creation. Once you’ve mastered the basic pose, you can keep building on it and even turn your teddy into characters or illustrations for gifts and personal projects.
Happy drawing—and don’t forget to give your teddy a name!