To crackle paint, apply a base coat, allow to dry, add crackle medium, then top coat. Achieve a vintage look with crackle paint technique.
Create unique, textured surfaces for furniture and home decor projects. With crackle paint, you can add character and charm to your creations. Let’s explore the steps to achieve the crackle effect and unleash your creativity with this fun and easy technique.
Contents
- Introduction To Crackle Paint
- Materials Needed For Crackle Painting
- Preparation: Setting The Stage
- Applying The Crackle Medium
- Techniques For Layering Paint
- Drying And Curing Process
- Finishing Touches
- Creative Ideas And Tips
- Troubleshooting Common Issues
- Maintenance And Care
- Frequently Asked Questions
- Conclusion
Introduction To Crackle Paint
Crackle painting is a popular technique used to achieve a vintage, distressed look on various surfaces. This unique method creates a cracked effect on the topcoat, revealing the base coat underneath.
The Lure Of Vintage Aesthetics
Crackle paint adds character and charm to furniture, decor items, and art pieces. Its weathered appearance gives a sense of history and nostalgia, making it a favorite among DIY enthusiasts and professional artists alike.
Basics Of Crackle Painting Technique
- Apply a base coat and let it dry completely.
- Apply a crackle medium or glue and allow it to partially dry.
- Paint the topcoat color and watch the crackle magic happen as it dries.
Materials Needed For Crackle Painting
Crackle painting is a fun and creative technique that adds a vintage and distressed look to any surface. To achieve the desired crackle effect, you will need a few key materials. In this article, we will discuss the essential materials you need to get started with crackle painting.
Choosing The Right Paint
When it comes to crackle painting, selecting the right paint is crucial. You will need two different types of paint: a base coat and a top coat. The base coat should be a matte or satin finish paint, while the top coat should be a contrasting color and have a glossy finish. This contrast will create the crackle effect.
Here is a breakdown of the paint materials you will need:
| Paint | Type | Finish |
|---|---|---|
| Base Coat | Acrylic or Latex | Matte or Satin |
| Top Coat | Acrylic or Latex | Glossy |
Selecting A Crackle Medium
In addition to paint, you will also need a crackle medium to achieve the crackle effect. The crackle medium is responsible for creating the cracks in the top coat of paint. There are various crackle mediums available in the market, such as water-based and oil-based options.
Here are some crackle mediums you can choose from:
- Water-Based Crackle Medium
- Oil-Based Crackle Medium
Essential Tools For Application
Along with the paint and crackle medium, you will need a few essential tools to ensure a smooth application. These tools will help you achieve the desired crackle effect and make the process easier.
Here are the essential tools you will need:
- Paintbrushes: Different sizes for applying the base coat and top coat.
- Palette Knife: Used to apply the crackle medium.
- Sanding Block: Helps distress the surface after the crackle effect has dried.
- Lint-Free Cloth: Used for cleaning and wiping away any excess paint or medium.
- Protective Sealant: Optional but recommended to protect the finished crackle painting.
By having these essential materials and tools ready, you are well-prepared to embark on your crackle painting journey. Let your creativity flow and enjoy the process of transforming ordinary surfaces into unique works of art!
Preparation: Setting The Stage
Surface Cleaning And Sanding
Start by cleaning the surface with soap and water. Eliminate dirt and grime for smooth paint application.
Next, sand the surface lightly to create a textured base for the crackle effect.
Applying The Base Coat
Choose a base coat color that contrasts with the top coat for the crackle effect to stand out.
Apply the base coat evenly using a brush or roller. Let it dry completely before proceeding.
Applying The Crackle Medium
Applying the crackle medium is a crucial step in achieving that beautiful crackled effect on your painted surface. It requires careful attention to detail and the use of correct application techniques. In this section, we will explore the correct techniques to apply the crackle medium as well as common mistakes to avoid.
Correct Application Techniques
When applying the crackle medium, it is important to follow the correct techniques to ensure the best results. Here are some key steps to keep in mind:
- Prepare the surface: Before applying the crackle medium, make sure the surface is clean and free from any dust or debris. Sand down any rough spots and apply a primer if necessary.
- Apply a base coat: Start by applying a base coat of paint in the desired color. Let it dry completely before moving on to the next step. The base coat will show through the cracks created by the crackle medium.
- Apply the crackle medium: Using a brush or a roller, apply an even layer of crackle medium over the dry base coat. Make sure to follow the manufacturer’s instructions regarding the thickness of the layer and the drying time.
- Wait for the crackle effect: After applying the crackle medium, let it dry for the recommended amount of time. As it dries, it will start to crack and create the desired effect. Avoid touching or disturbing the surface during this process.
- Apply the top coat: Once the crackle medium has dried and created the desired effect, it’s time to apply the top coat. Choose a contrasting color for the top coat to enhance the crackled effect. Apply the top coat using a brush or a roller, making sure to cover the entire surface evenly.
- Allow for drying time: After applying the top coat, allow it to dry completely. Avoid any contact with the surface until it has fully dried to prevent smudging or disrupting the crackled effect.
Common Mistakes To Avoid
While applying the crackle medium, it’s important to be aware of common mistakes that can hinder the desired crackled effect. Here are some mistakes to avoid:
- Applying too thick or too thin: The thickness of the crackle medium layer is crucial. Applying it too thick or too thin can result in an uneven or ineffective crackled effect. Follow the manufacturer’s instructions for the recommended thickness.
- Not allowing enough drying time: Rushing the drying process can prevent the crackle medium from properly cracking and creating the desired effect. Make sure to allow sufficient drying time as recommended by the manufacturer.
- Using the wrong brush or roller: The type of brush or roller used for applying the crackle medium can impact the final result. Using a brush or roller that is too stiff or too soft may not distribute the medium evenly, affecting the crackled effect.
- Skipping the base coat: Applying the crackle medium directly onto the surface without a base coat can result in a less prominent crackled effect. The base coat helps to provide contrast and depth to the cracks.
- Disturbing the surface during drying: Touching or disturbing the surface while the crackle medium is drying can disrupt the cracking process and ruin the desired effect. It’s important to be patient and avoid any contact until the surface is fully dry.
Techniques For Layering Paint
Create a crackled paint effect by layering paint for a unique and textured finish. Experiment with different colors and techniques to achieve stunning results. Discover the art of crackling paint and add depth and character to your artwork or home decor projects.
Creating The Crackle Effect
Layering paint is a popular technique for achieving a crackle effect on surfaces. To achieve this effect, start with a base coat of paint, followed by a layer of crackle medium, and then another layer of paint. The crackle medium creates a barrier between the two layers of paint, causing the top layer to crack and reveal the base coat underneath. Experiment with different color combinations and layering techniques to achieve unique crackle effects.Timing And Thickness Considerations
The timing and thickness of the paint layers are crucial for achieving the desired crackle effect. Ensure that the base coat is completely dry before applying the crackle medium. Additionally, the thickness of the crackle medium and top coat will impact the size and depth of the cracks. Experiment with varying thicknesses and application techniques to achieve different crackle patterns. Layering paint is a versatile technique that allows for creative experimentation. By mastering the timing and thickness considerations, you can achieve stunning crackle effects that add depth and texture to your projects.
Credit: m.youtube.com
Drying And Curing Process
During the crackle paint process, the drying and curing stages are crucial. Properly drying each layer ensures the cracking effect develops evenly, while curing allows the paint to harden fully for a durable finish. Mastering these steps is key to achieving a stunning crackle paint effect.
Crackle painting is a fun and creative technique that can add character and texture to any surface. However, the drying and curing process is just as important as the painting process itself. In this section, we’ll cover the optimal drying conditions and how long you should wait before handling your crackle painted surface.Optimal Drying Conditions
To achieve the best results, it is important to ensure that your crackle painted surface is dried under optimal conditions. This means that the temperature and humidity levels should be controlled to promote even drying and prevent cracking or peeling. Here are some tips to create the perfect drying environment:- Choose a well-ventilated area with good air circulation
- Avoid drying your surface in direct sunlight or near a heat source
- Keep the temperature between 70-85°F (21-29°C)
- Maintain a humidity level of around 50%
How Long To Wait Before Handling
After you’ve applied the crackle paint to your surface, it’s important to wait for it to dry and cure properly before handling it. If you try to handle it too soon, you risk smudging or ruining the crackle effect. Here are some general guidelines for drying and curing times:| Material | Drying Time | Curing Time |
|---|---|---|
| Wood | 2-4 hours | 24-48 hours |
| Glass | 30-60 minutes | 24-48 hours |
| Metal | 30 minutes – 1 hour | 24-48 hours |
Finishing Touches
The finishing touches are crucial in achieving the perfect crackle paint effect. These final steps will determine the durability and overall appearance of your project. Let’s explore the important finishing touches for crackle paint.
Sanding For A Distressed Look
To achieve a distressed look, begin by lightly sanding the painted surface with fine-grit sandpaper. Focus on the edges and corners to create a weathered appearance. Be gentle to avoid removing too much paint. The goal is to reveal the base coat and create a naturally aged effect.
Sealing The Paint For Durability
Sealing the crackle paint is essential to protect the finish and ensure its longevity. Apply a clear topcoat or varnish using a high-quality brush or a spray for a smooth and even finish. This protective layer will safeguard the crackle effect from wear and tear, making your project durable and long-lasting.
Creative Ideas And Tips
Crackle painting is a wonderful way to add a touch of vintage charm to your home decor projects. From furniture to decorative accessories, this technique can give your items a unique, weathered look that adds character and personality to any space. If you’re looking to try your hand at crackle painting, here are some creative ideas and tips to help you get started.
Incorporating Colors And Textures
When crackle painting, consider using a combination of contrasting colors to create a striking visual impact. For a subtle effect, choose colors that are close in tone. Experiment with different textures such as matte and glossy finishes to enhance the crackling effect. This interplay of colors and textures can elevate your home decor pieces to a whole new level.
Inspiration For Home Decor Projects
Looking for inspiration for your crackle painting projects? Consider transforming a plain wooden tray into a stunning centerpiece for your coffee table. Or, breathe new life into an old picture frame by giving it a distressed, time-worn appearance. You can also use this technique to revamp a tired piece of furniture and turn it into a statement piece for your living space. The possibilities are endless!
Troubleshooting Common Issues
Looking to crackle paint? Troubleshooting common issues can help you achieve the desired effect. Learn how to avoid peeling or uneven texture with these helpful tips and tricks.
Troubleshooting Common Issues: Crackle painting is an excellent technique to add a unique and vintage look to your furniture or home décor items. While it is a simple process, some common issues can arise during the crackling process. Here are some common issues you may face while crackle painting and how to fix them. Crackle Effect Not Showing: If the crackle effect is not visible, the most common reason is that the top coat of paint is too thick. When the top coat of paint is too thick, it prevents the crackle medium from doing its job. To fix this, try applying a thinner coat of paint. You can also add a little water to the top coat to make it thinner, but be careful not to make it too thin. Fixing Uneven Textures: Uneven textures can occur when the base coat is not smooth enough. It is essential to have a smooth base coat to achieve an even crackle effect. If you are facing this issue, you can sand the base coat down with fine-grit sandpaper to create a smooth surface. You can also try applying a layer of primer before the base coat to ensure it is smooth and even. In conclusion, by troubleshooting common issues, you can achieve a beautiful crackle effect on your furniture or home décor items. By following the above tips, you can easily fix any issues that arise and achieve a perfect crackle effect every time you try this technique.
Credit: www.realmilkpaint.com
Maintenance And Care
To create a crackle paint effect, first apply a base coat, then a crackle medium, followed by a top coat. Use a brush or sponge for the best results and let each layer dry thoroughly. Experiment with different colors for a unique finish.
Maintenance and care are crucial for preserving the aesthetic appeal of crackle paint surfaces. Proper cleaning and long-term preservation techniques can ensure that the crackle finish maintains its visual allure for years to come.Cleaning Painted Surfaces
When cleaning crackle painted surfaces, it is important to use gentle methods to avoid damaging the delicate finish. Regular dusting with a soft, dry cloth can help prevent the accumulation of dirt and grime. For more thorough cleaning, a damp cloth with mild soap and water can be used. Avoid abrasive cleaners that can scratch or remove the crackle paint.Long-term Preservation Of Crackle Finish
To preserve the crackle finish over the long term, it is essential to protect the painted surfaces from excessive wear and tear. Applying a clear sealant can provide an additional layer of protection against moisture and physical damage. Avoid placing heavy objects directly on crackle painted surfaces to prevent chipping or cracking. Overall, gentle cleaning and preventative measures are key to maintaining the beauty of crackle painted surfaces.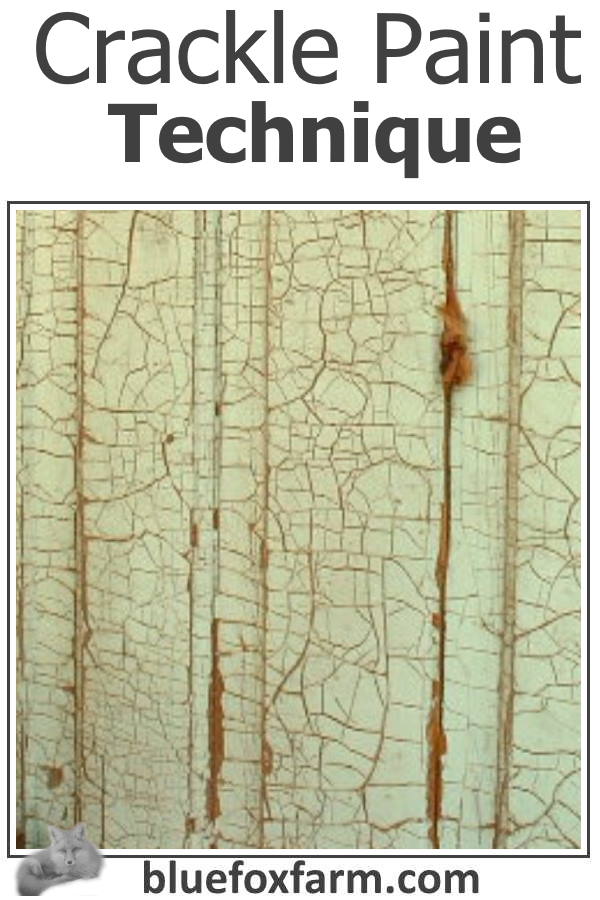
Credit: www.bluefoxfarm.com
Frequently Asked Questions
How Do I Do Crackle Paint?
To create crackle paint, apply a base coat and let it dry. Then, apply crackle medium and let it dry before adding the top coat. The top coat will crack as it dries, revealing the base coat underneath. Sanding can enhance the aged look.
What Can I Add To Paint To Make It Crackle?
Adding crackle medium to paint can create a crackling effect. You can also use glue or petroleum jelly as a crackle medium. Apply a base coat of paint, let it dry, then apply the crackle medium followed by a top coat of paint.
The drying time and thickness of the layers will affect the size and amount of cracks.
How Do You Make Paint Look Old And Cracked?
To make paint look old and cracked, apply a base coat, followed by a crackle medium, then a top coat. Allow to dry for a vintage effect.
How To Get A Crackle Effect With Acrylic?
To achieve a crackle effect with acrylic, apply a thick layer of paint, then a thin layer. Use a hairdryer to speed up drying and create cracks.
Conclusion
Crackle painting is a fun and creative way to add texture and personality to your home decor. With just a few simple steps and materials, you can achieve a unique and vintage look that will impress your guests. Remember to choose complementary colors and experiment with different techniques to achieve the desired effect.
Don’t be afraid to make mistakes and have fun with the process. Happy painting!