
Learning how to paint a bifold door is an easy way to refresh a room without replacing the entire door. Whether your bifold doors are made from wood, MDF, composite material, or a previously painted surface, a fresh coat of paint can make them look cleaner and more modern. The key is proper preparation, especially because bifold doors have multiple panels, edges, hinges, and moving components.
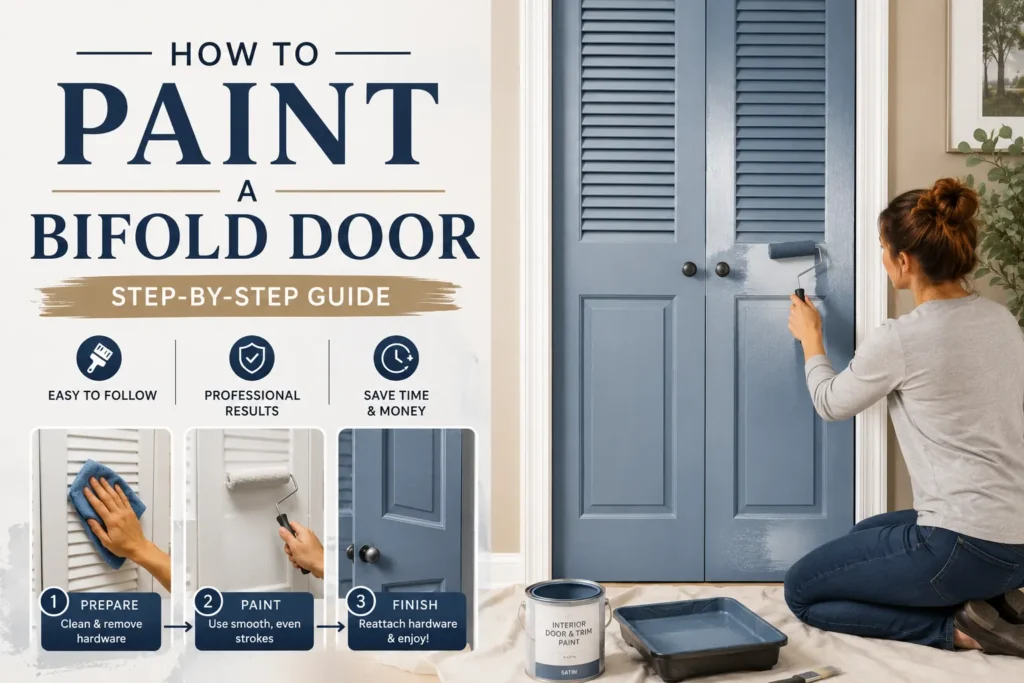
A successful paint job doesn’t require professional equipment. With the right preparation, suitable paint, careful masking, and thin, even coats, you can achieve a smooth finish that looks polished. This guide walks you through the process from removing hardware and cleaning the doors to sanding, priming, painting, and reinstalling them.
Items to Buy
- Interior paint
- Primer
- Fine-grit sandpaper
- Medium-grit sandpaper
- Sanding sponge
- Degreasing cleaner
- Clean cloths
- Microfiber cloths
- Small paint roller
- Angled paintbrush
- Small detail brush
- Paint tray
- Painter’s tape
- Drop cloth
- Screwdriver
- Wood filler, if needed
- Caulk, if needed
- Putty knife
- Tack cloth
- Paint stirrer
Why Paint a Bifold Door?
Bifold doors often occupy a noticeable area of a room, especially when they cover a closet or pantry.
Painting them can:
- Refresh an outdated room
- Cover faded paint
- Update an old closet
- Match the door to new décor
- Create an accent feature
- Hide minor cosmetic imperfections
- Give inexpensive doors a more finished appearance
Instead of replacing the entire door system, painting can provide a relatively simple makeover.
Can You Paint a Bifold Door?
Yes, most bifold doors can be painted.
The exact preparation depends on the door material and existing finish.
Common bifold door materials include:
- Solid wood
- Wood veneer
- MDF
- Composite
- Previously painted wood
- Previously painted manufactured material
The most important rule is to choose a primer and paint that are compatible with the existing surface.
How to Paint a Bifold Door Step by Step
Step 1: Remove the Bifold Door
If practical, remove the door from its track before painting.
This makes it easier to reach:
- Panel edges
- Hinges
- Corners
- Recessed areas
- Top and bottom edges
The exact removal process varies depending on the bifold door hardware.
If you’re unfamiliar with the track system, take photos before removing anything. This gives you a reference when it’s time to reinstall the door.
If removing the door isn’t practical, you can paint it while installed, but you’ll need to carefully protect the surrounding area.
Step 2: Remove Hardware
Remove handles, knobs, pulls, and other hardware whenever possible.
Removing hardware gives you cleaner edges and prevents paint from covering the finish.
Keep screws and small parts in a labeled container so they don’t get misplaced.
If certain hardware cannot be removed, cover it carefully with painter’s tape.
Step 3: Clean the Door
Cleaning is one of the most important preparation steps.
Bifold doors can collect:
- Dust
- Fingerprints
- Grease
- Pet hair
- Cleaning-product residue
- Dirt
Use a suitable household degreasing cleaner and a clean cloth.
Pay particular attention to areas around the handles and edges because these areas often accumulate oils from frequent handling.
Allow the door to dry completely before sanding.
Step 4: Inspect the Surface
Look closely at the entire door.
Check for:
- Scratches
- Dents
- Cracks
- Peeling paint
- Chipped edges
- Loose veneer
- Water damage
- Uneven surfaces
Small imperfections are much easier to notice after a new coat of paint, so it’s worth repairing them before painting.
Step 5: Repair Minor Damage
Use an appropriate filler for small dents and holes.
Apply it with a putty knife.
Allow the filler to dry completely according to the product instructions.
Then sand the repaired areas until they’re smooth and level with the surrounding surface.
For damaged veneer or significant structural problems, repair the door appropriately before continuing.
Step 6: Sand the Door
Lightly sand the existing finish.
You don’t necessarily need to remove all the old paint.
The goal is to:
- Smooth imperfections
- Remove loose coating
- Reduce surface sheen
- Improve primer adhesion
Use fine-grit sandpaper or a sanding sponge for most surfaces.
Be especially careful around thin veneer.
You don’t want to sand through the surface layer.
Step 7: Sand the Edges and Recesses
Bifold doors often have detailed panel edges and narrow areas that are easy to overlook.
Sand carefully around:
- Panel borders
- Grooves
- Corners
- Edges
- Decorative details
A sanding sponge can be useful because it conforms to curved or uneven surfaces.
Step 8: Remove Sanding Dust
After sanding, remove all dust from the door.
Use a clean cloth or appropriate tack cloth.
Don’t begin priming while sanding dust remains on the surface.
Dust trapped under primer can create a rough texture that becomes more noticeable with each subsequent coat.
Step 9: Mask the Hinges and Hardware Areas
If you’ve removed the hardware, this step is easier.
If the hinges remain attached, protect them with painter’s tape.
Avoid allowing excessive paint to build up around hinges because thick paint can interfere with movement.
Also protect any track components or areas that shouldn’t receive paint.
Step 10: Apply Primer
Primer helps create a uniform surface and improves adhesion.
It is especially useful when:
- You’re painting a glossy surface
- You’re changing from a dark color to a light color
- The door has exposed wood
- Repairs have been made
- You’re painting MDF or composite material
- The existing finish is questionable
Apply a thin, even coat.
Avoid creating heavy buildup around panel edges.
Allow the primer to dry or cure according to its instructions.
Step 11: Lightly Sand the Primer
Once the primer is completely dry, inspect the surface.
If necessary, lightly sand it with fine-grit sandpaper.
This can remove tiny imperfections and create a smoother foundation for your final paint.
Clean away the dust afterward.
Step 12: Choose Your Paint
For most interior bifold doors, a durable interior trim or door paint is a good choice.
Consider the finish carefully.
Satin
A popular option because it provides some sheen while remaining relatively subtle.
Semi-Gloss
More reflective and often easier to wipe clean.
Gloss
Highly reflective and dramatic, but it can emphasize surface imperfections.
Matte or Eggshell
Can create a softer appearance, although these finishes may not be as practical for frequently handled doors.
Choose a finish that fits the room and the amount of use the door receives.
Step 13: Start With the Detailed Areas
If the bifold door has recessed panels, use a small angled brush to paint the detailed sections first.
Work carefully around:
- Panel edges
- Corners
- Grooves
- Decorative trim
Don’t overload the brush.
Excess paint can collect in corners and create visible drips.
Step 14: Paint the Flat Sections
Use a small roller for broad, flat areas.
A quality roller can create a smoother finish than brushing large surfaces.
Work in manageable sections.
Apply thin coats rather than trying to achieve complete coverage immediately.
Step 15: Paint in the Direction of the Surface
For wood-grain doors, follow the direction of the grain where practical.
For smooth MDF or composite doors, use consistent strokes and avoid repeatedly going over paint that has begun to set.
This helps minimize visible brush and roller marks.
Step 16: Allow the First Coat to Dry
Give the first coat adequate drying time.
Don’t judge the final color while the paint is still wet.
The surface may appear uneven during the first coat, especially when changing from a dark color to a lighter one.
That’s normal.
Step 17: Lightly Sand Between Coats
If the paint system recommends sanding between coats, use very fine sandpaper and a light touch.
The goal is to remove tiny imperfections rather than strip away the fresh paint.
Clean the surface thoroughly afterward.
Step 18: Apply the Second Coat
Apply the second coat using the same method.
Use thin, controlled layers.
Pay attention to the edges and recessed areas because these can collect too much paint.
A second coat will generally provide better color consistency and coverage.
Step 19: Inspect the Finish
After the final coat dries, inspect the door from several angles.
Look for:
- Drips
- Brush marks
- Roller texture
- Missed spots
- Uneven coverage
- Paint buildup
- Dust particles
If you notice a small imperfection, allow the finish to cure appropriately before correcting it.
Step 20: Let the Door Cure
Dry to the touch doesn’t necessarily mean fully cured.
Allow the paint to cure according to the manufacturer’s recommendations before reinstalling or using the door heavily.
This is particularly important with doors because the panels move against each other during operation.
Step 21: Reinstall the Hardware
Once the paint is properly cured, reinstall the handles, knobs, and other hardware.
Avoid overtightening screws because this can damage freshly painted surfaces.
If you removed hinges, reinstall them carefully and check that the panels move freely.
Step 22: Reinstall the Bifold Door
Return the door to its track according to the manufacturer’s hardware configuration.
Check that:
- The panels fold smoothly
- The door opens properly
- The top track operates correctly
- The bottom pivot is secure
- The panels don’t rub together
- The door closes evenly
If the door feels stiff, inspect for paint buildup around moving components.
How to Paint a Bifold Door Without Removing It
You can paint a bifold door while it remains installed.
This method is useful if removing the door is difficult.
Start by protecting:
- Floor
- Walls
- Door frame
- Track
- Hardware
- Nearby furniture
Open the door enough to access the individual panels.
Paint carefully and avoid excessive paint around hinges and moving areas.
The disadvantage is that access to the edges and rear surfaces can be limited.
For the cleanest finish, removing the door is generally easier when practical.
How to Paint a Bifold Closet Door
Closet bifold doors are especially good candidates for a paint makeover.
For a bedroom, consider:
- Warm white
- Soft beige
- Light gray
- Sage green
- Dusty blue
- Muted taupe
For a bold accent, consider:
- Deep navy
- Forest green
- Charcoal
- Terracotta
- Deep blue
Choose a color that works with the walls, flooring, furniture, and lighting.
How to Paint Bifold Doors With Slats
Louvered bifold doors require more patience because of the many narrow surfaces.
Use a small angled brush.
Paint the edges of each slat carefully without flooding the openings.
A small foam roller may work on accessible flat sections, but detailed brushing is often necessary for the narrow louvers.
Apply thin coats to avoid paint buildup.
How to Paint Wood Bifold Doors
Wood doors can be painted beautifully when properly prepared.
Start by cleaning and lightly sanding the surface.
If the wood is unfinished, use an appropriate wood primer.
If you’re painting previously finished wood, scuff the existing surface and use a compatible bonding primer when necessary.
For a traditional appearance, let some of the natural grain influence your brush direction.
How to Paint MDF Bifold Doors
MDF can provide a smooth surface, but its edges can absorb paint differently from the flat faces.
Pay special attention to exposed edges.
A suitable primer can help create a more uniform surface.
Avoid excessive moisture because MDF can swell when exposed to water.
How to Paint a Dark Bifold Door White
Going from dark paint to white requires good preparation.
Start with:
- Cleaning
- Light sanding
- Primer
- First white coat
- Second coat
- Final inspection
A quality primer can help reduce the number of color coats needed.
Don’t apply extremely thick white paint in an attempt to cover the dark color faster.
Multiple thin coats generally produce a cleaner result.
How to Get a Smooth Finish
A smooth bifold door finish depends on preparation as much as painting technique.
Use Fine Sandpaper
Smooth the surface before painting.
Choose the Right Roller
A small, high-quality roller designed for smooth surfaces can reduce texture.
Don’t Overload the Brush
Too much paint can create drips and brush marks.
Work With Thin Coats
Thin layers provide better control.
Avoid Overworking Drying Paint
Once paint begins to set, repeatedly brushing over it can create texture.
Keep the Workspace Clean
Dust settling on wet paint can create unwanted bumps.
Common Mistakes to Avoid
Skipping Cleaning
Paint may not adhere properly to greasy surfaces.
Painting Over Gloss Without Preparation
A glossy surface may need sanding and appropriate primer.
Applying Too Much Paint
Heavy coats can drip and interfere with door movement.
Painting the Hinges
Paint buildup can restrict movement.
Ignoring the Edges
Unpainted edges can be obvious when the door opens.
Reinstalling Too Quickly
Fresh paint can become damaged during installation.
Using the Wrong Roller
A roller designed for textured walls can leave an unwanted texture.
Sanding Too Aggressively
You can damage veneer or exposed material.
Forgetting the Track
Paint in the wrong areas can interfere with the bifold mechanism.
How Long Does It Take to Paint a Bifold Door?
The actual painting may only take a few hours, but the entire project can take longer because of drying and curing.
A typical project may include:
- Cleaning and preparation
- Sanding
- Priming
- Drying
- First paint coat
- Drying
- Second paint coat
- Curing
- Reinstallation
Don’t rush the process simply to finish in one day.
Allowing each layer to dry properly is usually more important than speed.
Can You Spray Paint a Bifold Door?
Yes, spray application can produce a very smooth finish when done correctly.
It can be especially useful for doors with detailed profiles.
However, spraying requires:
- Proper ventilation
- Overspray control
- Appropriate respiratory protection
- Suitable workspace
- Consistent technique
For a beginner, a small roller and quality brush may be easier to control.
FAQs
Can I paint a bifold door without removing it?
Yes. You can paint it while installed, but removing it can make preparation and painting easier and give you better access to the edges.
What paint is best for bifold doors?
A durable interior trim or door paint is generally a good choice. Select a product compatible with the existing surface and primer.
Do I need to sand bifold doors before painting?
Usually, yes. Light sanding helps remove imperfections and improves adhesion, especially on glossy surfaces.
Do bifold doors need primer?
Primer is often recommended, particularly when painting glossy surfaces, bare material, repaired areas, MDF, or when making a significant color change.
Can I paint over previously painted bifold doors?
Yes, provided the existing finish is stable, clean, and properly prepared.
Should I remove the hardware before painting?
Yes, whenever practical. Removing hardware makes it easier to create clean edges and prevents paint from interfering with its operation.
Can I paint the hinges on a bifold door?
It’s generally better to keep hinges and moving hardware free of unnecessary paint buildup. Mask or remove them when possible.
Can I use a roller to paint bifold doors?
Yes. A small roller designed for smooth surfaces can work well on flat sections, while a brush is useful for edges and recessed details.
How many coats of paint should I use?
Usually two thin finish coats provide better coverage than one heavy coat, but follow the paint manufacturer’s recommendations.
How long should paint dry before reinstalling a bifold door?
Follow the product’s recommended drying and curing time. Reinstalling too soon can damage the finish, especially around hinges and contact points.
Can I paint a wood bifold door?
Yes. Clean, sand, prime when necessary, and use a suitable interior paint.
Can I paint a louvered bifold door?
Yes. A small brush is particularly useful for reaching the narrow slats and edges.
How do I prevent brush marks?
Use a quality brush, avoid overloading it, apply thin coats, and don’t repeatedly brush over paint that has begun to dry.
What finish is best for closet bifold doors?
Satin and semi-gloss are popular because they provide a balance of appearance, durability, and cleanability.
Final Words
Learning how to paint a bifold door is a simple home improvement project that can make an outdated room feel fresh and finished. The best results come from taking your time with preparation rather than rushing directly to the paint. Clean the door thoroughly, repair imperfections, sand the surface, apply a suitable primer, and build the color with thin, even coats.
Pay special attention to hinges, tracks, edges, and other moving components. Avoid heavy paint buildup in these areas because it can interfere with how the bifold door operates. Once the final coat has properly cured, reinstall the hardware and door, check the movement, and enjoy the refreshed look. With the right technique, even an ordinary closet bifold door can become a polished part of your room’s design.