
A beautifully decorated bottle can become an elegant centerpiece, memorable gift, or stylish piece of home décor. Learning how to paint a champagne bottle is an enjoyable DIY project that allows you to personalize bottles for weddings, birthdays, anniversaries, holidays, or special celebrations. Whether you’re creating a luxurious metallic finish or a hand-painted masterpiece, painting a champagne bottle offers endless creative possibilities.
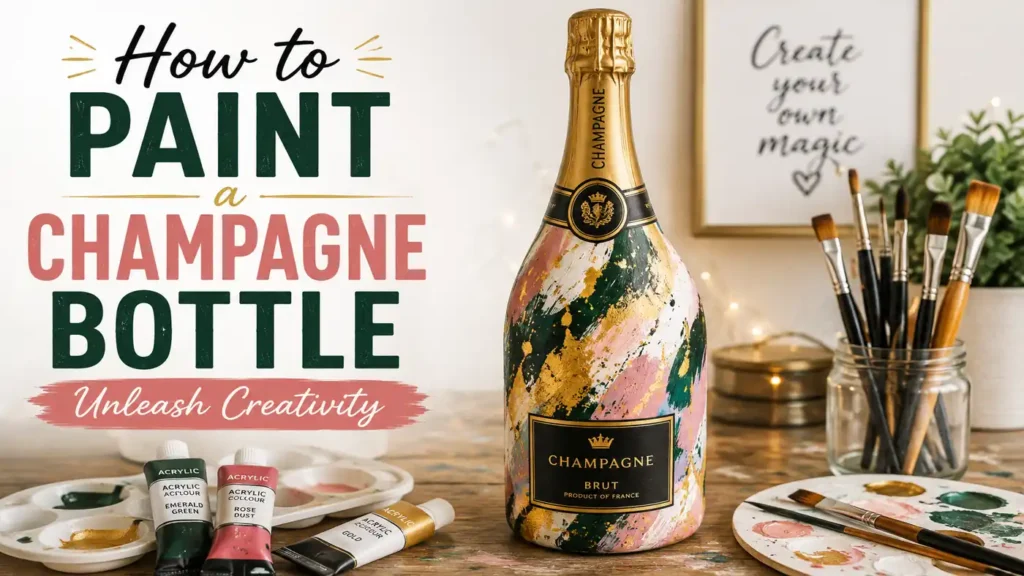
The key to achieving a professional-looking result is preparing the glass correctly and choosing paints that adhere well to smooth surfaces. With the right tools and techniques, you can transform an ordinary champagne bottle into a stunning decorative item that reflects your personal style. This guide covers everything you need to know, from preparation to sealing your finished design.
Items to Buy
- Empty champagne bottle
- Mild dish soap
- Glass cleaner
- Isopropyl alcohol
- Microfiber cloths
- Painter’s tape
- Fine-grit sandpaper
- Glass primer
- Acrylic paint
- Multi-surface paint
- Glass paint
- Metallic paint
- Chalk paint
- Paint brushes
- Foam brushes
- Paint palette
- Sponges
- Stencils
- Painter’s tape
- Glitter (optional)
- Gold leaf (optional)
- Craft vinyl (optional)
- Clear acrylic sealer
- Spray sealer
- Nitrile gloves
Why Paint a Champagne Bottle?
Painting a champagne bottle offers numerous advantages.
Benefits include:
- Creates custom gifts
- Makes elegant centerpieces
- Enhances party décor
- Upcycles empty bottles
- Matches event themes
- Encourages creativity
- Adds home décor accents
- Creates keepsakes
Decorated champagne bottles can be displayed long after the celebration is over.
Can You Paint a Champagne Bottle?
Yes, champagne bottles can be painted successfully.
Since champagne bottles are made of glass, they require proper cleaning and, in many cases, a primer or glass-specific paint to improve adhesion. With the correct preparation, the finish can remain beautiful for years when used as decorative décor.
Best Paint for Glass Bottles
Several paint options work well.
Popular choices include:
- Glass paint
- Multi-surface acrylic paint
- Acrylic enamel paint
- Chalk paint
- Metallic craft paint
- Spray paint for glass
Choose a paint suitable for decorative glass surfaces.
Best Primer for Glass
Primer helps paint adhere to smooth glass.
Recommended options include:
- Glass primer
- Bonding primer
- Multi-surface primer
Using primer is especially helpful if you plan to handle the bottle frequently.
Creative Champagne Bottle Design Ideas
Popular styles include:
- Matte white
- Matte black
- Gold metallic
- Rose gold
- Ombre effects
- Floral artwork
- Wedding themes
- Holiday-inspired designs
Adding ribbons, pearls, or dried flowers can further enhance the finished piece.
Preparing the Champagne Bottle
Preparation is essential for a durable finish.
Glass naturally has a slick surface that can make paint peel if not cleaned properly. Removing labels, oils, and residue creates a better foundation for primer and paint.
Taking extra time during preparation often produces the best-looking results.
How to Paint a Champagne Bottle Step by Step Guide
Step 1: Empty the Bottle
If the bottle still contains champagne, empty it completely before beginning.
For decorative projects, allow the bottle to dry thoroughly inside.
Step 2: Remove Labels
Soak the bottle in warm water to loosen the labels.
Carefully remove:
- Front label
- Back label
- Neck label
- Adhesive residue
Use adhesive remover if necessary.
Step 3: Wash the Bottle
Clean the bottle using warm water and mild dish soap.
Remove:
- Dirt
- Oils
- Dust
- Fingerprints
Dry the bottle with a microfiber cloth.
Step 4: Clean With Alcohol
Wipe the glass using isopropyl alcohol.
This removes remaining oils and improves paint adhesion.
Avoid touching the surface afterward.
Step 5: Lightly Sand (Optional)
Very lightly sand the surface using fine-grit sandpaper.
This step can improve adhesion but should be done gently.
Remove sanding dust afterward.
Step 6: Protect Areas You Don’t Want Painted
Use painter’s tape to mask:
- Bottle opening
- Decorative sections
- Labels you wish to preserve
- Pattern outlines
Careful masking creates cleaner designs.
Step 7: Apply Primer
Apply a thin, even coat of glass primer.
Allow the primer to dry completely.
Apply additional coats if recommended by the manufacturer.
Step 8: Apply the Base Coat
Paint the bottle using smooth, even strokes.
You can use:
- Foam brush
- Soft paintbrush
- Spray paint
- Sponge
Thin coats generally produce smoother finishes.
Step 9: Allow Drying
Let the first coat dry completely.
Avoid rushing between coats.
Step 10: Apply Additional Paint Coats
Most bottles require two to four coats for full coverage.
Allow proper drying between each layer.
Step 11: Add Decorative Details
Decorate using:
- Stencils
- Floral patterns
- Lettering
- Metallic accents
- Dots
- Geometric shapes
Build your design gradually.
Step 12: Add Embellishments (Optional)
Enhance the bottle with:
- Gold leaf
- Glitter
- Rhinestones
- Ribbon
- Lace
- Twine
Use craft adhesive where needed.
Step 13: Inspect the Finish
Look for:
- Thin spots
- Brush marks
- Uneven coverage
- Missed areas
Touch up any imperfections.
Step 14: Apply Clear Sealer
Seal the painted surface with a clear acrylic sealer.
Benefits include:
- Scratch resistance
- Moisture protection
- Improved durability
- Enhanced appearance
Apply multiple light coats if desired.
Step 15: Allow Full Curing
Let the bottle cure according to the sealer manufacturer’s instructions.
Avoid handling until fully cured.
Step 16: Display Your Finished Bottle
Use the painted bottle as:
- Table centerpiece
- Wedding decoration
- Shelf décor
- Gift
- Flower vase
- Holiday display
Your customized bottle is now ready to showcase.
Painting Techniques to Try
Experiment with different styles.
Popular techniques include:
- Dry brushing
- Color washing
- Sponge painting
- Ombre blending
- Splatter effects
- Marble effects
- Metallic layering
- Distressed finishes
Each method creates a unique decorative look.
Spray Paint vs Brush Painting
Both methods have advantages.
Spray Paint
Benefits include:
- Smooth finish
- Fast application
- Even coverage
- Minimal brush marks
Brush Painting
Benefits include:
- Greater artistic control
- Detailed artwork
- Lower equipment cost
- Easier customization
Choose the technique that suits your project.
Common Mistakes to Avoid
One of the most common mistakes is skipping the cleaning process.
Even invisible oils can prevent paint from adhering properly. Another mistake is applying thick paint coats.
Heavy layers may drip, crack, or take much longer to dry.
Failing to seal the finished design can also reduce durability, especially if the bottle will be handled frequently.
Tips for a Professional Finish
For the best results:
- Clean thoroughly
- Use quality glass primer
- Apply multiple thin coats
- Allow proper drying
- Seal the paint
- Avoid fingerprints during painting
- Work in a dust-free area
These habits help create a smooth and durable finish.
How Long Will Painted Champagne Bottles Last?
Durability depends on:
- Paint quality
- Surface preparation
- Sealer quality
- Display conditions
- Handling frequency
Decorative bottles displayed indoors can remain beautiful for many years.
Caring for Painted Champagne Bottles
To maintain the finish:
- Dust gently
- Avoid soaking in water
- Handle carefully
- Keep away from harsh cleaners
- Store indoors
- Touch up chips if necessary
Proper care helps preserve your artwork.
FAQs
Can you paint directly on a champagne bottle?
Yes, but proper cleaning and primer improve adhesion.
What paint works best?
Glass paint and multi-surface acrylic paints are popular choices.
Should I remove the labels?
Yes, removing labels creates a cleaner and more professional finish.
Is primer necessary?
Primer is recommended for maximum durability.
Can I use spray paint?
Yes, spray paint formulated for glass or multi-surface projects works well.
Do I need a sealer?
Yes, sealing helps protect the painted design.
Can painted bottles hold flowers?
Yes, if the exterior is painted and properly sealed.
Are painted champagne bottles food safe?
Decorative paints should remain on the outside only and should not come into contact with beverages.
Creative Ways to Display Painted Champagne Bottles
Painted champagne bottles can be used far beyond special occasions. They make elegant home décor pieces when displayed on bookshelves, mantels, dining tables, or entryway consoles. Seasonal colors and themed artwork can easily refresh your décor throughout the year.
You can also turn painted bottles into decorative vases, LED light displays, or personalized gifts by adding custom names, dates, or meaningful messages. These creative touches make each bottle a unique keepsake.
Final Words
Learning how to paint a champagne bottle is a fun and creative way to transform an ordinary glass bottle into a beautiful decorative piece. By cleaning the surface thoroughly, using quality primer and paint, applying multiple thin coats, and sealing the finished design, you can create a durable project that looks elegant and professional.
Whether you’re decorating for a wedding, holiday, birthday, or simply adding charm to your home, a painted champagne bottle offers endless opportunities for creativity. With the techniques in this guide, you’ll be able to create stunning custom designs that can be admired for years to come.