
A custom-painted controller is one of the easiest ways to personalize your gaming setup. Learning how to paint a GameCube controller allows you to transform an ordinary controller into a unique piece that reflects your style, favorite game, or collection theme. Whether you want a sleek matte-black finish, a vibrant multi-color design, or a replica inspired by a popular Nintendo character, painting a GameCube controller can be a fun and rewarding DIY project.
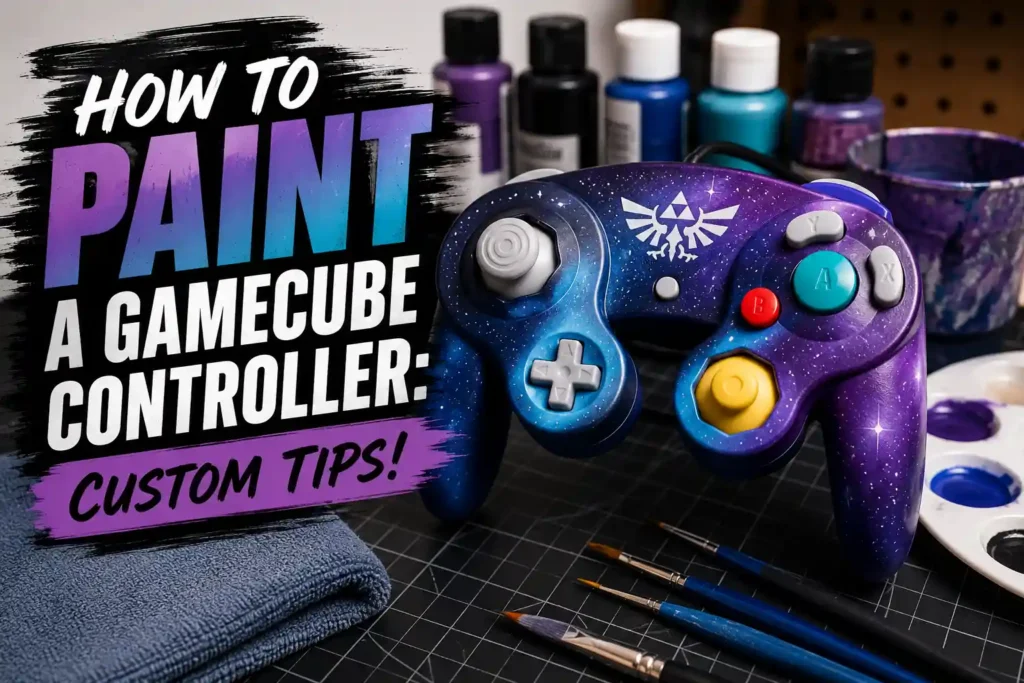
Because GameCube controllers are handled frequently, the painting process requires more than simply spraying color onto the plastic shell. Proper disassembly, cleaning, sanding, priming, painting, and sealing are essential for creating a finish that looks professional and resists wear over time. This guide covers every step needed to achieve the best results.
Items to Buy
- Tri-wing screwdriver
- Small Phillips screwdriver
- Plastic containers
- Mild dish soap
- Microfiber cloths
- Isopropyl alcohol
- Fine-grit sandpaper
- Sanding sponge
- Tack cloth
- Plastic adhesion promoter
- Plastic primer
- Spray paint for plastic
- Acrylic paint
- Airbrush paint
- Painter’s tape
- Hobby masking tape
- Stencils
- Automotive clear coat
- Matte clear coat
- Gloss clear coat
- Respirator mask
- Safety goggles
- Nitrile gloves
Why Paint a GameCube Controller?
Painting a controller offers several advantages.
Benefits include:
- Creates a unique design
- Matches gaming setups
- Restores worn shells
- Covers scratches
- Supports custom themes
- Increases visual appeal
- Enhances collector displays
- Allows creative expression
A well-painted controller can stand out while maintaining full functionality.
Can You Paint a GameCube Controller?
Yes, GameCube controllers can be painted successfully.
The outer shell is made from plastic, which accepts paint when properly prepared. However, because controllers experience constant handling, durability depends heavily on preparation and protective clear coatings.
Rushing the process often leads to chips, scratches, and peeling paint.
Best Paint for a GameCube Controller
Several paint types work well.
Popular choices include:
- Plastic-compatible spray paint
- Acrylic paint
- Airbrush paint
- Automotive paint
- Model paint
Paint specifically formulated for plastic surfaces generally provides the best adhesion.
Best Primer for Controller Shells
Primer helps paint bond to the plastic shell.
Recommended products include:
- Plastic adhesion promoter
- Plastic primer
- Automotive plastic primer
These products create a strong foundation for the paint system.
Popular GameCube Controller Color Ideas
Many gamers choose:
- Matte black
- Gloss white
- Transparent-inspired colors
- Metallic blue
- Metallic red
- Gold accents
- Character-themed designs
- Retro Nintendo color schemes
Custom combinations can create a truly one-of-a-kind controller.
Planning Your Design
Before painting, decide on:
- Color scheme
- Graphics
- Logos
- Character themes
- Finish type
Common finish options include:
- Matte
- Satin
- Gloss
- Metallic
- Pearl
Planning helps ensure a more professional final result.
How to Paint a GameCube Controller Step by Step Guide
Step 1: Disassemble the Controller
Use a tri-wing screwdriver to open the controller.
Carefully remove:
- Shell halves
- Buttons
- Thumbsticks
- Triggers
- Internal electronics
Store small components safely.
Step 2: Photograph the Interior
Take pictures before disassembly.
Reference photos make reassembly easier later.
This simple step can prevent confusion.
Step 3: Clean the Shell Thoroughly
Wash the shell pieces using warm water and mild soap.
Remove:
- Dirt
- Oils
- Fingerprints
- Dust
- Residue
Allow all parts to dry completely.
Step 4: Degrease the Plastic
Wipe the shell using isopropyl alcohol.
This helps remove oils that may interfere with paint adhesion.
Ensure complete coverage.
Step 5: Sand the Surface
Lightly sand the shell using fine-grit sandpaper.
The goal is to:
- Remove gloss
- Improve adhesion
- Smooth imperfections
Avoid excessive sanding.
Step 6: Remove Sanding Dust
Use a tack cloth or microfiber cloth.
The shell should be completely clean before priming.
Dust particles can affect finish quality.
Step 7: Mask Areas That Should Not Be Painted
Use hobby masking tape to protect:
- Logos
- Button labels
- Internal mounting surfaces
- Decorative elements
Precise masking helps create cleaner designs.
Step 8: Apply Adhesion Promoter
Spray a light coat of plastic adhesion promoter.
This improves bonding between the plastic and primer.
Allow it to flash according to instructions.
Step 9: Apply Primer
Apply several light coats of plastic primer.
Use smooth, overlapping passes.
Allow drying time between coats.
Step 10: Sand the Primer Lightly
Once dry, lightly sand the primer if necessary.
This helps eliminate imperfections.
Remove all sanding dust afterward.
Step 11: Apply the Base Color
Spray the first coat of paint evenly.
Keep the coat light and avoid heavy applications.
Consistency is important.
Step 12: Apply Additional Paint Coats
Most controller projects require two to four color coats.
Build coverage gradually.
Allow proper drying between coats.
Step 13: Add Custom Designs
After the base color dries, add:
- Graphics
- Stencils
- Character art
- Accent colors
- Custom logos
Work carefully to maintain clean lines.
Step 14: Inspect the Finish
Check for:
- Thin spots
- Runs
- Uneven coverage
- Dust particles
Correct any issues before sealing.
Step 15: Apply Clear Coat
Apply multiple coats of clear coat.
Benefits include:
- Scratch resistance
- Color protection
- Improved durability
- Enhanced appearance
This step is critical for a controller that will be handled frequently.
Step 16: Allow Full Curing
Allow the paint system to cure completely.
Avoid touching or assembling the controller prematurely.
Patience improves durability.
Step 17: Reassemble the Controller
Carefully reinstall:
- Buttons
- Thumbsticks
- Triggers
- Circuit boards
- Shell components
Use reference photos if needed.
Step 18: Test Controller Functionality
Verify that:
- Buttons move freely
- Triggers operate correctly
- Thumbsticks function properly
- No paint interferes with movement
Address any issues before regular use.
Airbrush vs Spray Paint
Both methods can produce excellent results.
Airbrush Advantages
- Superior detail
- Smooth gradients
- Professional designs
- Better artistic control
Spray Paint Advantages
- Affordable
- Easy to use
- Widely available
- Fast coverage
Choose the option that best fits your project goals.
Creative Design Ideas
Popular custom themes include:
- Super Smash Bros.
- Mario-inspired designs
- Zelda themes
- Pokémon color schemes
- Retro GameCube colors
- Esports-inspired finishes
- Anime-themed artwork
- Glow-effect designs
Custom designs can make a controller truly unique.
Common Mistakes to Avoid
One common mistake is painting without disassembling the controller.
This often leads to paint interfering with moving components. Another frequent issue is skipping primer.
Without primer, paint may chip or peel much more easily.
Applying thick paint coats is another mistake that can create runs and hide fine details.
Thin layers generally produce better results.
Tips for a Professional Finish
For the best outcome:
- Disassemble completely
- Clean thoroughly
- Sand lightly
- Use adhesion promoter
- Apply multiple thin coats
- Use quality clear coat
- Allow full curing time
These habits help maximize both appearance and durability.
How Long Will the Paint Last?
Durability depends on:
- Surface preparation
- Paint quality
- Clear coat quality
- Frequency of use
- Handling habits
A properly painted controller can remain attractive for years.
Maintaining a Painted Controller
To preserve the finish:
- Wash hands before use
- Avoid dropping the controller
- Clean gently with microfiber cloths
- Avoid harsh cleaners
- Store carefully when not in use
Routine care helps prevent unnecessary wear.
FAQs
Can you paint a GameCube controller?
Yes, the plastic shell can be painted successfully with proper preparation.
Do I need to take the controller apart?
Yes, disassembly is highly recommended for the best results.
What paint works best?
Plastic-compatible spray paint and airbrush paints are popular options.
Is primer necessary?
Yes, primer greatly improves adhesion and durability.
Yes, but excessive paint can interfere with button movement.
Should I use clear coat?
Yes, clear coat protects the finish from wear and scratches.
How many coats of paint are needed?
Most projects require two to four color coats.
How long should the paint cure?
Follow product instructions, but full curing often takes several days.
Advanced Customization Ideas
Experienced hobbyists often combine painting with additional modifications such as custom buttons, upgraded thumbsticks, LED lighting, and hand-painted artwork. These upgrades can create truly unique controllers that stand out in both casual gaming setups and competitive collections.
When adding multiple modifications, complete all painting and curing before installing upgraded components. This helps protect the finish and simplifies assembly.
Final Words
Learning how to paint a GameCube controller is a fun way to personalize your gaming gear while giving an older controller a fresh new look. By carefully disassembling the shell, preparing the plastic, applying quality primer and paint, and sealing everything with a durable clear coat, you can achieve a professional-looking finish that lasts.
Whether you’re creating a simple color change or an elaborate custom design, patience and preparation are the keys to success. With the techniques outlined in this guide, your GameCube controller can become a unique centerpiece of your gaming collection.