
Learning how to paint a motorcycle is one of the most rewarding ways to customize your bike and give it a completely new personality. Whether you’re restoring an older motorcycle, repairing faded paint, or creating a one-of-a-kind custom design, a fresh paint job can dramatically improve both appearance and pride of ownership.
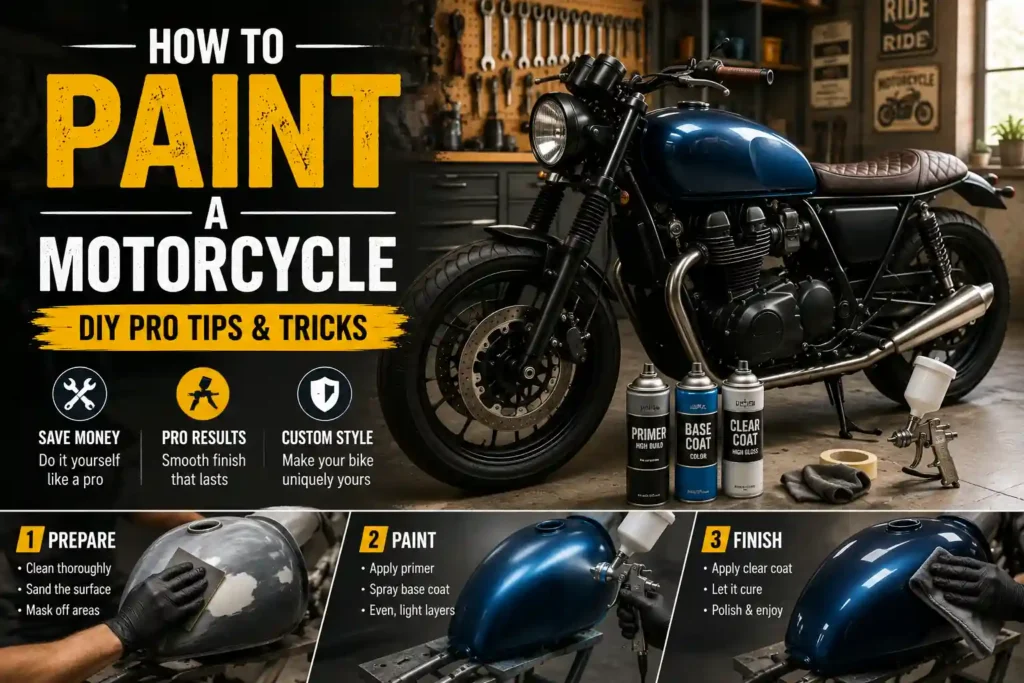
A professional motorcycle paint job can be expensive, but with the right tools, preparation, and techniques, you can achieve impressive results at home. The key is patience. Proper cleaning, sanding, priming, painting, and curing all play critical roles in creating a durable finish that looks great for years. This guide covers everything you need to know to successfully paint your motorcycle from start to finish.
Items to Buy
- Motorcycle paint
- Automotive paint
- Self-etching primer
- Filler primer
- Clear coat
- Degreaser
- Wax and grease remover
- Sandpaper
- Wet sandpaper
- Sanding block
- Body filler
- Putty knife
- Tack cloth
- Microfiber cloths
- Painter’s tape
- Plastic sheeting
- Drop cloths
- Spray gun
- Air compressor
- Paint mixing cups
- Respirator mask
- Safety goggles
- Nitrile gloves
Why Paint a Motorcycle?
Painting a motorcycle offers numerous benefits.
Advantages include:
- Custom appearance
- Restored finish
- Increased visual appeal
- Protection against rust
- Affordable makeover
- Personal expression
- Better resale presentation
- Unique style
A new paint job can make an older motorcycle look significantly newer and more valuable.
Can You Paint a Motorcycle Yourself?
Yes, many motorcycle enthusiasts successfully paint their own bikes.
While professional painters have specialized equipment and years of experience, DIY motorcycle painting is achievable with proper preparation and attention to detail.
The process requires patience more than advanced skill.
Even beginners can achieve excellent results when they follow proven techniques.
Decide What Parts to Paint
Before beginning, determine which components will receive paint.
Common motorcycle parts include:
- Fuel tank
- Front fender
- Rear fender
- Side covers
- Fairings
- Tail section
- Saddlebag lids
Painting removable parts separately often produces the best results.
Choosing the Right Paint
Several paint systems work well for motorcycles.
Popular options include:
- Acrylic enamel
- Acrylic urethane
- Base coat and clear coat systems
- Automotive spray paint
- Metallic paint
- Pearl paint
Automotive-grade paint is generally preferred because it provides excellent durability and weather resistance.
Popular Motorcycle Paint Styles
Motorcycle owners choose many different styles.
Popular options include:
- Gloss black
- Matte black
- Candy red
- Metallic blue
- Pearl white
- Two-tone designs
- Racing stripes
- Custom graphics
Your design should complement the overall style of the motorcycle.
Preparing the Motorcycle for Painting
Preparation is the most important phase of the project.
Even the highest-quality paint will fail if applied over dirt, grease, rust, or poorly prepared surfaces.
Many professional painters spend more time preparing than actually painting.
The better the preparation, the better the final result.
How to Paint a Motorcycle Step by Step Guide
Step 1: Disassemble the Motorcycle
Remove all parts that will be painted.
This often includes:
- Fuel tank
- Fairings
- Side panels
- Fenders
Painting separate parts provides easier access and more professional results.
Step 2: Clean Thoroughly
Wash all parts using a degreaser and wax remover.
Remove:
- Dirt
- Oil
- Wax
- Road grime
- Fuel residue
A perfectly clean surface is essential for proper adhesion.
Step 3: Inspect for Damage
Examine all painted components for:
- Scratches
- Dents
- Rust
- Cracks
- Paint chips
Address any imperfections before moving forward.
Step 4: Repair Surface Defects
Use body filler if necessary to repair dents and deep scratches.
Allow the filler to cure completely before sanding.
Smooth surfaces produce smoother paint jobs.
Step 5: Sand Existing Paint
Sand the old finish using appropriate sandpaper.
The objective is not always to remove every bit of paint but to create a stable, smooth surface for primer.
Remove loose or damaged coatings completely.
Step 6: Clean Again
After sanding, remove all dust using a tack cloth.
Even small dust particles can affect the final finish.
Cleanliness is critical at every stage.
Step 7: Mask Non-Painted Areas
Use painter’s tape and plastic sheeting to cover areas that should not receive paint.
Careful masking prevents overspray and creates clean edges.
Step 8: Apply Primer
Spray a thin coat of primer over the prepared surfaces.
Use smooth, overlapping passes for even coverage.
Primer improves adhesion and helps create a uniform base.
Step 9: Sand the Primer
Once dry, lightly wet sand the primer.
This removes imperfections and creates a smooth surface for paint.
Wipe away residue afterward.
Step 10: Apply the Base Coat
Apply the first coat of paint using steady, even passes.
Avoid heavy coats that may cause runs.
Allow the paint to flash and dry according to product instructions.
Step 11: Build Color Gradually
Apply additional coats until full coverage is achieved.
Most motorcycle projects require two to four coats.
Thin layers typically produce better results than thick applications.
Step 12: Add Graphics or Designs
If using custom graphics, stripes, stencils, or artwork, apply them after the base color has dried.
Take your time to ensure precise placement.
Step 13: Apply Clear Coat
Clear coat protects the paint and enhances appearance.
Apply multiple thin coats for:
- Gloss
- UV protection
- Scratch resistance
- Long-term durability
Clear coat often determines the final visual quality of the paint job.
Step 14: Allow Proper Curing
Allow the painted parts to cure fully before handling.
Curing times vary depending on paint type, humidity, and temperature.
Avoid rushing this stage.
Step 15: Reassemble the Motorcycle
Once everything has cured completely, reinstall all painted components.
Inspect for any imperfections and perform touch-ups if needed.
The transformation is now complete.
Spray Paint vs Spray Gun
Both methods can produce attractive results.
Spray Paint Cans
Advantages include:
- Lower cost
- Easy access
- Beginner-friendly
- Minimal equipment
Spray Gun Systems
Advantages include:
- Superior finish quality
- Better control
- Greater customization
- Professional results
Choose the option that best fits your budget and experience level.
Common Mistakes to Avoid
One of the biggest mistakes is rushing preparation.
Poor cleaning and sanding often lead to peeling paint and adhesion problems. Another issue is applying paint too heavily.
Thick coats commonly create runs, drips, and uneven textures.
Many DIY painters also underestimate the importance of curing time.
Patience consistently produces better results.
Pro Tips for a Better Finish
For the best outcome:
- Work in a clean environment
- Use quality materials
- Apply multiple thin coats
- Maintain proper spray distance
- Sand between stages when necessary
- Follow drying instructions carefully
- Wear proper safety equipment
These professional habits significantly improve the final appearance.
How Long Does Motorcycle Paint Last?
Durability depends on several factors.
These include:
- Paint quality
- Surface preparation
- Storage conditions
- UV exposure
- Maintenance habits
A properly applied paint system can remain attractive for many years.
Maintaining a Newly Painted Motorcycle
To preserve the finish:
- Wash regularly
- Avoid abrasive cleaners
- Remove fuel spills immediately
- Use paint-safe cleaning products
- Store indoors when possible
- Apply protective wax when appropriate
Routine care helps maintain the shine and durability of the paint.
Custom Motorcycle Paint Ideas
Once you’ve mastered the basics, consider:
- Metallic finishes
- Pearl effects
- Candy colors
- Racing stripes
- Vintage graphics
- Matte finishes
- Airbrushed artwork
- Two-tone paint schemes
Custom designs help create a truly unique motorcycle.
FAQs
Can I paint a motorcycle myself?
Yes, many riders successfully complete DIY motorcycle paint projects.
What paint is best for motorcycles?
Automotive acrylic urethane and base coat/clear coat systems are popular choices.
Do I need primer?
Yes, primer improves adhesion and helps create a uniform surface.
How many coats of paint are needed?
Most motorcycles require two to four color coats plus clear coat.
Can I use spray paint?
Yes, quality automotive spray paint can produce excellent results.
Why is my motorcycle paint peeling?
Poor preparation, contamination, or inadequate primer are common causes.
How long should paint cure?
Follow the manufacturer’s instructions, as curing times vary by product.
Is clear coat necessary?
While optional, clear coat significantly improves durability and appearance.
Final Words
Learning how to paint a motorcycle is a rewarding project that allows you to completely transform the appearance of your bike while expressing your personal style. By taking time to clean, repair, sand, prime, paint, and cure properly, you can achieve a durable finish that rivals many professional paint jobs.
Whether you’re restoring a classic motorcycle, refreshing worn bodywork, or creating a custom masterpiece, patience and preparation are the keys to success. With the right materials and techniques, your motorcycle can become a stunning reflection of your creativity and craftsmanship.