To paint a pegboard, start by cleaning the surface with a mild detergent and water. Then, lightly sand the board to create a rough surface for better paint adhesion.
Apply a coat of primer, let it dry, and then apply two coats of paint, allowing each coat to dry completely before applying the next. Finally, seal the paint with a clear, protective topcoat.
Contents
- Introduction To Peg Board Painting
- Materials Needed For A Successful Project
- Preparation: The Key To Perfection
- Choosing Your Color Palette
- Applying Primer: The First Step
- Painting Techniques For Peg Boards
- Adding A Protective Finish
- Mounting And Decorating Your Peg Board
- Maintenance Tips
- Showcasing Real Diy Peg Board Projects
- Frequently Asked Questions
- Conclusion
Introduction To Peg Board Painting
Discover the art of painting a pegboard to add flair to your space. Learn how to transform a pegboard into a stylish organizational masterpiece with a splash of color and creativity. Master the technique of pegboard painting for a functional and visually appealing storage solution.
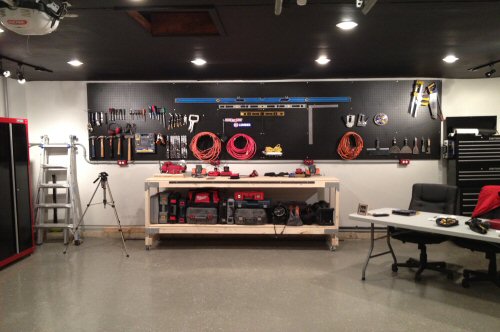
The Rise Of Peg Boards In Home Decor
Peg boards have become increasingly popular in home decor in recent years. These versatile and functional boards were initially used in workshops and garages to keep tools organized. However, their practicality and aesthetic appeal have made them a trendy choice for interior design. Whether you want to organize your kitchen utensils, display your favorite plants, or create a stylish wall feature, a peg board can be the perfect solution. With a little paint and creativity, you can transform a plain peg board into a unique and eye-catching addition to any room in your home.Benefits Of Adding A Splash Of Color
Painting a peg board allows you to personalize and customize it to match your home decor. By adding a splash of color, you can create a focal point or enhance the overall aesthetic of your space. Here are some benefits of painting a peg board: 1. Increased visual appeal: A painted peg board adds visual interest to your room, making it more vibrant and inviting. 2. Coordination with existing decor: By choosing the right colors, you can coordinate your peg board with the rest of your room’s color scheme, creating a cohesive look. 3. Expression of personality: Painting a peg board gives you the opportunity to showcase your personal style and creativity. Whether you prefer bold and bright colors or subtle and muted tones, you can reflect your personality through your choice of paint. 4. Easy organization: By assigning specific colors to different categories of items, you can create an organized and visually appealing storage solution. This makes it easier to find and access your belongings. 5. Flexibility: If you ever want to change the color or design of your peg board, it can easily be repainted, allowing you to update your space without much hassle. In the following sections, we will guide you through the step-by-step process of painting a peg board, from preparation to finishing touches. Get ready to unleash your creativity and transform a simple peg board into a functional and visually appealing piece of art.Materials Needed For A Successful Project
To successfully paint a peg board, you will need to gather the right materials. Ensuring that you have the necessary supplies will help you achieve a professional and long-lasting finish. In this section, we’ll outline the essential materials needed for a successful project, including the right paint and brushes as well as other crucial supplies.
Selecting The Right Paint And Brushes
When it comes to painting a peg board, selecting the right paint and brushes is crucial. Acrylic or latex paints are recommended for their durability and quick drying time. Opt for satin or semi-gloss finishes to allow for easy cleaning of the peg board.
For brushes, choose high-quality synthetic bristle brushes in various sizes to ensure smooth and even application. Foam brushes can also be used for applying paint to larger areas of the peg board.
Other Essential Supplies
In addition to the paint and brushes, several other supplies are essential for a successful peg board painting project. These include:
- Primer: A high-quality primer designed for use on wood or metal surfaces will ensure proper adhesion of the paint.
- Sandpaper: Use fine-grit sandpaper to smooth the surface of the peg board before painting.
- Painter’s Tape: This will help create clean, straight lines and protect adjacent surfaces from paint splatter.
- Drop Cloths or Plastic Sheeting: To protect the surrounding area from paint drips and spills.
- Safety Equipment: This includes gloves, safety goggles, and a respirator mask to protect yourself during the painting process.
Preparation: The Key To Perfection
Preparation is the foundation for a flawless peg board paint job. The key to achieving a professional finish lies in meticulous preparation. From cleaning the surface to sanding for smoothness, each step plays a crucial role in ensuring the paint adheres properly and the final result is visually appealing.
Cleaning The Peg Board
Before embarking on the painting process, start by thoroughly cleaning the peg board. Use a mild detergent solution and a soft-bristled brush to remove any dirt, dust, or grease. Ensure that the surface is completely dry before proceeding to the next step.
Sanding For Smoothness
After cleaning, sand the peg board to create a smooth and even surface for the paint to adhere to. Use fine-grit sandpaper to gently sand the entire board, paying extra attention to any rough or uneven areas. Once you’ve achieved a uniformly smooth surface, wipe away any dust with a clean cloth.
Choosing Your Color Palette
When painting a pegboard, selecting the right color palette is crucial. Consider the room’s existing colors and choose complementary or contrasting shades to create a visually appealing and cohesive look. Neutral tones like white or gray can provide a versatile backdrop for organizing tools and accessories.
Current Trends In Color
Stay up-to-date with the latest color trends to ensure your pegboard project is modern and stylish.
Complementing Your Room’s Decor
Choose colors that harmonize with your existing room decor for a cohesive and visually appealing look.
Applying Primer: The First Step
Prepare your peg board for painting by applying a primer as the first step. This will help the paint adhere better and ensure a smooth, long-lasting finish. Be sure to choose a primer that is suitable for the material of your peg board to achieve the best results.
When it comes to painting a pegboard, applying primer is a crucial first step. Primer is a base coat that prepares the surface for the paint and helps it adhere better. This step is especially important if you’re painting a pegboard made of wood or metal, as it can prevent the paint from peeling or chipping.Why Primer Is Crucial
Primer is not just an optional step in the painting process, it’s a crucial one. Applying primer ensures that the paint adheres to the surface properly and lasts longer. Without it, the paint may not stick well or may peel off easily.Best Practices For Primer Application
To ensure that your primer application is effective, it’s important to follow some best practices:- Clean the surface thoroughly before applying primer. Use a mild detergent and water to remove any dirt, grease, or dust.
- Fill any holes or cracks in the surface with spackle or wood filler and let it dry completely before applying primer.
- Choose the right primer for your surface. If you’re painting a wooden pegboard, use a wood primer. If it’s a metal pegboard, use a metal primer.
- Apply the primer evenly with a brush or roller. Be sure to cover the entire surface and avoid leaving any brush marks.
- Allow the primer to dry completely before applying the paint. Check the manufacturer’s instructions for the recommended drying time.
Credit: www.oneprojectcloser.com
Painting Techniques For Peg Boards
Achieve a flawless finish on your peg board with these painting techniques. Discover how to paint a peg board easily and efficiently for a professional look. Improve your organization and aesthetics with this simple DIY project.
Painting a pegboard can be a fun and creative way to add a pop of color and organization to your space. When it comes to painting techniques for pegboards, there are a few key methods to consider to achieve a professional and long-lasting finish.Brush Vs. Spray Painting
When deciding on the best painting technique for your pegboard, it’s important to weigh the pros and cons of brush painting versus spray painting. Brush painting allows for more precision and control, especially when working around small holes and edges. On the other hand, spray painting can provide a smoother and more even finish, particularly on larger surfaces.Techniques For Even Coats
Achieving an even coat of paint on a pegboard is essential for a polished look. Before painting, ensure the surface is clean and free of any dust or debris. When brush painting, use smooth and even strokes, working in the same direction for a consistent finish. For spray painting, maintain a consistent distance from the pegboard to avoid drips and ensure thorough coverage. These painting techniques for pegboards can help you achieve a professional and visually appealing result. Whether you opt for brush painting or spray painting, focusing on even coats and thorough coverage is key to a successful outcome.Adding A Protective Finish
Achieve a professional look by adding a protective finish to your painted peg board. Seal in the color and protect against wear for long-lasting durability. Make your peg board project stand out with a quality finish that enhances both appearance and longevity.
Adding a Protective Finish to your painted peg board will not only enhance its appearance but also extend its lifespan. It’s essential to choose the right type of finish for your project and apply it correctly for maximum durability. In this section, we’ll explore the different Types of Finishes Available and share Application Tips for Durability.Types Of Finishes Available
There are various types of finishes available, including:- Polyurethane: A popular finish for its durability and water-resistance. Available in glossy or matte finishes.
- Varnish: Provides a hard, protective coating and enhances the natural wood grain. Available in various finishes.
- Shellac: A natural finish made from insect secretions that dries quickly and provides a glossy finish.
- Lacquer: A fast-drying finish that provides a hard, durable coating. Available in clear or colored finishes.
Application Tips For Durability
Follow these tips when applying a protective finish to your painted peg board:- Clean the Surface: Ensure the surface is clean and free from dust and debris before applying the finish.
- Use a Quality Brush: Use a high-quality brush to apply the finish to ensure a smooth and even application.
- Apply Thin Coats: Apply thin coats of finish, allowing each coat to dry completely before applying the next.
- Sand Between Coats: Sand the surface lightly between coats to ensure adhesion and a smooth finish.
- Protect from Moisture: Once the finish is dry, protect it from moisture and extreme temperatures to ensure maximum durability.
Mounting And Decorating Your Peg Board
Enhance your workspace by painting your peg board with vibrant colors. Transform it into a stylish organizational tool that complements your decor effortlessly. Add a personal touch by customizing the paint color to suit your style and brighten up your space.
Mounting and Decorating Your Peg Board can be a fun and creative DIY project that not only adds style to your space but also helps with organization. After you have painted your peg board, the next step is to mount it securely and start decorating it. Here are some tips to help you with the process.Mounting Safely And Securely
To mount your peg board safely and securely, you will need to choose the right hardware for the job. It’s essential to pick hardware that can support the weight of the board and the items you plan to hang on it. Here are some options to consider:- Toggle bolts
- Drywall anchors
- Masonry screws
Creative Ways To Use Your Peg Board
Once your peg board is securely mounted, it’s time to start decorating it. Peg boards can be used in a variety of ways to organize and decorate your space. Here are some creative ideas:| For the Kitchen | For the Craft Room |
|
|
| For the Garage | For the Office |
|
|
Maintenance Tips
Painting a peg board is a simple and cost-effective way to spruce up your space. Start by cleaning the board thoroughly, then apply a primer and let it dry. Finally, choose your desired paint color and apply multiple coats for a durable finish.
Keep your peg board looking fresh by regularly cleaning it with a soft cloth and mild detergent.
Maintenance Tips When it comes to maintaining your painted peg board, regular upkeep is essential to ensure it remains both functional and visually appealing. By following a few simple maintenance tips, you can preserve the vibrancy of the paint and keep your peg board in top condition for years to come. Cleaning Your Painted Peg Board Regular cleaning is crucial to prevent dust and grime from accumulating on your painted peg board. Use a soft, damp cloth to gently wipe down the surface, taking care to remove any dirt or debris that may have settled on the paint. Avoid using harsh chemicals or abrasive cleaning tools, as these can damage the paint and affect its longevity. Touch-Up Strategies In the event of any minor scuffs or scratches, having a touch-up strategy in place can help maintain the overall appearance of your painted peg board. Keep a small amount of the original paint handy for quick touch-ups, and apply it carefully to any areas that may have been damaged. This will help to preserve the seamless look of the paint and prevent any wear and tear from becoming more noticeable over time. By incorporating these maintenance tips into your regular routine, you can ensure that your painted peg board remains in optimal condition, maintaining its aesthetic appeal and functionality for the long term.
Credit: everydaydishes.com
Showcasing Real Diy Peg Board Projects
Discover inspiring and practical DIY peg board projects that showcase the art of painting a peg board. Learn how to transform a plain peg board into a vibrant and functional piece for organizing tools, accessories, and more. Unleash your creativity and elevate your space with these real-life examples of painted peg board projects.
Inspirational Examples
Showcasing real DIY peg board projects can be an excellent way of inspiring others to get creative and start their own projects. Seeing how others have utilized peg boards in their homes or businesses can ignite a spark of creativity and provide some much-needed inspiration. Whether you’re a beginner or a seasoned DIYer, there’s always something new to learn and gain from other people’s projects.Organization
One of the most common uses of peg boards is for organization. A peg board can be used to store tools, craft supplies, or even jewelry. It’s a great way to keep everything in one place and easily accessible. Some people have taken it to the next level and created entire workstations using peg boards, complete with shelves and storage bins.Decorative
Peg boards aren’t just for organization, they can also be used as a decorative element in your home. Painting a peg board in a fun color or pattern can add some personality and visual interest to any room. You can also use peg boards to display artwork, photos, or other decorative items.Sharing Your Own Peg Board Project
If you’ve completed a peg board project of your own, it’s time to share it with the world! Whether you’re a blogger, social media influencer, or just someone who loves to share their DIY projects, there are plenty of ways to showcase your work.Blogging
If you have a blog, consider writing a post about your peg board project. Share your process, including any tips or tricks you learned along the way. Be sure to include plenty of photos so that readers can see your project in detail.Social Media
Social media is another great way to share your project. Post photos of your completed project on Instagram, Facebook, or Pinterest. Use hashtags to help others find your project and be sure to tag any brands or products that you used.Community
Finally, consider joining a DIY community or forum. These groups are a great place to share your projects, get feedback, and connect with other like-minded DIYers. You may even find some inspiration for your next project!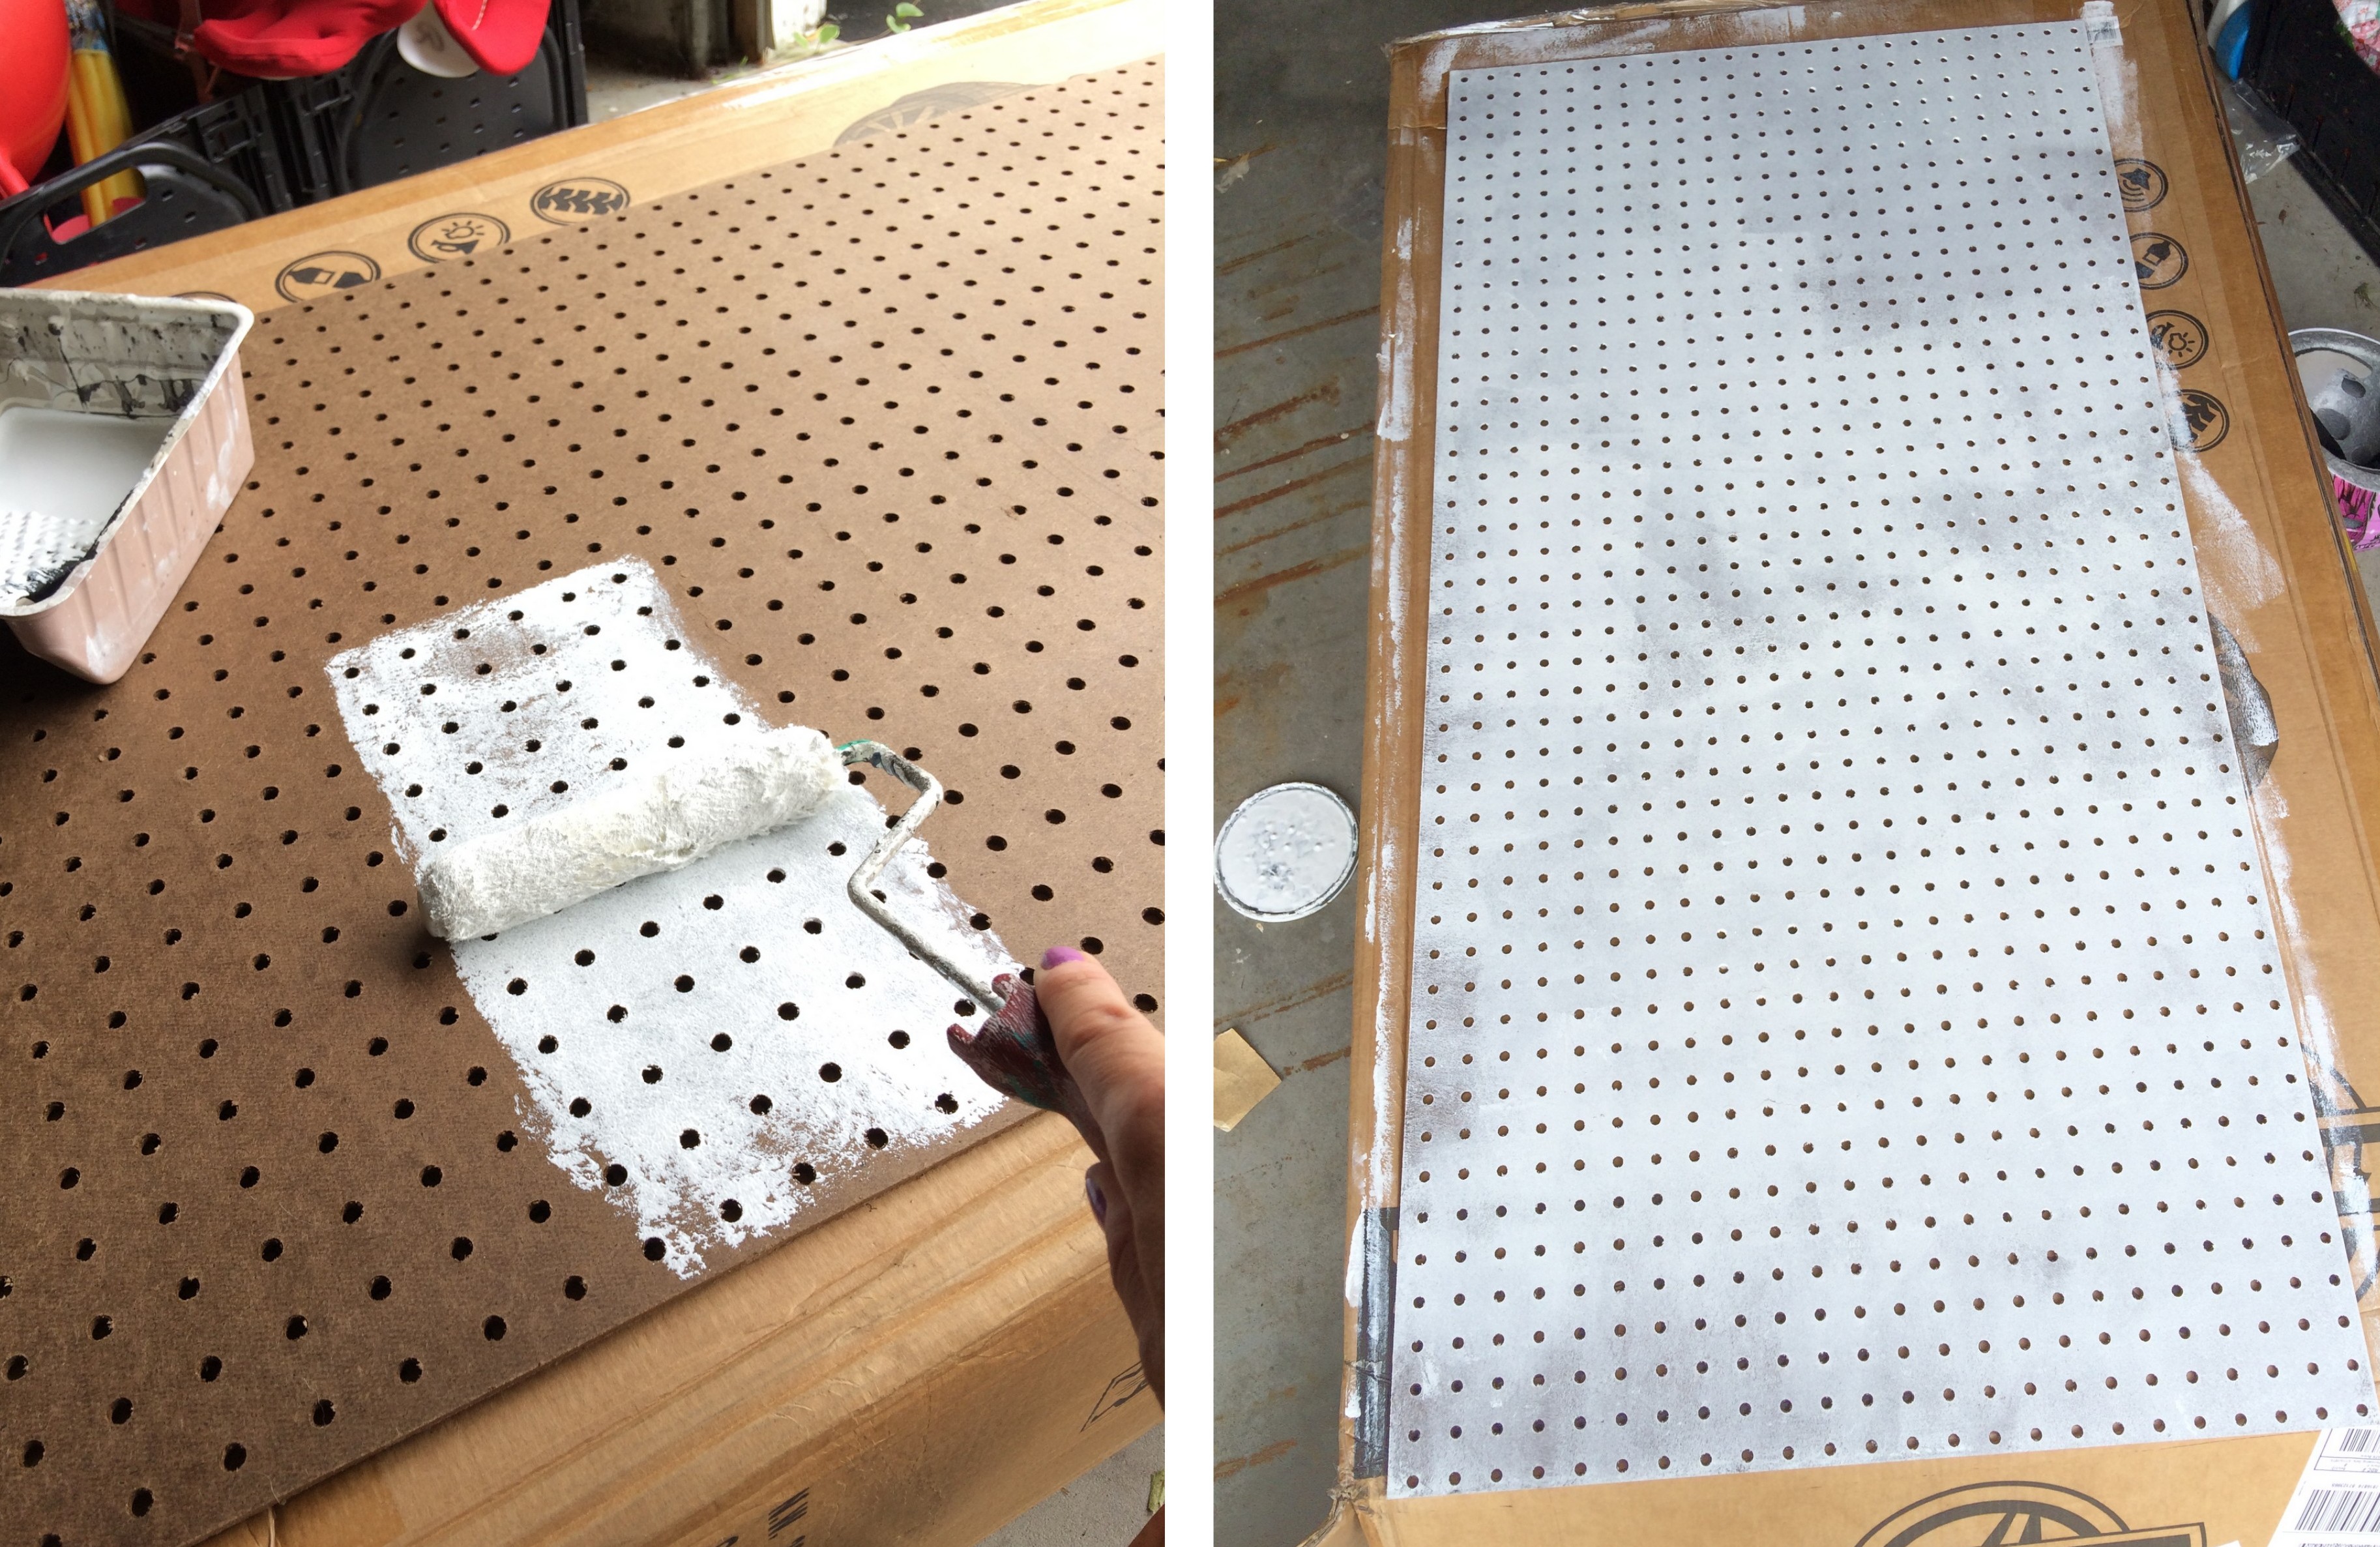
Credit: jennaburger.com
Frequently Asked Questions
What Kind Of Paint Do You Use On A Peg Board?
Use acrylic or latex paint on a pegboard for durability and easy application. These types of paint provide good coverage and adhere well to the surface.
How Long Does It Take For Spray Paint To Dry On Pegboard?
Spray paint on pegboard typically dries in about 30 minutes to touch and fully cures in 24 hours.
Can You Sand A Pegboard?
Yes, you can sand a pegboard. It helps smooth the surface and remove imperfections, making it easier to paint or finish. Use sandpaper or a sanding block to gently sand the pegboard in a circular motion. Make sure to clean the dust afterwards for a clean finish.
What To Put On A Pegboard?
You can put tools, kitchen utensils, craft supplies, and office accessories on a pegboard. It’s versatile and customizable for various items.
Conclusion
Incorporating a fresh coat of paint can transform a pegboard into a stylish and functional organizational tool. By following the simple steps outlined in this guide, you can easily revamp your space while adding a personal touch. Embrace creativity and color to enhance both the aesthetic appeal and practicality of your pegboard.
Start painting and enjoy the process of making your organization system uniquely yours.