
Learning how to paint a pumpkin is a fun and creative way to decorate for fall, Halloween, Thanksgiving, or seasonal home décor without the mess of carving. Painted pumpkins last much longer than carved pumpkins and offer endless opportunities for customization, from simple solid colors to detailed artistic designs.
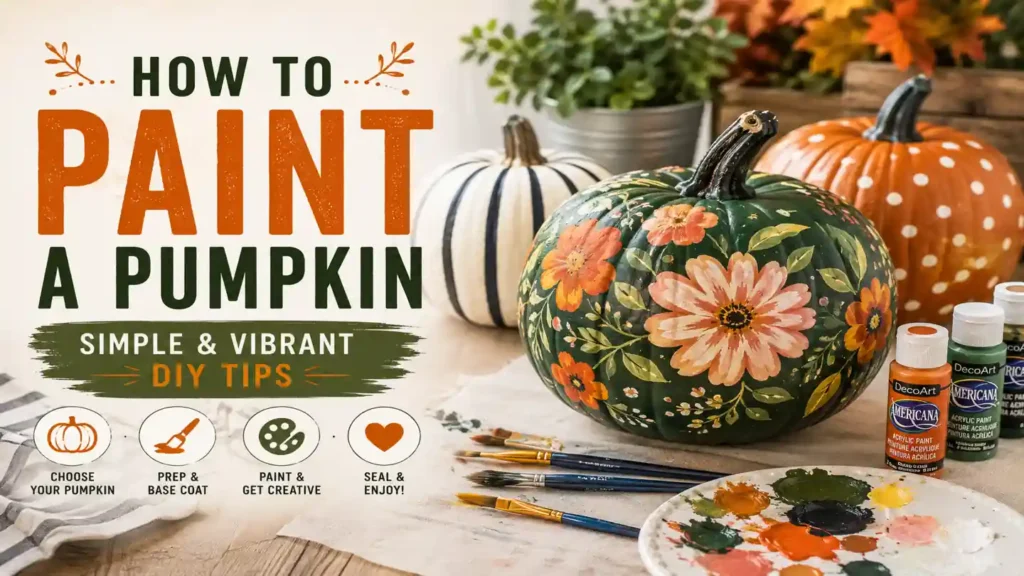
Whether you’re decorating real pumpkins or craft pumpkins, the right preparation and painting techniques can help you achieve beautiful, vibrant results. This guide covers everything from choosing supplies to creating eye-catching pumpkin designs that can brighten your home throughout the season.
Items to Buy
- Pumpkin
- Acrylic paint
- Craft paint
- Paint brushes
- Foam brushes
- Paint palette
- Paint pens
- Primer
- White paint
- Black paint
- Metallic paint
- Glitter paint
- Painter’s tape
- Paper towels
- Water container
- Drop cloth
- Pencil
- Sealant spray
- Clear acrylic sealer
- Disposable gloves
Why Paint a Pumpkin Instead of Carving?
Painting offers several advantages over traditional pumpkin carving.
Benefits include:
- Longer-lasting decorations
- No sharp tools required
- Family-friendly activity
- Unlimited design options
- Less mess
- Easier customization
- Suitable for all ages
- Reusable craft pumpkins
Many people choose painting because it allows greater creativity while helping pumpkins stay attractive for weeks.
Choosing the Right Pumpkin
Almost any pumpkin can be painted successfully.
Popular options include:
- Traditional orange pumpkins
- White pumpkins
- Mini pumpkins
- Large pumpkins
- Faux craft pumpkins
- Decorative heirloom pumpkins
Choose a pumpkin with a smooth, clean surface whenever possible for easier painting.
However, textured pumpkins can create interesting artistic effects.
Best Paint for Pumpkins
Selecting the right paint helps create vibrant, long-lasting designs.
Popular choices include:
- Acrylic paint
- Multi-surface craft paint
- Chalk paint
- Metallic paint
- Spray paint
- Paint markers
Acrylic paint remains one of the most popular options because it offers excellent coverage, dries quickly, and works well on both real and artificial pumpkins.
Preparing a Pumpkin for Painting
Proper preparation helps paint adhere more effectively.
Start by cleaning the pumpkin thoroughly to remove dirt, dust, and moisture. Wipe it down with a damp cloth and allow it to dry completely.
A clean surface improves paint coverage and helps create a smoother finish.
Preparation also helps extend the life of the decoration.
How to Paint a Pumpkin Step by Step Guide
Step 1: Protect Your Workspace
Cover your work area with a drop cloth, newspaper, or craft mat.
Painting can be messy, especially when working with multiple colors.
Preparing the area makes cleanup easier.
Step 2: Clean the Pumpkin
Wipe the pumpkin with a damp cloth.
Remove any dirt, dust, or debris from the surface.
Allow it to dry completely before painting.
Step 3: Apply Primer if Desired
For brighter colors and smoother coverage, apply a thin coat of primer.
White primer is especially helpful when painting light or pastel colors.
Allow the primer to dry fully.
Step 4: Plan Your Design
Sketch your design lightly with a pencil if needed.
Planning ahead can help prevent mistakes and improve the overall appearance.
Simple designs often work best for beginners.
Step 5: Apply the Base Coat
Paint the entire pumpkin with your chosen base color.
Use smooth, even strokes and cover all visible areas.
Allow the paint to dry completely.
Step 6: Apply a Second Coat
Most pumpkins benefit from a second coat.
Additional layers help create stronger color and better coverage.
Let each coat dry before adding another.
Step 7: Add Decorative Elements
Begin painting patterns, shapes, lettering, or illustrations.
Popular options include:
- Polka dots
- Stripes
- Florals
- Faces
- Geometric patterns
- Seasonal themes
Work slowly and build details gradually.
Step 8: Use Paint Pens for Details
Paint pens are excellent for outlines, lettering, and intricate designs.
They provide greater control than larger brushes.
Allow detailed work to dry completely.
Step 9: Add Metallic or Accent Colors
Gold, silver, bronze, and glitter accents can add extra visual interest.
Use these sparingly to avoid overwhelming the design.
Small touches often create the greatest impact.
Step 10: Correct Imperfections
Inspect the pumpkin closely.
Touch up any uneven areas, mistakes, or thin spots before moving on.
Careful corrections improve the finished appearance.
Step 11: Apply a Protective Sealer
Once the paint is fully dry, apply a clear sealer.
This helps protect the design from scratches and moisture.
A sealer can also increase the lifespan of the painted pumpkin.
Step 12: Display Your Pumpkin
Place your finished pumpkin on a porch, mantel, table, or entryway.
Choose a location where the design can be appreciated and protected from excessive weather exposure.
Enjoy your custom seasonal decoration.
Easy Pumpkin Painting Ideas
If you’re unsure what to paint, consider these beginner-friendly ideas:
- Polka dots
- Ombre colors
- Plaid patterns
- Floral pumpkins
- Abstract art
- Monogram designs
- Halloween faces
- Metallic pumpkins
Simple designs can be just as striking as complex artwork.
Halloween Pumpkin Painting Ideas
Painted pumpkins are perfect for Halloween décor.
Popular themes include:
- Ghosts
- Bats
- Black cats
- Spider webs
- Jack-o’-lantern faces
- Skeletons
- Witches
- Haunted houses
These designs provide festive alternatives to traditional carving.
Fall Pumpkin Painting Ideas
For autumn decorating, consider:
- Sunflowers
- Leaves
- Pumpkins on pumpkins
- Harvest themes
- Farmhouse patterns
- Woodland animals
- Acorns
- Seasonal quotes
These designs work well throughout the entire fall season.
How to Paint Mini Pumpkins
Mini pumpkins are ideal for quick projects.
The painting process is the same as larger pumpkins, but smaller brushes often provide better control.
Mini pumpkins work beautifully as table centerpieces, party favors, or decorative accents.
Their compact size makes them easy to customize.
How to Paint Faux Pumpkins
Craft pumpkins offer several advantages.
Unlike real pumpkins, faux pumpkins:
- Last for years
- Resist rotting
- Can be repainted
- Work indoors and outdoors
Preparation and painting techniques are nearly identical to those used for real pumpkins.
Common Mistakes to Avoid
One common mistake is painting a dirty pumpkin.
Dust and moisture can interfere with paint adhesion. Another issue is applying thick coats that take longer to dry and may create streaks.
Many beginners also rush between layers.
Allowing adequate drying time usually produces cleaner, more professional-looking results.
Tips for a Professional Finish
To achieve better results:
- Use quality acrylic paints
- Apply thin coats
- Allow layers to dry fully
- Use smaller brushes for details
- Seal the finished design
- Work in good lighting
Attention to detail often separates amateur projects from professional-looking creations.
FAQs
What paint works best on pumpkins?
Acrylic paint is one of the most popular and effective options.
Do I need to prime a pumpkin before painting?
Primer is optional but can improve coverage and color vibrancy.
How long do painted pumpkins last?
Painted pumpkins often last significantly longer than carved pumpkins.
Can children paint pumpkins?
Yes, pumpkin painting is a family-friendly activity suitable for most ages.
Should I seal a painted pumpkin?
A clear sealer helps protect the design and extend its lifespan.
Can I use spray paint on pumpkins?
Yes, spray paint can provide smooth and even coverage.
What can I paint on a pumpkin?
You can paint patterns, faces, flowers, seasonal designs, and virtually any artwork.
Can faux pumpkins be painted?
Yes, faux pumpkins are excellent surfaces for painting projects.
Final Words
Learning how to paint a pumpkin is a simple and enjoyable way to create personalized seasonal decorations. Whether you’re designing elegant metallic pumpkins, playful Halloween characters, or colorful fall centerpieces, painting offers endless creative possibilities without the mess of carving.
With the right supplies, a little planning, and some imagination, you can transform ordinary pumpkins into beautiful works of art. From beginner-friendly designs to detailed masterpieces, painted pumpkins are a fun project that can brighten your home throughout the fall season.