
Learning how to paint a toilet seat can help you refresh an outdated bathroom without spending money on a complete renovation. Whether you want to update an old wooden seat, coordinate your toilet with new bathroom décor, or give the exterior of the lid a fresh color, the right preparation and paint can make a noticeable difference.
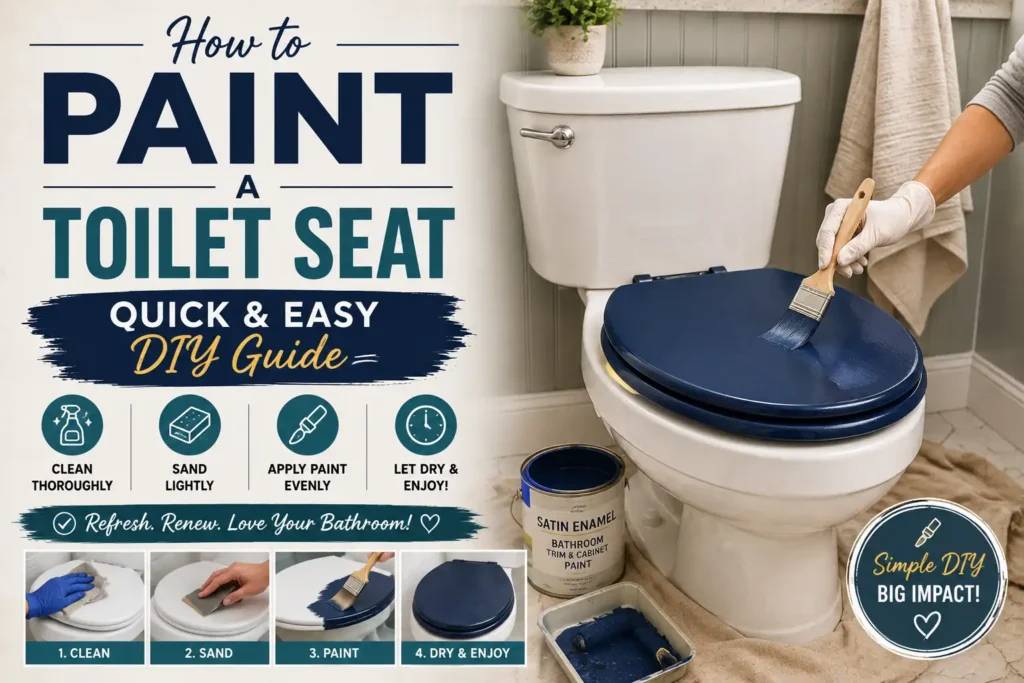
However, toilet seats experience frequent contact, cleaning, moisture, and friction, so choosing the correct materials is essential. Painting the lid’s exterior is generally more practical than painting the actual sitting surface, where coatings can wear or chip.
Affiliate disclosure: As an Amazon Associate, I earn from qualifying purchases.
Items to Buy
- Plastic-Compatible Spray Paint
- Paint for Wooden Toilet Seats
- Plastic Adhesion Promoter
- Bonding Primer
- Fine-Grit Sandpaper
- Sanding Sponge
- Mild Bathroom Cleaner
- Microfiber Cleaning Cloths
- Small Paintbrush Set
- Foam Paintbrushes
- Painter’s Tape
- Plastic Drop Cloth
- Protective Gloves
- Safety Goggles
- Clear Protective Sealer
Why Refresh an Old Toilet Seat?
A worn or discolored toilet seat can make an otherwise clean bathroom look dated. Refreshing its appearance may seem like a small project, but it can help coordinate the seat with updated fixtures, painted walls, new accessories, or a different color scheme.
Painting the exterior of a toilet lid can be useful when you want to:
- Update an old-fashioned color.
- Coordinate the lid with bathroom décor.
- Refresh a wooden lid with a worn finish.
- Add a decorative accent to a guest bathroom.
- Experiment with a new color before making other cosmetic changes.
Painting is not always the best option, though. If the seat is cracked, loose, heavily stained, or difficult to clean, replacing it is usually the more practical choice. A new seat is also preferable when you want a durable, hygienic surface without worrying about paint wear.
Can You Paint a Toilet Seat?
Technically, some toilet seats can be painted, but the material and intended use matter considerably.
Wooden toilet seats: These are generally easier to prepare and paint, particularly on the lid’s exterior. However, moisture-resistant preparation and a compatible coating are essential.
Plastic toilet seats: These can be more difficult to paint because many are made from smooth, low-adhesion plastics. A suitable adhesion promoter and plastic-compatible coating may improve bonding, but the finish can still scratch or peel with regular use.
The actual sitting surface: Painting this area is generally not recommended for ordinary DIY projects. Repeated body contact, friction, cleaning, and moisture can damage the coating. Chipped paint can also make the surface harder to keep clean.
For the best balance of appearance and practicality, consider painting only the exterior of a wooden lid, provided the coating manufacturer approves the intended use. For plastic seats or the sitting surface, replacing the seat is usually the safer, longer-lasting solution.
Choosing the Right Paint and Finish
Selecting the correct coating is one of the most important parts of the project. Ordinary wall paint is not designed for the repeated contact, cleaning, and moisture exposure associated with toilet seats.
Paint for Wooden Seats
A suitable furniture or wood coating may work on the exterior of a wooden lid. Look for a product that is compatible with the existing finish and intended for the expected moisture exposure.
A compatible primer can help create a uniform base, especially if the wood is bare, stained, or previously coated.
Paint for Plastic Seats
If you intend to paint a plastic lid’s exterior, choose a coating system explicitly compatible with the specific plastic. A plastic adhesion promoter may be required before the primer or color coat.
Not every product labeled for plastic works on every type of plastic, so check the product information carefully.
Choosing a Sheen
Different finishes create different appearances:
- Matte: Creates a soft, understated look but may show marks more easily.
- Satin: Offers a subtle sheen and works well with many bathroom styles.
- Semi-gloss: Provides a brighter appearance and can be easier to wipe clean when the coating is suitable for the application.
- Gloss: Creates a shiny, polished look but may highlight surface imperfections.
Remember that a clear coat does not automatically make an unsuitable paint safe or durable for a toilet seat. Use only compatible products and follow their intended-use instructions.
Preparing the Toilet Seat Before Painting
Preparation is essential for a smooth finish. Dirt, body oils, cleaning-product residue, and an existing glossy coating can prevent paint from bonding properly.
Before starting, inspect the seat and decide whether it is worth repainting. Avoid painting over cracks, loose material, or damaged surfaces.
If the seat is old, check its condition carefully and consider replacing it if the surface has deteriorated.
How to Paint a Toilet Seat: Step-by-Step Guide
Step 1: Remove the Toilet Seat
If you are painting the exterior of the lid, remove the seat assembly whenever practical.
Most toilet seats attach with bolts near the back of the toilet. Follow the manufacturer’s instructions to remove the hardware without damaging the toilet or seat.
Removing the assembly makes it easier to work on the lid and helps prevent paint from reaching the toilet bowl, hinges, or surrounding fixtures.
If removal is not possible, mask the surrounding area carefully. Never paint over hinges or moving parts that need to operate freely.
Step 2: Choose a Suitable Work Area
Move the lid or seat to a stable work surface in a well-ventilated area.
Cover the work surface with a drop cloth or protective sheeting. If you are using spray paint, choose an appropriate location where overspray will not reach furniture, vehicles, plants, or other nearby objects.
Follow the product’s ventilation and protective-equipment instructions. Do not spray paint in an occupied bathroom without adequate ventilation.
Step 3: Clean the Surface Thoroughly
Wash the exterior of the lid with a cleaner suitable for the material.
Remove dirt, dust, grease, fingerprints, and cleaning-product residue. Use a soft cloth or sponge to avoid creating unnecessary scratches.
Rinse or wipe away any cleaner residue according to its instructions, then allow the surface to dry completely.
Never mix cleaning products, especially bleach and ammonia.
Step 4: Inspect the Existing Finish
Examine the lid for peeling coating, deep scratches, chips, cracks, or other damage.
If the existing finish is loose, remove unstable material using a method appropriate for the surface. If the seat is cracked or structurally damaged, replace it instead of trying to conceal the problem with paint.
A sound, stable surface gives the new coating a better chance of lasting.
Step 5: Lightly Sand the Surface When Appropriate
For paintable wood or a compatible existing finish, light sanding can reduce gloss and help prepare the surface for primer.
Use fine-grit sandpaper and gentle pressure. Avoid sanding aggressively, particularly on thin plastic components.
For plastic, follow the coating manufacturer’s preparation instructions because some products require light abrasion while others specify a different approach.
Wear suitable protective equipment and remove sanding dust before continuing.
Step 6: Mask Areas That Should Not Be Painted
Use painter’s tape to protect areas that must remain unpainted.
These may include:
- Hinge openings
- Mounting holes
- Underside hardware
- Rubber bumpers
- Labels or decorative details
- Any moving or fitting surfaces
Careful masking helps create cleaner edges and prevents paint from interfering with the seat’s operation.
Do not paint hardware or contact surfaces that need to remain clean and functional.
Step 7: Apply a Compatible Primer
If your chosen coating system requires primer, apply a thin, even layer suitable for the seat material.
For wood, use a compatible wood or bonding primer. For plastic, use an adhesion promoter or plastic primer specifically approved for the material.
Allow the primer to dry according to the manufacturer’s instructions. Avoid applying an unrelated primer simply because it is available; incompatible products may fail to bond correctly.
Step 8: Inspect the Primed Surface
Once the primer has dried, inspect the lid under good lighting.
Look for missed spots, rough areas, drips, or uneven coverage. Correct any imperfections using a method permitted by the product instructions.
If light sanding is recommended, do it gently and remove all dust before applying the color coat.
Step 9: Apply the First Coat of Paint
Apply the selected paint in a thin, even layer.
For a small wooden lid, a suitable brush may provide good control. For a plastic lid’s exterior, a compatible spray coating may produce a more uniform finish when applied according to the label.
Avoid applying too much paint at once. Thick coats can drip, dry unevenly, or create a soft finish that is more vulnerable to damage.
Step 10: Allow the First Coat to Dry
Give the first coat the recommended drying time before applying another.
Drying time varies with the coating, temperature, humidity, airflow, and thickness of application. Do not rely solely on whether the surface feels dry to the touch.
Keep the lid in a clean location where dust and debris cannot settle on the wet paint.
Step 11: Apply Additional Thin Coats
If more coverage is needed, apply additional thin coats within the manufacturer’s recommended recoat window.
Allow each layer to dry as directed. Two thin coats may provide more even coverage than one thick coat, but the required number depends on the coating and the color change.
Inspect the surface between coats and avoid building up paint around edges or mounting holes.
Step 12: Apply a Compatible Protective Finish if Required
Some coating systems require or permit a clear protective finish. If yours does, choose one that is compatible with the paint and intended for the same application.
A clear finish may improve resistance to minor scratches and cleaning, but it cannot guarantee that paint will withstand repeated friction or prolonged moisture.
Do not use a sealer to make an otherwise unsuitable coating appropriate for the actual sitting surface.
Step 13: Allow the Coating to Cure Fully
Curing is different from drying. A lid may feel dry before the coating has reached its intended hardness.
Follow the manufacturer’s full curing instructions before handling or reinstalling the painted component. Rushing this stage can lead to fingerprints, scratches, sticking, or coating failure.
Keep the painted part away from water and unnecessary contact while it cures.
Step 14: Reinstall the Lid Carefully
Once the coating has fully cured, remove the masking tape and reinstall the lid according to the manufacturer’s instructions.
Tighten the hardware appropriately without overtightening or scraping the newly painted surface.
Check that the lid opens and closes freely, sits correctly, and does not stick against the toilet bowl or other components.
If the paint interferes with the seat’s movement or fit, stop using it until the problem is corrected.
Common Mistakes to Avoid
Using ordinary wall paint: It may not adhere well or withstand the conditions associated with a toilet seat.
Painting a cracked seat: Paint cannot repair structural damage. Replace a damaged seat.
Skipping cleaning: Grease and cleaning residue can interfere with adhesion.
Applying thick coats: Heavy paint layers may drip, remain soft, or cure unevenly.
Painting hinges and moving parts: Paint can interfere with proper operation.
Rushing the curing process: A coating that has not fully cured may scratch, stick, or peel.
Painting the sitting surface without checking suitability: A decorative coating may not withstand regular contact, friction, and cleaning. Replacement is usually the more practical choice.
Tips for a Better Result
For the best outcome:
- Check the seat material before buying paint.
- Paint the exterior of the lid rather than the sitting surface.
- Clean thoroughly and allow the surface to dry.
- Use only compatible primer and paint.
- Apply thin, even coats.
- Follow the manufacturer’s drying and curing instructions.
- Protect hinges and mounting areas.
- Consider replacing the seat if it is cracked, stained, or badly worn.
Preparation and product compatibility are more important than applying extra layers of paint.
How to Maintain a Painted Toilet Lid
After the coating has fully cured, clean the painted exterior gently with a product approved for the finish.
Avoid abrasive pads, harsh chemicals, and aggressive scrubbing unless the coating manufacturer specifically permits them. Inspect the surface periodically for chips, peeling, or soft areas.
If the coating starts to deteriorate, stop using the painted component as intended and consider replacing it. A damaged finish is difficult to keep looking clean and may not be worth repairing.
FAQs
Can you paint a toilet seat?
Some toilet-seat materials can be painted, particularly on the exterior of the lid, but durability varies. Replacing the seat is usually more practical for plastic seats or worn sitting surfaces.
What paint works best on a wooden toilet seat?
Choose a coating compatible with the wood and intended use. Follow the product instructions and consider whether replacement would provide a more durable result.
Can you paint a plastic toilet seat?
It may be possible to paint the exterior of some plastic lids with a compatible adhesion-promoter and coating system. However, paint can still scratch or peel with frequent handling.
Should I paint the top of the seat where I sit?
Generally, no. The sitting surface experiences friction, body contact, cleaning, and moisture, which can cause paint to wear or chip. Replacing the seat is usually the better option.
Do I need to sand the toilet seat before painting?
Some surfaces benefit from light sanding, but the correct preparation depends on the material and coating system. Follow the manufacturer’s instructions.
Do I need primer?
A compatible primer or adhesion promoter may be necessary, especially for smooth plastic or bare wood. Check the paint manufacturer’s recommendations.
How many coats of paint should I apply?
Apply the number of thin coats recommended by the manufacturer. Avoid heavy layers that may dry unevenly.
How long should I wait before reinstalling the seat?
Wait until the paint and any protective finish have fully cured according to the product instructions.
Final Words
Learning how to paint a toilet seat can be useful for refreshing the exterior of a sound wooden lid or coordinating a bathroom’s decorative details. The key is identifying the material, preparing it properly, using compatible products, and allowing enough time for the finish to cure.
For plastic seats and the surface where you sit, replacement is generally the more durable and hygienic option. If you decide to paint, focus on the exterior of the lid, follow the coating manufacturer’s instructions, and avoid using paint where it could interfere with comfort, cleaning, or normal operation.