
A faded or rusty stove can make an entire room feel outdated, but learning how to paint a wood stove is an affordable way to give it a fresh, attractive appearance. With the proper high-heat paint and preparation techniques, you can restore an old wood stove and create a finish that withstands years of use.
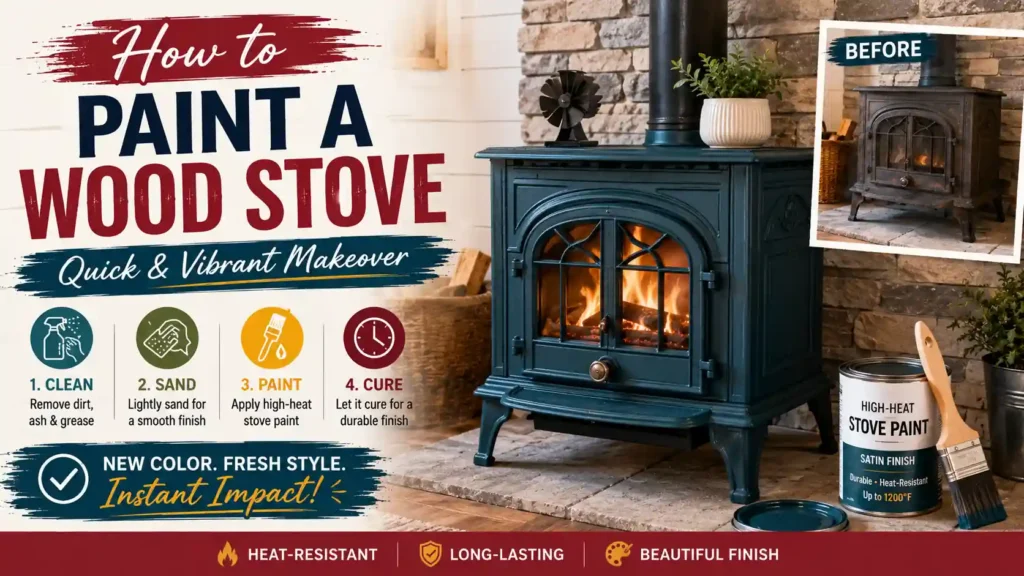
Unlike standard painting projects, wood stoves require specialized coatings that can tolerate extreme temperatures. Proper cleaning, rust removal, and paint application are essential for achieving a durable finish that won’t peel, blister, or discolor when the stove heats up.
Items to Buy
- High-heat stove paint
- High-temperature spray paint
- Wire brush
- Steel wool
- Sandpaper
- Orbital sander
- Shop vacuum
- Degreaser
- Stove cleaner
- Microfiber cloths
- Tack cloth
- Drop cloths
- Painter’s tape
- Plastic sheeting
- Respirator mask
- Safety goggles
- Work gloves
- Dust mask
- Putty knife
- Rust remover
Why Paint a Wood Stove?
Painting a wood stove offers both practical and aesthetic benefits.
Over time, heat, moisture, and daily use can cause paint to fade, chip, or develop rust spots. A fresh coat of stove paint helps protect the metal while restoring its original appearance.
Painting is also much less expensive than replacing the stove and can dramatically improve the look of your living space.
A properly painted stove can look nearly brand new.
Can You Use Regular Paint on a Wood Stove?
No, regular paint should never be used on a wood stove.
Standard paints cannot withstand the high temperatures produced during operation. When exposed to heat, they may blister, peel, smoke, or release unpleasant odors.
Instead, use paint specifically designed for high-temperature applications.
Most stove paints are rated to handle temperatures ranging from 1,000°F to 1,200°F or more.
Choosing the Best Paint for a Wood Stove
Selecting the right paint is critical.
Popular options include:
- High-heat stove paint
- High-temperature enamel paint
- Heat-resistant spray paint
- Stove restoration paint
- Fireplace paint
These products are specifically formulated to withstand repeated heating and cooling cycles.
Always follow the manufacturer’s temperature ratings and application instructions.
When Should You Paint a Wood Stove?
A wood stove may benefit from repainting when you notice:
- Fading color
- Surface rust
- Scratches
- Peeling paint
- Heat discoloration
- Dull finish
Addressing these issues early can help prevent further deterioration.
Routine maintenance can significantly extend the life of the stove.
How to Paint a Wood Stove Step by Step Guide
Step 1: Allow the Stove to Cool Completely
Never paint a hot stove.
Ensure the stove has been completely cool for at least 24 hours before beginning any work.
Safety should always be the first priority.
Step 2: Move or Protect Surrounding Areas
If possible, move the stove to a well-ventilated workspace.
If relocation isn’t practical, protect nearby walls, floors, and furniture with drop cloths and plastic sheeting.
Proper preparation simplifies cleanup.
Step 3: Clean the Stove Thoroughly
Remove dirt, soot, grease, and ash from all surfaces.
Use a degreaser and clean cloths to eliminate contaminants that may interfere with paint adhesion.
Allow the surface to dry completely.
Step 4: Remove Rust
Use a wire brush, steel wool, or sandpaper to remove rust.
Focus on all corroded areas until only solid metal remains.
Removing rust helps ensure a longer-lasting finish.
Step 5: Sand the Surface
Lightly sand the entire stove surface.
The goal is to remove loose paint and create a texture that helps the new paint bond effectively.
Smooth out rough areas as needed.
Step 6: Remove Dust and Debris
Vacuum the stove and wipe it down with a tack cloth.
Even small dust particles can affect the final appearance.
Take time to clean thoroughly before painting.
Step 7: Mask Areas You Don’t Want Painted
Use painter’s tape and plastic sheeting to cover handles, glass windows, trim pieces, and surrounding surfaces.
Proper masking helps create clean edges.
Careful preparation improves overall results.
Step 8: Apply the First Coat
Shake the paint thoroughly according to the manufacturer’s instructions.
Apply a light, even coat using smooth, overlapping passes.
Avoid applying heavy coats.
Step 9: Allow the Paint to Dry
Let the first coat dry completely.
Drying times vary depending on the paint product and environmental conditions.
Follow all manufacturer recommendations.
Step 10: Apply Additional Coats
Apply one or two additional thin coats as needed.
Multiple light coats generally provide better durability and appearance than one heavy coat.
Allow adequate drying between coats.
Step 11: Inspect the Finish
Check the stove for missed areas, uneven coverage, or imperfections.
Touch up any problem spots before proceeding.
A careful inspection helps achieve professional-looking results.
Step 12: Cure the Paint
Most stove paints require heat curing.
Follow the manufacturer’s instructions, which typically involve gradually heating the stove during its first use.
Proper curing helps maximize durability and heat resistance.
Spray Paint vs Brush-On Paint
Both options can work well for wood stoves.
Spray Paint
Benefits include:
- Smooth finish
- Faster application
- Even coverage
- Professional appearance
Brush-On Paint
Benefits include:
- Better control
- Less overspray
- Suitable for touch-ups
- Ideal for small areas
Many homeowners prefer spray paint because it often produces the smoothest finish.
Common Mistakes to Avoid
One common mistake is using regular household paint.
Another issue is painting over rust without proper preparation. Some people also apply paint too heavily, resulting in drips, uneven coverage, or curing problems.
Skipping the cleaning process can lead to poor adhesion and premature failure.
Taking time to prepare properly helps avoid these issues.
Tips for a Professional Finish
Work in a well-ventilated area whenever possible.
Apply several thin coats rather than one thick coat. Maintain a consistent spray distance and overlap each pass slightly.
Always follow the manufacturer’s drying and curing instructions carefully.
Patience often produces the best results.
How to Maintain a Painted Wood Stove
Proper maintenance helps preserve the finish.
Regularly remove dust and ash buildup using a soft cloth. Avoid harsh cleaners that may damage the paint.
Address scratches and chips promptly to prevent rust from developing.
Routine care can keep the stove looking fresh for many years.
Best Colors for Wood Stoves
While black remains the most popular choice, several options are available.
Common colors include:
- Matte black
- Satin black
- Metallic black
- Charcoal gray
- Bronze
- Brown
- Silver
- Graphite
Choose a color that complements your room’s style and décor.
FAQs
What kind of paint should I use on a wood stove?
Use high-temperature stove paint designed specifically for extreme heat.
Can I paint a rusty wood stove?
Yes, but rust should be removed before painting.
Do I need primer?
Most high-heat stove paints are designed to be applied directly to prepared metal surfaces.
Can I use regular spray paint?
No. Regular spray paint cannot tolerate stove temperatures.
How many coats should I apply?
Two to three thin coats are typically recommended.
Why does stove paint need curing?
Heat curing helps the paint reach its maximum durability and heat resistance.
Can I paint the stove while it’s installed?
Yes, as long as surrounding areas are protected properly.
How long will stove paint last?
With proper preparation and maintenance, stove paint can last for many years.
Final Words
Learning how to paint a wood stove is a practical and cost-effective way to restore an aging appliance while protecting it from rust and wear. By using high-temperature paint, removing rust thoroughly, and applying multiple thin coats, you can achieve a durable finish that withstands years of heating cycles.
Whether you’re restoring a vintage cast iron stove or refreshing a modern wood burner, proper preparation and patience are the keys to success. With the right techniques and materials, your wood stove can become a beautiful focal point that enhances the appearance of your home.