
Learning how to paint a Yeti cooler is a fun way to turn a plain cooler into a personalized piece for camping trips, tailgates, beach days, hunting trips, or backyard gatherings. A custom-painted cooler can feature bold colors, names, logos, patterns, artwork, or even a complete hand-painted scene. The key challenge is the cooler’s smooth plastic exterior, which doesn’t naturally provide an ideal surface for paint adhesion.
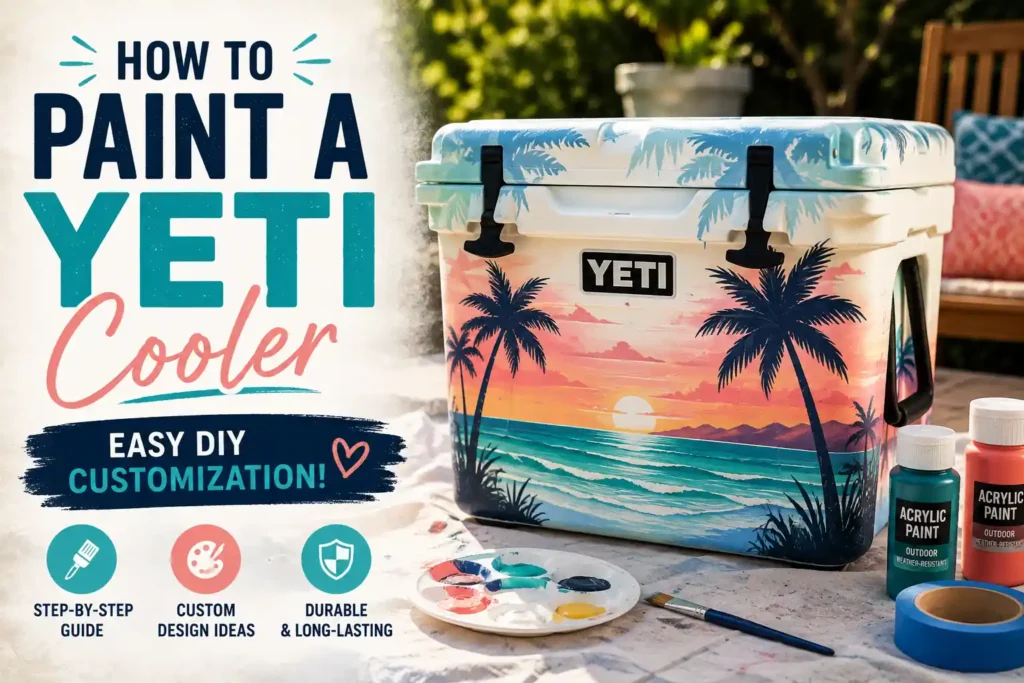
For a finish that lasts, preparation matters more than simply choosing a colorful paint. Clean the cooler thoroughly, lightly scuff the surface, use a primer or coating specifically suited to the plastic, apply compatible paint in thin layers, and allow everything to cure properly. Plastic-paint manufacturers also recommend testing compatibility on an inconspicuous area because some plastics can be difficult to coat reliably.
Items to Buy
- Yeti cooler
- Mild dish soap
- Soft sponge
- Microfiber cloth
- Fine-grit sandpaper
- Plastic bonding primer
- Acrylic or plastic-compatible paint
- Paintbrushes
- Foam brushes
- Detail brushes
- Paint pens
- Painter’s tape
- Pencil
- Stencils
- Ruler
- Clear protective topcoat
- Drop cloth
- Disposable gloves
- Safety glasses
- Respiratory protection when required by product instructions
Can You Paint a Yeti Cooler?
Yes, but painting a Yeti cooler requires more preparation than painting wood or another porous surface.
The cooler’s exterior is a smooth plastic surface, so paint applied directly to it may have poor adhesion. A combination of cleaning, light abrasion, and a compatible bonding primer or plastic-specific coating can significantly improve the foundation of the project.
The exact approach should also depend on the plastic formulation and the particular paint system you’re using. Always check the product label and test a small hidden area first.
What Paint Is Best for a Yeti Cooler?
Look for paint specifically designed for plastic or a coating system recommended for hard-to-paint plastics.
Good options can include:
- Plastic-compatible spray paint
- Acrylic paint over a suitable bonding primer
- Flexible enamel formulated for plastic
- Specialty plastic paint
Avoid assuming that ordinary wall paint will adhere well to the cooler’s exterior.
If you’re creating detailed artwork, acrylic paint can be convenient because it gives you excellent color variety and precise brush control. The important part is having a suitable primer underneath and protective finish over the artwork when appropriate.
How to Paint a Yeti Cooler Step by Step
Step 1: Choose Your Design
Before touching the cooler with paint, decide what you want it to look like.
You could create:
- A solid-color makeover
- Camo pattern
- Floral artwork
- Geometric shapes
- Beach-inspired artwork
- Mountain scenery
- Sports-inspired colors
- Personalized lettering
- Monograms
- Abstract patterns
For complicated artwork, sketching the design on paper first can make the painting process much easier.
Step 2: Remove Accessories
If practical, remove components that don’t need to be painted.
Depending on the model, these may include:
- Rope handles
- Rubber components
- Removable hardware
- Accessories
If something cannot be removed, protect it carefully with painter’s tape.
Step 3: Protect the Logo
If you want to keep the original Yeti logo visible, cover it carefully.
Use painter’s tape and press the edges firmly around the logo.
For intricate shapes, carefully trim excess tape with an appropriate precision blade.
Step 4: Clean the Cooler
Wash the exterior thoroughly with mild soap and water.
Remove:
- Dirt
- Grease
- Oils
- Dust
- Residue
- Mud
A clean surface is essential because contaminants can interfere with paint adhesion. Plastic-paint manufacturers likewise emphasize cleaning and complete drying before coating.
Step 5: Rinse and Dry
Rinse away all cleaning residue.
Then wipe the cooler with a clean microfiber cloth.
Allow it to dry completely before continuing.
Step 6: Lightly Sand the Exterior
Lightly scuff the areas you intend to paint.
The goal isn’t to aggressively remove plastic. Instead, you’re creating a subtle surface profile that can help the coating grip.
For smooth plastic, light sanding is commonly recommended before painting.
Step 7: Remove Sanding Dust
Wipe the surface clean using a microfiber or tack cloth.
Don’t leave loose plastic dust behind.
Allow the surface to dry completely if you used a damp cloth.
Step 8: Mask Everything You Don’t Want Painted
Cover:
- Hinges
- Rubber latches
- Handles
- Feet
- Gaskets
- Interior
- Drain components
- Logo, if desired
Use plastic sheeting or additional masking material for large areas.
Step 9: Test Your Paint System
Before painting the entire cooler, test your chosen primer and paint on a small inconspicuous area.
This is particularly important because different plastics have different adhesion characteristics. Some polyethylene-based plastics can be challenging for coatings.
Step 10: Apply Plastic Bonding Primer
Apply a primer specifically designed for the plastic you’re working with.
Use thin, even coats and follow the manufacturer’s application and drying instructions.
Don’t create a thick layer simply because you want complete coverage quickly.
Some plastic primers are designed to work with specific topcoats, so keep the entire coating system compatible.
Step 11: Allow the Primer to Dry
Give the primer the recommended drying time.
Don’t rush into the color coat while the primer is still soft or tacky.
The exact timing varies between products and environmental conditions.
Step 12: Apply Your Base Color
Choose your primary color and apply it in thin, even layers.
For spray paint, maintain a consistent distance and keep the can moving.
For brush application, use smooth strokes and avoid loading the brush with excessive paint.
Step 13: Allow the Base Coat to Dry
Let the first layer dry according to the product instructions.
Inspect the surface before adding another coat.
Step 14: Add Additional Base Coats
Apply additional thin coats until you achieve the desired coverage.
Several controlled layers are generally easier to manage than one thick coat.
Step 15: Transfer Your Design
If you’re creating artwork, lightly sketch your design with a pencil or use a stencil or tracing method.
For lettering, a ruler can help maintain consistent spacing.
For complicated designs, transfer the major shapes first and then fill in the details.
Step 16: Paint the Main Design
Work from larger areas toward smaller details.
For example:
- Background
- Large shapes
- Secondary colors
- Outlines
- Small details
- Highlights
This approach helps keep the artwork organized.
Step 17: Add Lettering
Personalized names and phrases can make a cooler feel completely custom.
Paint names, initials, dates, locations, or short phrases.
Paint pens can be particularly useful for precise lettering and thin lines, although they should still be compatible with the underlying coating system.
Step 18: Add Highlights and Shadows
Small highlights can give artwork considerably more dimension.
Use lighter shades on raised or illuminated areas and darker tones to create depth.
Keep the shading subtle if you’re aiming for a clean, modern design.
Step 19: Inspect Your Artwork
Look closely for:
- Uneven edges
- Paint drips
- Missed areas
- Smudges
- Dust
- Inconsistent lettering
- Uneven coverage
Fix imperfections before applying your protective topcoat.
Step 20: Remove Masking Carefully
Once the paint has reached the appropriate stage for removing tape, carefully peel it away.
Pull the tape slowly rather than aggressively.
If you’ve created detailed borders, take extra care around those edges.
Step 21: Apply a Compatible Protective Finish
If your paint system calls for a clear topcoat, choose one compatible with the underlying paint and plastic.
A suitable exterior or UV-resistant clear coat can help protect artwork from sunlight and environmental exposure.
Don’t assume that every clear coat is compatible with every acrylic or plastic coating.
Step 22: Let the Cooler Cure
This is one of the most important steps.
A surface can feel dry while the coating is still developing its final durability.
For example, some plastic coatings specify that maximum adhesion takes several days rather than being achieved immediately after the surface becomes dry.
Follow your specific paint and clear-coat instructions before putting the cooler into heavy use.
How to Paint a Yeti Cooler With Acrylic Paint
Acrylic paint can be useful when you want detailed artwork rather than a simple sprayed finish.
Start with proper plastic preparation and a compatible bonding primer.
After the base coat is ready, use acrylic colors to create your design.
Acrylic is particularly useful for:
- Flowers
- Animals
- Landscapes
- Lettering
- Patterns
- Illustrations
- Small decorative details
Once the artwork has dried and cured appropriately, use a compatible protective coating if recommended for your paint system.
How to Spray Paint a Yeti Cooler
Spray paint is an excellent option when you’re looking for a relatively uniform solid-color finish.
After cleaning, scuffing, and priming:
- Place the cooler on a protected surface.
- Work in a well-ventilated area.
- Shake the can according to its instructions.
- Hold the can at the manufacturer’s recommended distance.
- Keep the can moving continuously.
- Apply light coats.
- Allow appropriate drying time between coats.
Plastic spray-paint manufacturers commonly recommend thin, controlled applications rather than heavy coats.
How to Paint a Yeti Cooler With a Design
If you want a professional-looking custom design, don’t immediately start painting freehand.
Instead, break the project into stages.
Start With a Background
Choose a base color that complements the design.
Add Large Shapes
Paint the largest elements first.
Add Medium Details
Build the composition with secondary colors.
Finish With Small Details
Use detail brushes or compatible paint pens for outlines, lettering, and highlights.
This method makes complicated artwork much easier to control.
Yeti Cooler Painting Ideas
1. Mountain Landscape
Paint mountains, pine trees, a lake, and a sunset across the cooler.
This is ideal for camping and outdoor enthusiasts.
2. Camo Cooler
Create an earthy camouflage pattern using greens, browns, tans, and black.
A matte finish can complement this style particularly well.
3. Tropical Cooler
Use palm leaves, tropical flowers, sunsets, and ocean-inspired colors.
4. Personalized Monogram
Choose a large initial or set of initials and surround it with decorative elements.
5. Beach Theme
Paint waves, seashells, surfboards, and colorful sunsets.
6. Floral Design
Create a bold arrangement of flowers across the lid and sides.
7. Geometric Design
Use painter’s tape to create clean triangles, stripes, diamonds, or color blocks.
8. Wildlife Design
Paint bears, deer, fish, birds, or other outdoor-inspired subjects.
9. Sports-Inspired Design
Use your favorite team’s colors and add a personalized number or name.
10. Minimalist Two-Tone Design
Use two complementary colors with a clean dividing line for a modern appearance.
How to Paint a Camo Yeti Cooler
Camo is one of the easiest designs to create because it doesn’t require perfect lines.
Start with a neutral base color.
Then layer irregular shapes in progressively darker and lighter colors.
Try combinations such as:
- Olive green
- Forest green
- Brown
- Tan
- Black
Don’t make the shapes perfectly symmetrical.
Natural-looking irregular forms create a more convincing camouflage appearance.
How to Paint a Yeti Cooler Without Sanding
Some paint systems are marketed as suitable for plastic without extensive sanding, but you should not assume that every paint will adhere directly to a Yeti cooler.
Manufacturers vary in their recommendations, and some specifically advise sanding glossy or smooth plastic before coating.
If you want to minimize preparation, use a coating system specifically designed for the cooler’s plastic and test it first.
For maximum durability, however, properly preparing the surface is generally the safer approach.
How to Protect the Painted Cooler
A painted cooler is going to encounter considerably more abuse than a decorative object.
It may experience:
- Sunlight
- Water
- Ice
- Dirt
- Scratches
- Transportation
- Repeated handling
A compatible protective topcoat can provide an additional layer of protection.
Choose a product intended for the environment and compatible with your paint system.
UV-resistant protection can be especially useful for outdoor projects because prolonged sunlight can contribute to fading and degradation.
Should You Paint the Inside of a Yeti Cooler?
Generally, focus your customization on the exterior.
The inside comes into direct contact with:
- Ice
- Water
- Food
- Drinks
- Cleaning
Exterior paint products and clear coats should not automatically be assumed to be suitable for food-contact surfaces.
Keep coatings away from the interior unless you’re using a product specifically designed and approved for that application.
Common Mistakes to Avoid
Painting Directly Onto Dirty Plastic
Dirt and oils can interfere with adhesion.
Skipping Surface Preparation
Smooth plastic is challenging for many coatings.
Using the Wrong Primer
A general-purpose primer isn’t necessarily suitable for every plastic.
Applying Thick Paint
Heavy layers can run, wrinkle, or take much longer to cure.
Painting Over Rubber Components
Paint can interfere with flexible parts and moving components.
Ignoring Compatibility
Primer, paint, and clear coat should work together as a coating system.
Rushing the Cure
A cooler shouldn’t immediately be subjected to rough outdoor use after painting.
Assuming Paint Makes the Cooler Waterproof
The cooler itself is designed for its normal use, but the painted exterior still needs a coating system appropriate for outdoor exposure.
Tips for a Long-Lasting Custom Cooler
For the best results:
- Clean thoroughly
- Lightly scuff smooth surfaces
- Test your products first
- Use plastic-compatible primer
- Apply thin coats
- Let each layer dry properly
- Use compatible paint
- Protect the artwork with an appropriate topcoat
- Allow full curing
- Wash gently
- Avoid unnecessary abrasion
The preparation and curing stages can make a major difference in how long your custom design remains attractive.
How to Clean a Painted Yeti Cooler
Once your custom cooler has fully cured, clean the exterior gently.
Use:
- Mild soap
- Water
- Soft sponge
- Microfiber cloth
Avoid aggressive scrubbing and abrasive cleaning products that could wear away the decorative coating.
For stubborn dirt, let mild soapy water loosen the residue rather than attacking it with a rough pad.
How Long Does Painted Cooler Art Last?
There isn’t one universal lifespan.
Durability depends on:
- Plastic type
- Paint system
- Surface preparation
- Primer
- Clear coat
- UV exposure
- Frequency of use
- Cleaning methods
- Scratches and impacts
- Curing time
A well-prepared coating system can last considerably longer than paint applied directly to smooth plastic.
However, a cooler used heavily outdoors will naturally experience more wear than one kept mostly at home.
FAQs
Can I paint a Yeti cooler?
Yes. The exterior can be customized, but smooth plastic requires careful preparation and compatible paint products.
What kind of paint sticks to a Yeti cooler?
Use paint specifically designed for plastic or a compatible paint system applied over an appropriate bonding primer.
Do I need to sand a Yeti cooler before painting?
Lightly scuffing a smooth surface can improve adhesion, and manufacturers commonly recommend sanding glossy or smooth plastic when necessary.
Can I use acrylic paint on a Yeti cooler?
Acrylic paint can be useful for decorative artwork when applied over a suitable prepared surface and compatible primer. Seal the finished artwork with a compatible product if appropriate.
Can I spray paint a Yeti cooler?
Yes, provided the spray paint is compatible with the cooler’s plastic. Follow the manufacturer’s surface-preparation and application instructions.
Should I use primer?
A plastic bonding primer can improve adhesion, particularly when the paint system requires one. Always check compatibility because different plastics behave differently.
Can I paint over the Yeti logo?
You can customize the exterior, but whether you should cover the logo is a personal design choice. Mask it if you want to preserve it.
How do I keep paint from peeling off my cooler?
Proper cleaning, light surface preparation, compatible primer and paint, thin coats, and full curing are key steps.
Can I paint the inside of a Yeti cooler?
It’s best to keep ordinary decorative paint and clear coats away from food- and drink-contact surfaces unless the specific products are expressly intended and approved for that use.
How long should I wait before using my painted cooler?
Follow the specific paint and topcoat manufacturer’s cure instructions. Some plastic coatings reach maximum adhesion several days after application.
Can I make a waterproof painted Yeti cooler?
A compatible exterior coating can improve resistance to water and outdoor exposure, but don’t assume that every paint or clear coat is waterproof simply because it dries hard.
Final Words
Learning how to paint a Yeti cooler gives you an easy way to turn an ordinary outdoor essential into something completely personal. Whether you choose a simple solid color, a detailed mountain landscape, bold florals, camouflage, geometric patterns, or custom lettering, the most important part is building a strong foundation.
Clean and lightly prepare the plastic, choose products designed to adhere to the surface, apply thin coats, and give every layer enough time to dry and cure. For an outdoor cooler that will see plenty of use, finish with a compatible protective coating when appropriate. With patience and a little creativity, you can create a custom cooler that stands out at your next camping trip, tailgate, picnic, or outdoor adventure.