
Learning how to paint motorcycle exhaust pipes is a great way to restore a bike’s appearance, cover discoloration, and protect metal surfaces from rust and corrosion. Over time, exhaust pipes can become faded, scratched, or stained from heat, road debris, and weather exposure. A fresh coat of high-temperature paint can dramatically improve their appearance while adding a layer of protection.
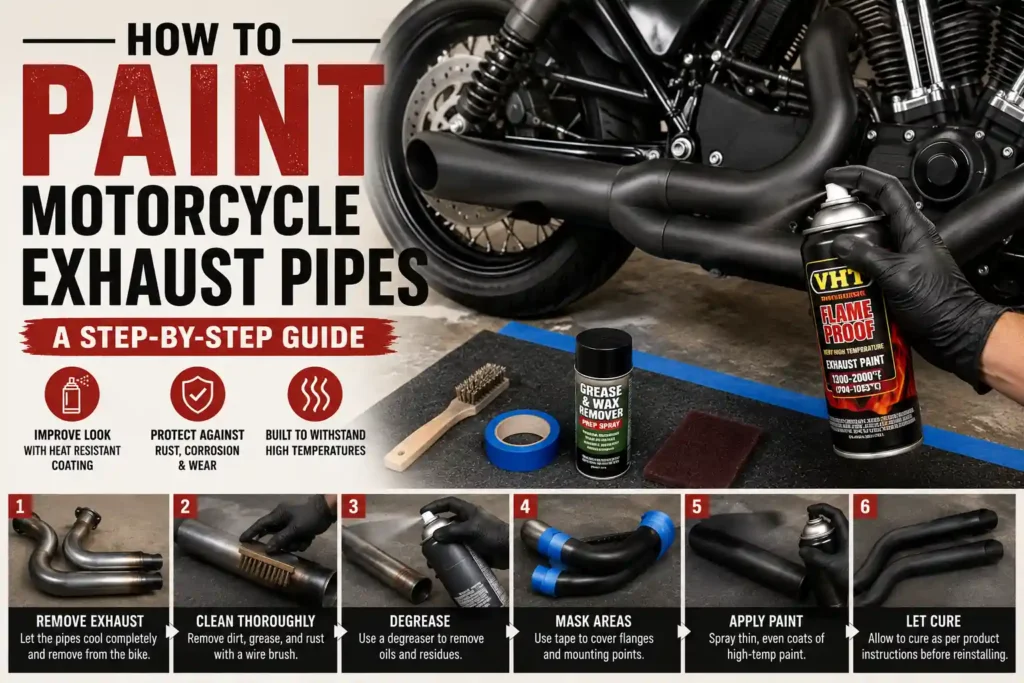
Because exhaust systems are exposed to extreme heat, painting them requires special preparation and products. Using the right techniques ensures the finish remains durable and resistant to peeling, blistering, and fading. This guide walks you through everything you need to know for a successful exhaust pipe painting project.
Items to Buy
- High-temperature exhaust paint
- Heat-resistant primer
- Degreaser
- Dish soap
- Bucket
- Wire brush
- Steel wool
- Sandpaper
- Sanding block
- Tack cloth
- Microfiber cloths
- Painter’s tape
- Aluminum foil
- Plastic sheeting
- Drop cloths
- Safety goggles
- Respirator mask
- Nitrile gloves
- Socket set
- Clean rags
Why Paint Motorcycle Exhaust Pipes?
Painting exhaust pipes offers both cosmetic and protective benefits.
Common advantages include:
- Improves appearance
- Covers discoloration
- Hides scratches
- Helps prevent rust
- Extends component life
- Creates a custom look
- Restores older exhaust systems
- Enhances overall bike aesthetics
A properly painted exhaust can make an older motorcycle look significantly newer.
Can Regular Paint Be Used on Exhaust Pipes?
No, standard paint is not suitable for motorcycle exhaust systems.
Regular paints cannot withstand the high temperatures generated by exhaust pipes and will quickly blister, peel, or burn away.
Instead, choose paint specifically formulated for high-heat applications. Many exhaust paints are designed to withstand temperatures exceeding 1,000°F (538°C).
Always check product specifications before purchasing.
Best Paint for Motorcycle Exhaust Pipes
Several paint types work well on exhaust systems.
Popular options include:
- High-temperature spray paint
- Ceramic exhaust paint
- Heat-resistant enamel
- Exhaust manifold paint
- Engine and exhaust coatings
Most DIY projects use high-temperature spray paint because it provides even coverage and easy application.
Choosing the Right Finish
Exhaust paints are available in several finishes.
Popular choices include:
- Matte black
- Satin black
- Flat black
- Silver
- Titanium gray
- Metallic finishes
Matte and satin black remain among the most popular options because they create a clean, aggressive appearance.
Preparing Motorcycle Exhaust Pipes for Painting
Preparation is the most important part of the project.
Exhaust pipes accumulate grease, oil, rust, road grime, and carbon deposits. If these contaminants remain on the surface, paint adhesion may suffer.
Thorough cleaning and surface preparation help ensure a long-lasting finish.
Taking extra time during preparation usually leads to better results.
How to Paint Motorcycle Exhaust Pipes Step by Step Guide
Step 1: Allow the Exhaust to Cool
Make sure the motorcycle has been off long enough for the exhaust system to cool completely.
Never attempt to work on hot exhaust pipes.
Safety should always come first.
Step 2: Remove the Exhaust (Optional)
While some riders paint exhausts on the motorcycle, removing them often makes the job easier.
Removal provides better access and helps prevent overspray.
Follow your motorcycle manufacturer’s instructions if removing components.
Step 3: Clean the Surface Thoroughly
Wash the exhaust using degreaser and warm soapy water.
Remove all grease, oil, dirt, and road residue.
Rinse thoroughly and allow the surface to dry completely.
Step 4: Remove Rust and Loose Coatings
Use a wire brush, steel wool, or sandpaper to remove rust, oxidation, and peeling finishes.
Work until the surface feels smooth and stable.
Proper preparation improves paint adhesion.
Step 5: Sand the Exhaust Pipes
Lightly sand the entire surface using medium- to fine-grit sandpaper.
The goal is to create a slightly rough texture that helps primer and paint bond effectively.
Avoid leaving deep scratches.
Step 6: Remove Dust
Wipe the exhaust thoroughly using a tack cloth or microfiber cloth.
Remove all sanding dust before proceeding.
A clean surface is essential for a professional finish.
Step 7: Mask Nearby Areas
If the exhaust remains installed, use painter’s tape, foil, and plastic sheeting to protect surrounding components.
Careful masking prevents accidental overspray.
Double-check all exposed areas.
Step 8: Apply Heat-Resistant Primer
Spray a light coat of high-temperature primer over the exhaust.
Use smooth, even passes and avoid heavy application.
Allow the primer to dry according to the manufacturer’s instructions.
Step 9: Apply the First Coat of Paint
Shake the paint thoroughly.
Apply a thin, even coat using steady sweeping motions.
Keep the spray can moving to avoid drips.
Thin coats typically perform better than thick coats.
Step 10: Apply Additional Coats
Most exhaust systems require two to three coats.
Allow each coat to dry before applying the next.
Building coverage gradually helps create a more durable finish.
Step 11: Allow the Paint to Dry
Follow the paint manufacturer’s recommended drying schedule.
Proper drying improves adhesion and overall durability.
Avoid handling the exhaust prematurely.
Step 12: Cure the Paint
Many high-temperature paints require heat curing.
Reinstall the exhaust if necessary and run the motorcycle according to the paint manufacturer’s instructions.
Controlled heat exposure helps harden the finish and maximize durability.
Common Mistakes to Avoid
One common mistake is using ordinary spray paint.
Standard paint cannot withstand exhaust temperatures and usually fails quickly. Another issue is poor surface preparation.
Paint applied over grease, rust, or loose coatings may peel prematurely.
Many DIYers also apply paint too heavily, resulting in runs and uneven curing.
Patience produces better results.
Tips for a Professional Finish
For the best outcome:
- Use high-temperature paint
- Clean thoroughly
- Sand properly
- Apply multiple thin coats
- Follow curing instructions
- Work in a dust-free environment
Attention to detail often determines how long the finish lasts.
How Long Does Exhaust Paint Last?
Durability depends on several factors.
These include:
- Surface preparation
- Paint quality
- Riding conditions
- Weather exposure
- Proper curing
With proper preparation and quality products, painted exhaust pipes can maintain their appearance for several years.
Periodic touch-ups may be necessary for heavily used motorcycles.
Maintaining Painted Exhaust Pipes
Routine care helps preserve the finish.
Allow the exhaust to cool before cleaning. Use mild soap and water to remove dirt and road grime.
Avoid abrasive cleaners that may damage the coating.
Regular inspections help identify chips or scratches before they become larger issues.
When Should Exhaust Pipes Be Repainted?
Repainting may be necessary if you notice:
- Peeling paint
- Rust spots
- Severe discoloration
- Chipping
- Surface corrosion
- Fading
Addressing these issues early can help prevent further deterioration.
FAQs
Can motorcycle exhaust pipes be painted?
Yes, provided high-temperature paint designed for exhaust systems is used.
What paint works best on exhaust pipes?
Heat-resistant exhaust paint or ceramic exhaust coatings are popular choices.
Do I need primer?
Using a heat-resistant primer generally improves adhesion and durability.
Can I paint chrome exhaust pipes?
Yes, but chrome surfaces require thorough sanding and preparation.
How many coats should I apply?
Most projects require two to three thin coats.
Why is my exhaust paint peeling?
Poor preparation, contamination, or incorrect paint selection may cause peeling.
Do I need to remove rust before painting?
Yes, rust should be removed to ensure proper adhesion and longevity.
Does exhaust paint need curing?
Many high-temperature paints require a curing process involving controlled heat exposure.
Final Words
Learning how to paint motorcycle exhaust pipes is an effective way to restore your motorcycle’s appearance while protecting the exhaust system from rust and wear. By cleaning thoroughly, removing rust, applying heat-resistant primer, and using high-temperature paint, you can achieve a durable finish that withstands extreme operating temperatures.
Whether you’re refreshing an aging exhaust or creating a custom look, proper preparation and patience are the keys to success. With the right materials and techniques, your motorcycle exhaust pipes can look cleaner, sharper, and better protected for many miles to come.