
Learning how to paint a motorcycle helmet is a great way to personalize your riding gear and create a unique look that reflects your style. Whether you want a simple color change, custom graphics, racing-inspired designs, or a complete makeover, painting a helmet can transform an ordinary piece of equipment into something truly eye-catching.
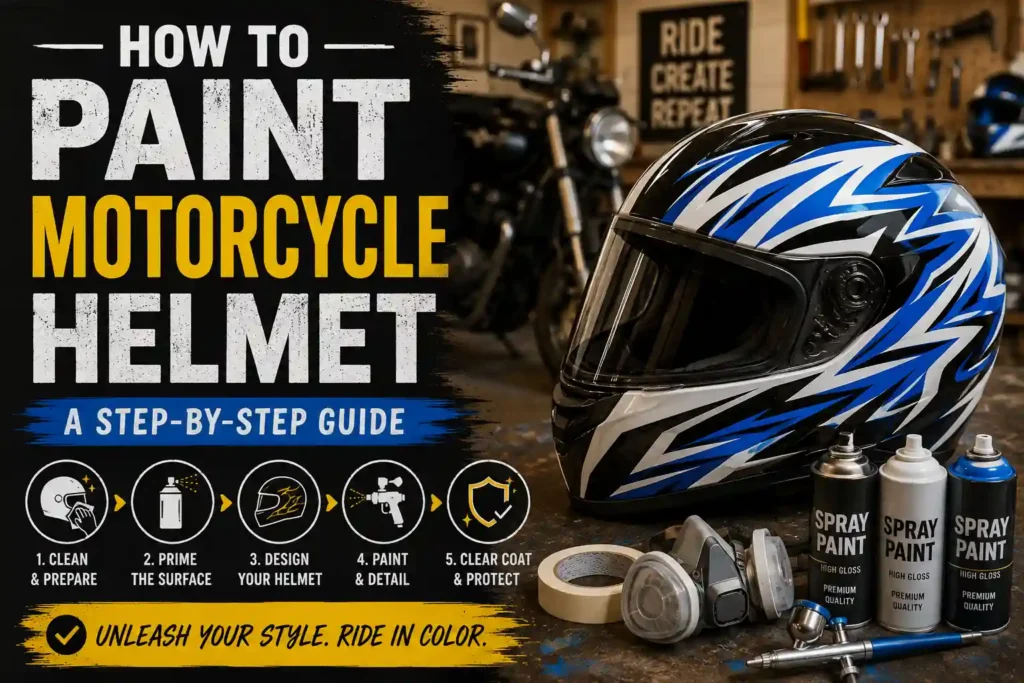
Because motorcycle helmets are exposed to sunlight, weather, road debris, and frequent handling, proper preparation and painting techniques are essential. Using the correct products and following a careful process will help you achieve a smooth, durable finish. This guide covers everything you need to know, from preparation and priming to painting and protecting your design.
Items to Buy
- Helmet-safe spray paint
- Plastic primer
- Adhesion promoter
- Automotive paint
- Clear coat
- Degreaser
- Mild soap
- Microfiber cloths
- Fine-grit sandpaper
- Wet sandpaper
- Sanding sponge
- Tack cloth
- Painter’s tape
- Masking paper
- Plastic sheeting
- Respirator mask
- Safety goggles
- Nitrile gloves
- Hobby knife
- Stencils (optional)
- Decals (optional)
Can You Paint a Motorcycle Helmet?
Yes, most motorcycle helmets can be painted successfully.
However, it is important to use products that are compatible with the helmet material. Certain solvents can damage helmet shells, especially those made from polycarbonate.
Always check the helmet manufacturer’s recommendations before painting.
Using helmet-safe products helps prevent structural damage and ensures safety.
Why Paint a Motorcycle Helmet?
Painting a helmet offers several benefits.
Advantages include:
- Personalized appearance
- Unique custom design
- Refreshed look
- Color matching with your motorcycle
- Creative expression
- Affordable customization
- Restoration of faded helmets
- Enhanced visual appeal
A custom-painted helmet can make your riding gear stand out while showcasing your personality.
Choosing a Helmet Design
Before painting, decide on the style you want.
Popular design ideas include:
- Solid colors
- Racing stripes
- Matte finishes
- Metallic finishes
- Flames
- Skull graphics
- Camouflage patterns
- Retro racing designs
- Geometric artwork
- Custom decals
Planning the design beforehand helps create a more polished final result.
Choosing the Right Paint
Not all paints are suitable for helmets.
Popular choices include:
- Helmet-safe spray paint
- Acrylic automotive paint
- Water-based paint systems
- Airbrush paints
- Urethane finishes
Avoid paints containing harsh solvents that could weaken the helmet shell.
Always verify compatibility before application.
Preparing the Helmet for Painting
Preparation is the most important stage of the project.
Helmets often accumulate dirt, oils, waxes, and road grime that can interfere with paint adhesion. Proper cleaning and sanding create a strong foundation for the new finish.
Skipping preparation can lead to peeling, bubbling, or uneven paint.
How to Paint a Motorcycle Helmet Step by Step Guide
Step 1: Remove Accessories
Remove any detachable components, including:
- Visor
- Face shield
- Vents
- Trim pieces
- Decals
Store small parts safely for reassembly later.
Step 2: Clean the Helmet Thoroughly
Wash the helmet using mild soap and water.
Remove dirt, grease, and surface contaminants.
After washing, wipe the surface with a degreaser.
Allow it to dry completely.
Step 3: Inspect the Helmet
Check the helmet for:
- Deep scratches
- Cracks
- Chips
- Surface damage
Do not paint a helmet that has structural damage or has been involved in a significant impact.
Safety should always come first.
Step 4: Sand the Existing Finish
Lightly sand the helmet using fine-grit sandpaper.
The goal is to remove gloss and create a surface that allows primer to bond effectively.
Avoid sanding too aggressively.
Step 5: Remove Dust
Wipe the helmet thoroughly with a tack cloth.
Remove all sanding residue before applying primer.
A clean surface helps produce a smooth finish.
Step 6: Mask Areas That Should Not Be Painted
Use painter’s tape and masking paper to cover:
- Interior padding
- Vent openings
- Rubber trim
- Attachment points
Careful masking helps create clean lines.
Step 7: Apply Adhesion Promoter
If recommended for your helmet material, apply an adhesion promoter.
This helps primer bond more effectively to plastic surfaces.
Allow it to dry according to product instructions.
Step 8: Apply Primer
Spray a thin coat of plastic primer onto the helmet.
Use smooth, overlapping passes for even coverage.
Allow the primer to dry fully.
Step 9: Sand the Primer
Once dry, lightly wet sand the primer using very fine sandpaper.
This creates a smooth foundation for the color coat.
Remove dust afterward.
Step 10: Apply the Base Color
Spray the first coat of paint using light, even passes.
Keep the can moving continuously to avoid drips.
Allow the paint to dry between coats.
Step 11: Apply Additional Color Coats
Most helmets require two to four coats of paint.
Build color gradually using multiple thin layers.
This produces better coverage and a smoother appearance.
Step 12: Add Graphics or Designs
If creating custom artwork, use stencils, masking techniques, decals, or airbrush methods.
Allow each design layer to dry before proceeding.
Patience helps maintain sharp lines.
Step 13: Apply Clear Coat
Apply several thin coats of clear coat.
The clear layer protects the paint from UV exposure, scratches, and weather.
It also adds depth and shine.
Step 14: Allow the Helmet to Cure
Follow the manufacturer’s recommended curing times.
Avoid handling the helmet until the finish has fully cured.
Proper curing improves durability.
Step 15: Reassemble the Helmet
Reinstall all removed components carefully.
Inspect the finish and enjoy your customized helmet.
Common Mistakes to Avoid
One common mistake is using incompatible paint.
Certain solvents can damage helmet materials and compromise safety. Another issue is skipping surface preparation.
Poor preparation often leads to peeling paint and uneven finishes.
Applying heavy coats is another frequent mistake that causes runs and drips.
Thin coats consistently produce better results.
Tips for a Professional Finish
For the best outcome:
- Clean thoroughly
- Use compatible products
- Apply multiple thin coats
- Sand between stages
- Work in a dust-free environment
- Follow curing instructions
- Plan your design beforehand
Attention to detail can dramatically improve the final appearance.
Custom Helmet Design Ideas
Once you’ve mastered the basics, consider experimenting with:
- Racing-inspired graphics
- Matte black designs
- Vintage motorcycle themes
- Metallic finishes
- Two-tone color schemes
- Airbrushed artwork
- Reflective accents
- Pinstriping
Creative designs allow your helmet to become a true extension of your motorcycle.
How Long Does Helmet Paint Last?
Durability depends on:
- Surface preparation
- Paint quality
- Clear coat protection
- Sun exposure
- Storage conditions
A properly painted and protected helmet can maintain its appearance for many years.
Maintaining a Painted Helmet
To keep the finish looking its best:
- Clean gently with mild soap
- Avoid abrasive cleaners
- Store away from direct sunlight
- Handle carefully
- Remove bugs and road debris promptly
Regular maintenance helps preserve both appearance and durability.
Safety Considerations
When painting a helmet:
- Follow manufacturer recommendations
- Use compatible products
- Avoid harsh solvents
- Do not paint over damaged helmets
- Replace helmets after major impacts
Appearance should never take priority over rider safety.
FAQs
Can I paint my motorcycle helmet?
Yes, most helmets can be painted when proper materials and techniques are used.
Will painting damage my helmet?
Using incompatible paints may damage certain helmet materials. Always verify compatibility first.
What paint should I use?
Helmet-safe or automotive acrylic paints are popular choices.
Do I need primer?
Yes, primer improves adhesion and creates a smoother finish.
How many coats of paint are needed?
Most helmets require two to four color coats plus clear coat.
Can I add custom graphics?
Yes, stencils, decals, and airbrushing are commonly used for custom designs.
How long should paint cure?
Follow the manufacturer’s recommendations for best results.
Is clear coat necessary?
While optional, clear coat significantly improves durability and appearance.
Final Words
Learning how to paint a motorcycle helmet is a rewarding project that allows you to personalize one of the most visible parts of your riding gear. By cleaning thoroughly, preparing the surface properly, applying compatible paint products, and protecting the finish with clear coat, you can achieve a professional-looking result that reflects your style.
Whether you’re creating a simple color change or an elaborate custom design, patience and careful preparation are the keys to success. With the techniques outlined in this guide, you can transform an ordinary helmet into a unique piece of motorcycle gear that stands out on every ride.