
If you’re wondering how to paint polypropylene, you’re dealing with one of the more challenging plastics to coat. Polypropylene is lightweight, flexible, moisture-resistant, and naturally has a low surface energy, which means ordinary paint can struggle to stick to it. However, with the right preparation, adhesion promoter, primer, and paint system, you can create a durable and attractive finish.
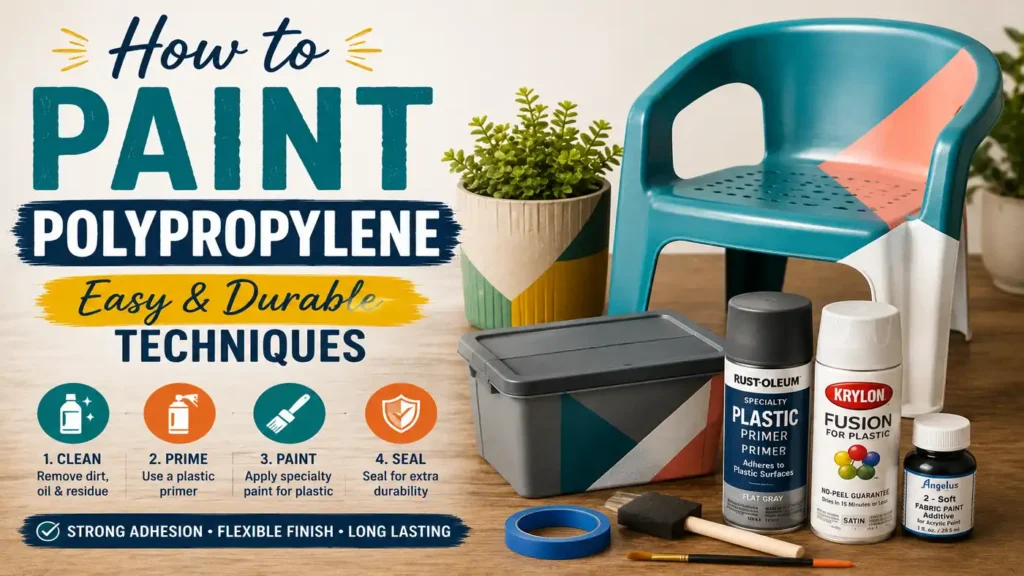
Whether you’re painting polypropylene containers, automotive trim, storage items, furniture components, planters, or other plastic surfaces, the process is more about preparation than simply applying color. Cleaning, lightly abrading, using products designed for difficult plastics, and allowing adequate curing time can make a major difference. This guide explains the process from preparation through final protection.
Items to Buy
- Mild dish soap
- Warm water
- Degreaser
- Microfiber cloths
- Soft sponge
- Isopropyl alcohol
- Fine-grit sandpaper
- Sanding sponge
- Tack cloth
- Plastic adhesion promoter
- Polypropylene-compatible primer
- Plastic primer
- Acrylic paint
- Acrylic enamel
- Automotive paint
- Spray paint formulated for plastic
- Foam brushes
- Paintbrushes
- Paint sprayer
- Paint tray
- Painter’s tape
- Drop cloth
- Clear protective coat
- Safety goggles
- Respirator
- Nitrile gloves
What Is Polypropylene?
Polypropylene is a thermoplastic commonly used to manufacture products that need to be lightweight, durable, and resistant to moisture and chemicals.
You may find polypropylene in:
- Automotive parts
- Storage containers
- Outdoor furniture
- Plastic bins
- Planters
- Household products
- Industrial components
- Packaging
- Appliance parts
Its durability is useful in everyday products, but its low surface energy makes painting more difficult than painting wood, metal, or some other plastics.
Can You Paint Polypropylene?
Yes, polypropylene can be painted, but conventional paint may not adhere well without specialized preparation.
The biggest challenge is adhesion. Polypropylene has a slick, chemically resistant surface, so simply cleaning it and applying ordinary acrylic paint can result in peeling, flaking, or scratching.
For the most durable finish, use a plastic adhesion promoter or primer specifically designed for low-surface-energy plastics.
Why Is Polypropylene Difficult to Paint?
Polypropylene naturally resists many coatings.
Its surface characteristics can make it difficult for paint to form a strong mechanical or chemical bond. Even if paint initially appears to stick, frequent bending, handling, moisture exposure, or temperature changes can cause it to fail.
That is why a successful project usually involves three important stages:
- Thorough cleaning
- Surface preparation
- Specialized adhesion products
Skipping any of these steps can significantly reduce durability.
Best Paint for Polypropylene
The best paint depends on the item’s intended use.
Suitable options may include:
- Plastic-specific spray paint
- Automotive plastic coatings
- Acrylic enamel formulated for plastic
- Polypropylene-compatible industrial coatings
- Specialty plastic paint systems
Always check the manufacturer’s label to confirm that the product is suitable for polypropylene or low-surface-energy plastics.
A paint designed only for general-purpose surfaces may not provide adequate adhesion.
Best Primer for Polypropylene
Primer is particularly important when painting polypropylene.
Look for:
- Plastic adhesion promoter
- Polypropylene adhesion promoter
- Specialty plastic primer
- Automotive plastic primer
- Primer designed for low-surface-energy plastics
Some products combine adhesion promotion and priming into one system, while others require a separate adhesion promoter before primer.
Follow the coating manufacturer’s recommended system rather than mixing unrelated products.
Should You Sand Polypropylene?
Light sanding can help prepare the surface, but sanding alone is usually not enough.
Use fine-grit sandpaper to lightly dull the surface without removing excessive material. The purpose is to create a more receptive surface for the coating.
Avoid aggressive sanding, especially on thin polypropylene parts that could become distorted or weakened.
Preparing Polypropylene for Painting
Proper preparation is the foundation of a durable finish.
Polypropylene can carry manufacturing oils, grease, fingerprints, dust, and mold-release contaminants. Even a small amount of residue can interfere with adhesion.
Before painting, clean the item thoroughly and allow it to dry completely.
How to Paint Polypropylene Step by Step
Step 1: Identify the Plastic
Before buying paint, confirm that the item is actually polypropylene.
Look for a recycling symbol or material marking. Polypropylene is commonly identified by the number 5 inside the recycling triangle.
If you’re unsure, check the manufacturer’s specifications.
Step 2: Remove Dirt and Debris
Wash the polypropylene surface with warm water and mild dish soap.
Remove:
- Dust
- Dirt
- Grease
- Fingerprints
- Mud
- General residue
Use a soft sponge rather than an abrasive scrubber.
Step 3: Rinse Thoroughly
Rinse away all soap residue.
Leftover detergent can interfere with adhesion just as much as grease or oil.
Allow the surface to dry completely.
Step 4: Degrease the Surface
Use a suitable plastic-safe degreaser or cleaning product recommended for your coating system.
Wipe the surface carefully with a clean microfiber cloth.
Avoid leaving any oily residue behind.
Step 5: Lightly Sand
Lightly abrade the polypropylene with fine-grit sandpaper or a sanding sponge.
Use consistent pressure across the surface.
The objective is to reduce the slickness of the surface rather than aggressively remove material.
Step 6: Remove Sanding Dust
Wipe the surface with a clean microfiber cloth or tack cloth.
Make sure no sanding particles remain.
A clean surface allows the adhesion promoter to work more effectively.
Step 7: Mask Unpainted Areas
Use painter’s tape to protect:
- Labels
- Hardware
- Handles
- Openings
- Moving parts
- Decorative sections
Good masking helps create crisp edges and prevents unnecessary overspray.
Step 8: Apply Adhesion Promoter
Apply a light, even coat of plastic adhesion promoter designed for polypropylene or similar plastics.
Avoid flooding the surface.
Allow the product to flash or dry according to its manufacturer’s instructions.
Step 9: Apply Plastic Primer if Required
If your chosen coating system calls for primer, apply a thin, even coat.
Primer can help create a uniform foundation for the color coat and may improve durability.
Allow it to dry as directed.
Step 10: Inspect the Surface
Look for:
- Rough areas
- Missed sections
- Uneven primer
- Dust particles
- Surface imperfections
Correct problems before applying paint.
Step 11: Apply the First Paint Coat
Apply a very light first coat of plastic-compatible paint.
Do not try to achieve full coverage immediately.
A light tack coat can help subsequent layers build more evenly.
Step 12: Apply Additional Coats
Once the first coat has reached the appropriate recoat stage, apply additional thin coats.
Use consistent passes when spraying.
Avoid excessive buildup, which can cause:
- Runs
- Sagging
- Uneven drying
- Cracking
- Soft paint
Step 13: Allow Adequate Drying
Allow each coat to dry according to the manufacturer’s instructions.
Temperature, humidity, airflow, and coating chemistry can all affect drying time.
Do not rush the process.
Step 14: Inspect the Finish
Check the surface under good lighting.
Look for:
- Uneven color
- Thin areas
- Runs
- Dust
- Missed edges
Apply another light coat if necessary.
Step 15: Apply Protective Clear Coat
If compatible with your paint system, apply a clear protective coating.
A suitable clear coat can provide:
- Additional scratch resistance
- UV protection
- Improved durability
- Easier cleaning
- Enhanced appearance
Make sure the clear coat is compatible with the underlying paint.
Step 16: Allow Full Curing
Drying and curing are not the same thing.
A coating may feel dry while still being vulnerable to scratches or chemicals. Allow the painted polypropylene to cure for the period specified by the coating manufacturer before putting it into heavy use.
Painting Polypropylene With Spray Paint
Spray paint can be one of the easiest ways to achieve an even finish on polypropylene.
Choose a product specifically labeled for plastic and verify compatibility with polypropylene when possible.
For the best results:
- Shake the can thoroughly
- Spray in a ventilated area
- Hold the can at the recommended distance
- Use overlapping passes
- Apply thin coats
- Avoid spraying too heavily
Several light coats generally look better than one thick coat.
Painting Polypropylene With a Brush
Brush painting can work for small projects, detailed areas, and touch-ups.
Use a high-quality synthetic brush and apply thin coats.
Brush painting may leave visible marks if the coating is too thick, so work carefully and avoid repeatedly brushing areas that have already started to dry.
Painting Polypropylene With a Spray Gun
For larger projects, a spray gun can provide excellent coverage and control.
Advantages include:
- Smooth application
- Consistent coverage
- Greater color control
- Efficient application on large surfaces
However, spray guns require appropriate equipment, ventilation, and experience.
Always follow the coating manufacturer’s recommendations for thinning, nozzle selection, pressure, and safety equipment.
Choosing the Right Finish
Your desired appearance can influence your paint selection.
Matte Finish
A matte finish gives polypropylene a modern, understated appearance and can help hide minor surface imperfections.
Satin Finish
Satin provides a subtle sheen while remaining less reflective than gloss.
Gloss Finish
Gloss creates a smooth, reflective appearance and can make colors look more vibrant.
Metallic Finish
Metallic coatings can create decorative or automotive-inspired effects, but surface preparation must still be thorough.
Painting Outdoor Polypropylene
Outdoor polypropylene items require additional consideration.
If you’re painting:
- Outdoor furniture
- Planters
- Storage containers
- Garden accessories
- Automotive components
choose a coating designed to tolerate the relevant environmental conditions.
UV exposure, rain, temperature changes, and physical abrasion can all shorten the life of an unsuitable coating.
A UV-resistant protective finish may also be beneficial when compatible with the paint system.
Painting Automotive Polypropylene
Polypropylene is widely used in automotive applications, including certain bumpers, trim pieces, and other components.
Automotive polypropylene typically requires an automotive-compatible adhesion promoter and coating system.
For vehicle parts, use products specifically intended for automotive plastics and follow the coating manufacturer’s complete preparation and application system.
Common Mistakes to Avoid
Skipping the Cleaning Process
Grease and manufacturing residue can prevent proper adhesion.
Always clean the surface thoroughly before sanding and painting.
Using Ordinary Wall Paint
Interior wall paint is generally not designed to adhere to polypropylene or withstand the flexing and handling associated with plastic components.
Use a coating formulated for plastic instead.
Relying on Sanding Alone
Sanding helps create a more receptive surface, but polypropylene may still require an adhesion promoter.
Applying Thick Coats
Heavy coats can run, sag, dry slowly, and create an uneven finish.
Thin layers are generally more reliable.
Mixing Incompatible Products
Primer, paint, and clear coat should be compatible.
Whenever possible, use products from the same coating system or verify compatibility before applying them together.
Handling the Item Too Soon
Touching or installing the item before the coating has cured can leave fingerprints, scratches, or pressure marks.
Give the finish adequate curing time.
Tips for a More Durable Finish
For the best results:
- Confirm the plastic type
- Clean thoroughly
- Lightly abrade the surface
- Use polypropylene-compatible adhesion promoter
- Prime when recommended
- Apply thin coats
- Follow recoat times
- Use compatible clear coat
- Allow full curing
- Protect the finished item from unnecessary abrasion
Preparation and patience usually matter more than simply choosing the most expensive paint.
How Long Does Paint Last on Polypropylene?
There is no single lifespan for painted polypropylene.
Durability depends on:
- Surface preparation
- Coating chemistry
- Adhesion promoter
- UV exposure
- Moisture
- Flexing
- Abrasion
- Frequency of handling
A properly prepared indoor item may remain attractive for a long time, while an outdoor or frequently handled component may experience wear much sooner.
How to Maintain Painted Polypropylene
Once the coating has fully cured, maintain it by:
- Cleaning gently
- Avoiding abrasive scrubbers
- Wiping spills promptly
- Limiting unnecessary friction
- Repairing chips early
- Following the paint manufacturer’s cleaning recommendations
Proper maintenance can help extend the life of the finish.
FAQs
Can you paint polypropylene plastic?
Yes. Polypropylene can be painted, but it generally requires specialized surface preparation and an adhesion-promoting coating system.
What is the best paint for polypropylene?
The best choice is a paint specifically formulated for plastic or verified by the manufacturer as compatible with polypropylene.
Do you need primer for polypropylene?
A suitable adhesion promoter is often essential. Whether a separate primer is needed depends on the coating system you choose.
Can you spray paint polypropylene?
Yes. Plastic-compatible spray paint can work well when the surface is properly prepared and the product is suitable for polypropylene.
Should polypropylene be sanded before painting?
Light sanding can improve surface preparation, but it should be combined with proper cleaning and an appropriate adhesion promoter.
Why is my paint peeling off polypropylene?
Poor cleaning, inadequate surface preparation, incompatible paint, missing adhesion promoter, or insufficient curing can all contribute to peeling.
Can acrylic paint stick to polypropylene?
Some acrylic coatings can work when formulated for plastic, but ordinary craft acrylic paint may not provide sufficient adhesion or durability on polypropylene.
Can you paint polypropylene outdoors?
Yes, but use a coating system designed for outdoor exposure and consider UV resistance, moisture, temperature changes, and abrasion.
Can You Repaint Polypropylene?
Yes, but the existing coating must be evaluated first.
If the old paint is peeling, remove loose material and prepare the exposed polypropylene again. Sanding alone may not be sufficient, so use the appropriate adhesion promoter before applying a compatible coating.
If the existing finish is firmly bonded, lightly abrading and cleaning the surface may allow a compatible new coating to adhere. Always test your chosen products on an inconspicuous area before completing the entire project.
When to Avoid Painting Polypropylene
Painting may not be worthwhile if the polypropylene component flexes constantly, experiences severe abrasion, or has a surface that cannot be adequately prepared.
For heavily used parts, consider whether a coating is appropriate for the item’s actual function. In some cases, replacing the component or using a molded-in color may provide better long-term durability than a painted finish.
Final Words
Learning how to paint polypropylene requires more preparation than painting many conventional surfaces, but the process is completely manageable with the right products and techniques. The most important steps are identifying the plastic, cleaning it thoroughly, lightly abrading the surface, using a polypropylene-compatible adhesion promoter, and applying compatible paint in thin coats.
Whether you’re refreshing an automotive component, updating outdoor furniture, or giving a household plastic item a new color, patience is essential. With proper preparation and a coating system designed for polypropylene, you can achieve a smooth, attractive, and considerably more durable finish.