
Removing paint from rubber is easier when you choose a cleaning method that matches the paint type and the rubber surface. Fresh water-based paint often comes off with soap and water, while dried paint may need gentle scraping or a carefully tested cleaning product.
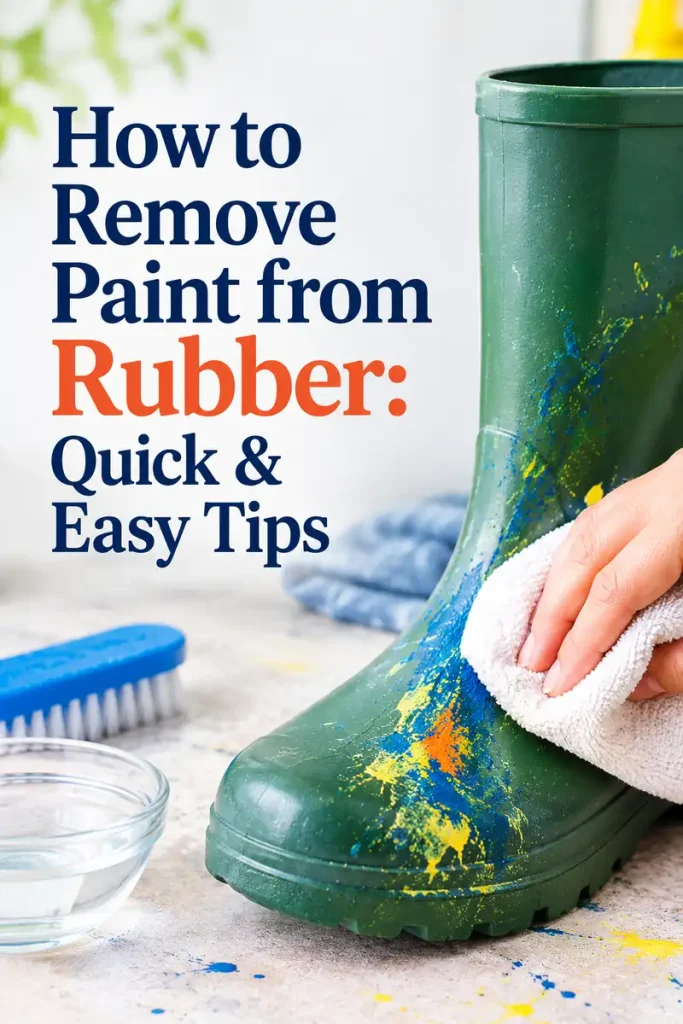
The most important thing is to remove the paint without making the rubber sticky, faded, cracked, or brittle. This guide explains practical methods for cleaning rubber shoes, mats, seals, and other rubber items safely.
Affiliate disclosure: As an Amazon Associate I earn from qualifying purchases.
Items to Buy
- Microfiber Cleaning Cloths
- Mild Dish Soap
- Soft-Bristle Cleaning Brushes
- Plastic Scraper Tools
- Cotton Swabs
- Protective Cleaning Gloves
- Painter’s Tape
What to Know Before Removing Paint from Rubber
Rubber products vary widely. A rubber shoe sole, flexible door seal, rubber mat, and synthetic rubber component may react differently to the same cleaning product. Some items also have coatings, adhesives, or plastic parts that can be damaged during cleaning.
Before choosing a method, consider three things.
The type of paint: Water-based latex and acrylic paints may respond to soap and water while they are fresh. Oil-based paints and fully cured coatings can be more difficult to remove.
The condition of the paint: Wet paint is usually easier to lift than dried paint. Removing excess paint quickly can reduce the amount of scrubbing needed later.
The type of rubber: Natural rubber, silicone rubber, and synthetic rubber do not all tolerate the same chemicals. Even a product described as a general-purpose cleaner may damage a particular item.
When possible, check the item’s care instructions or contact the manufacturer. Test any cleaning solution on a small, hidden area first and let it dry to check for changes in color, texture, flexibility, or stickiness.
How to Remove Paint from Rubber: 6 Easy Methods
1. Use Soap and Warm Water for Fresh Paint
Mild dish soap and warm water are the best starting points for fresh, water-based paint on many rubber surfaces. This approach avoids strong solvents and gives you a chance to remove the stain before it hardens.
What you need:
- Mild dish soap
- Warm water
- A soft cloth
- A soft-bristle brush
Steps to follow:
- Blot excess wet paint with a disposable cloth or paper towel. Lift it gently instead of spreading it across the rubber.
- Mix a few drops of dish soap into a bowl of warm water.
- Dampen a soft cloth with the solution.
- Wipe the paint stain from the outside toward the center to limit spreading.
- For textured rubber, use a soft-bristle brush to loosen paint trapped in grooves.
- Wipe the area with a clean, damp cloth to remove soap and loosened paint.
- Dry the rubber with a microfiber cloth and inspect the surface.
Repeat the process if some paint remains. Avoid soaking rubber parts that contain adhesives, metal fittings, or other materials that could be affected by moisture.
This method is especially useful for fresh splashes on rubber shoe soles, flexible mats, and washable rubber accessories. It may not completely remove old or oil-based paint, but it is a sensible first step.
2. Lift Dried Paint with a Plastic Scraper
Dried paint may form a raised spot or thin layer that can sometimes be lifted mechanically. A plastic scraper is generally preferable to a metal blade because it is less likely to cut or scratch the rubber.
How to do it:
- Make sure the rubber surface is clean enough to see the edges of the paint.
- If the item can tolerate moisture, place a warm, damp cloth over the stain for several minutes to soften the paint’s surface.
- Hold a plastic scraper at a shallow angle.
- Gently work beneath an exposed edge of the paint.
- Lift small flakes gradually instead of trying to remove the entire patch at once.
- Wipe away loose particles with a damp cloth.
- Finish with mild soapy water and dry the surface.
Do not force the scraper beneath paint that is firmly bonded to the rubber. Stop if the surface begins to peel, stretch, tear, or change texture.
This method works best when the paint sits on top of the rubber rather than soaking into a textured or porous surface. Avoid using sharp knives, metal putty knives, or abrasive tools on flexible rubber.
3. Try Rubbing Alcohol Only After a Compatibility Test
Rubbing alcohol may help loosen certain paint residues, including some acrylic or water-based paints. However, it is not safe for every rubber compound, finish, adhesive, or colored surface.
Use it only when the item’s manufacturer allows it or a careful compatibility test indicates that the product is suitable.
Steps to follow:
- Move the item to a well-ventilated area.
- Test a small amount of isopropyl alcohol on a hidden section of the rubber, following the product label.
- Allow the test area to dry fully and check for discoloration, dullness, swelling, tackiness, or cracking.
- If the material shows no signs of damage and the product is appropriate for the item, dampen a cotton swab or cloth with a small amount of alcohol.
- Dab the paint stain gently rather than flooding the surface.
- Wipe away loosened paint with a clean cloth.
- Clean the area with mild soap and water if appropriate for the item, then dry it.
Keep alcohol away from flames, sparks, and heat because it is flammable. Do not mix it with other cleaning chemicals.
If the paint does not loosen quickly, do not keep applying alcohol or leave it sitting on the rubber for a long time. Choose another method or consult the item’s manufacturer.
4. Use a Small Amount of Oil for Certain Fresh Paint Stains
For some fresh paint splashes, a little cooking oil may help loosen paint from the surface. This is not a universal method, and it is more likely to help with certain fresh residues than with fully cured paint.
Oil can also leave a slippery film, attract dirt, or affect rubber components and adhesives. Avoid it on surfaces where grip is important, such as shoe soles, floor mats, pedals, and rubberized handles.
How to try it carefully:
- Check whether the rubber item can tolerate an oil-based cleaner.
- Test a tiny amount on a hidden spot and inspect the material after wiping it clean.
- If appropriate, place a small amount of cooking oil on a cloth rather than pouring it directly onto the rubber.
- Dab the paint gently and allow only a brief contact time.
- Wipe away the loosened residue.
- Clean the area with mild dish soap and water if the item’s care instructions permit.
- Remove all oily residue and dry the surface thoroughly.
Do not use this approach on rubber that needs to remain nonslip or on parts where oil could interfere with adhesives. If the paint remains firmly attached, stop rather than applying more oil.
5. Use a Rubber-Compatible Commercial Cleaner
When household methods do not work, a commercial cleaner may be an option. Choose a product that explicitly states it is suitable for the specific rubber material and the type of paint involved.
Not every paint remover is appropriate for rubber. Some products are formulated to strip coatings from hard surfaces and may soften, swell, or deteriorate flexible materials.
How to use a suitable product:
- Identify the rubber item and, if possible, the type of paint.
- Read the product label and confirm that both the surface and paint are covered by its instructions.
- Check the safety directions, including the required gloves, ventilation, and contact time.
- Test the product on a hidden area before treating the visible stain.
- Apply only the recommended amount using the method stated on the label.
- Remove the paint and cleaner according to the instructions.
- Rinse or wipe the area as directed, then allow it to dry completely.
Do not assume that a product labeled “paint remover” is safe for rubber. Avoid products containing aggressive solvents unless the manufacturer confirms they are suitable for the exact material. Never mix different cleaners.
For valuable, specialized, or safety-critical rubber parts, professional cleaning may be preferable to experimenting with chemical strippers.
6. Clean Textured Rubber with a Soft Brush
Rubber with grooves, ridges, or a patterned surface can trap paint in small recesses. A soft brush can help remove loosened residue without the abrasion caused by stiff wire brushes or rough scouring pads.
Follow these steps:
- Remove loose dirt and paint flakes with a dry cloth.
- Apply a mild soapy solution if the rubber can be cleaned with water.
- Let the solution sit briefly to loosen surface residue without allowing it to dry.
- Brush gently along the grooves and textured areas.
- Wipe away the loosened paint with a damp microfiber cloth.
- Repeat as needed without applying excessive pressure.
- Rinse or wipe away soap residue and dry the item.
For deep grooves, use a small soft brush rather than a sharp object. If paint has penetrated the texture or cured firmly against the material, complete removal may not be possible without affecting the rubber.
How to Remove Different Types of Paint from Rubber
The paint type can affect which method is most likely to work. If you do not know what kind of paint was used, begin with the gentlest approach.
Removing Acrylic Paint from Rubber
Fresh acrylic paint is often easier to remove with a damp cloth and mild soapy water. Blot the excess paint first, then clean the residue before it dries.
For dried acrylic paint, try gently lifting raised edges with a plastic scraper. If that is unsuccessful, check whether the rubber manufacturer permits a compatible cleaning product. Rubbing alcohol may help with some acrylic residues, but test it first because it can affect certain rubber compounds and finishes.
Avoid scraping aggressively or soaking flexible parts in a solvent.
Removing Latex Paint from Rubber
Latex paint is water-based, so fresh stains often respond well to warm water and dish soap.
Blot the paint, wash the area gently, and use a soft brush for textured sections. If the paint has dried, dampen it briefly if the item can tolerate water, then try lifting it with a plastic scraper.
Older latex paint may cling tightly to the surface. If soap and gentle mechanical removal do not work, consult the manufacturer before using a stronger cleaner.
Removing Oil-Based Paint from Rubber
Oil-based paint can be more difficult to remove, especially after it has cured. Water alone is unlikely to remove a fully dried coating.
First, remove any loose material without damaging the rubber. Check the rubber manufacturer’s guidance and the paint product’s cleanup instructions before choosing a solvent. A solvent that dissolves oil-based paint may also damage the rubber, its adhesive, or a protective coating.
Avoid automatically reaching for paint thinner, mineral spirits, or acetone. If the surface is valuable or the stain is extensive, a professional may be able to recommend a compatible treatment.
Removing Spray Paint from Rubber
Spray paint can form a thin film over a wide area, making it tempting to scrub aggressively. Instead, start by wiping away loose contamination and checking whether the paint is still fresh.
For fresh water-based spray paint, try mild soap and water. For dried overspray, use a plastic scraper only where the paint has formed raised droplets and where scraping is safe for the item. Any solvent should be tested first and used only if it is confirmed compatible with the rubber.
If spray paint covers a large section of a rubber item, complete removal may require specialist advice. Strong paint strippers can damage the surface even when they remove the color.
How to Remove Paint from Rubber Shoes
Paint on rubber shoe soles is a common problem after home improvement projects, craft activities, or walking across a freshly painted surface. The best approach depends on whether the paint is on the sole, the upper, or a rubber trim.
Cleaning Paint from Rubber Soles
Start with a soft cloth, warm water, and a small amount of dish soap. Wipe away loose paint, then use a soft brush to clean the tread and grooves.
For dried paint, carefully lift raised flakes with a plastic scraper. Avoid using oil on the tread because a slippery residue could reduce traction. Do not use a strong solvent unless the shoe manufacturer confirms that it is safe for the sole and surrounding materials.
After cleaning, remove all soap residue and let the shoes dry before wearing them.
Cleaning Paint Near the Shoe Upper
If the paint is near fabric, leather, suede, or synthetic shoe material, take extra care. A cleaner that is acceptable for the rubber sole may stain or damage the upper.
Use a cotton swab to work on a small stain precisely, and keep moisture or cleaning products away from adjoining materials. Check the shoe manufacturer’s care instructions before using alcohol or a specialty cleaner.
For expensive shoes, delicate materials, or paint close to glued seams, professional shoe cleaning may be the safer option.
Common Mistakes to Avoid
Paint removal can go wrong when the cleaner is too strong or the technique is too aggressive. Avoid these common mistakes:
- Using acetone without checking compatibility: Acetone can damage some rubber compounds, coatings, and adhesives.
- Applying paint thinner directly: Strong solvents may cause swelling, softening, discoloration, or loss of flexibility.
- Scrubbing with wire brushes: Hard bristles can scratch or tear the rubber surface.
- Using a metal blade: Sharp tools may cut flexible rubber or damage the surrounding finish.
- Soaking the item unnecessarily: Extended exposure to water or chemicals may affect adhesives and connected materials.
- Skipping the patch test: A cleaner can appear effective while causing damage that becomes visible only after drying.
- Leaving solvent on too long: Follow the product’s exact contact-time instructions and remove it as directed.
- Mixing cleaning chemicals: Combining products can create hazardous fumes or other dangerous reactions.
- Ignoring slippery residue: Oil or soap left on a shoe sole, mat, or handle can create a safety risk.
The safest rule is to begin with mild cleaning, increase the intensity only when necessary, and stop if the rubber’s appearance or texture changes.
How to Protect Rubber from Future Paint Stains
Preventing paint splashes is usually easier than removing dried paint. A few precautions can help protect rubber items during painting or renovation.
Cover Nearby Rubber Parts
Use painter’s tape and suitable protective coverings to shield rubber seals, mats, handles, and other nearby components. Make sure the tape itself is safe for the surface and does not leave adhesive residue.
Clean Fresh Splashes Promptly
Keep a soft cloth and mild soapy water nearby when painting. If paint reaches a rubber surface, remove the excess promptly using a method compatible with the item.
Do not wipe a large wet stain across the surface, as this can spread the paint.
Keep Cleaning Supplies Suitable for the Material
Store a soft brush, microfiber cloths, and mild dish soap with your general cleaning supplies. For specialty rubber components, keep the manufacturer’s care instructions available so you can select an appropriate product.
Allow Paint to Dry Away from Rubber Surfaces
When possible, move removable rubber items away from the painting area. If the rubber part cannot be moved, cover it securely and check the protective covering periodically to ensure paint has not seeped underneath.
Frequently Asked Questions
What is the easiest way to remove paint from rubber?
For fresh water-based paint, start with mild dish soap, warm water, and a soft cloth. Dried paint may need gentle lifting with a plastic scraper. Test any stronger cleaner on a hidden area first to make sure it does not damage the rubber.
Does vinegar remove paint from rubber?
Vinegar is not a dependable paint remover for every type of rubber or paint. It may help with some light residue, but it is not usually the first choice for dried paint. Mild soap and water are a better starting point, and any alternative cleaner should be checked for material compatibility.
Can rubbing alcohol remove dried paint from rubber?
It may loosen certain acrylic or water-based paint residues, but it can also affect some rubber materials, finishes, and adhesives. Use it only when appropriate for the item, test a hidden area first, and stop if the surface changes.
Will acetone damage rubber?
Acetone can damage some rubber compounds and may affect coatings, adhesives, or nearby plastic parts. Do not use it simply because it removes paint from other materials. Confirm compatibility with the item’s manufacturer before considering any strong solvent.
How do you remove spray paint from rubber shoes?
Begin with mild soapy water and a soft brush. If the paint is dry and raised, try lifting it gently with a plastic scraper. Avoid strong solvents unless the shoe manufacturer confirms they are safe for the sole and any adjoining materials.
Can dried paint be removed completely from rubber?
Sometimes, but not always. Paint that sits on the surface may come off with gentle cleaning and careful scraping. Paint that has bonded strongly to textured or porous rubber may leave discoloration even after the residue is removed. Avoid damaging the rubber in pursuit of a perfect finish.
Is paint thinner safe for rubber?
Do not assume paint thinner is safe for rubber. Its ingredients may soften, swell, discolor, or weaken certain rubber compounds and adhesives. Check the rubber manufacturer’s guidance and the solvent label before using it.
What should I do if the rubber becomes sticky after cleaning?
Stop using the cleaner and remove any remaining product according to its label and the rubber manufacturer’s instructions. Do not apply another solvent to counteract the first one. If the rubber remains sticky, swollen, cracked, or unusually soft after drying, it may have suffered chemical damage.
Final Words
Removing paint from rubber starts with identifying the paint, checking the material, and choosing the gentlest method that is likely to work. Fresh water-based stains often respond to soap and water, while dried paint may need careful scraping or a compatible specialist cleaner.
Avoid harsh solvents unless the manufacturer confirms they are suitable, and always test a hidden area first. Taking your time can help remove unwanted paint while preserving the rubber’s color, texture, and flexibility.
Helpful Resources
- Poison Control — Top Tips for a Safe Spring Cleaning — Practical guidance on reading cleaner labels, ventilation, and avoiding hazardous chemical mixtures.
- Smooth-On — Cleaning Uncured Materials — Explains why cleaning methods depend on the material and why solvents should be tested before use.