Have you ever wanted to create stunning artwork of an octopus? This fascinating sea creature, with its flowing tentacles and unique features, can be a joy to draw.
Whether you’re a beginner or looking to refine your skills, this guide is designed for you. You’ll discover simple techniques that make drawing an octopus fun and easy. Imagine impressing your friends with your artistic abilities or even creating a beautiful piece for your home.
Stick around, and you’ll find step-by-step instructions, tips, and tricks that will unlock your creativity and boost your confidence. Get ready to dive in and bring your octopus to life!
Credit: theartchi.com
Contents
Materials You Need
Drawing an octopus is fun and easy. To start, gather your materials. Having the right tools makes the process smoother. Here’s a list of what you will need.
Paper
Choose a good quality paper. Sketch paper works well. You can also use drawing paper. Pick a size that feels comfortable for you. A4 or letter size is common.
Pencils
Use a pencil for your initial sketch. A standard HB pencil is perfect. It gives you a nice balance of softness and hardness. You can also try a mechanical pencil for fine lines.
Eraser
An eraser is important. Mistakes happen, and you want to fix them. A soft rubber eraser works best. It removes pencil marks without tearing the paper.
Colored Pencils Or Markers
Once your sketch is ready, add color. Colored pencils are great for blending. Markers provide bold colors. Choose what you prefer for your artwork.
Reference Images
Use reference images of octopuses. Look for pictures online or in books. This helps you understand their shape and features better. You can create a more realistic drawing.
Ruler
A ruler helps with straight lines. It’s useful for creating a background. You may want a clean look for your octopus drawing.
Credit: www.youtube.com
Sketching The Basic Shape
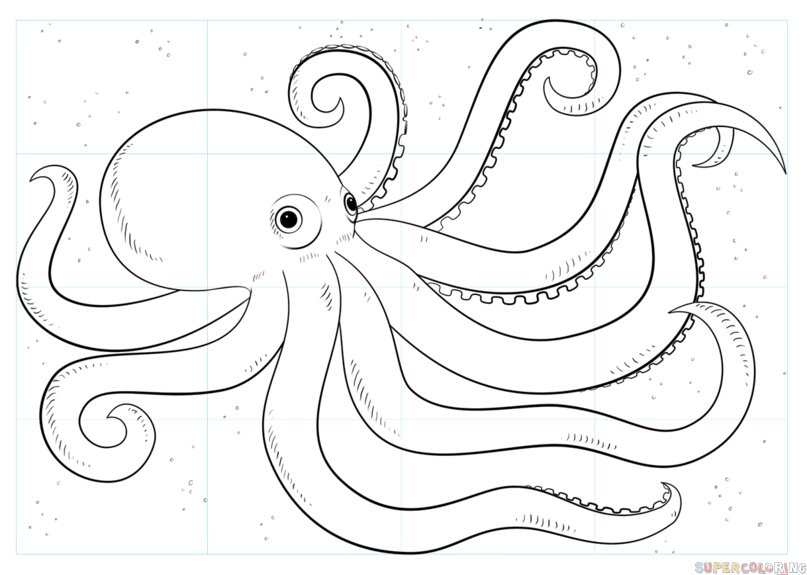
Sketching the basic shape of an octopus is an exciting first step. This part sets the foundation for the entire drawing. Understanding its form is key. An octopus has a unique shape. The head is rounded and the tentacles flow outward. Let’s break it down into simple steps. This will make the process enjoyable and manageable.
Drawing The Head
Start with a clean sheet of paper. Use a pencil for easy adjustments. Draw a large, oval shape for the head. This represents the main body. Make it slightly wider at the top. It should taper slightly at the bottom. This will give your octopus a natural look. Keep the lines light and smooth.
Adding Tentacle Guidelines
Next, focus on the tentacles. Draw eight lines extending from the bottom of the head. These lines serve as guidelines for the tentacles. Vary the length and curve of each line. This adds realism to your drawing. Position them evenly around the head. Ensure they appear fluid and natural. This step captures the dynamic movement of an octopus.
Refining The Tentacles
Drawing an octopus can be fun and easy. Focus on its unique shape and long tentacles. Start with simple lines and shapes, then add details to bring your octopus to life. Enjoy the process and let your creativity flow.
Refining the tentacles of your octopus drawing is crucial for bringing your artwork to life. Tentacles are not just appendages; they define the character and movement of your octopus. By focusing on the details, you can transform a simple sketch into a vibrant representation of this fascinating creature.
Shaping The Tentacles
Start by sketching the basic outline of the tentacles. Think of them as elongated shapes that gradually taper towards the ends.
– Vary the Width: Not all tentacles are the same. Make some wider and others thinner to add interest.
– Add Curves: Tentacles are flexible and can bend in various directions. Aim for natural curves rather than straight lines.
Pay attention to how the tentacles connect to the body. The base should be wider and gradually become slimmer as they extend outward.
Creating Natural Flow
Creating a sense of movement is vital for realism. Imagine how an octopus moves through the water.
– Use Dynamic Lines: Draw lines that suggest flow and grace. Avoid rigid shapes; instead, focus on fluidity.
– Incorporate Action: Show how tentacles might interact with their environment. Are they reaching for something or curling around a rock?
Don’t forget about the texture. Add subtle lines and shading to suggest suckers along the tentacles. This small detail can elevate your drawing significantly.
Have you ever watched an octopus in action? Observing their movements can offer valuable insights into how to depict them in your art. Engaging with the subject will enhance your understanding and improve your drawing skills.
By refining your tentacles with these tips, you’ll create a more dynamic and lifelike octopus. Your attention to detail will shine through, making your artwork a captivating piece.

Credit: www.youtube.com
Adding Facial Features
Facial features bring life to your octopus drawing. They add character and personality. Focus on the eyes and mouth. These elements will make your octopus unique.
Drawing The Eyes
Start with two large circles for the eyes. Position them near the top of the head. Make sure they are evenly spaced. This gives your octopus a friendly look.
Add smaller circles inside each eye. These will be the pupils. You can make the pupils round or oval. Position them slightly off-center for a playful effect.
Consider adding highlights. Small white dots in the pupils create a shiny effect. This adds depth and makes the eyes more appealing.
Including The Mouth
The mouth is an important feature. Draw a curved line below the eyes. This creates a smiley look. A simple line works well for a friendly octopus.
For a different expression, change the curve. An upward curve shows happiness, while a downward curve shows sadness. Experiment with different shapes.
Optional: Add texture to the mouth. Small lines can show the lips or give it a fun look. This small detail enhances the overall drawing.
Detailing The Texture
Drawing an octopus involves capturing its unique texture. Focus on the smooth, flowing lines of its body and the soft, wavy edges of its tentacles. Pay attention to the subtle details, like the small suckers, to bring your octopus to life.
Detailing the texture of your octopus drawing can elevate it from a simple sketch to a captivating piece of art. Paying attention to details like suckers and skin patterns adds depth and realism. This section will guide you through these essential elements, making your octopus come alive on paper.
Drawing Suckers
Suckers are one of the most defining features of an octopus. They give your drawing character and realism. Start by sketching small circles along the underside of each tentacle.
To create a more realistic look, vary the size of the suckers. Make them larger near the base of the tentacle and gradually smaller towards the tips.
Use shading to enhance their three-dimensional appearance. Darken the edges and lighten the center. This contrast makes them pop off the page.
Consider adding a few suckers at different angles. This variation creates a dynamic look. It also adds interest and captures the movement of the octopus.
Adding Skin Patterns
The skin of an octopus is not just smooth; it has intricate patterns and textures. Start with light pencil strokes to outline the areas where you want the skin patterns to appear.
Observe real octopuses. They often have spots, stripes, or even mottled patterns. Try to replicate these in your drawing, ensuring they flow naturally with the shape of the body.
Don’t hesitate to use color. Adding shades of blue, green, or even a hint of red can give your octopus a vibrant look. Layering colors will create a sense of depth.
Consider the lighting in your drawing. Shadows can enhance the texture, making the skin appear more lifelike. Experiment with different techniques, like cross-hatching or stippling, to find what works best for you.
As you work on these details, ask yourself: What emotions do you want your octopus to convey? Is it playful, mysterious, or perhaps a bit mischievous? Your choices in texture can help tell that story.
Inking The Outline
Inking the outline is an exciting part of drawing an octopus. This step brings your pencil sketch to life. Using the right tools makes a big difference. Clear lines create a strong base for your artwork.
Choosing The Right Pen
Picking the right pen is crucial. Use a pen that feels comfortable. Fine liners are great for detailed work. They come in different sizes. A smaller tip helps with tiny details.
Brush pens can add style. They create varying line thickness. This adds depth to your octopus. Test different pens to find your favorite.
Tracing Over Pencil Lines
Start tracing gently over your pencil lines. Be steady and patient. Follow the curves of the octopus’s body. Pay attention to its tentacles. Each one has its unique shape.
Don’t rush this step. Allow the ink to dry fully. Once dry, erase the pencil lines carefully. This leaves you with a clean outline.
Your octopus is now ready for color. The outline gives it character and life.
Bringing It To Life With Color
Bringing your octopus drawing to life with color can transform it from a simple sketch to a vibrant underwater creature. Color adds depth, personality, and emotion to your artwork. It invites viewers into the world you’ve created, making your octopus not just a figure on paper, but a living part of the ocean.
Picking A Color Palette
Choosing the right color palette is crucial. Think about the mood you want to convey. Do you want your octopus to feel playful, mysterious, or realistic?
- Realistic Approach: Use various shades of blues, greens, and browns to mimic the ocean’s colors.
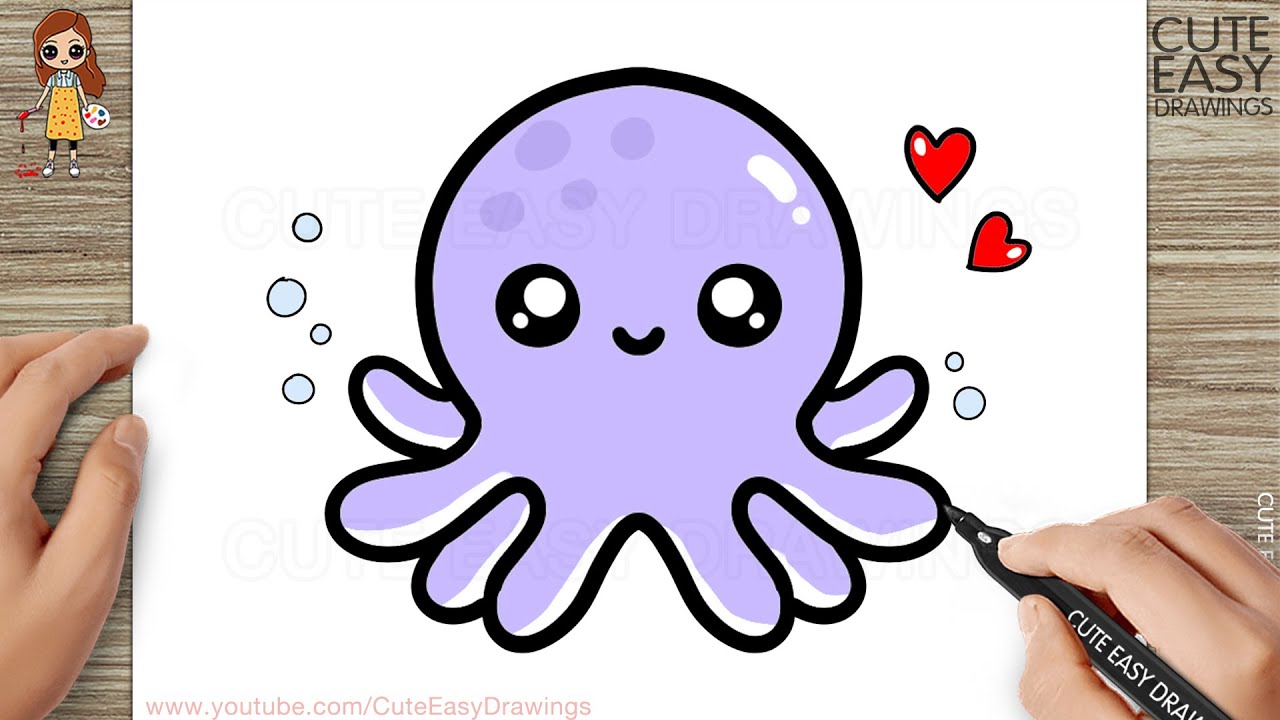
- Playful Palette: Try bright pinks, purples, and yellows for a fun, cartoonish style.
- Mysterious Vibe: Deep purples and dark blues can create an enchanting aura.
Once you’ve chosen a theme, gather your colors. Test them on a separate sheet to see how they blend together. This step can be exciting; you might discover unexpected combinations that work beautifully!
Shading And Highlights
Shading gives your octopus depth and dimension. Think about where the light hits your drawing. Shadows should be added to the underside of the tentacles and the areas that might be tucked away.
- Start with a base color for the main body.
- Add darker shades to create shadows.
- Highlight areas where light would naturally reflect.
Using a blending tool can help create a smooth transition between colors. This technique adds realism and makes your octopus look three-dimensional. Don’t hesitate to play around with colors; sometimes, a splash of unexpected color can make your artwork truly stand out.
What colors resonate with you? As you experiment, consider how each choice influences the character of your octopus. This process is not just about filling in spaces; it’s about breathing life into your creation.
Final Touches
Final touches can bring your octopus drawing to life. This part is about refining details and adding depth. Small changes make a big difference.
Erasing Pencil Marks
Start by gently erasing any unwanted pencil lines. Use a soft eraser for better control. Focus on areas that need to be cleaner.
Be careful around the edges of the octopus. You want to keep the shape intact. Erasing too hard can damage the paper. Take your time with this step.
Adding Background Elements
Now, think about what to add behind your octopus. A simple ocean scene works well. Draw some bubbles, seaweed, or rocks.
Keep the background light. This helps the octopus stand out. Use soft colors or light pencil strokes.
Consider adding some fish for a lively touch. Make sure they are smaller than the octopus. This will create a sense of depth.
Remember, balance is key. The background should not overpower your octopus. Keep it simple and fun.
Frequently Asked Questions
How Do I Start Drawing An Octopus?
To begin drawing an octopus, sketch a simple oval for the body. Then, add a central head and eight tentacles. Focus on the shape and flow of the tentacles. Use light strokes to adjust proportions before finalizing the details. Don’t forget to add eyes for character!
What Materials Do I Need To Draw An Octopus?
You can use basic materials like pencils, erasers, and paper. If you prefer color, consider colored pencils or markers. A sketchbook is ideal for practice. Additionally, you might want reference images for better accuracy. Experiment with different tools to find your preferred medium!
How Can I Make My Octopus Look Realistic?
To create a realistic octopus, study its anatomy and movement. Pay attention to the texture of the skin, adding shading for depth. Use flowing lines for the tentacles to mimic their natural motion. Observing real octopuses can enhance your understanding and improve your drawing skills.
What Are Some Common Mistakes When Drawing An Octopus?
Common mistakes include disproportionate tentacles and incorrect body shapes. Artists often overlook the unique features of the octopus, like suckers. Failing to capture the fluidity of movement can also detract from realism. Always refer to images and practice regularly to avoid these pitfalls.
Conclusion
Drawing an octopus can be fun and rewarding. With practice, anyone can create a great octopus drawing. Remember to start with simple shapes. Then, add details like the eyes and tentacles. Don’t rush; take your time to get it right.
Use colors to make your octopus stand out. Share your art with friends or online. Enjoy the process and keep experimenting. Drawing helps improve skills and boosts creativity. Dive into your next art project with confidence. Happy drawing!