
Learning how to draw a belt is a simple and enjoyable way to practice basic shapes, proportions, perspective, and small details. A belt may look like an ordinary object, but its long curved strap, buckle, holes, and layered construction provide plenty of opportunities to improve your drawing skills. Beginners can create a realistic belt by breaking it into a few simple shapes first.
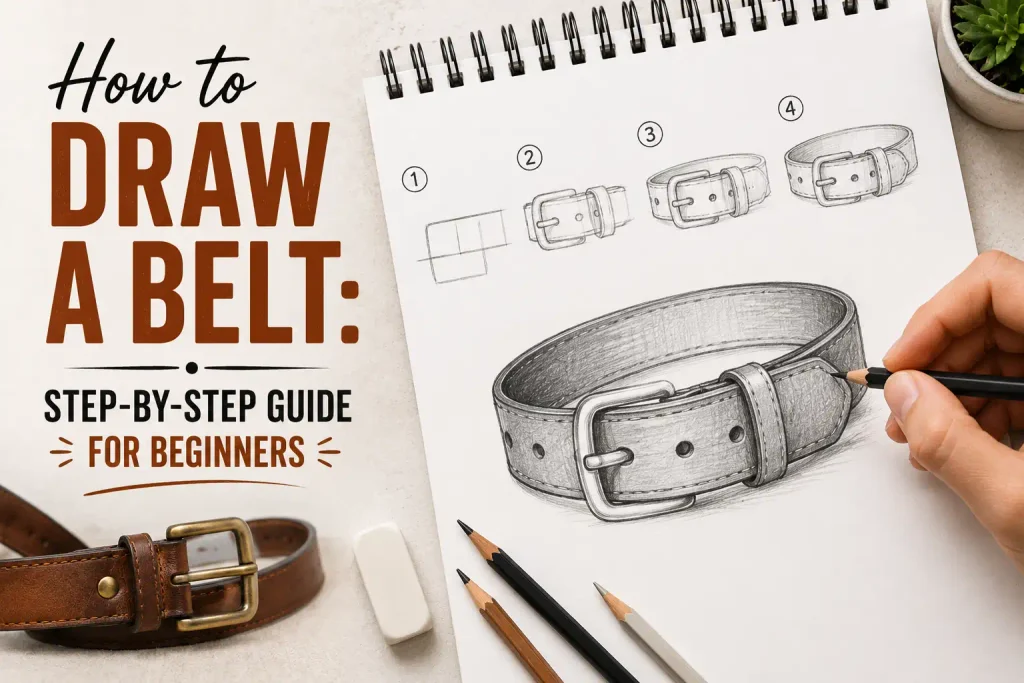
The easiest approach is to sketch the belt strap before adding the buckle and other details. Once the overall shape looks correct, you can refine the edges, belt loops, holes, stitching, and texture. Whether you want to draw a leather belt, a fashion belt, or a cartoon-style belt, these steps will help you create a clean illustration.
Items to Buy
- Drawing paper
- HB pencil
- 2B pencil
- 4B pencil
- Eraser
- Kneaded eraser
- Sharpener
- Fine-tip drawing pen
- Ruler
- Colored pencils
- Brown colored pencil
- Black colored pencil
- Gray colored pencil
- Blending stump
Why Draw a Belt?
A belt is an excellent beginner drawing subject because it combines simple geometric forms with realistic details.
Drawing a belt can help you practice:
- Straight and curved lines
- Perspective
- Symmetry
- Proportion
- Metal textures
- Leather textures
- Shading
- Highlights
- Repeating patterns
- Small details
You can also experiment with different belt styles, colors, buckles, and materials.
How to Draw a Belt Step by Step
Step 1: Choose the Belt Position
First, decide how you want the belt to appear.
You can draw it:
- Lying flat
- Hanging vertically
- Curled into a loop
- Fastened around a waist
- Folded over
- Shown from the front
- Shown at an angle
For beginners, drawing a belt lying flat is the easiest option.
Step 2: Sketch the Main Belt Strap
Start by drawing two long, parallel lines.
These lines represent the upper and lower edges of the belt.
Keep the distance between them consistent.
If you’re drawing a curved belt, gently bend both lines in the same direction.
Don’t press heavily with your pencil because these are construction lines.
Step 3: Shape the Belt Tip
At one end of the strap, create the belt tip.
A traditional belt may have a rounded, pointed, or slightly angled end.
For a classic leather belt, try a gently rounded point.
Make sure both sides connect smoothly to the end.
Step 4: Add the Buckle Area
At the opposite end, leave enough space for the buckle.
Sketch a rectangular or rounded frame.
The exact shape depends on the style of buckle you’re drawing.
Keep the buckle slightly wider than the strap if you want a traditional appearance.
Step 5: Draw the Buckle Frame
Refine the buckle using a larger outer shape and a smaller inner opening.
For example, you can create:
- Rectangular buckle
- Square buckle
- Rounded buckle
- Oval buckle
- Decorative buckle
Use a ruler if you want perfectly straight edges.
Step 6: Add the Buckle Tongue
Inside the buckle, draw the small metal prong.
It should extend from one side toward the center.
Keep it narrow and slightly pointed.
The tongue will eventually line up with one of the belt holes.
Step 7: Add the Belt Keeper
Draw the small loop near the buckle.
This loop holds the loose end of the belt in place.
Make it slightly wider than the belt strap.
Depending on your perspective, you can show it as a small rectangular loop around the strap.
Step 8: Add the Belt Holes
Draw a series of evenly spaced holes near the tip of the belt.
They can be:
- Round
- Oval
- Small rectangles
For a classic belt, five or more evenly spaced holes can work well.
Use a ruler or light guidelines to keep the spacing consistent.
Step 9: Refine the Strap Edges
Now go over the main strap.
Make the edges smooth and consistent.
If you’re drawing leather, slightly soften the corners rather than making everything perfectly geometric.
For a fabric belt, you can make the edges softer.
Step 10: Add Stitching
Stitching can make a simple belt drawing look much more realistic.
Draw a thin line near the edges of the strap.
Then add small repeated marks along the line.
Keep the stitches evenly spaced.
You don’t need to draw every stitch with heavy lines.
Step 11: Add the Belt Loop Details
Refine the belt keeper near the buckle.
Add the inner edge and any visible stitching.
If the belt is made of leather, use slightly curved lines to show how the loop wraps around the strap.
Step 12: Add Leather Texture
If you’re drawing a leather belt, use subtle irregular marks.
You can add:
- Fine scratches
- Tiny creases
- Slight color variations
- Small wrinkles
- Edge wear
Don’t cover the entire belt with texture.
A few carefully placed details will make the material look more natural.
Step 13: Add Metal Details
Now refine the buckle.
Use darker shading around the inner edges.
Leave some areas lighter to create the appearance of reflective metal.
You can also add small highlights along the outer frame.
This creates a stronger contrast between the metal buckle and the belt strap.
Step 14: Strengthen the Outline
Once all the proportions and details look right, reinforce the most important lines.
Darken:
- Belt edges
- Buckle outline
- Belt holes
- Tongue
- Belt keeper
Keep smaller texture lines lighter.
This prevents the drawing from looking too heavy.
Step 15: Add Shading
Choose where your light is coming from.
If the light comes from above, add shadows beneath:
- Belt folds
- Buckle
- Belt keeper
- Raised edges
- Curved sections
Use gradual shading rather than one solid dark area.
Step 16: Add Highlights
Use a kneaded eraser to create small highlights.
For leather, highlights can appear along curved surfaces.
For metal, sharper highlights can make the buckle look shiny.
Keep the brightest areas relatively small.
How to Draw a Leather Belt
Leather belts are easy to customize with texture.
Start with a long strap.
Give the edges a slightly rounded appearance.
Add belt holes and stitching.
Then use brown, black, tan, or dark red shades.
Add subtle wrinkles and darker areas around the edges.
For an aged leather appearance, add small irregular marks and slightly uneven color.
How to Draw a Belt Buckle
Start with the outer buckle shape.
Then draw the inner opening.
Add the tongue or prong inside.
Finally, add the attachment point where the buckle connects to the strap.
For a realistic buckle, focus on light and shadow.
The metal should generally have stronger highlights and darker edges than the leather strap.
How to Draw a Belt From the Front
A front-facing belt is one of the easiest versions.
Draw the strap horizontally.
Place the buckle near one end.
Add the holes toward the opposite end.
Then add stitching and texture.
Keep the strap edges parallel for a clean appearance.
How to Draw a Belt at an Angle
For a more three-dimensional drawing, angle the belt diagonally across the page.
Make the closer section slightly larger.
Allow the farther section to become narrower.
The buckle can be positioned in the foreground.
This creates a stronger sense of depth.
How to Draw a Curved Belt
Start with two long curved lines.
Keep the distance between them consistent.
Then add the buckle and belt tip.
For a realistic curve, the strap edges should follow the same general path.
Add subtle shadows where the belt overlaps itself.
How to Draw a Belt Around a Waist
If you’re drawing a belt around a person, begin with the waist or torso shape.
Then draw the belt as a curved band following the body.
The belt should wrap around the waist rather than appearing as a straight line across it.
Add the buckle at the front.
Use perspective to make the sides of the belt appear slightly narrower as they move away from the viewer.
How to Draw a Cartoon Belt
For a cartoon-style belt, simplify the details.
Use:
- Bold outlines
- Simple buckle
- Large belt holes
- Exaggerated proportions
- Bright colors
You can make the buckle oversized for a playful appearance.
Add decorative stars, patterns, or symbols to the strap.
How to Draw a Belt With Colored Pencils
Start with a light base color.
For brown leather, begin with tan or light brown.
Add darker brown around the edges and folds.
Use black or dark brown for the deepest shadows.
For a black belt, don’t use pure black everywhere.
Layer gray and dark tones to preserve visible texture and highlights.
For the buckle, use gray or silver tones and leave small highlights.
How to Draw a Belt With a Marker
Markers work well for bold belt illustrations.
Begin with a clean pencil sketch.
Outline the main shapes.
Apply the lightest color first.
Then add darker areas around the edges, buckle, and folds.
Use a darker marker for the final outline if desired.
How to Make a Belt Look Realistic
Realism depends on small details and accurate proportions.
Focus on:
- Consistent strap width
- Natural curves
- Correct buckle proportions
- Evenly spaced holes
- Subtle stitching
- Material texture
- Directional lighting
- Soft shadows
Avoid making every line perfectly straight or every texture mark identical.
Common Mistakes to Avoid
Making the Strap Uneven
Keep both edges relatively consistent unless the belt is intentionally folded.
Making the Buckle Too Small
The buckle should be proportional to the strap.
Spacing Holes Unevenly
Use light guidelines to keep them aligned.
Forgetting the Belt Keeper
The small loop adds realism and helps identify the belt structure.
Adding Too Much Texture
A few subtle marks are usually more effective.
Making Metal Completely Flat
Use highlights and shadows to give the buckle dimension.
Ignoring Perspective
A curved or angled belt should change size naturally with distance.
Easy Belt Drawing Ideas
Classic Leather Belt
Draw a simple brown belt with a metal buckle and traditional stitching.
Black Fashion Belt
Use a slim strap and polished buckle.
Western Belt
Add a large decorative buckle and textured leather.
Cartoon Belt
Use exaggerated proportions and bold colors.
Vintage Belt
Add distressed leather, worn edges, and an aged buckle.
Designer-Style Belt
Create decorative patterns along the strap and a distinctive buckle.
FAQs
Is a belt easy to draw?
Yes. A belt can be simplified into a long strap, buckle, holes, and belt loop, making it a good beginner drawing subject.
What should I draw first?
Start with the two main edges of the strap. Then add the belt tip and buckle.
How do I draw a belt buckle?
Create an outer frame, draw the inner opening, and add the metal tongue inside.
How many holes should I draw?
You can draw five or more evenly spaced holes depending on the belt style and the amount of strap you want to show.
How do I make a leather belt look realistic?
Use subtle wrinkles, stitching, edge shading, and small irregular texture marks.
How do I draw a curved belt?
Use two parallel curved lines for the strap and maintain a consistent width as the belt bends.
Can I draw a belt with colored pencils?
Yes. Layer colors gradually and use darker tones around edges and folds to create depth.
How do I draw a shiny buckle?
Use darker shading around the edges and leave small bright areas for reflected highlights.
How do I draw a cartoon belt?
Simplify the strap and buckle, use bold outlines, and exaggerate the proportions for a playful appearance.
What pencil should I use?
An HB pencil is ideal for the initial sketch, while 2B and 4B pencils are useful for shading and darker details.
Final Words
Learning how to draw a belt is a straightforward project that can teach you valuable skills in proportion, perspective, texture, and shading. Start with the long strap, then add the buckle, tongue, belt holes, keeper, and stitching. Once the structure is complete, use shadows and highlights to give the belt dimension.
Try drawing different styles to build your confidence. A simple leather belt is a great starting point, while curved belts, decorative buckles, western designs, and cartoon versions can help you practice more advanced shapes. With regular practice, you’ll be able to create clean and detailed belt illustrations in a variety of styles.