
Learning how to draw a skirt is a great way to practice clothing proportions, fabric movement, folds, seams, and different fashion silhouettes. Skirts can range from fitted pencil styles to flowing maxi designs, but most can be built from a few simple shapes. Starting with basic guidelines makes it easier to create a balanced and natural-looking garment.
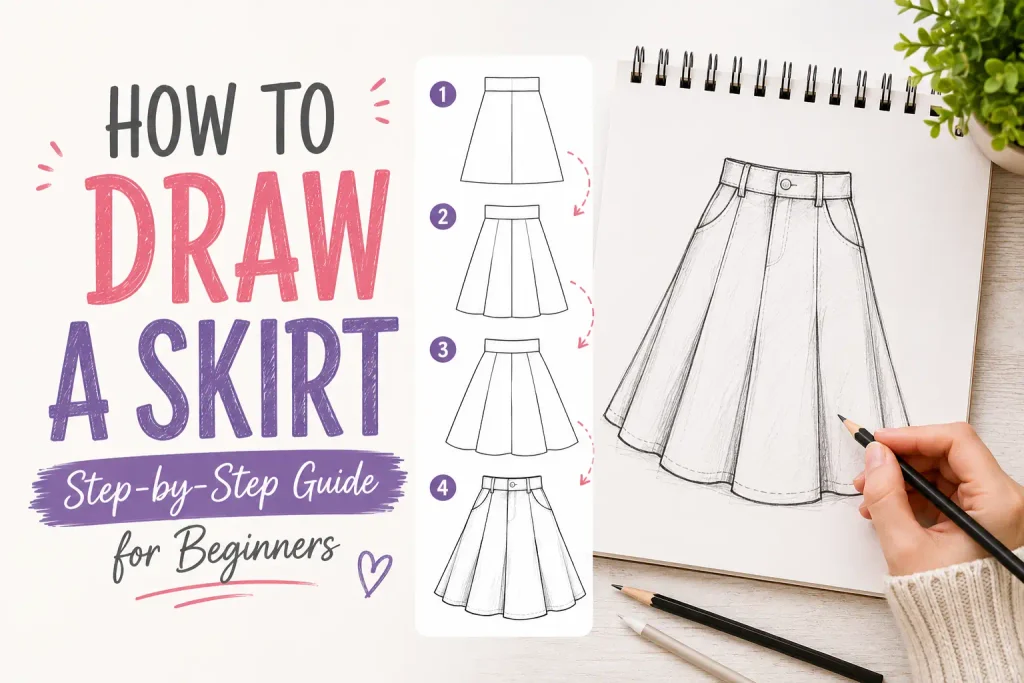
The easiest approach is to sketch the waistband first and then build the hips, hemline, and fabric folds underneath it. Once the main shape is complete, add seams, pleats, pockets, texture, and shading. Follow these 10 beginner-friendly steps to create a simple skirt drawing and then experiment with different styles and lengths.
Items to Buy
- Drawing paper
- HB pencil
- 2B pencil
- 4B pencil
- Eraser
- Kneaded eraser
- Sharpener
- Fine-tip black pen
- Ruler
- Colored pencils
- Gray colored pencil
- Black colored pencil
- Pink colored pencil
- Blue colored pencil
- Brown colored pencil
- White colored pencil
Why Draw a Skirt?
Skirts are useful subjects for learning how fabric behaves around the body.
Drawing skirts helps you practice:
- Clothing proportions
- Waistbands
- Hems
- Fabric folds
- Pleats
- Seams
- Pockets
- Draping
- Shading
- Fashion illustration
Once you understand the basic shape, you can easily create mini skirts, pencil skirts, pleated skirts, A-line skirts, and flowing maxi skirts.
How to Draw a Skirt Step by Step
Step 1: Sketch the Waistband
Begin with a slightly curved horizontal shape for the waistband.
If you’re drawing a skirt on a person, lightly sketch the waist and hips underneath it first. This gives you a guide for positioning the garment.
Keep the waistband relatively narrow unless you’re drawing a high-waisted style.
Step 2: Draw the Hip Area
From both sides of the waistband, extend curved lines downward to establish the upper portion of the skirt.
The shape should follow the body’s general form.
For a fitted skirt, keep the sides relatively close to the hips. For a loose skirt, allow the fabric to extend outward.
Step 3: Establish the Length
Decide whether your skirt is mini, knee-length, midi, or maxi.
Draw a light guideline across the bottom to establish the hem.
For a straight skirt, keep the hem relatively even.
For a flowing skirt, use a curved or uneven hem to suggest movement.
Step 4: Shape the Outer Edges
Connect the waistband to the hemline.
For an A-line skirt, let the sides gradually widen toward the bottom.
For a pencil skirt, keep the sides relatively straight and slightly tapered.
For a pleated skirt, allow the silhouette to expand as it reaches the hem.
Step 5: Add the Hem
Create a clean lower edge.
For a simple skirt, use a single curved line.
Then add a second small line above or below it to represent the folded fabric or stitching.
Keep the hem consistent with the perspective of the garment.
Step 6: Add Pleats or Folds
Now add the fabric details.
For pleats, draw repeated lines running from the waistband toward the hem.
For a flowing skirt, use longer curved folds.
Place more folds where the fabric is gathered or compressed.
Avoid making every fold identical.
Step 7: Add Seams and Details
Refine the garment with details such as:
- Side seams
- Waistband stitching
- Pockets
- Buttons
- Zippers
- Belt loops
- Decorative stitching
Keep these details subtle so they complement rather than overwhelm the main silhouette.
Step 8: Add Fabric Texture
Think about the material you’re drawing.
Cotton can have soft, subtle folds.
Denim can have stronger seams and heavier structure.
Satin can have smooth flowing folds with bright highlights.
Wool or knit fabric can have a softer, slightly textured appearance.
Use your pencil strokes to communicate the material.
Step 9: Add Shading
Choose a light source before shading.
Darken areas underneath the waistband and inside deeper folds.
Add shadows near overlapping fabric and along the sides.
Leave the raised areas lighter.
Gradual shading can make a flat skirt look three-dimensional.
Step 10: Clean Up and Color
Erase unnecessary construction lines.
Strengthen the important outer contours and refine any uneven edges.
Then add your chosen colors.
Try classic shades such as:
- Black
- Navy
- Beige
- Brown
- White
- Burgundy
- Pink
- Green
- Denim blue
Add lighter highlights and darker shadows to create depth.
How to Draw a Pencil Skirt
Start with a narrow waistband.
Draw the skirt close to the hips and gradually taper it toward the knees.
Keep the hem relatively straight.
Add a back slit if you want a more detailed fashion design.
Use subtle folds around the waist and knees.
How to Draw an A-Line Skirt
Begin with a fitted waistband.
Let the sides gradually widen as they move toward the hem.
Keep the bottom wider than the waist.
Add a few long folds that flow downward from the waistband.
This creates the classic triangular silhouette of an A-line skirt.
How to Draw a Pleated Skirt
Start with the waistband.
Then divide the skirt into repeated vertical sections.
Draw each pleat as a narrow folded panel.
Use alternating light and dark values to show which sections face the light.
Keep the pleats consistent near the waist while allowing them to spread slightly toward the hem.
How to Draw a Maxi Skirt
Create a waistband and extend the fabric all the way toward the ground.
Keep the skirt loose and flowing.
Add long vertical folds that become wider toward the bottom.
A slightly uneven hem can make the fabric appear more natural.
How to Draw a Mini Skirt
Start with the waistband and create a short hemline above the knees.
Keep the overall shape relatively simple.
You can make it fitted, A-line, pleated, or slightly flared.
Add pockets, buttons, stitching, or belt loops for extra detail.
How to Draw a Skirt on a Person
Lightly sketch the person’s waist, hips, and legs first.
Then draw the skirt around the body rather than placing it on top as a flat shape.
Remember that fabric follows the body’s curves.
Add more folds around areas where the garment is pulled, tucked, or compressed.
For a flowing skirt, let the fabric extend naturally away from the legs.
How to Draw a Skirt From the Side
Begin with the waistband around the waist.
Then draw the curve of the hips and extend the skirt toward the chosen hemline.
For a fitted skirt, keep the fabric close to the body.
For a loose skirt, allow the material to flare outward.
Add folds that follow the direction of the fabric.
How to Draw a Skirt With Colored Pencils
Start with a light base layer.
Gradually add darker colors around the waistband, seams, folds, and sides.
Use white or a lighter version of your main color for highlights.
For patterned skirts, draw the pattern lightly first and then build the color around it.
How to Make Skirt Folds Look Realistic
Folds should have a reason for being there.
Look for areas where fabric is:
- Gathered at the waist
- Pulled by movement
- Compressed around the hips
- Hanging freely
- Overlapping
- Caught by a seam
Use long, flowing lines for lightweight fabric and shorter, stronger folds for heavier materials.
Common Mistakes to Avoid
Making the Waistband Completely Straight
A slight curve helps the garment follow the body’s shape.
Making Every Fold Identical
Natural fabric folds vary in size and direction.
Forgetting the Hem
A defined hem gives the skirt a finished appearance.
Ignoring the Fabric Type
Different materials create very different folds and silhouettes.
Adding Too Much Shading
Too much darkness can hide the structure of the garment.
Drawing the Skirt Flat on the Body
Consider the body’s shape underneath the fabric.
Easy Skirt Drawing Ideas
Classic A-Line Skirt
Create a fitted waist and gently widening silhouette.
Pleated Skirt
Use repeated vertical pleats and alternating shadows.
Denim Skirt
Add pockets, seams, stitching, and a button.
Floral Skirt
Create a flowing skirt covered with simple flowers and leaves.
Long Maxi Skirt
Use long folds and a soft flowing hem.
Fashion Sketch Skirt
Experiment with exaggerated proportions, patterns, and dramatic folds.
FAQs
Is a skirt easy to draw?
Yes. Most skirt styles can be created from a waistband, hip shape, side lines, and hem.
What should I draw first?
Start with the waistband and then establish the hips, length, sides, and hem.
How do I draw skirt folds?
Follow the way fabric naturally hangs from the waistband. Use curved or vertical lines depending on the skirt style.
How do I draw a pleated skirt?
Divide the garment into repeated sections and use alternating light and dark areas to create the appearance of folded fabric.
How do I draw a flowing skirt?
Make the lower portion wider and use long curved folds that extend from the waist toward the hem.
What skirt is easiest for beginners?
A simple A-line skirt is an excellent starting point because its silhouette is straightforward.
How do I make a skirt look realistic?
Pay attention to body proportions, fabric type, folds, seams, shadows, and the direction of the light.
Can beginners draw a skirt on a person?
Absolutely. Lightly sketch the waist, hips, and legs first, then build the skirt around the body.
What pencil should I use?
An HB pencil works well for the initial sketch, while 2B and 4B pencils are useful for darker lines and shading.
Final Words
Learning how to draw a skirt becomes much easier when you begin with the basic garment structure. Start with the waistband, establish the hips and desired length, then create the side edges and hem. Once the silhouette is correct, add pleats, folds, seams, pockets, and fabric texture to give the skirt character and dimension.
After mastering the basic design, experiment with different silhouettes and materials. Try drawing a fitted pencil skirt, a pleated school skirt, a flowing maxi skirt, or a casual denim design. With regular practice, you’ll become more confident drawing clothing proportions, fabric movement, realistic folds, and stylish fashion illustrations.