
Learning how to draw a lion is a great way for beginners to practice animal proportions, facial features, flowing fur, and shading. Lions may appear complicated because of their large manes and powerful bodies, but you can simplify the process by starting with basic shapes. Once the main structure is correct, you can gradually build the face, mane, paws, tail, and fur details.
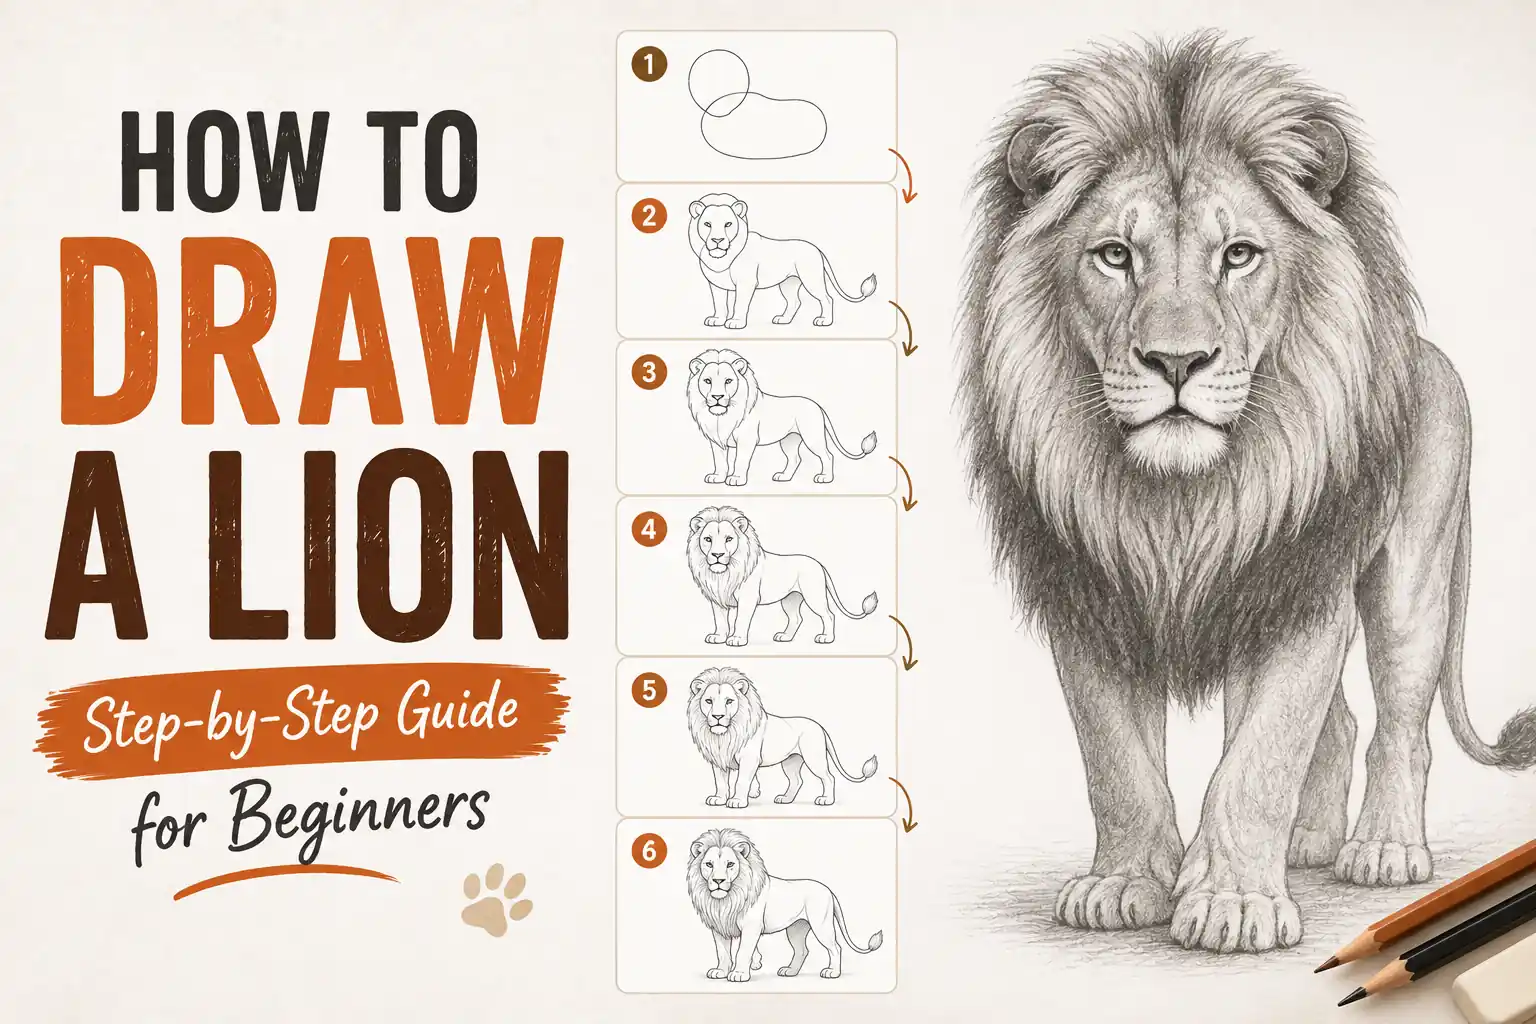
The easiest method is to work from the inside out. Start with circles and ovals for the head and body, add the legs and tail, then refine the facial features and mane. Finally, use darker pencil strokes for shadows and short, directional marks for fur. With patience and a little practice, you can create anything from a simple cartoon lion to a more realistic wildlife drawing.
Items to Buy
- Drawing paper
- HB pencil
- 2B pencil
- 4B pencil
- Eraser
- Kneaded eraser
- Sharpener
- Fine-tip black pen
- Colored pencils
- Golden-yellow colored pencil
- Brown colored pencil
- Orange colored pencil
- Black colored pencil
- Blending stump
Why Draw a Lion?
Lions are excellent subjects for learning animal drawing because their anatomy includes many useful shapes and textures.
Drawing a lion can help you practice:
- Animal proportions
- Facial structure
- Fur texture
- Symmetry
- Body construction
- Paws and claws
- Shading
- Light and shadow
- Expressive eyes
You can also experiment with different poses, including a sitting lion, roaring lion, walking lion, or lion resting on the ground.
How to Draw a Lion Step by Step
Step 1: Choose Your Lion’s Pose
Before putting detailed lines on the paper, decide what position you want your lion to have.
For beginners, a side view or three-quarter view is usually easier.
You can draw your lion:
- Standing
- Sitting
- Lying down
- Walking
- Roaring
- Looking forward
- Looking to the side
A three-quarter portrait is especially useful if you want to focus on the lion’s face and mane.
Step 2: Draw the Main Body
Begin with a large horizontal oval for the lion’s torso.
Keep your pencil strokes light.
Don’t worry about drawing muscles or fur yet.
The oval simply represents the main mass of the body.
Make it broad enough to accommodate the lion’s powerful chest and shoulders.
Step 3: Add the Chest
Sketch a slightly larger curved shape around the front portion of the torso.
The chest should look strong and substantial.
Lions have powerful shoulders and forequarters, so don’t make the front of the body too narrow.
This basic shape will help you position the front legs later.
Step 4: Add the Hips
Draw another rounded shape toward the back of the torso.
The hips should connect smoothly to the body.
Keep them slightly smaller than the main torso if you’re drawing a side-view lion.
These construction shapes don’t need to remain visible in the final drawing.
Step 5: Draw the Head
Add a rounded shape at the front of the body.
For a side-view lion, the head can be slightly smaller than the chest.
For a front-facing lion, begin with a broad circle.
Keep the head relatively compact.
Step 6: Add the Muzzle
Sketch two smaller rounded forms toward the front of the face.
These represent the muzzle.
The muzzle should extend slightly forward from the main head shape.
Don’t make it too long.
A lion’s muzzle is broad and powerful rather than narrow.
Step 7: Add the Nose
Place the nose at the front of the muzzle.
Start with a simple rounded or slightly triangular shape.
Keep it dark but don’t fill it completely if you’re still constructing the drawing.
Leave room for highlights later.
Step 8: Draw the Eyes
Position the eyes above the muzzle.
For a front-facing lion, keep them relatively symmetrical.
For a three-quarter view, the farther eye will appear slightly smaller.
Keep the eyes fairly small compared with the entire head.
This helps maintain realistic proportions.
Step 9: Add the Ears
Draw two rounded ears near the top of the head.
Lion ears aren’t perfectly circular.
Use a slightly curved outer shape and a smaller inner shape.
Keep the ears partially covered by the mane if you’re drawing a male lion.
Step 10: Sketch the Mane
The mane is one of the most recognizable features of a male lion.
Don’t draw it as a perfect circle.
Instead, create an irregular, flowing outline around the head.
Make some sections longer than others.
The mane can extend around:
- The top of the head
- The cheeks
- The neck
- The shoulders
- The upper chest
Use loose, jagged curves to suggest layers of hair.
Step 11: Draw the Neck
Connect the head to the body using two strong curved lines.
The neck should appear thick and muscular.
If you’re drawing a male lion, allow the mane to overlap portions of the neck.
For a lioness, the neck can be more clearly defined because there is no large mane.
Step 12: Add the Front Legs
Sketch the front legs underneath the chest.
Begin with broad upper legs.
Gradually narrow them toward the ankles.
Then add the paws.
Avoid making the legs perfectly straight tubes.
Use gentle changes in width to suggest muscle and joints.
Step 13: Add the Hind Legs
The hind legs should look powerful and slightly more complex than the front legs.
Start around the hip.
Create the upper leg with a curved muscular shape.
Then add the lower leg and paw.
If the lion is standing, make sure the paws appear to support the body naturally.
Step 14: Draw the Paws
Simplify the paws into rounded shapes at first.
Then divide the front of each paw into individual toe sections.
You don’t need to draw the claws prominently unless you want a dramatic or aggressive pose.
Keep the paws proportional to the legs.
Step 15: Add the Tail
Draw the tail from the rear of the body.
Make it thicker near the base.
Gradually taper it toward the end.
At the tip, add the characteristic tuft of hair.
The tail can hang downward, curve behind the body, or sweep upward depending on your pose.
Step 16: Refine the Body Silhouette
Now examine the entire lion.
Check whether:
- The head is proportional
- The chest looks powerful
- The legs support the body
- The hips connect naturally
- The tail emerges correctly
- The neck is thick enough
Erase construction lines that you no longer need.
Don’t begin detailed fur until the overall shape looks right.
Step 17: Add Facial Details
Now refine the lion’s face.
Add:
- Eyebrows
- Nose details
- Mouth
- Cheeks
- Whisker spots
- Jawline
Use curved lines rather than rigid geometric shapes.
The facial features should follow the underlying structure of the skull.
Step 18: Draw the Mouth
For a relaxed lion, draw a simple closed mouth.
For a roaring lion, open the jaw and show the teeth.
If the mouth is open, carefully construct the upper and lower jaws before adding individual teeth.
Keep the teeth relatively small compared with the size of the head.
Step 19: Add Whiskers
Place several small dots around the muzzle.
Then add thin whiskers extending outward.
Don’t make every whisker the same length.
Use very light lines so they don’t overpower the face.
Step 20: Add Fur Texture
Now begin adding fur.
Use short pencil strokes that follow the direction of the lion’s body.
Different areas need different stroke directions.
For example:
- Forehead fur follows the shape of the head.
- Cheek fur flows outward.
- Chest fur points downward.
- Back fur follows the body.
- Leg fur follows the limbs.
Avoid drawing individual hairs everywhere.
Groups of strokes create a more realistic effect.
Step 21: Detail the Mane
The mane needs longer and more flowing strokes than the rest of the body.
Start near the face and work outward.
Vary the length and direction of the strokes.
Some sections should overlap others.
This creates the layered appearance of a thick mane.
Step 22: Add Shadows
Choose a clear light source.
Then darken areas away from the light.
Good places for shadows include:
- Under the mane
- Beneath the chin
- Around the muzzle
- Under the belly
- Between the legs
- Behind the ears
- Around the paws
Build shadows gradually.
Step 23: Add Highlights
Use a kneaded eraser to lift graphite from selected areas.
Highlights can be added to:
- Nose
- Eyes
- Forehead
- Mane
- Shoulder
- Back
Small highlights in the eyes can make the lion appear much more alive.
Step 24: Strengthen Important Lines
Once the drawing is complete, reinforce selected areas with a darker pencil.
Use stronger lines around the:
- Nose
- Eyes
- Jaw
- Mane
- Feet
- Tail tip
Keep the fur lines lighter.
This gives the finished drawing better visual hierarchy.
How to Draw a Realistic Lion
Realistic lion drawings depend on proportion, anatomy, texture, and value.
Don’t rely on thousands of individual fur lines.
Instead, establish large light and dark areas first.
Then add fur texture over those forms.
Pay special attention to the eyes, nose, muzzle, and mane because these features strongly influence the lion’s expression.
How to Draw a Lion Face
If you only want to draw the face, begin with a broad circle.
Add a vertical center guideline and a horizontal guideline.
Place the eyes along the horizontal guide.
Then add the muzzle below them.
Position the nose at the center of the muzzle.
Add the ears at the top.
Finally, build the mane around the head.
This construction method helps keep the face symmetrical.
How to Draw a Lion Roaring
A roaring lion creates a dramatic drawing.
Start by tilting the head slightly upward.
Open the jaw.
Then add:
- Upper teeth
- Lower teeth
- Tongue
- Throat
- Wrinkled muzzle
- Raised mane
Make the mouth one of the darkest areas in the drawing.
You can also add a slightly raised front paw to create a more powerful pose.
How to Draw a Lioness
Lionesses don’t have the large mane of adult male lions.
Use a slimmer head silhouette.
Keep the neck clearly visible.
The facial structure can remain similar, but the surrounding fur should be shorter and less dramatic.
For a realistic lioness, focus more on subtle fur direction and facial shading.
How to Draw a Cute Lion
For a cartoon lion, simplify the anatomy.
Make the:
- Head larger
- Eyes bigger
- Body rounder
- Legs shorter
- Paws larger
Use a simplified mane made from rounded or scalloped shapes.
A small smiling mouth can give the lion a friendly appearance.
How to Draw a Lion for Beginners
If you’re completely new to drawing animals, simplify the process into basic shapes:
- Oval for the body
- Circle for the head
- Smaller shapes for the muzzle
- Four shapes for the legs
- Curved line for the tail
- Large irregular shape for the mane
Once these proportions look right, add the eyes, nose, ears, paws, and fur.
How to Draw a Lion With Colored Pencils
Start with a light tan or golden base.
Then layer:
- Yellow
- Ochre
- Light brown
- Dark brown
- Orange
- Black
Use darker browns around the mane and shadowed areas.
Build color gradually.
Use short directional strokes to create the appearance of fur.
Leave small lighter areas around the forehead, muzzle, and shoulders to create highlights.
How to Draw a Lion With Watercolors
Begin with a very light pencil sketch.
Apply a pale golden wash over the body.
Allow it to dry.
Add slightly darker layers around the shadows and mane.
Use a smaller brush for the face and fur details.
Keep some areas of the paper lighter so the lion doesn’t become visually flat.
How to Draw a Lion From Different Angles
Side View
Show the profile of the head and body.
This is one of the easiest views for beginners.
Front View
Focus on facial symmetry.
The mane can surround the face like a large frame.
Three-Quarter View
This creates a more dimensional appearance.
One side of the face should appear slightly more prominent.
Walking View
Shift the legs into different positions to create movement.
How to Make Your Lion Look Three-Dimensional
Think of the lion as a collection of rounded forms.
The head is a sphere-like shape.
The muzzle protrudes from the front.
The chest is a large volume.
The legs are cylindrical but muscular.
The mane surrounds the head and neck.
Add shadows where these forms overlap.
This creates depth without requiring excessive detail.
Common Mistakes to Avoid
Making the Head Too Large
Keep it proportional to the body.
Drawing a Perfectly Circular Mane
A natural mane has irregular, flowing edges.
Making the Legs Too Thin
Lions have powerful limbs.
Adding Fur Too Early
Get the anatomy right before adding texture.
Making Every Hair the Same Length
Vary the direction and length of your strokes.
Forgetting the Tail Tuft
The tuft is an important recognizable detail.
Making the Eyes Too Large
Keep realistic eyes relatively small.
Using Heavy Lines Everywhere
Use stronger lines selectively.
Easy Lion Drawing Ideas
Lion Portrait
Focus on the face, mane, eyes, and muzzle.
Roaring Lion
Open the mouth and emphasize the teeth and mane.
Lion and Cub
Draw a larger adult lion beside a smaller cub.
Lion in the Grass
Add grass and a simple natural background.
Cute Cartoon Lion
Use rounded shapes and oversized eyes.
Lion Silhouette
Create a simple dark silhouette with a recognizable mane and tail.
FAQs
Is a lion easy to draw?
A lion can be simplified into basic shapes, making it suitable for beginners. The most challenging part is usually adding realistic fur and facial details.
What should I draw first?
Start with the body, head, and basic limb shapes. Add the mane and facial details after the proportions are established.
How do I draw a lion’s mane?
Create an irregular outline around the head and neck, then use long, flowing strokes that radiate outward.
How do I make a lion look realistic?
Focus on accurate proportions, facial structure, fur direction, light and shadow, and gradual tonal changes.
How do I draw a lion’s face?
Start with a broad head shape, add the eyes, muzzle, nose, ears, and mouth, then surround the head with the mane.
What colors should I use for a lion?
Golden yellow, tan, ochre, light brown, dark brown, and cream work well for a traditional lion color palette.
How do I draw a lion roaring?
Tilt the head upward, open the jaw, add the teeth and tongue, and emphasize the facial and mane fur.
How do I draw a cute lion?
Make the head larger, eyes bigger, body rounder, and features simpler while retaining the recognizable mane and tail.
What pencil is best for lion drawings?
HB is useful for construction, while 2B and 4B work well for darker shadows and fur.
How do I draw realistic fur?
Use short strokes that follow the direction of the body. Build larger light and dark shapes first, then add selective fur details.
Final Words
Learning how to draw a lion becomes much easier when you break the animal into simple shapes before adding details. Begin with the body, head, muzzle, legs, and tail, then build the mane and facial features. Once the proportions are correct, use directional fur strokes, shading, and highlights to give your lion depth and character.
Don’t worry if your first lion doesn’t look perfect. Practice the basic structure several times before attempting detailed fur. Try different poses, expressions, and styles as your confidence grows. With regular practice, you can create everything from a simple cartoon lion to a powerful, realistic wildlife illustration.