
Learning how to draw a sloth is a fun and relaxing drawing project for beginners. With its round face, long arms, curved claws, and fluffy body, a sloth can be created from a few simple shapes before adding smaller details.
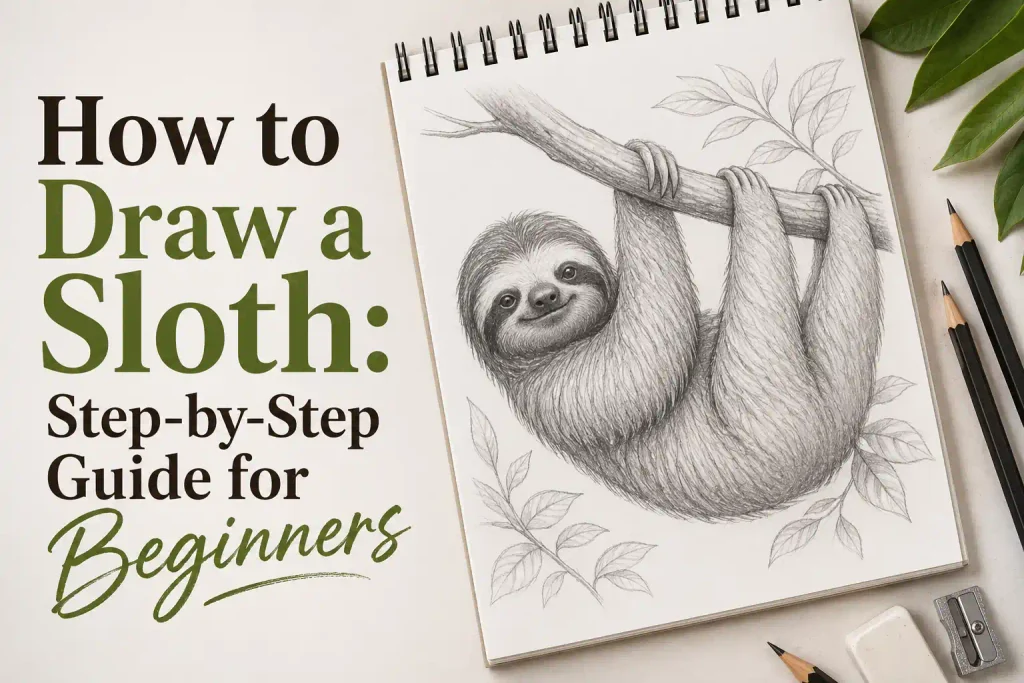
Whether you want to draw a cute cartoon sloth, a realistic sloth, or a sloth hanging from a tree branch, the process becomes easier when you work step by step. Start with basic shapes, refine the body, and finish with fur, shading, and color.
Items to Buy
- Drawing Pencil
- Eraser
- Sketchbook
- Fine-Line Pen
- Colored Pencils
- Markers
- Brown Colored Pencil
- Green Colored Pencil
- Blending Pencil
- Pencil Sharpener
Why Learn How to Draw a Sloth?
Sloths are great subjects for beginners because their bodies can be simplified into rounded shapes. Their relaxed poses also allow you to focus on proportion, facial expressions, texture, and basic anatomy without creating complicated movement.
Drawing a sloth can also help you practice curved lines and organic shapes. Once you learn the basic structure, you can easily create different poses, expressions, environments, and artistic styles.
How to Draw a Sloth Step by Step
Step 1: Draw the Head Shape
Begin with a light pencil sketch of the sloth’s head. Use a large rounded or slightly oval shape rather than making it perfectly circular.
Keep the head fairly large compared with the body if you want a cute cartoon appearance. Leave enough space around it for the ears, facial markings, and body.
Step 2: Sketch the Body
Under the head, draw a larger rounded shape for the sloth’s body. Sloths have compact, curved bodies, so avoid making the torso completely straight.
Connect the head and body with smooth lines. Keep your construction marks light because you will adjust the proportions as you add the limbs.
Step 3: Add the Face
Now draw the sloth’s facial features. Place two small eyes near the center of the face and add a rounded nose underneath them.
You can create a gentle smile below the nose to give your sloth a friendly expression. For a cute illustration, make the eyes slightly larger and keep the facial features simple.
Step 4: Draw the Ears and Face Markings
Add two small rounded ears on the sides of the head. They should be visible but not overly large.
Next, sketch the darker facial markings that surround the eyes and extend toward the sides of the face. Keep these markings soft and curved so they follow the shape of the sloth’s head.
Step 5: Draw the Arms
Sketch the sloth’s long arms extending from the upper body. If you are drawing a sloth hanging from a branch, make the arms curve upward around the branch.
Keep the arms rounded rather than making them perfectly straight. Slight bends will make the pose look more natural and give the sloth a relaxed appearance.
Step 6: Add the Legs
Draw the hind legs near the lower portion of the body. Depending on the pose, they can hang downward, curve around a branch, or rest against the body.
Use simple curved shapes at first. Make the legs slightly wider near the body and narrower toward the feet to create a natural transition.
Step 7: Draw the Claws
Now add the sloth’s characteristic claws. Draw two or three long, curved claws at the ends of the hands and feet.
The claws should curve inward slightly. Keep them relatively thin and pointed, but avoid making them extremely sharp or oversized compared with the limbs.
Step 8: Add Fur Texture
Begin adding short, curved strokes across the body to represent fur. Follow the direction of the body rather than drawing random lines.
Use longer strokes around the outer edges and shorter strokes around the face and limbs. You do not need to draw every individual hair. A few carefully placed marks can create the impression of soft fur.
Step 9: Refine the Outline and Add Details
Go over your best pencil lines with a darker pencil or fine-line pen. Strengthen the face, ears, arms, legs, claws, and body outline.
Erase unnecessary construction marks and add extra fur texture where needed. You can also add a few lines around the hands and feet to show how the claws grip a branch.
Step 10: Add Color and Shading
Finish your sloth drawing with color. Browns, tans, beige, gray, and soft green tones can work well for a natural-looking illustration.
Add darker shading beneath the head, around the limbs, inside the facial markings, and where the body overlaps the branch. Leave lighter areas on the face and raised parts of the fur to create dimension.
How to Draw a Cute Sloth
For a cute sloth, make the head slightly larger than the body and use simple rounded shapes. Give the sloth large friendly eyes and a small smiling mouth.
You can also add a tiny flower, heart, leaf, or colorful accessory. A soft pastel color palette can make the finished drawing look especially playful.
How to Draw a Sloth Hanging from a Tree
Start by drawing a thick curved branch across the upper part of your page. Sketch the sloth’s body underneath it and position the arms and legs around the branch.
Make the claws wrap around the branch rather than simply touching it. Add a few leaves and vines around the scene to make the sloth’s environment more recognizable.
How to Draw a Sloth Face
A sloth face can be drawn using a large rounded shape. Add two small eyes, a dark rounded nose, and a gentle curved mouth.
The most important detail is the facial pattern. Create soft darker areas around the eyes and sides of the face while leaving the center of the face lighter.
How to Draw a Cartoon Sloth
A cartoon sloth can use exaggerated proportions and simplified details. Start with a large head, small body, short facial features, and long curved limbs.
Give the sloth a relaxed expression and exaggerated claws. You can also create a funny pose, such as the sloth sleeping on a branch or holding a leaf.
How to Draw a Realistic Sloth
For a realistic sloth, focus more carefully on body proportions and fur direction. Keep the face smaller and make the limbs appear longer and more naturally curved.
Use multiple shades of brown, gray, and beige to create depth. Layer small fur strokes over darker shadows while keeping some areas softer and less detailed.
How to Draw a Sloth in a Tree
Draw the tree trunk and branches first so you can plan the sloth’s position. Then sketch the body around one of the branches.
Add large tropical leaves, vines, and smaller branches around the animal. Use darker shading where the sloth overlaps the tree to make the subject appear connected to its surroundings.
Easy Sloth Drawing Ideas
Once you know the basic structure, try these fun variations:
- Cute sloth
- Sloth hanging from a branch
- Sleeping sloth
- Baby sloth
- Cartoon sloth
- Realistic sloth
- Sloth holding a leaf
- Sloth in a tree
- Sloth with flowers
- Sloth surrounded by leaves
- Sloth face
- Sloth family
How to Make Your Sloth Drawing Look Better
Start with light construction lines and gradually darken the final outline. This gives you plenty of room to correct the proportions before committing to details.
Pay attention to the direction of the fur and the curves of the limbs. A relaxed animal should not look stiff, so use soft lines and gentle bends throughout the body.
Common Mistakes to Avoid
One common mistake is making the limbs too short. Sloths are known for their long arms and legs, so give them enough length to create the characteristic silhouette.
Another mistake is drawing too much fur detail too early. Finish the body shape first, then add texture. Also make sure the claws follow the direction of the fingers instead of appearing as separate shapes attached to the hands.
Tips for Better Sloth Drawings
Practice the sloth’s face separately before attempting the entire animal. Once you are comfortable with the eyes, nose, facial markings, and ears, the rest of the drawing becomes easier.
Try drawing the sloth in several poses. A hanging pose is particularly useful because it teaches you how limbs wrap around a branch. Experiment with sitting, climbing, sleeping, and upside-down positions to develop your skills.
FAQs
Is drawing a sloth easy for beginners?
Yes. A sloth can be simplified into basic rounded shapes, making it a good subject for beginners. You can start with a cartoon version before trying a more detailed drawing.
What colors should I use for a sloth?
Brown, gray, tan, beige, and cream are useful for natural-looking sloths. You can also use brighter colors if you want to create a cartoon or fantasy illustration.
How do I draw a sloth’s claws?
Draw two or three curved shapes extending from each hand or foot. Keep the claws attached naturally to the limbs and curve them around a branch when drawing a hanging sloth.
How can I make my sloth look cute?
Use a large rounded head, simple facial features, expressive eyes, and a small smiling mouth. Slightly exaggerating the head-to-body ratio can create a cute appearance.
How do I draw realistic sloth fur?
Use short curved strokes that follow the direction of the body. Layer darker and lighter marks instead of outlining every individual hair.
What should I draw after learning how to draw a sloth?
Try drawing other rainforest animals such as monkeys, toucans, frogs, parrots, or jaguars. You can also combine them into a complete tropical forest scene.
Final Words
Learning how to draw a sloth is a simple and enjoyable way to practice animal drawing. By building the animal from basic shapes and gradually adding its face, long limbs, claws, fur texture, and shading, you can create a charming sloth illustration step by step.
Keep practicing different poses and styles to make your drawings more expressive. Whether you choose a cute cartoon sloth or a detailed realistic version, patience and simple construction lines will help you create a better result with every drawing.