
Learning how to draw Jordans is a great way to practice sneaker design, perspective, proportions, shading, and small details. Jordan-style sneakers have recognizable shapes, layered panels, thick soles, laces, and distinctive design elements that make them exciting subjects for artists.
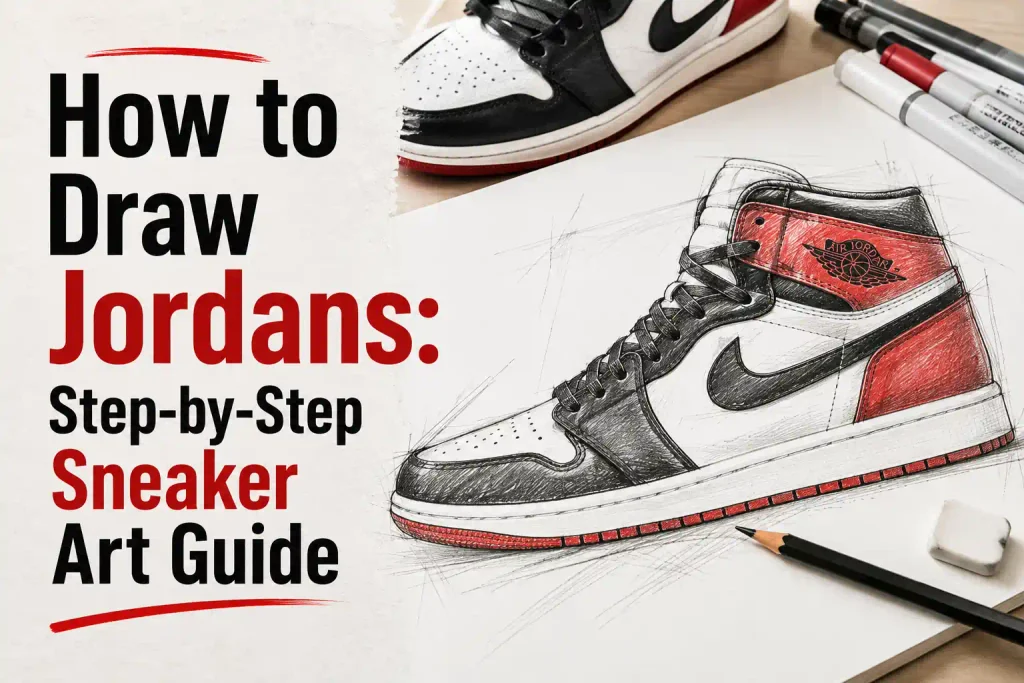
You do not need advanced drawing skills to get started. By breaking the sneaker into simple shapes and gradually adding its panels, sole, tongue, laces, and textures, you can create an impressive sneaker illustration. Start with a basic side view and then experiment with different angles and styles.
Items to Buy
- Drawing Pencil
- Eraser
- Sketchbook
- Ruler
- Fine-Line Pen
- Colored Pencils
- Markers
- Black Colored Pencil
- White Gel Pen
- Blending Pencil
- Pencil Sharpener
Why Learn How to Draw Jordans?
Sneakers are excellent subjects for learning how to draw three-dimensional objects. A Jordan-style shoe contains overlapping panels and curved surfaces, giving you plenty of opportunities to practice perspective and proportion.
Drawing sneakers can also improve your fashion illustration skills. Once you understand the basic shoe structure, you can design your own colorways, patterns, materials, and custom sneaker concepts.
How to Draw Jordans Step by Step
Step 1: Sketch the Basic Sneaker Shape
Start by lightly drawing the overall silhouette of the sneaker. For a side view, create a long, slightly curved shape for the toe, foot area, heel, and sole.
Do not add any details yet. Think of the shoe as a collection of simple forms. Keep the bottom relatively flat and leave enough room above it for the upper portion of the sneaker.
Step 2: Shape the Toe and Heel
Refine the front and back of the shoe. The toe should have a rounded, slightly raised shape, while the heel should rise more vertically.
Connect these areas with smooth lines across the top of the sneaker. Pay attention to the overall proportions because an incorrectly shaped silhouette can make the shoe look distorted even after details are added.
Step 3: Draw the Thick Sole
Add the midsole underneath the upper section. Follow the existing bottom contour while keeping the sole slightly thick.
Create another line beneath it to represent the outsole. Add gentle curves and small separations where appropriate. The sole should follow the perspective of the entire sneaker rather than appearing completely flat.
Step 4: Add the Main Shoe Panels
Now divide the upper into its major sections. Add curved panel lines around the toe, sides, heel, and ankle area.
These overlapping sections give the sneaker its structured appearance. Keep your lines clean and smooth, and remember that panels should follow the three-dimensional shape of the shoe.
Step 5: Draw the Ankle Collar and Tongue
At the top of the sneaker, sketch the ankle collar. Make it slightly padded and curved to suggest thickness.
Then add the tongue rising from the opening. The tongue can be partially visible depending on the angle of the sneaker. Add a small label area near the top if you want to create additional sneaker detail.
Step 6: Add the Laces
Draw the lace area across the center of the upper. Start by creating several eyelets along the sides of the tongue.
Then add the laces using curved or slightly diagonal lines that cross from one side to the other. Keep the spacing relatively consistent, but allow the laces to bend naturally instead of looking perfectly rigid.
Step 7: Add Stitching and Small Details
Add stitching lines along the major panels. Use short, evenly spaced marks rather than drawing one heavy line.
You can also add decorative perforations, seams, textured sections, and other small details. Keep them proportional to the sneaker so the drawing remains clean and recognizable.
Step 8: Add Signature-Inspired Design Details
Jordan sneakers are known for distinctive branding and design elements. If you are creating a study or fan-art style drawing, you can add recognizable basketball-inspired details such as a winged emblem or a small jumping basketball-player silhouette.
For an original sneaker concept, replace these with your own symbols, initials, patterns, or graphics. This is a great opportunity to turn a basic sneaker drawing into a unique design.
Step 9: Refine the Outline and Add Shading
Go over the strongest lines with a darker pencil or fine-line pen. Erase construction lines that are no longer needed.
Add shadows underneath the tongue, around overlapping panels, beneath the laces, inside the ankle opening, and underneath the sole. Stronger shadows in these areas will make the sneaker appear more three-dimensional.
Step 10: Add Color and Final Highlights
Choose a color combination for your sneaker and apply it carefully to each panel. You can use classic black and white, red and black, blue and white, or create your own custom colorway.
Finish with highlights along raised edges and smooth surfaces. A white gel pen or light-colored pencil can help create small reflective details, making the sneaker look cleaner and more realistic.
How to Draw Jordans from the Side
The side view is one of the easiest perspectives for beginners because it clearly shows the sneaker’s silhouette. Begin with the toe, sole, heel, and ankle collar before adding the panel structure.
Keep the sole aligned with the direction of the shoe. Once the silhouette is correct, add the laces, stitching, panels, and other details.
How to Draw Jordans from the Front
For a front view, start with the centerline of the sneaker. Sketch the toe box around this line and gradually build the sides outward.
Make the left and right sides approximately symmetrical. Add the tongue in the center and draw the laces extending outward. Use shading along the sides of the shoe to create depth.
How to Draw Jordans from the Back
Begin with the heel as a rounded vertical shape. Add the ankle collar at the top and the sole underneath.
Panel seams can then be drawn around the heel. Add a small logo or original design element if desired, and use shading along the edges to show the curved structure of the back.
How to Draw Jordans in Perspective
Perspective can make a sneaker drawing look much more dynamic. Begin with a simple three-dimensional box or wedge to establish the shoe’s overall direction.
Build the toe and heel around that guide, then add the sole and upper panels. Parts of the sneaker closer to the viewer should generally appear larger, while distant areas can appear smaller.
How to Draw High-Top Jordans
For a high-top design, make the ankle section taller than a low-top sneaker. Start with the foot portion and then extend the upper upward around the ankle.
Add a padded collar, tongue, laces, and overlapping ankle panels. Use curved lines to show the thickness of the padding and make the high-top structure look substantial.
How to Draw Low-Top Jordans
A low-top sneaker has a shorter ankle section, making the overall silhouette lower and more streamlined. Begin with the same basic foot shape used for other sneaker drawings.
Reduce the height around the ankle and emphasize the toe, side panels, laces, and sole. This simplified structure can be particularly useful for beginners.
How to Draw Jordans with Colored Pencils
Colored pencils are excellent for creating detailed sneaker illustrations. Start with light layers of your chosen colors and gradually increase the intensity.
Use darker shades along panel edges and underneath overlapping sections. Leave small areas lighter to represent highlights. For materials such as leather or synthetic surfaces, smooth coloring usually works better than rough, heavily textured strokes.
How to Draw Realistic Sneakers
Realistic sneaker drawings depend on accurate proportions, perspective, texture, and lighting. Before adding details, make sure the basic silhouette looks correct.
Use different shading strengths for different materials. Smooth leather can have clean highlights, while mesh or fabric can be represented with small repeated marks. Keep the strongest shadows where parts overlap or sit close to the sole.
How to Draw a Custom Jordan-Style Sneaker
After mastering the basic structure, create your own sneaker design. Change the color scheme, panel shapes, sole pattern, lace style, and decorative graphics.
Try unusual combinations such as metallic accents, contrasting panels, geometric patterns, or personalized symbols. Designing your own version lets you practice the same construction skills while developing creativity.
Easy Sneaker Drawing Ideas
Try these ideas after completing your first sneaker:
- High-top sneaker
- Low-top sneaker
- Side-view sneaker
- Front-view sneaker
- Sneaker in perspective
- Red and black sneaker
- Black and white sneaker
- Colorful basketball sneaker
- Custom sneaker
- Sneaker with patterned panels
- Sneaker with glowing accents
- Sneaker collection
How to Make Your Sneaker Drawing Look Better
Always spend time getting the silhouette right before adding small details. A strong outline makes the finished drawing much more convincing.
Use overlapping lines to show which panels sit above or below others. Add shadows underneath raised sections and keep highlights on areas facing the light. These simple techniques can dramatically improve the three-dimensional appearance.
Common Mistakes to Avoid
One common mistake is making the sole too thin or completely straight. Sneaker soles have thickness and curves, so give them enough visual weight.
Another mistake is adding logos and tiny details before establishing the shoe’s proportions. Work from large shapes to small details. Also avoid drawing every lace as a perfectly straight line because natural curves make the sneaker feel more realistic.
Tips for Better Sneaker Art
Use reference images when practicing unfamiliar sneaker shapes, especially when learning perspective. Study how the sole, toe, heel, tongue, and panels connect.
Practice the same sneaker from several angles instead of repeatedly drawing only one view. Side, front, back, and three-quarter views will help you understand the shoe as a three-dimensional object.
If you want to develop your own sneaker designs, sketch several silhouettes first. Choose the strongest one and then develop its panels, colors, materials, and details.
FAQs
Is drawing Jordans difficult for beginners?
It can look complicated because of the many panels and details, but the basic sneaker can be broken into simple shapes. Start with a side view and gradually add the smaller features.
What pencil should I use for sneaker drawings?
An HB pencil is a good choice for construction lines. A softer 2B or 4B pencil can be useful for darker shadows and final details.
How do I make my sneaker look three-dimensional?
Focus on perspective, overlapping panels, shading, and highlights. Darken areas underneath raised sections and keep highlights on surfaces facing your imaginary light source.
How do I draw sneaker laces?
First draw the tongue and eyelets, then connect the eyelets with curved lines. Keep the laces following the shape of the sneaker rather than crossing randomly.
Can I design my own Jordan-style sneaker?
Yes. Use the basic sneaker structure as a starting point and experiment with your own colors, panel arrangements, patterns, symbols, and materials.
Should I draw the logo first?
No. Establish the overall sneaker shape first. Once the proportions and panels are correct, add small branding-inspired or original graphic details near the end.
What should I draw after learning how to draw Jordans?
Try drawing other sneakers, basketball shoes, running shoes, boots, or an entire sneaker collection. Practicing different footwear designs will improve your understanding of shape and perspective.
Final Words
Learning how to draw Jordans is a great way to build your sneaker illustration skills. Start with the basic silhouette, shape the toe and heel, build the sole and panels, then add the tongue, laces, stitching, details, shading, and color.
With regular practice, you can move beyond simple side-view drawings and create sneakers from different angles and perspectives. Experiment with custom colors and original designs to turn each drawing into your own piece of sneaker art.