
Learning how to draw a leather jacket is a great beginner-friendly art project because you can practice clothing proportions, folds, seams, pockets, zippers, and realistic texture. A leather jacket may look complicated at first, but breaking it into simple shapes makes the drawing much easier. Start with the overall jacket silhouette before adding the smaller construction details.
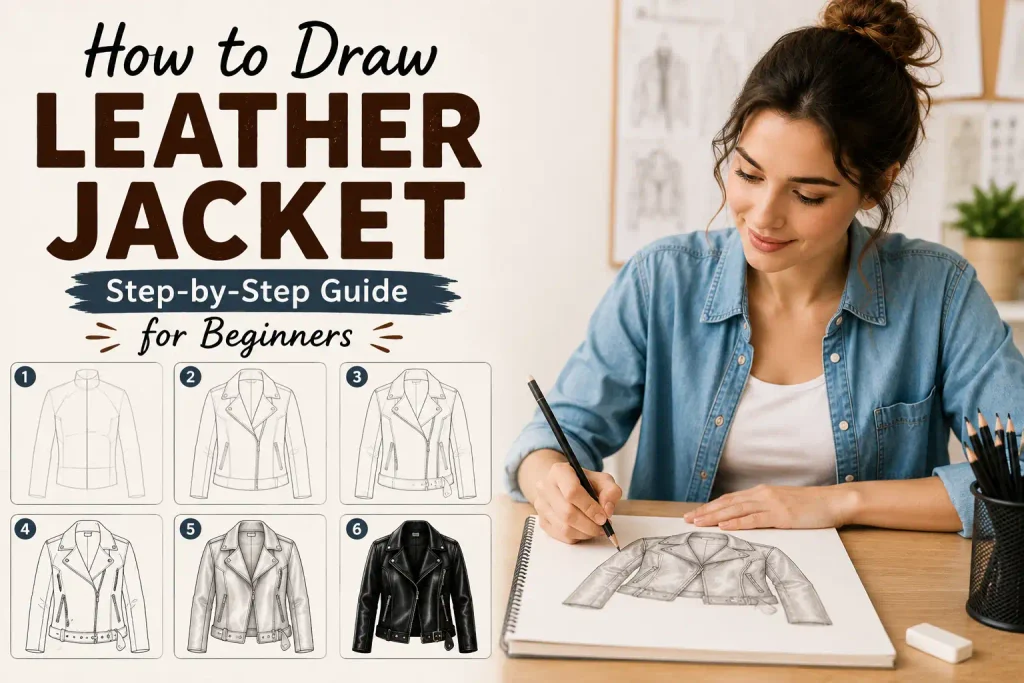
The secret to a convincing leather jacket is showing its structure and material. Leather has characteristic folds, highlights, seams, and slightly irregular surfaces. Once your basic jacket shape is complete, you can use darker shading around the folds and brighter highlights on raised areas to create a realistic leather appearance.
Items to Buy
- Drawing paper
- HB pencil
- 2B pencil
- 4B pencil
- Eraser
- Kneaded eraser
- Sharpener
- Ruler
- Fine-tip drawing pen
- Black colored pencil
- Brown colored pencil
- Gray colored pencil
- White colored pencil
- Blending stump
Why Draw a Leather Jacket?
A leather jacket combines simple clothing shapes with interesting textures and details.
Drawing one can help you practice:
- Clothing proportions
- Symmetry
- Perspective
- Fabric folds
- Seams
- Zippers
- Pockets
- Buttons
- Shading
- Material texture
You can also experiment with biker jackets, bomber jackets, cropped jackets, oversized styles, and colorful leather designs.
How to Draw a Leather Jacket Step by Step
Step 1: Choose the Jacket Position
First, decide how you want your jacket to appear.
You can draw it:
- Straight from the front
- From the side
- At a three-quarter angle
- Hanging on a hook
- Worn by a person
- Lying flat
For beginners, a front-facing jacket is the easiest place to start because the main shapes are easier to organize.
Step 2: Draw the Center Guideline
Start with a light vertical line down the middle of your page.
This will help you keep the jacket balanced.
If you’re drawing a jacket with an asymmetrical zipper, the guideline still helps establish the overall center of the garment.
Keep this line very light.
Step 3: Sketch the Torso
Draw a large shape for the main body of the jacket.
Start near the shoulders and gradually taper the shape toward the waist.
Don’t make it perfectly rectangular.
A jacket usually has curved sides that follow the shape of the torso.
Step 4: Add the Shoulders
Extend the upper body outward to create the shoulders.
Make the shoulder line slightly curved.
For a fitted leather jacket, keep the shoulders relatively structured.
For an oversized jacket, make them wider and slightly lower.
Step 5: Draw the Collar
Add the collar around the neckline.
For a classic biker jacket, create two pointed lapels.
For a bomber jacket, use a rounded collar.
For a simple leather jacket, you can use a narrow standing collar.
Keep the collar symmetrical if you’re drawing the jacket from the front.
Step 6: Add the Sleeves
Sketch the sleeves extending from the shoulders.
Start with broad upper sleeves.
Then gradually narrow them toward the wrists.
Avoid making them completely straight.
A slight curve makes the sleeves look more natural.
Step 7: Add the Cuffs
At the end of each sleeve, draw the cuffs.
Depending on the jacket style, cuffs may have:
- Zippers
- Buttons
- Snaps
- Folded edges
- Ribbed sections
For a classic leather jacket, a small zipper or snap detail works well.
Step 8: Draw the Main Opening
Add the jacket’s front opening.
For a standard jacket, this can be a vertical center line.
For a biker jacket, the zipper may run diagonally across the chest.
This detail immediately makes the drawing more recognizable as a leather jacket.
Step 9: Add the Zipper
Draw two narrow parallel lines for the zipper.
Then add small zipper teeth or a simplified zipper track.
Keep the details small.
A zipper should enhance the drawing rather than dominate it.
Step 10: Add the Pockets
Sketch the pockets on the lower front.
You can create:
- Horizontal pockets
- Diagonal pockets
- Zipper pockets
- Flap pockets
For a biker jacket, diagonal zipper pockets can create a strong visual feature.
Step 11: Add the Chest Details
Depending on the style, add:
- Chest pockets
- Zippers
- Decorative panels
- Snaps
- Seams
- Small badges
Keep the details aligned with the jacket’s construction.
Step 12: Add Seams
Seams are essential for making the jacket look constructed rather than like a flat shirt.
Add lines along:
- Shoulders
- Sleeves
- Side panels
- Cuffs
- Collar
- Pockets
Use subtle curved lines to follow the shape of the jacket.
Step 13: Refine the Jacket Silhouette
Step back and examine the entire shape.
Check:
- Shoulder width
- Sleeve length
- Jacket length
- Collar position
- Waist width
- Pocket placement
Erase construction lines that aren’t needed.
Make sure both sleeves look connected naturally to the shoulders.
Step 14: Add Leather Folds
Now begin adding wrinkles and folds.
Leather folds usually appear around areas where the material bends or compresses.
Useful locations include:
- Elbows
- Wrists
- Underarms
- Waist
- Shoulders
- Around pockets
- Near the zipper
Use curved lines rather than random wrinkles.
Step 15: Add Leather Texture
Leather doesn’t need to be covered with hundreds of tiny lines.
Instead, add subtle irregular marks.
You can suggest leather using:
- Fine scratches
- Small creases
- Slight tonal variations
- Edge wear
- Tiny wrinkles
Keep the texture concentrated around areas that naturally receive wear.
Step 16: Strengthen the Outline
Once you’re happy with the construction, strengthen the outer silhouette.
Darken the:
- Shoulders
- Sleeves
- Collar
- Jacket hem
- Cuffs
Keep internal seams slightly lighter.
This gives your illustration a clear visual hierarchy.
Step 17: Add Shadows
Choose a light source.
Then add darker areas on the opposite side.
Good shadow locations include:
- Under the collar
- Inside the sleeves
- Beneath the arms
- Around pockets
- Along the zipper
- Under folds
- Near the jacket hem
Build the shadows gradually.
Step 18: Add Leather Highlights
Leather often has strong highlights because of its relatively smooth surface.
Use a kneaded eraser or white pencil to add highlights along raised areas.
Good locations include:
- Shoulders
- Chest
- Sleeves
- Collar
- Upper arms
Keep the highlights narrow and irregular rather than perfectly straight.
How to Draw a Black Leather Jacket
Start with a light graphite construction.
Once the shape is correct, use darker values throughout the jacket.
Don’t fill everything with pure black.
Instead, use different shades of gray and black.
Leave highlights on the shoulders, sleeves, and chest.
This makes the black leather look dimensional rather than flat.
How to Draw a Brown Leather Jacket
Use several brown tones.
Start with a light tan or medium brown.
Add darker brown around:
- Seams
- Folds
- Pockets
- Sleeves
- Collar
Use lighter brown or cream for highlights.
A few darker irregular marks can suggest worn leather.
How to Draw a Biker Leather Jacket
A biker jacket usually has a distinctive diagonal front zipper.
Start with the main torso.
Add:
- Wide lapels
- Diagonal zipper
- Zipper pockets
- Snaps
- Cuffs
- Seams
- Belt or waist detail
Keep the shoulders structured.
Add deeper shadows around the folds to create a rugged appearance.
How to Draw a Leather Jacket on a Person
Start by drawing the person’s basic body proportions.
Then place the jacket over the torso.
The jacket should follow the body underneath it.
Pay attention to where the fabric bends around:
- Shoulders
- Elbows
- Waist
- Chest
Don’t draw the jacket as a rigid shell.
Let the leather folds follow the person’s pose.
How to Draw an Oversized Leather Jacket
Make the shoulders wider.
Extend the sleeves farther from the arms.
Allow extra material around the torso.
Add larger folds around the elbows and waist.
The hem should sit farther away from the body.
This creates the relaxed appearance of an oversized jacket.
How to Draw a Cropped Leather Jacket
Shorten the torso section.
Keep the jacket ending around the waist or slightly above it.
Make the sleeves proportional to the shortened body.
Add a defined waistband or hem.
A cropped jacket can also have a slightly boxier silhouette.
How to Draw a Leather Jacket With Colored Pencils
Begin with a light base color.
For black leather, layer gray, dark gray, and black.
For brown leather, layer tan, brown, dark brown, and cream.
Build color slowly.
Use short strokes for subtle texture.
Leave some areas lighter to represent reflected light.
How to Draw a Leather Jacket With Markers
Markers work well for bold fashion illustrations.
Begin with a clean pencil sketch.
Outline the jacket.
Apply a light base tone.
Then add darker marker strokes around folds, seams, and pockets.
Leave selected areas uncolored to create highlights.
Use a fine-tip pen for zippers and stitching.
How to Make Leather Look Realistic
The most important thing is contrast.
Smooth leather often has clear transitions between highlights and shadows.
Start by identifying the raised surfaces.
Make them lighter.
Darken the areas where folds overlap.
Then add only a few fine texture marks.
Too much texture can make leather look like rough fabric instead of smooth leather.
Common Mistakes to Avoid
Making the Jacket Too Symmetrical
Real jackets can have slight irregularities, especially around folds.
Drawing Straight Sleeves
Sleeves should follow the arms and have natural bends.
Forgetting Seams
Seams help communicate how the jacket is constructed.
Adding Too Many Wrinkles
Use folds where the material naturally bends.
Making Leather Completely Matte
Use highlights to suggest the material’s smooth surface.
Overusing Black
Even black leather needs different values to show its shape.
Making the Zipper Too Large
Keep hardware proportional to the jacket.
Easy Leather Jacket Drawing Ideas
Classic Black Leather Jacket
Create a simple front-facing jacket with silver zipper details.
Brown Vintage Jacket
Use warm brown tones and subtle distressed texture.
Biker Jacket
Add diagonal zippers, wide lapels, snaps, and pockets.
Cropped Leather Jacket
Create a shorter silhouette with a defined waist.
Oversized Leather Jacket
Use broad shoulders and loose sleeves.
Fashion Illustration
Draw a stylish jacket with exaggerated proportions and decorative details.
FAQs
Is a leather jacket difficult to draw?
Not necessarily. Start with basic torso and sleeve shapes, then gradually add the collar, zipper, pockets, seams, and leather texture.
What should I draw first?
Begin with the center guideline, torso, shoulders, and sleeves. Add clothing details after the overall silhouette is correct.
How do I draw leather texture?
Use subtle creases, scratches, wrinkles, and tonal variations rather than covering the jacket with tiny marks.
How do I make black leather look realistic?
Use different shades of gray and black, with bright highlights on raised surfaces and darker shadows around folds.
How do I draw a biker jacket?
Use a structured silhouette, wide lapels, diagonal zipper, zipper pockets, snaps, and defined seams.
How do I draw folds in leather?
Place folds around the elbows, shoulders, underarms, waist, and other areas where the jacket bends or compresses.
Can beginners draw a leather jacket?
Yes. Construction shapes make the process much easier, especially when you’re learning clothing proportions.
What pencil should I use?
Use HB for the initial sketch and 2B or 4B for darker outlines, folds, and shadows.
Can I draw a colorful leather jacket?
Absolutely. Try red, burgundy, blue, green, cream, or other colors, then use darker versions of the same color for shadows.
How do I make the jacket look three-dimensional?
Use overlapping seams, natural folds, directional shadows, and bright highlights on raised leather surfaces.
Final Words
Learning how to draw a leather jacket becomes much easier when you build the garment from simple shapes. Start with the torso, shoulders, sleeves, and collar before adding the zipper, pockets, cuffs, seams, and other details. Once the construction is correct, focus on folds, shadows, and highlights to make the leather look dimensional.
Practice different jacket styles to improve your skills. Try a classic black jacket first, then experiment with biker, cropped, oversized, and vintage designs. With consistent practice, you’ll become more comfortable drawing clothing structure and realistic leather textures while developing your own fashion illustration style.