
Learning how to draw a hedgehog is a fun way for beginners to practice simple animal shapes, proportions, facial features, and texture. Hedgehogs may look complicated because of their many spines, but you don’t need to draw every individual spine to create a convincing illustration. By starting with a few basic shapes and adding texture gradually, you can create an adorable or realistic hedgehog.
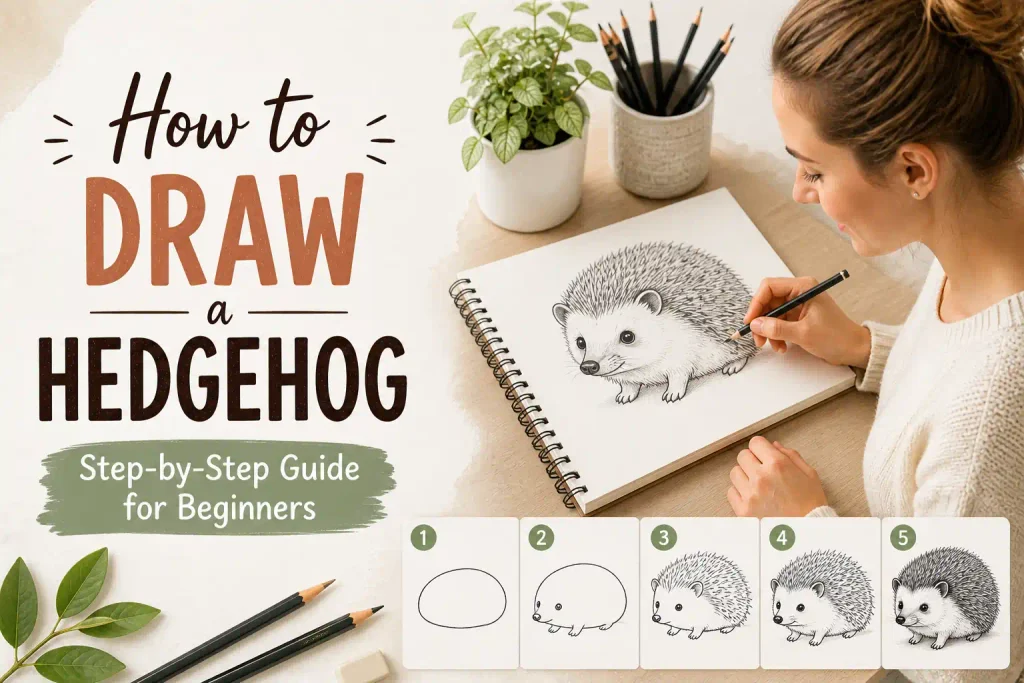
The easiest method is to begin with the body, face, and nose before adding the distinctive spiny back. Once the basic silhouette is complete, use short, directional strokes to suggest the quills. You can then add shading, highlights, paws, and small facial details to give your hedgehog personality and depth.
Items to Buy
- Drawing paper
- HB pencil
- 2B pencil
- 4B pencil
- Eraser
- Kneaded eraser
- Sharpener
- Fine-tip drawing pen
- Ruler, optional
- Colored pencils
- Brown colored pencil
- Tan colored pencil
- Black colored pencil
- Gray colored pencil
- Blending stump
Why Draw a Hedgehog?
Hedgehogs are excellent subjects for beginner artists because their bodies can be simplified into basic rounded forms.
Drawing one can help you practice:
- Animal proportions
- Curved lines
- Facial features
- Fur texture
- Quill patterns
- Shading
- Light and shadow
- Small details
- Cute character expressions
You can draw a hedgehog standing, walking, curled into a ball, or sitting among leaves.
How to Draw a Hedgehog Step by Step
Step 1: Choose Your Pose
Before sketching, decide what position you want your hedgehog to have.
For beginners, a side-facing hedgehog is one of the easiest poses.
You can also draw one:
- Sitting
- Walking
- Looking forward
- Eating
- Curled into a ball
- Standing beside a flower
A side view clearly shows the contrast between the soft face and spiny back.
Step 2: Draw the Main Body
Begin with a large oval for the body.
Tilt it slightly if you want the hedgehog to look like it’s walking.
Keep your pencil strokes light.
This oval will eventually become the main mass beneath the quills.
Step 3: Add the Face
At the front of the body, sketch a smaller rounded shape for the face.
The face should project outward from the spiny body.
Don’t make the head too large.
Hedgehogs have compact heads with a noticeably pointed snout.
Step 4: Shape the Snout
Extend the face into a tapered muzzle.
The snout should gradually narrow toward the nose.
Use gentle curved lines rather than making it completely pointed.
This shape is important because the long muzzle helps give a hedgehog its recognizable profile.
Step 5: Add the Nose
Place a small dark oval or rounded shape at the end of the snout.
Leave a tiny highlight if you’re drawing realistically.
The nose should be relatively small compared with the head.
Step 6: Draw the Eye
Add a small, rounded eye above the muzzle.
Keep it dark.
You can leave a tiny white highlight inside it to make the eye look lively.
Don’t make the eye excessively large unless you’re creating a cartoon hedgehog.
Step 7: Add the Ear
Draw a small rounded ear behind the eye.
The ear can be partially hidden by the head and quills.
Add a smaller curved shape inside the ear to suggest its inner surface.
Step 8: Create the Spiny Back
Now begin shaping the hedgehog’s most recognizable feature.
Instead of drawing individual quills immediately, create an irregular outer silhouette around the body.
Use small pointed or jagged curves.
Don’t make every point identical.
Vary the size and direction slightly.
Step 9: Add the Second Side of the Body
Continue the spiny outline down toward the belly.
Keep the underside smoother than the back.
The face and belly should have a softer appearance than the quilled back.
This contrast makes the hedgehog easier to recognize.
Step 10: Draw the Front Leg
Sketch a small leg beneath the front portion of the body.
Hedgehog legs are short.
Keep the leg relatively small and close to the body.
Add a tiny paw at the bottom.
Step 11: Add the Rear Leg
Draw another small leg toward the back.
Depending on your pose, the rear leg may be partly hidden.
Don’t make it dramatically larger than the front leg.
Step 12: Add the Feet
Simplify each foot into a small rounded shape.
Add a few short lines to suggest toes.
Avoid making the feet too detailed.
Their small size is part of the hedgehog’s characteristic appearance.
Step 13: Refine the Silhouette
Now examine the entire hedgehog.
Check that:
- The body is rounded
- The snout is tapered
- The eye is correctly positioned
- The legs are short
- The back has a spiny outline
- The belly remains relatively smooth
Erase unnecessary construction lines.
Step 14: Add the Quills
Now you can add individual quill marks.
Use short strokes pointing outward from the body.
Don’t draw every quill separately.
Instead, create clusters.
Some areas can have darker, denser strokes while others remain lighter.
This creates a more natural texture.
Step 15: Follow the Quill Direction
Quills should follow the shape of the body.
Near the head, they can angle backward.
Along the back, they can point outward and slightly upward.
Near the rear, they can follow the curve of the body.
Avoid making all the quills point in exactly the same direction.
Step 16: Add Face Texture
The face doesn’t have the same dense quill texture as the back.
Use short, soft strokes around:
- Forehead
- Cheeks
- Snout
- Neck
Keep these marks lighter than the quills.
Step 17: Add Whiskers
Draw a few thin whiskers extending from the muzzle.
Use very light lines.
Vary their length slightly.
You don’t need many.
A few carefully positioned whiskers can make the face look much more natural.
Step 18: Add Shading
Choose a light source.
Then add darker areas underneath the body and around overlapping forms.
Useful shadow areas include:
- Under the chin
- Beneath the belly
- Behind the legs
- Around the face
- Between quill clusters
- Under the ear
Build the shading gradually.
Step 19: Add Highlights
Use a kneaded eraser to lift graphite from selected areas.
Highlights can work well on:
- Nose
- Eye
- Snout
- Face
- Upper quills
Keep the brightest highlights small.
Step 20: Strengthen the Main Outline
Once your drawing is complete, reinforce selected parts of the outer contour.
Darken the:
- Nose
- Eye
- Back silhouette
- Feet
- Lower body
Keep the quill details slightly lighter so the drawing doesn’t become too dark.
How to Draw a Cute Hedgehog
For a cartoon hedgehog, simplify the anatomy.
Make the:
- Head slightly larger
- Eyes bigger
- Nose rounder
- Body rounder
- Feet smaller
You can make the quills into simple triangular or curved shapes.
Add a smile or rosy cheeks for an extra cute appearance.
How to Draw a Realistic Hedgehog
Realistic hedgehog drawings require more attention to texture.
Start with the overall body shape.
Then use layered quill strokes rather than individual repeated spikes.
Keep the face softer.
Use darker shading between dense groups of quills.
Add subtle fur around the muzzle, cheeks, and legs.
How to Draw a Hedgehog Curled Into a Ball
A curled hedgehog is mostly a rounded spiny shape.
Start with a large oval.
Create the quills around the entire outer edge.
Then add a small visible face or nose if the pose allows.
Use darker shading underneath the curled body.
This is one of the easiest hedgehog poses for beginners.
How to Draw a Hedgehog Walking
For a walking pose, slightly stretch the body horizontally.
Position one front foot forward.
Move one rear foot backward.
Keep the other legs partly hidden.
Tilt the head slightly toward the ground.
This creates the appearance of natural movement.
How to Draw a Hedgehog With Colored Pencils
Begin with a light tan or beige base for the face.
Use browns and darker neutral shades for the quills.
Layer darker colors toward the back.
Use lighter tan around the muzzle and belly.
For the nose and eye, use a deep black or dark brown.
Build color gradually to preserve the texture.
How to Draw a Hedgehog With Watercolors
Start with a light pencil outline.
Apply a pale brown wash to the body.
Keep the face lighter.
Add darker brown layers over the quilled area.
Use a fine brush for selected quill marks.
Leave small areas unpainted to create natural highlights.
Avoid repeatedly brushing the same area because this can muddy delicate textures.
How to Draw a Hedgehog in a Garden
Create a simple natural setting around your hedgehog.
You can add:
- Grass
- Leaves
- Flowers
- Mushrooms
- Small stones
- Fallen branches
Keep the background less detailed than the hedgehog.
This helps the main subject stand out.
How to Draw a Hedgehog From Different Angles
Side View
Show the pointed snout and large spiny back.
Front View
Make the face the main focus and show the rounded body behind it.
Three-Quarter View
Show one side of the face more prominently while keeping both eyes visible.
Rear View
Focus on the rounded spiny silhouette and small feet.
How to Make Your Hedgehog Look Three-Dimensional
Think of the body as a rounded volume.
Add darker shading underneath the body.
Keep the upper surfaces lighter.
Use overlapping quill clusters to show the curved back.
The face should appear slightly in front of the body.
These simple changes can give the illustration much more depth.
Common Mistakes to Avoid
Making the Snout Too Short
The tapered muzzle is an important feature.
Making the Quills Perfectly Identical
Vary their direction and length.
Drawing Every Quill Separately
Work in groups to create a more natural texture.
Making the Legs Too Long
Hedgehog legs are short and close to the body.
Making the Face Too Dark
Keep the face softer than the spiny back.
Making the Eye Too Large
Use a small eye for a realistic hedgehog.
Forgetting the Nose Highlight
A tiny highlight can make the nose appear rounded and shiny.
Easy Hedgehog Drawing Ideas
Cute Hedgehog
Draw a round hedgehog with oversized eyes and a tiny nose.
Hedgehog With an Apple
Place a small apple beside the animal for a charming scene.
Hedgehog in Leaves
Add autumn leaves around the body.
Sleeping Hedgehog
Draw the animal curled into a ball with closed eyes.
Hedgehog in a Garden
Add flowers, grass, and small plants.
Hedgehog Portrait
Focus closely on the face, nose, eye, and quill texture.
FAQs
Is a hedgehog easy to draw?
Yes. The body can be simplified into a rounded shape, while the quills can be represented with grouped strokes rather than individual details.
What should I draw first?
Start with the body, head, snout, and basic legs. Add the quills after the overall silhouette is correct.
How do I draw hedgehog quills?
Use short strokes pointing outward from the body. Vary their length and direction to create a natural appearance.
How do I make a hedgehog look realistic?
Focus on proportions, layered quill texture, soft facial fur, subtle shading, and small highlights.
How do I draw a cute hedgehog?
Make the head and eyes slightly larger, simplify the quills, and use rounded shapes for the body and feet.
What colors should I use?
Tan, beige, warm brown, dark brown, gray, and black work well for a traditional hedgehog.
How do I draw a curled-up hedgehog?
Start with a rounded body shape, cover the outer silhouette with quills, and add a small visible face if appropriate.
Can beginners draw a realistic hedgehog?
Yes. Begin with simple construction shapes and gradually build the quills, facial details, and shading.
What pencil should I use?
Use an HB pencil for the initial sketch and softer 2B or 4B pencils for shadows and darker quill areas.
How do I make the quills look three-dimensional?
Vary their direction, group them into layers, and add darker shading between overlapping sections. This makes the spiny back appear rounded and textured.
Final Words
Learning how to draw a hedgehog becomes much easier when you simplify the animal into basic shapes before adding its distinctive quills. Start with the rounded body, tapered face, nose, eye, ears, short legs, and feet. Once the silhouette looks right, gradually build the spiny texture using short, directional strokes.
Try different poses as you improve, such as a walking hedgehog, curled-up hedgehog, cute cartoon character, or garden scene. With regular practice, you can learn to balance soft facial features with detailed quills and create charming hedgehog illustrations in both realistic and playful styles.