I never expected ‘how to make metallic paint?’ would be a frequently asked question. But since metallic paints have a huge fan base, it’s not really surprising.
And that’s exactly why you see people making these paints at home. It reduces cost and gives you a level of customization perfect for doing personal projects and crafts.
However, making metallic paint isn’t easy. Metallic paint’s shiny finish is the reason behind its glamorous look. And that’s where everything can get messed up if you don’t know the tricks and tips for making metallic paint.
The trick to getting the perfect paint is not in using the right materials, but it’s all about the method and mixture ratio.
This article is all about the tricks and tips to make the perfect metallic paint for kinds of uses. Keep reading for the details.
Contents
How Is Metallic Paint Made?
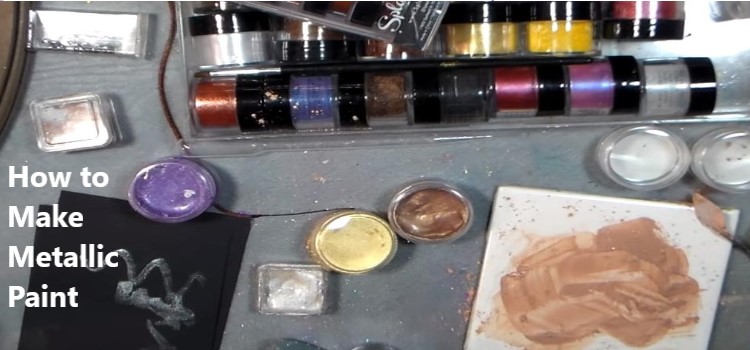
The ingredients are, of course, important. But I suspect you already know about them. In case you are a newbie in this field, see the list below. It should have the supplies and tools you need for getting the perfect gloss on your paint.
List of ingredients:
- Pigments
- Aluminum flakes
- Powdered Glitter
- Lacquer
If you are wondering, where is the amount for each ingredient? This is a general list of ingredients; I’ll mention the perfect amount and ratio later in the article.
Pigments
You might be thinking, where am I going to find pigments and lacquer, let alone mix them perfectly? Well, don’t be scared. There is always a workaround for a lot of things.
If you buy a normal paint and mix those metal flakes, you’ll get the exact same results. There will be no need to buy pigments separately. Also, there are alternatives for the other ingredients on the list. Do not worry; I’ll mention them.
Aluminum Flakes and Glitter
If you don’t know the function of these two ingredients, you need to get familiarized. These two ingredients perform the same function for your paint, although the glitter doesn’t give the same amount of shine like metal. Yes, the shine in your metallic paint comes from these two ingredients.
You can use both of them together, or you can use either one. If you’re forced to use only one of them, try to get the aluminum flakes for the best outcome.
I’m subtly against using glitter because it can make the paint a bit clumpy, which is something you don’t want on your car or bike’s metallic finish. But it’s fine to use for other uses where it won’t be as visible.
Tools and Supplies
These are the tools and supplies you’ll need:
- Mixing stick or paint mixer machine
- Buckets for mixing
- Measurement tools
How Do Manufacturers Make Metallic Paint in Factories?
Manufacturers make their paint products in large batches, which reduces costs but it isn’t suitable for small quantity production. You can’t also get customized paint without spending big bucks due to production complexity.
They use color pigments and lacquer as the medium to produce paint. You can also follow this process, as you’ll see below.
How to Make Metallic Paint: DIY Method
You can’t expect to duplicate the exact factory process since you’re not making your glossy metallic paint in a factory environment. It’s not cost-effective as well, taking the cost of instruments into account. You can just do what everyone does; “Do It Yourself.”
Here are the simple steps to follow to make metallic paints at home.
Steps to Make Metallic Paint
Making paint is a tedious process. It takes time, makes things messy, and also requires a lot of energy. Dividing the process into different parts makes it easier to understand.
1. Choose and Collect Your Tools and Supplies
The first thing to do is select the color and decide whether you’re going to use pigment and lacquer or prepared paint as the base.
Now, for the ‘metal’ part of your metallic paint, which are you going to use? I prefer to purchase a metallic powder such as aluminum oxide, aka silver sparkle. You could also go with other metallic powders to get the color of gold, bronze, or copper.
However, there is a risk with using those colors if you don’t treat them with anti-oxidizing agents. The color will definitely change, even if it’s not as much as noticeable. One common occurrence is that a gold metallic color returns a greenish color after it contacts oxygen.
2. Measurement Time
As you saw, there are two routes. One is using pigments and lacquer, and the other is using paint.
- Pigments and Lacquer
Take 2lbs of pigment of your choosing and mix it with 1 gallon of lacquer medium. That’s approximately a ratio of 1:4. You have the liberty to change, but I think this is the ideal amount. It’ll ensure a sufficient amount of color. But who’ll stop you?
- Paint
Or you can just take a gallon of paint instead of going through all that hassle. This is the most common step for DIYers.
How much shine do you want?
Your paint’s shine will be determined by the amount of metallic powder, flakes, or glitter you use.
Metal Powder or Flakes
The perfect measurement for metal powder content is 4 ounces of metal powder such as aluminum flakes for a 1-gallon paint medium.
You can increase the glossy finish of the paint with a higher amount of flakes. However, excessive gloss will be irritating to the eye, and it won’t also look good.
3. Make a Few Test Batches
With all those in mind, I think you can try making a few test batches before making the final mixture. Take small portions with the ratio you’re targeting and see how it looks. You’ll get a bit of experience in mixing while testing out your formula.
4. Getting the Perfect Mix
The best way to mix paint is using a paint mixer machine. It’ll shake and make your paint instantly. But that’s not possible in a home environment. So you’ll use a bucket or a can to mix.
Pour your measured ingredients in the bucket or can. Mix them for a little while with a strong thick stick.
Now, take the bucket and shake it. Use an agitator machine for a large batch. It’s impossible to do it by hand. If you’re doing a small batch, mix it in a can and shake it by hand.
How long should you shake? A good 2 minutes will do the job.
5. Let It Rest
Now, you should let the mixture rest for 20 to 30 minutes before opening. You will check the paint’s consistency more than any other feature. And also, make sure that everything is mixed in the solution well. Add more mineral/metal powder to it if it needs. Adding a bit more won’t hurt.
Read Next: Tips for making magenta color paint
Tips for Making the Paint
There are a few considerations when making the mixture. Note them down.
- Make sure that your pigment, glitter, and metal powder aren’t clamped together. Using a sifter to sift the powder through can be a good way to minimize that risk.
- Add a sufficient amount of water to prevent your metallic powder from becoming clumpy. You can add this water before you make the or afterward in the mixture.
- Apply a little from your test batch on your target object and see if you like it. What you thought might not be what you get. Trust me, I’m talking from experience. You don’t want to waste your time and, most importantly, money.
- Use an anti-oxidant spray on your metallic paint after you’re done with your project. It’ll protect your desired color by preventing oxidization.
Looking for a Shortcut?
Well, if you think mixing paint and metallic powders is too much of a burden for you, you can do what I do. Follow a shortcut. You can emulate the visual of metallic pain by using lacquer and glitter only. You can forget about pigments and metallic powder.
Metallic gold or silver paint is simply a clear coat with glitters or flakes. So you can do just that. Give a final finish on your painted target surface, and voila! You’ve got your metallic paint visual without having to go through the trouble.
Or, You can just buy a glitter spray and use it on your painted surface. I mean, it won’t give you the exact replica of metallic paint, but it might just make your life easy.
Final Words
Knowing about making DIY metallic paint can simplify your project preparation but it’s not an easy process. Sure, you can improvise and opt for a shortcut but there’s no shortcut to getting the perfect result.
So what have you decided after going through this article? the easy route while sacrificing a bit on quality? or the hard route for a perfect result? Whichever you choose, I’m certain that you’ll love the result. After all, it’s only a matter of gloss and shine.