Looking to add a unique and personal touch to your home decor? One way to do so is by creating your own unique skin tone paint. Surprised? Are you wondering how to make skin color paint that would match your skin?
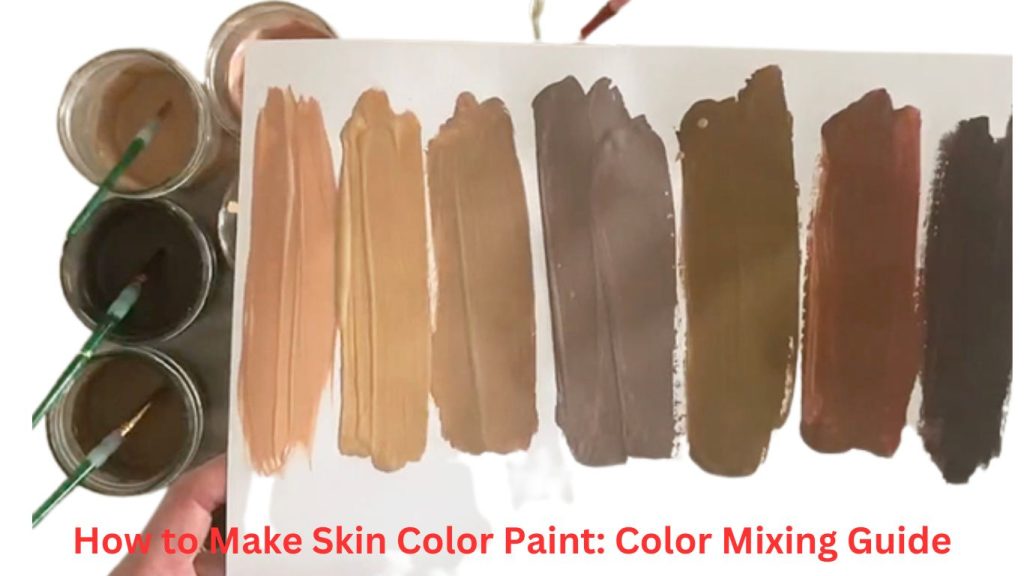
Whether it’s for a feature wall, furniture upholstery, or DIY projects, making your own skin tone paint allows for a bespoke and authentic touch. By mixing red, blue, yellow, black, and white, you can create a shade that perfectly matches your skin tone or any desired hue.
In this article, we’ll guide you through the process of making different skin tone paint and provide tips for achieving the perfect shade.
Contents
- What Colors Make Skin Color?
- How to Make Skin Color Paint: Different Ways & Step-By-Step Guide
- How To Make Skin Color Paint With Acrylic Paints: Step-By-Step Guide
- How To Make Skin Color With Fabric Paint: Step-By-Step Guide
- How To Make Make Skin Color Paint With Oil-Based Paint: Step-By-Step Guide
- How to Make Brown Skin Tone Paint: Step-By-Step Guide
- How to Make Skin Color with Watercolor Step-By-Step Guide
- How to Make Light Skin Color with Paint Step-By-Step Guide
- Final Words
What Colors Make Skin Color?
It is doubtless that getting the skin color is tricky. It is tough and you will need to try continuously to achieve the exact tone. But when you plan to make skin color paint, you should know what colors are required to make this.
Well, the key colors that you need are red, blue, and yellow. If you can mix them maintaining the proper ratio, you will achieve skin color. But that may not be perfect. So, you will need white and black to adjust the tone.
White is for lightening the hue and black is for darkening the hue. Also, by adjusting the main three (3) colors, you can bring the change in color tone.
How to Make Skin Color Paint: Different Ways & Step-By-Step Guide
Different methods can be applied to make skin color paints. Depending on the ingredients and your desired tone, the processes can be different. Let’s check them all.
How To Make Skin Color Paint With Acrylic Paints: Step-By-Step Guide
If you want to add a personalization touch to your interior walls, why not consider creating skin color paint using acrylic paints? Every skin tone is unique, and while it may seem challenging to make a color that perfectly matches your own, with the right steps, it’s possible. Here’s how to do it:
Step 1: Gather the essentials
Here are the supplies you will need for the project:
- Paints: blue, yellow, red, black, and white
- A medium-sized bowl
- A stirring stick
- Your photograph
Step 2: Measure the primary colors
You will need three primary colors for this project. You need to measure them precisely. Take equal parts of blue, yellow, and red paint on a bowl. Mix them well using the stirring stick. You will get somewhat of a brownish hue.
Step 3: Adjust the color using the reference image
The result you will get on the first attempt is not likely to match your desired color. No worries, it’s time to use your image as a reference. You can use the image to match the result. You will need to bring slight changes to the proportion of blue, red, and yellow to match your desired shade.
This will depend on the skin tone you are trying to match. Initially, you may get a darker tone, so if you are trying to match a dark skin tone, it would be easier. If you need a bit lighter hue, you can slightly increase the proportion of the yellow color.
To brighten it up, you may add a bit of white to the mixture as well. However, keep in mind that white may alter the result, so if you want to add white use it carefully, very little at a time. If you want to make the hue a bit darker, try increasing the proportion of blue.
Depending on your project, you may change the proportion of red as well. You can try black to darken a color, but remember a minimum amount of black can go a long way in changing the color. That’s why if you need to use black, use it at a very small amount to see how it impacts the shade.
No matter which colors you add to the mixture, mix them well until it’s properly blended. Then apply it on a surface like a paper sheet and see how it looks.
How To Make Skin Color With Fabric Paint: Step-By-Step Guide
Decorating fabric with fabric paint is a fun and creative way to add a personal touch to your home decor. Whether you’re looking to refresh an old piece of furniture, update your curtains, or simply add some color to your cushions, fabric paint is a versatile and easy-to-use option.
With a wide range of colors and finishes available, you can create anything from bold and vibrant designs to subtle and understated patterns.
Additionally, many fabric paints are designed to be durable and long lasting, making them a great choice for items that will be used frequently.
With the right tools and some imagination, the possibilities for decorating fabric with fabric paint are endless! Here is the step-by-step guide to making skin color paint using fabric paints.
For this method, you will need:
- Fabric paints: yellow ochre, titanium white, burnt sienna, ultramarine blue
- A palette
- A mixing tray
- Brushes
Step 1: Make the base color
Take equal parts of burnt sienna and yellow ochre in the mixing tray. Mix them well using your brushes. This will give you a warm base tone.
Step 2: Cooling down the tone
After mixing the colors you will get an orangish tone which is not very close to human skin! You may find it too orangish, so you will need to cool it down a bit. To do that, you need to add a minimum amount of ultramarine blue to the base mixture.
You may use phthalocyanine blue as a substitute for ultramarine blue. Since blue is a dark color, even a small amount of it can alter the hue, so add a small amount at a time and mix.
If you feel like you need to cool down the hue further, you can keep adding a bit of blue and mix it well.
Step 3: Adjusting the hue
You can test the color on a piece of fabric; however, you will get a better idea about the resulting color when it dries. If the color seems too cool, adding a small amount of white can bring warmth. Repeat steps 2 and 3 for further adjustments.
After you are happy with the color, you can apply it to the fabric. Make sure the fabric is clean and free of any oils or dirt. For better paint adhesion, you can apply a fabric primer before applying the paint.
How To Make Make Skin Color Paint With Oil-Based Paint: Step-By-Step Guide
Oil-based paint is a popular choice for home improvement, DIY projects, and decor because of its durability and versatility. It provides a smooth, long-lasting finish and is ideal for surfaces that receive a lot of wear and tear, such as doors, trim, and cabinetry.
One of the main advantages of oil-based paint is its ability to adhere well to a variety of surfaces, including wood, metal, and ceramic. This makes it a good choice for repainting furniture, fixtures, and other household items. To add a skin tone accent to your home with oil-based paint, these are the steps to follow:
Step 1: Choose the base colors
You need to start by picking the base colors, for this, you will need yellow, white, brown, and red oil paint. Mix them well using a brush or a palette knife.
Step 2: Mix the colors
The best way to achieve your desired color is by experimenting with different ratios of colors. Keep changing the ratios and mixing until you get the desired skin tone.
Step 3: Test the color
Now, to check if the resulting color matches the desired skin tone, you can apply a small amount of paint to a canvas or piece of paper. If it does not match, repeat step 2 and adjust the ratio of colors accordingly.
Remember, skin tone can vary greatly based on factors such as race, ethnicity, and lighting, so it is recommended to use a photograph as reference material to achieve the most accurate result.
How to Make Brown Skin Tone Paint: Step-By-Step Guide
The processes that you need to follow to make brown skin tone are described below.
Step 1: Selecting the primary colors
For brown skin tones, you will need all the primary colors in the RYB color model. So, you will need to mix red, yellow, and blue paint.
Step 2: Mixing equal parts of red and yellow
Use a palette knife or brush to mix the yellow and red colors together. You will get a nice orange hue after mixing.
Step 3: Adding blue to the mixture
Now, you need to add a small amount of blue paint and mix it thoroughly into the orange hue. Be careful with the blue hue because a small amount of blue can impact the color a lot!
Step 4: Adjusting the color
Keep adding small amounts of blue paint until you get the desired brown skin tone.
Step 5: Testing the color
Apply the paint to a small area and let it dry to see if it matches the skin tone you want. Remember, the color may look different after it has dried, so you should let the paint dry before making any further adjustments. If it is too light or dark, you can adjust it by adding more of one of the primary colors.
How to Make Skin Color with Watercolor Step-By-Step Guide
When it comes to dealing with watercolor, it’s quite challenging to mix. But yeah, if you know color theory basics, that’s not a big deal. So, let’s just get started.
You need:
- Watercolor; red, blue, and yellow
- Color palette
- Paintbrush
- Paper
- Pencil
Step 1:
Firstly, take a color palette. Pour a small amount of yellow. Then take red and blue paint. These three primary colors act as a base tone for making skin color.
Step 2:
Take a paper. Make a chart on it with a pencil to understand the skin color differences.
Step 3:
Start with the red watercolor on the palette. Then add really a tiny amount of yellow. Mix them well with a paintbrush.
Step 4:
Add it to the paper with the paintbrush to see what the shade looks like. However, it will form a soft brown color on the palette. Add some more red if you want the next color to be a little bit stronger or a little more peachy.
If you desire to get darker skin tones, add blue to the diluted mixture. You will notice that the mixture starts to get a little darker as the blue is added.
Step 5:
Depending on how darker or lighter you want the tone to be, carefully add blue, red, or yellow to the existing paint mixture. Be sure to be aware of the amount of color mixing.
Continue the process until you get the desired color. Notice the color change each time you add it to the paper.
How to Make Light Skin Color with Paint Step-By-Step Guide
For this method, you will need red, yellow, and blue paint.
Step 1: Mix yellow and a small amount of red
Mix a little amount of red and yellow colors together. You will achieve a pale peach hue.
Step 2: Add the blue in a small amount
Add a minimum amount of blue paint and mix it thoroughly into the pale peach hue.
Step 3: Keep adjusting the color
To achieve the desired light skin tone with paint, gradually add small amounts of blue paint to the mix. Test the color on a small area and let it dry before evaluating if it matches your desired skin tone. If the paint appears too yellow or red, adjust it by adding more blue or yellow accordingly.
Read Next:
Final Words
Okay, now you know every single detail about making skin color paint. It’s time to apply the techniques that we shared. Just as there are various skin colors such as light, dark, or brown, there are various methods of creating different skin colors. Try different colors and apply our color mixing techniques until you get the desired color.
That one thing is always true when making specific paint at home, carefully mix different paints and keep the ratio controlled so that you get the actual paint shade.