
Learning how to paint a rose is a wonderful way to improve your painting skills while creating one of the most timeless and beautiful subjects in art. Roses are popular among artists because they offer elegant shapes, layered petals, rich colors, and endless opportunities for creative expression.
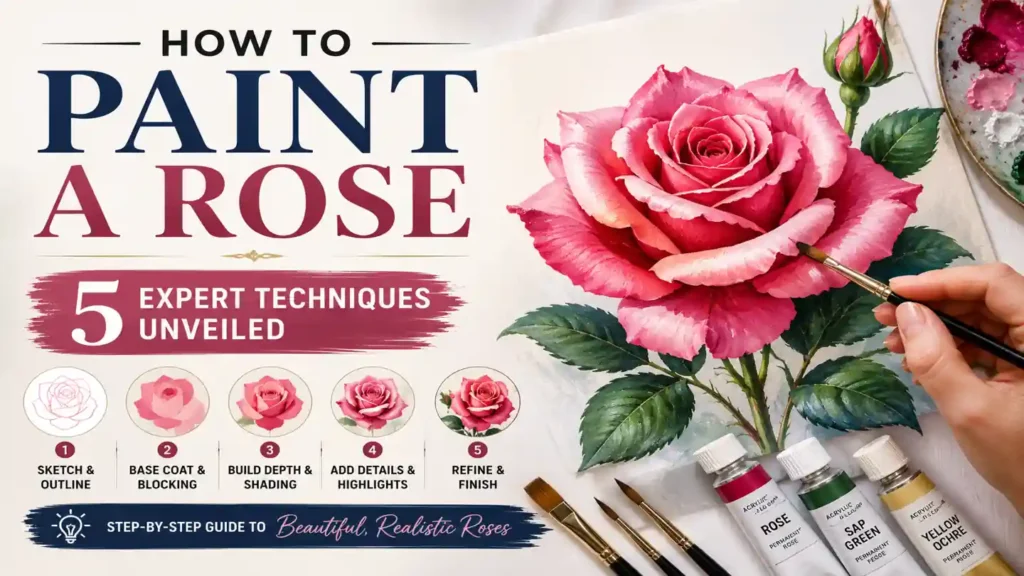
Whether you work with acrylics, oils, watercolors, or gouache, understanding a few professional techniques can make painting roses much easier. This guide explores five expert techniques, along with preparation tips, supplies, and a step-by-step process to help you create realistic and vibrant rose paintings.
Items to Buy
- Acrylic paints
- Oil paints
- Watercolor paints
- Round paint brushes
- Detail brushes
- Flat brushes
- Canvas
- Watercolor paper
- Mixing palette
- Palette knife
- Water container
- Paper towels
- Pencil
- Eraser
- Color wheel
- White paint
- Red paint
- Pink paint
- Yellow paint
- Green paint
- Black paint
Why Roses Are a Favorite Subject for Artists
Roses combine beauty and complexity in a single flower.
Their layered petals create natural shadows, highlights, and depth that help artists practice important painting skills. Roses also come in a wide range of colors, making them suitable for both realistic and imaginative artwork.
From beginner studies to advanced floral compositions, roses remain one of the most rewarding subjects to paint.
Understanding Rose Structure Before Painting
Before applying paint, it’s helpful to study the flower’s shape.
A rose begins with a tightly curled center that gradually expands into larger outer petals. Understanding how petals overlap and catch light makes it easier to create realistic depth.
Observing reference photos or real flowers can significantly improve your results.
A strong understanding of structure often matters more than painting skill alone.
Choosing Colors for a Rose Painting
Although red roses are the most common choice, roses appear in many colors.
Popular options include:
- Red
- Pink
- White
- Yellow
- Orange
- Peach
- Lavender
- Burgundy
Each color creates a different mood and visual impact.
Don’t be afraid to experiment with unique color combinations.
5 Expert Techniques for Painting Roses
Mastering a few key techniques can dramatically improve your floral artwork.
Technique 1: Build From the Center Outward
Many professional artists begin with the rosebud center.
By painting the central spiral first and gradually adding surrounding petals, you can maintain accurate proportions and natural petal placement.
This method also makes complex roses feel less intimidating.
Technique 2: Use Layered Values
Instead of relying solely on color, focus on light and dark values.
Adding shadows beneath overlapping petals helps create realistic depth.
Even simple roses appear more dimensional when value changes are emphasized.
Technique 3: Blend Soft Petal Edges
Roses often feature delicate transitions between highlights and shadows.
Using soft blending techniques creates a more natural appearance.
This is particularly effective when working with acrylics or oils.
Technique 4: Reserve Highlights
Highlights help petals appear fresh and luminous.
Avoid covering all light areas too early.
Preserving bright sections creates greater contrast and realism later.
Technique 5: Vary Petal Shapes
No two petals are exactly alike.
Introducing slight variations in size, curve, and angle creates a more believable flower.
Perfect symmetry can make a rose appear artificial.
Preparing to Paint a Rose
Proper preparation improves the entire painting process.
Begin by gathering supplies and selecting a reference image. Study the lighting, petal arrangement, and color relationships before making the first brushstroke.
Planning ahead helps reduce mistakes and creates stronger compositions.
A few minutes of preparation can save hours of correction later.
How to Paint a Rose Step by Step Guide
Step 1: Sketch the Basic Shape
Lightly draw the overall outline of the rose.
Focus on the general form rather than individual petal details.
A simple framework makes painting easier.
Step 2: Draw the Rose Center
Sketch the central spiral where the petals begin.
This area serves as the foundation for the rest of the flower.
Keep the lines loose and simple.
Step 3: Add Large Petal Shapes
Outline the major petals surrounding the center.
Pay attention to how the petals overlap and curve outward.
Avoid drawing every tiny detail.
Step 4: Establish the Background
Apply background colors before focusing on fine details.
A completed background helps you judge values and contrast more accurately.
Keep brushwork loose at this stage.
Step 5: Apply Base Colors
Paint the primary color of the rose.
Use broad, simple shapes to establish the flower before adding details.
Don’t worry about perfection yet.
Step 6: Add Midtones
Introduce darker and lighter variations within the petals.
These midtones begin creating depth and dimension.
Gradually build complexity.
Step 7: Paint the Shadows
Add shadows where petals overlap.
Observe your reference carefully and avoid using pure black.
Shadows should enhance realism without overpowering the flower.
Step 8: Refine Individual Petals
Begin defining petal edges and shapes.
Work from larger forms toward smaller details.
This approach keeps the rose cohesive.
Step 9: Add Highlights
Use lighter colors to emphasize areas that catch the most light.
Highlights help petals appear delicate and three-dimensional.
Apply them thoughtfully rather than everywhere.
Step 10: Paint Leaves and Stem
Add surrounding foliage if desired.
Leaves provide contrast and help frame the flower.
Use varied greens for a more natural appearance.
Step 11: Enhance Depth
Review the painting and strengthen any weak shadows or highlights.
Small adjustments often make a dramatic difference.
Look for opportunities to improve contrast.
Step 12: Add Final Details
Finish with subtle refinements and small accents.
Avoid overworking the painting.
Sometimes a few carefully placed brushstrokes are all that’s needed.
Acrylic Rose Painting Tips
Acrylic paints dry quickly, which can be both an advantage and a challenge.
Helpful tips include:
- Work in layers
- Use a wet palette
- Blend quickly
- Build colors gradually
- Use multiple brush sizes
Acrylics are excellent for beginners because they are forgiving and easy to clean.
Watercolor Rose Painting Tips
Watercolors create soft, luminous flowers.
For better results:
- Work from light to dark
- Preserve highlights
- Allow layers to dry
- Use transparent washes
- Avoid overworking the paper
Watercolor roses often appear elegant and delicate.
Oil Rose Painting Tips
Oil paints allow extensive blending and smooth transitions.
Benefits include:
- Longer working time
- Rich color depth
- Soft blending
- Detailed layering
Many classical floral artists prefer oils for their flexibility.
Common Mistakes to Avoid
One common mistake is focusing on petal details too early.
Without a strong overall structure, even beautifully painted petals can look misplaced. Another issue is using the same color throughout the flower.
Variations in value and temperature create much more realistic results.
Patience is often the secret to successful floral painting.
How to Practice Rose Painting
Improvement comes through repetition.
Practice exercises include:
- Painting rose centers
- Sketching petals
- Studying flower shapes
- Creating value studies
- Painting monochromatic roses
- Copying reference photos
Consistent practice builds confidence and skill over time.
FAQs
Is painting a rose difficult for beginners?
Roses can seem challenging, but breaking them into simple shapes makes them easier to paint.
What colors do I need to paint a rose?
Basic red, pink, white, yellow, green, and dark shadow colors are often sufficient.
Should I sketch the rose first?
Yes, a light sketch helps establish proportions and petal placement.
What is the easiest rose painting technique?
Starting from the center and working outward is often the simplest approach.
Can I paint roses with acrylics?
Yes, acrylics are one of the most popular mediums for floral painting.
How do I make rose petals look realistic?
Use layered values, soft blends, and carefully placed highlights.
Why does my rose look flat?
Insufficient contrast between highlights and shadows may reduce depth.
How often should I practice?
Regular practice, even for short periods, can greatly improve your results.
Final Words
Learning how to paint a rose becomes much easier when you focus on structure, value, and a few proven techniques. By building from the center outward, creating strong shadows, preserving highlights, and varying petal shapes, you can produce roses that appear vibrant and lifelike.
Whether you’re working with acrylics, watercolors, or oils, patience and observation are the keys to success. With consistent practice and the expert techniques covered in this guide, you’ll be able to create beautiful rose paintings that capture the elegance and charm of this timeless flower.