
Learning how to paint alloy sports bar components is an excellent way to refresh the appearance of your truck, ute, SUV, or off-road vehicle without replacing expensive accessories. Alloy sports bars are designed to be durable and corrosion-resistant, but years of exposure to sunlight, rain, road debris, and general wear can leave them looking faded, scratched, or outdated. A fresh coat of paint can restore their appearance and help protect the surface from further deterioration.
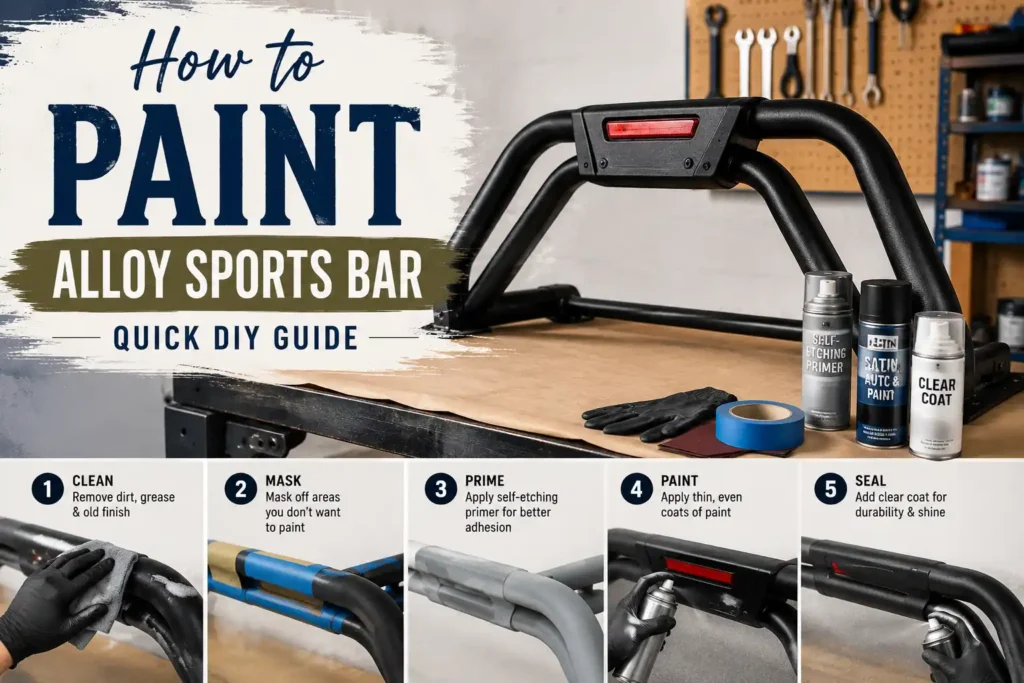
Because alloy surfaces are smooth and non-porous, painting them requires proper preparation and specialized products to ensure long-lasting adhesion. Simply applying paint directly to the metal often leads to peeling and chipping. This guide will walk you through the entire process, from preparation to final curing, so you can achieve a professional-looking finish at home.
Items to Buy
- Automotive degreaser
- Wax and grease remover
- Microfiber cloths
- Sandpaper
- Sanding sponge
- Scotch-Brite pads
- Self-etching primer
- Alloy primer
- Automotive paint
- Spray paint
- Clear coat
- Painter’s tape
- Plastic sheeting
- Drop cloth
- Tack cloth
- Spray gun
- Air compressor
- Paint tray
- Safety goggles
- Respirator mask
- Nitrile gloves
- Polishing compound
What Is an Alloy Sports Bar?
An alloy sports bar is a decorative and functional metal structure commonly mounted behind the cab of a pickup truck or utility vehicle.
Sports bars can:
- Enhance vehicle appearance
- Provide mounting points for lights
- Protect accessories
- Support cargo management systems
- Add off-road styling
Most sports bars are made from lightweight aluminum alloys that resist rust and corrosion.
Can You Paint an Alloy Sports Bar?
Yes, alloy sports bars can be painted successfully.
However, aluminum alloys have smooth surfaces that require special preparation for paint to adhere properly. Using the correct primer and paint system is essential for achieving a durable finish.
With proper preparation, painted alloy sports bars can look factory-finished and last for many years.
Why Paint an Alloy Sports Bar?
There are several reasons to repaint an alloy sports bar.
Benefits include:
- Restores faded appearance
- Covers scratches
- Updates vehicle styling
- Matches custom paint schemes
- Protects exposed surfaces
- Improves resale appearance
- Refreshes older accessories
- Creates a personalized look
A new finish can dramatically improve the overall appearance of a vehicle.
Best Paint for Alloy Sports Bars
Choosing the right paint is important.
Popular options include:
- Automotive acrylic paint
- Acrylic urethane paint
- Automotive enamel
- Two-part automotive coatings
- High-quality spray paint
Automotive-grade paints generally provide the best durability and weather resistance.
Best Primer for Alloy
Primer is critical when painting alloy surfaces.
Recommended products include:
- Self-etching primer
- Aluminum primer
- Adhesion-promoting primer
- Automotive metal primer
These products help create a strong bond between the alloy surface and the paint.
Common Sports Bar Finishes
Sports bars are commonly found in finishes such as:
- Polished aluminum
- Brushed aluminum
- Satin black
- Matte black
- Silver metallic
- Powder-coated finishes
Repainting allows you to completely change the look of the accessory.
Preparing the Alloy Sports Bar for Painting
Preparation determines the success of the project.
Most paint failures occur because the surface was not cleaned or prepared correctly. Oils, oxidation, dirt, and road contaminants can prevent paint from bonding properly.
Taking time to prepare the surface thoroughly will significantly improve durability.
How to Paint Alloy Sports Bar Step by Step Guide
Step 1: Remove the Sports Bar (If Possible)
Removing the sports bar often makes painting easier.
Working on a detached component allows better access to all surfaces and reduces the risk of overspray on the vehicle.
If removal is not practical, carefully mask surrounding areas.
Step 2: Wash Thoroughly
Clean the sports bar using automotive soap and water.
Remove:
- Dirt
- Dust
- Road grime
- Mud
- Debris
Allow the surface to dry completely.
Step 3: Degrease the Surface
Use wax and grease remover to eliminate:
- Oils
- Wax residue
- Silicone contamination
- Cleaning product residue
This step is essential for proper paint adhesion.
Step 4: Inspect for Damage
Look for:
- Scratches
- Dents
- Oxidation
- Corrosion
- Existing paint failure
Address any issues before proceeding.
Step 5: Sand the Surface
Sand the alloy using fine-grit sandpaper or Scotch-Brite pads.
The goal is to dull the surface and create microscopic scratches for primer adhesion.
Avoid overly aggressive sanding.
Step 6: Remove Sanding Dust
Wipe the surface with a tack cloth.
Dust particles can affect finish quality if left behind.
Cleanliness is important throughout the process.
Step 7: Mask Surrounding Areas
If the sports bar remains attached to the vehicle, mask:
- Truck bed
- Windows
- Cab panels
- Lights
- Trim
Careful masking helps prevent overspray damage.
Step 8: Apply Self-Etching Primer
Spray a light, even coat of self-etching primer.
Use smooth overlapping passes.
Allow the primer to dry according to the manufacturer’s instructions.
Step 9: Apply Additional Primer Coats
Most projects benefit from two light coats of primer.
Multiple thin coats generally provide better results than one heavy coat.
Allow proper drying between coats.
Step 10: Lightly Sand the Primer
Once dry, lightly sand the primer if needed.
This helps eliminate minor imperfections and creates a smoother painting surface.
Remove dust afterward.
Step 11: Apply the First Coat of Paint
Apply a thin coat of automotive paint.
Maintain a consistent spray distance and even coverage.
Avoid heavy applications.
Step 12: Build Coverage Gradually
Apply additional coats until full color coverage is achieved.
Most sports bars require two to four coats.
Thin layers help prevent runs and drips.
Step 13: Inspect the Finish
Check for:
- Uneven coverage
- Dry spray
- Thin spots
- Missed areas
Correct issues before moving on.
Step 14: Apply Clear Coat
Apply two to three coats of automotive clear coat.
Clear coat provides:
- UV protection
- Gloss enhancement
- Scratch resistance
- Weather protection
It significantly improves long-term durability.
Step 15: Allow Proper Curing
Allow the paint system to cure completely.
Avoid heavy use or washing during the curing period.
Follow product-specific recommendations.
Step 16: Reinstall the Sports Bar
If removed earlier, carefully reinstall the sports bar after curing.
Inspect the finish and perform any necessary touch-ups.
Popular Color Choices
Many vehicle owners choose:
- Gloss black
- Satin black
- Matte black
- Gunmetal gray
- Silver metallic
- Body-color matching paint
- Textured black finishes
The best choice depends on your vehicle’s style and intended use.
Spray Paint vs Spray Gun
Both methods can produce good results.
Spray Paint Cans
Advantages include:
- Lower cost
- Convenience
- Minimal equipment
- Suitable for small projects
Spray Gun Systems
Advantages include:
- Better atomization
- Greater control
- Smoother finish
- Professional-quality results
Choose the option that fits your experience level and budget.
Common Mistakes to Avoid
One of the most common mistakes is skipping self-etching primer.
Without proper primer, paint may peel prematurely from the alloy surface. Another frequent issue is inadequate cleaning.
Even small amounts of oil or wax can interfere with adhesion.
Applying thick paint coats is another mistake that often leads to runs, sagging, and uneven finishes.
Thin coats consistently produce better results.
Pro Tips for a Factory-Like Finish
For professional-looking results:
- Use quality automotive products
- Degrease thoroughly
- Apply self-etching primer
- Use multiple thin coats
- Maintain proper spray distance
- Allow recommended drying times
- Apply clear coat for protection
These habits can dramatically improve the final appearance.
How Long Will Painted Alloy Last?
Durability depends on:
- Surface preparation
- Paint quality
- Environmental exposure
- Maintenance habits
- UV protection
A properly painted alloy sports bar can maintain its appearance for many years.
Maintaining a Painted Sports Bar
To preserve the finish:
- Wash regularly
- Remove mud promptly
- Avoid abrasive cleaners
- Use automotive-safe products
- Apply protective wax when appropriate
- Inspect for chips and scratches
Routine care helps maximize paint longevity.
FAQs
Can alloy sports bars be painted?
Yes, alloy sports bars can be painted successfully using proper preparation and primer.
Do I need to sand alloy before painting?
Yes, light sanding improves primer and paint adhesion.
What primer should I use?
Self-etching primer is usually the best choice for alloy surfaces.
Can I use spray paint?
Yes, high-quality automotive spray paint works well for many projects.
Is clear coat necessary?
While optional, clear coat greatly improves durability and appearance.
How many coats of paint are needed?
Most projects require two to four color coats plus clear coat.
Will paint stick to polished aluminum?
Not without proper sanding and primer preparation.
How long should the paint cure?
Follow the manufacturer’s instructions, as curing times vary by product.
Additional Tips for Off-Road Vehicles
If your vehicle is frequently used off-road, consider using a textured or heavy-duty coating instead of traditional gloss paint. Textured finishes can hide minor scratches and withstand harsh conditions more effectively.
Regular inspections and prompt touch-ups will help prevent small chips from becoming larger paint failures, especially in rugged environments where sports bars are exposed to branches, rocks, and debris.
Final Words
Learning how to paint alloy sports bar accessories is a cost-effective way to restore, customize, and protect one of your vehicle’s most noticeable exterior features. By thoroughly cleaning, sanding, priming, painting, and applying a protective clear coat, you can achieve a finish that looks professional and withstands years of use.
Whether you’re matching your vehicle’s color scheme, covering scratches, or giving your truck a completely new look, careful preparation remains the key to success. With the techniques outlined in this guide, your alloy sports bar can become a durable and stylish enhancement to your vehicle.