
Learning how to paint aluminum siding is a practical way to refresh your home’s exterior without replacing the existing panels. Aluminum siding can develop faded colors, chalky residue, and worn finishes over time, but a properly prepared surface can often be repainted successfully.
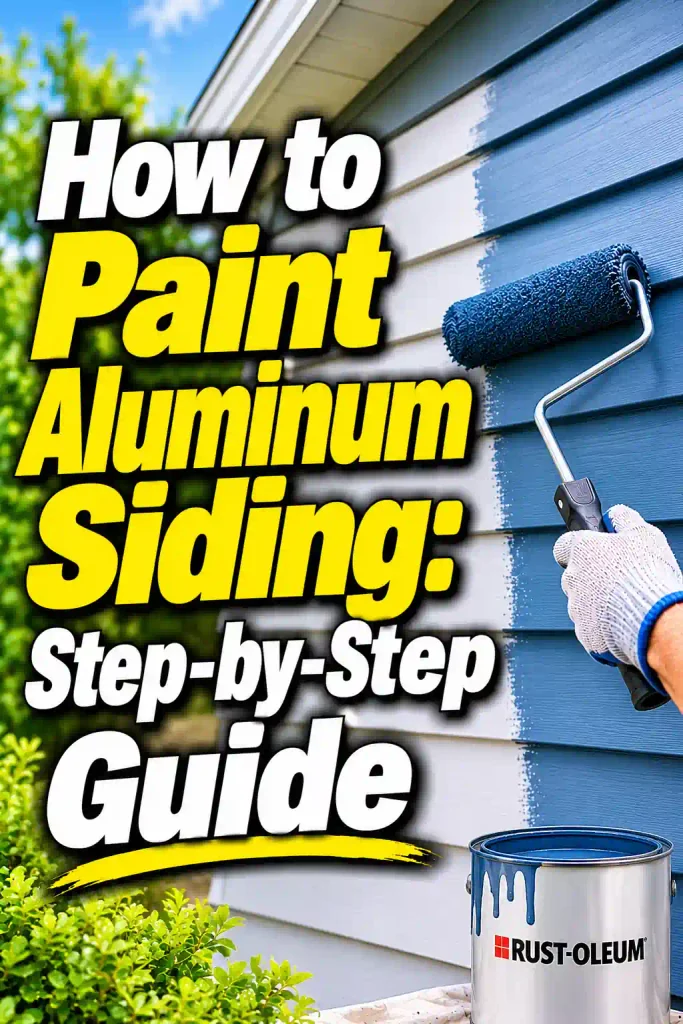
The secret to a durable result is thorough cleaning, choosing a compatible primer when needed, and applying high-quality exterior paint. With the right supplies and preparation, you can give your home a cleaner, more updated appearance.
Affiliate disclosure: As an Amazon Associate I earn from qualifying purchases.
What to Buy for Painting Aluminum Siding
Before starting, gather the necessary supplies. Choose products specifically designed for exterior metal surfaces and follow the coating manufacturer’s instructions.
- Exterior 100% acrylic paint – Provides an exterior finish suitable for many properly prepared aluminum siding surfaces.
- Aluminum bonding primer – Helps prepare exposed bare aluminum when the selected coating system requires primer.
- Exterior siding cleaner – Removes dirt, grime, and surface contaminants.
- Soft-bristle cleaning brush – Helps clean siding without unnecessary scratching.
- Paint scraper – Useful for carefully removing loose paint from small areas.
- Fine-grit sanding sponge – Helps smooth small imperfections when sanding is appropriate and safe.
- Exterior paintbrushes – Useful for edges, corners, and detailed areas.
- Paint roller and extension pole – Makes covering broad siding surfaces easier.
- Painter’s tape – Protects windows, trim, and other surfaces.
- Drop cloths – Protect landscaping and nearby areas.
- Protective gloves and safety glasses – Help protect you during cleaning and painting.
- Respirator suitable for the task – Choose appropriate respiratory protection based on the product and safety instructions.
You may not need every item. For example, a sound existing paint finish may not require full priming, while exposed bare aluminum needs an appropriate primer as part of a compatible coating system.
Why Paint Aluminum Siding?
Aluminum siding is a durable exterior material, but its appearance can change after years of exposure to sunlight, rain, wind, and temperature variations. Its original finish may fade, lose its shine, or develop a powdery surface known as chalking.
Painting offers several benefits:
- Refreshes the exterior: A new color can make an older home look cleaner and more updated.
- Improves appearance: Fresh paint can create a more consistent finish across faded panels.
- Covers cosmetic wear: Properly prepared paint can improve the appearance of minor surface imperfections.
- Provides an additional protective coating: A suitable exterior coating helps protect the surface from weather exposure.
- Offers a color change: You can choose a different shade to complement your roof, windows, doors, and landscaping.
However, paint will not repair severely dented, loose, or damaged siding. Address structural and water-related problems before beginning the project.
What Is the Best Paint for Aluminum Siding?
Choosing the right paint is essential for good adhesion and long-term performance. Aluminum siding requires a coating designed for exterior metal surfaces and compatible with the existing finish.
100% Acrylic Exterior Paint
High-quality 100% acrylic exterior paint is a popular option for properly prepared aluminum siding. It offers good exterior weather resistance and is available in a wide range of colors and finishes.
Look for a product whose technical information specifically permits application to aluminum siding. Follow the recommended primer requirements and application instructions.
Direct-to-Metal Acrylic Paint
Some acrylic direct-to-metal (DTM) coatings are designed to adhere to prepared metal surfaces. Depending on the product, they may be suitable for certain aluminum applications.
Check whether the coating can be applied directly to bare aluminum or whether it requires a separate primer. Do not assume that every DTM product works on every existing finish.
Aluminum-Compatible Primer
Primer is particularly important when bare aluminum is exposed, such as where the original paint has peeled away or worn through.
Choose a primer specifically approved for aluminum. It should be compatible with the selected exterior topcoat.
A sound, previously painted surface may not need a full primer coat if the paint manufacturer permits direct repainting after proper cleaning and preparation. Follow the coating system’s instructions rather than automatically priming every panel.
How to Choose the Right Color for Aluminum Siding
A new exterior color can change the overall appearance of your home. Before choosing a shade, consider the roof, trim, windows, front door, and surrounding landscape.
Here are some popular choices:
- White: Creates a bright, classic exterior and pairs well with darker trim.
- Light gray: Offers a clean, modern appearance without looking too bold.
- Charcoal gray: Creates a dramatic contrast with white windows and lighter architectural details.
- Beige: Provides a warm, traditional look.
- Cream: Softens the exterior and works well with natural stone and wood accents.
- Sage green: Adds a subtle natural color that complements landscaping.
- Navy blue: Creates a distinctive exterior when paired with suitable lighter trim.
- Taupe: Offers a balanced neutral option for traditional and contemporary homes.
Before committing to a color, test a small area with the complete coating system. Check the sample in morning, afternoon, and evening light because exterior colors can look different throughout the day.
How to Paint Aluminum Siding
Painting aluminum siding involves more preparation than simply applying a new color. Dirt, chalking, loose paint, and oxidation can prevent a fresh coating from adhering correctly.
Follow these steps to prepare the surface and achieve a more even finish.
Step 1: Inspect the Aluminum Siding
Walk around the exterior and examine the siding carefully.
Look for:
- Faded or peeling paint.
- Chalky residue.
- Dents and scratches.
- Loose or damaged panels.
- Oxidation and corrosion.
- Mildew or dark stains.
- Areas where bare aluminum is visible.
Check the condition of the siding before purchasing paint. Small cosmetic problems may be manageable, but severely damaged panels or underlying moisture issues should be repaired first.
If you are unsure whether the material is aluminum, check the product documentation. Aluminum is not magnetic, whereas steel siding generally is.
Step 2: Check for Lead-Based Paint
If the home or existing coating is old, determine whether lead-based paint may be present before scraping, sanding, or otherwise disturbing it.
Lead dust can cause serious health problems, especially for children and pregnant people. Do not dry-sand or aggressively scrape a potentially lead-containing coating.
Follow local regulations for testing and safe renovation. If lead paint is present or suspected, use a qualified lead-safe professional rather than treating it as an ordinary DIY preparation job.
Step 3: Protect the Surrounding Area
Cover nearby plants, outdoor furniture, walkways, and other surfaces with suitable drop cloths or protective sheeting.
Use painter’s tape to protect:
- Window glass and frames.
- Exterior doors.
- Light fixtures.
- Electrical outlets.
- Decorative trim.
- Gutters and downspouts.
- Areas that should not receive paint.
Move outdoor furniture and other removable items away from the work area.
If you are working at height, use suitable access equipment on stable ground. Never lean dangerously from a ladder or work near electrical wires.
Step 4: Clean the Siding Thoroughly
Cleaning is one of the most important parts of the project. Dirt, mildew, grease, and chalky residue can prevent the new paint from adhering properly.
Mix a suitable exterior siding cleaner according to its label instructions. Wash the panels using a soft-bristle brush or another approved cleaning method.
Pay special attention to areas that collect dirt, such as:
- Under windows.
- Around doors.
- Near gutters.
- Along the bottom of the siding.
- Around corners and trim.
If mildew is present, use a cleaner labeled for the surface and follow its safety instructions. Never mix bleach with ammonia, acids, or other cleaning products.
Step 5: Rinse and Allow the Surface to Dry
After cleaning, rinse the siding thoroughly with clean water to remove detergent and loosened residue.
A garden hose is often sufficient. If you use a pressure washer, follow the siding manufacturer’s instructions, use a suitable low-pressure approach, and keep the spray directed so that water is not forced behind the overlapping panels.
Aluminum siding can dent, and excessive water pressure can damage panels or force moisture behind the exterior.
Allow the siding to dry completely before proceeding. Drying time depends on weather, shade, humidity, and how much water was used.
Step 6: Check for Remaining Chalk
Chalking is a powdery residue that develops as some exterior coatings weather.
Once the siding is dry, rub a clean dark cloth across several areas. If the cloth collects a noticeable powder, more cleaning may be necessary.
Repeat the cleaning and rinsing process until the surface is sufficiently clean according to the paint manufacturer’s requirements.
Do not paint over heavy chalking. The new coating may bond to the loose powder instead of the siding, resulting in premature peeling.
Step 7: Remove Loose and Peeling Paint Safely
Inspect previously painted areas for loose, blistered, or peeling coatings.
If the existing paint is sound, you generally do not need to remove it completely. The goal is to eliminate unstable material and prepare the remaining finish for repainting.
For a small area of ordinary, confirmed lead-free paint, use a suitable scraper or approved preparation method. Avoid aggressive sanding that could damage thin aluminum panels.
If the old coating is widespread, badly deteriorated, or potentially lead-containing, seek professional advice before disturbing it.
Step 8: Address Bare Aluminum and Oxidation
Look for areas where the original coating has worn away and bare aluminum is exposed.
Aluminum can develop a dull, powdery oxidation layer. This should be addressed using a preparation method approved for the chosen primer.
For small areas of light oxidation, use a suitable nonaggressive cleaning or preparation method. Avoid damaging the thin siding panels through excessive abrasion.
If corrosion is extensive, panels are deteriorating, or the metal is deeply damaged, consult a siding professional.
Once the surface is prepared, use an aluminum-compatible primer on exposed bare areas as required by the coating system.
Step 9: Repair Minor Surface Problems
Small cosmetic defects can sometimes be repaired before painting.
For example, a compatible exterior metal repair product may be suitable for certain minor imperfections, depending on the siding’s construction.
Follow the repair product’s instructions for application, drying, and sanding. Do not use ordinary interior wall filler on exterior aluminum siding.
Replace badly damaged or loose panels rather than trying to hide significant defects under paint.
Step 10: Apply Primer Where Needed
Primer helps create a suitable surface for the topcoat, especially on exposed bare metal.
Choose an aluminum-compatible primer recommended by the finish paint manufacturer.
Apply it evenly to exposed areas or to the entire surface if the coating system requires full priming. Use a brush, roller, or sprayer approved for the product.
Avoid thick buildup around panel joints and overlapping edges. Allow the primer to dry for the specified time before applying the topcoat.
If the existing finish is sound and the paint manufacturer permits direct application after cleaning, additional primer may not be necessary.
Step 11: Choose the Right Weather Conditions
Check the paint label before beginning the finish coats.
Avoid painting when:
- Rain is expected before the coating becomes rain-resistant.
- The siding is wet or damp.
- Heavy dew is likely to form.
- Temperatures are outside the product’s recommended range.
- Strong winds could carry dust or debris onto wet paint.
- Direct sunlight makes the surface excessively hot.
A mild, dry day with suitable airflow is generally easier to work in. Follow the product’s temperature and humidity limits rather than relying on a universal weather rule.
Step 12: Apply the First Coat of Paint
Stir the exterior paint thoroughly and prepare your brush, roller, or sprayer according to the product instructions.
Start near the top of the house and work downward. This helps you maintain an organized painting pattern and address drips before they dry.
Use a brush around corners, trim, and detailed areas. A suitable roller can cover broad sections of siding, while a compatible sprayer may provide efficient coverage on larger surfaces.
Apply a thin, even coat. Avoid excessive paint buildup around overlapping panel edges.
Step 13: Follow the Siding’s Direction
Aluminum siding commonly has horizontal panels, so use smooth strokes that follow their length.
Work in manageable sections and maintain a wet edge to reduce visible lap marks. Keep the coating thickness consistent across each section.
For textured or grooved siding, make sure the paint reaches the recessed areas without creating heavy buildup.
If you are using a sprayer, follow the equipment and coating instructions. Back-rolling may be recommended for some products to improve coverage and consistency.
Step 14: Allow the First Coat to Dry
Allow the first coat to dry according to the paint manufacturer’s instructions.
Drying and recoating times depend on the specific product, temperature, humidity, airflow, and film thickness.
Do not apply another coat simply because the surface feels dry. It must be ready for recoating according to the product label.
Step 15: Apply the Second Coat if Required
Inspect the first coat after it has dried sufficiently.
If the coating system calls for a second coat, apply it evenly using the same technique. Two thin coats often provide more consistent coverage than one overly thick coat.
Check corners, panel grooves, and areas around windows for missed spots.
Avoid repeatedly brushing or rolling over paint that has started to dry because this can leave uneven marks.
Step 16: Remove Masking and Allow Full Curing
Remove painter’s tape according to its instructions and the coating manufacturer’s recommendations.
Inspect the finished surface for drips, thin areas, and missed sections. Allow the coating to cure fully before washing the siding or placing objects against it.
Remember that dry-to-touch and fully cured are different stages. Follow the product’s guidance before performing maintenance or exposing the finish to unnecessary wear.
Common Mistakes to Avoid When Painting Aluminum Siding
Even good-quality paint can fail when the surface is not prepared correctly. Avoid these common mistakes.
Painting Over Chalky Residue
Chalk can prevent proper adhesion. Clean the siding thoroughly and check it with a dark cloth before painting.
Using an Incompatible Primer
Not every metal primer is suitable for aluminum. Select one specifically approved for the surface and compatible with the topcoat.
Skipping Bare-Metal Preparation
Exposed aluminum needs the preparation and primer required by the chosen coating system. Painting directly over untreated bare metal can lead to adhesion problems.
Applying Paint in Direct, Intense Sunlight
Excessive surface heat can affect application and drying. Work in conditions that fall within the paint manufacturer’s recommended range.
Using Too Much Pressure When Washing
Aggressive pressure washing can dent aluminum panels and force water behind the siding. Use a careful cleaning method.
Applying Thick Coats
Thick paint can run, sag, and dry unevenly. Apply thin, consistent coats and follow the recommended coverage rate.
Ignoring Old Paint Safety
Scraping or sanding older coatings without checking for lead can create hazardous dust. Test first when appropriate and use qualified help if lead is present or suspected.
How to Maintain Painted Aluminum Siding
After painting, simple maintenance can help preserve the finish.
- Wash the siding periodically with mild detergent and water.
- Use a soft brush or cloth for stubborn dirt.
- Avoid abrasive cleaning pads.
- Check for peeling, cracking, or damaged areas.
- Touch up small defects with compatible products.
- Keep gutters clear to reduce dirty water running down the walls.
- Trim nearby branches that may scratch the surface.
- Inspect areas around windows and doors for moisture problems.
If the paint begins peeling, investigate the cause before applying another coat. Poor cleaning, incompatible coatings, moisture, and inadequate preparation can all contribute to finish failure.
Frequently Asked Questions
Can you paint aluminum siding without primer?
Sometimes. If the existing paint is sound, properly weathered, and thoroughly cleaned, some exterior paint systems permit direct repainting. Exposed bare aluminum usually requires an appropriate metal primer or approved direct-to-metal coating. Always follow the coating manufacturer’s instructions.
What is the best paint for aluminum siding?
High-quality 100% acrylic exterior paint is a common choice for properly prepared aluminum siding. The specific product must be approved for aluminum and compatible with the existing finish and primer.
Do you need to sand aluminum siding before painting?
Not always. Sound existing paint may only need cleaning and the preparation specified by the coating manufacturer. Limited abrasion may be appropriate for certain surfaces, but aggressive sanding can damage the thin metal. Take lead precautions before disturbing older coatings.
Can you paint aluminum siding with a roller?
Yes. A suitable exterior roller can cover large siding sections, while a brush helps with corners and detailed areas. A sprayer may also be appropriate if the coating allows it.
How many coats of paint does aluminum siding need?
The number depends on the paint system, existing color, surface condition, and coverage. Many projects use a primer where required followed by two finish coats, but the product label should determine the correct application.
Can you paint faded aluminum siding?
Yes, faded aluminum siding can often be repainted if the panels are in sound condition. Remove chalking, dirt, and loose paint before applying a compatible coating.
How long does painted aluminum siding last?
The lifespan depends on preparation, paint quality, climate, exposure, and maintenance. A properly prepared surface and suitable exterior coating can provide years of service, but no fixed lifespan applies to every home.
Is it better to paint or replace aluminum siding?
Painting is often a practical option when the existing panels are structurally sound and mainly have cosmetic problems. Replacement may be more appropriate when the siding has extensive damage, loose sections, or underlying moisture issues.
Final Words
Learning how to paint aluminum siding can help you refresh your home’s exterior without the expense of replacing sound panels. The most important part of the project is preparation: remove dirt and chalk, address loose paint, check for oxidation, and use a compatible primer wherever bare aluminum is exposed.
Choose an exterior coating designed for aluminum, work in suitable weather, and apply thin, even coats. Take extra care with older paint because lead may be present, and never disturb a potentially hazardous coating without appropriate precautions.
With careful preparation and regular maintenance, painted aluminum siding can give your home a fresh, attractive exterior for years to come.
Helpful Resources
- This Old House – How to Prep and Paint Aluminum Siding – Practical guidance on inspecting, cleaning, preparing, priming, and painting aluminum siding.
- USDA Forest Service – Wood and Metal Siding Maintenance – Maintenance information about metal siding, including aluminum, cleaning, and oxidation.