
Natural oyster shells are beautiful on their own, but painting them can transform these coastal treasures into stunning works of art. Learning how to paint an oyster shell is a fun and creative way to make unique ornaments, jewelry dishes, holiday decorations, trinket trays, place card holders, and personalized gifts. Whether you prefer elegant gold accents, floral designs, abstract patterns, or beach-inspired artwork, painted oyster shells offer endless possibilities.
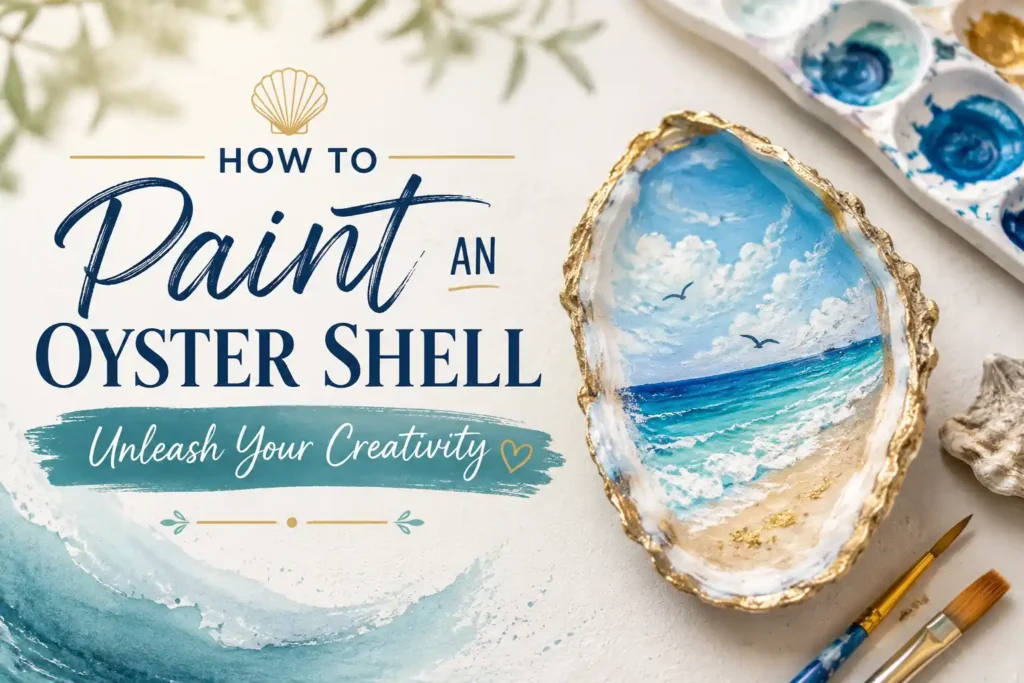
Because oyster shells have a textured, curved surface, proper preparation and painting techniques are essential for achieving the best results. This guide will walk you through everything you need to know, from cleaning the shell to sealing your finished masterpiece.
Items to Buy
- Oyster shells
- Acrylic paint
- Metallic paint
- Paint pens
- Fine-tip paintbrushes
- Detail brushes
- White primer
- Rubbing alcohol
- Mild dish soap
- Soft scrub brush
- Paper towels
- Water container
- Paint palette
- Pencil
- Gold leaf
- Craft glue
- Glitter (optional)
- Clear acrylic sealer
- Resin sealer (optional)
- Disposable gloves
Why Paint Oyster Shells?
Painting oyster shells is a popular craft because it combines natural beauty with artistic expression. Each shell has a unique shape, texture, and character, making every finished project one of a kind.
Painted oyster shells can be used as decorative accents throughout the home. Many people display them on coffee tables, vanities, bookshelves, and dining tables. They also make thoughtful handmade gifts for weddings, birthdays, holidays, and special occasions.
The project is beginner-friendly while still offering enough creative freedom for experienced artists.
Choosing the Right Oyster Shells
Not all oyster shells are the same.
Larger shells provide more painting space and are often easier for beginners to work with. Look for shells that are intact and free from major cracks or damage.
Collected shells from beaches should be cleaned thoroughly before use. Craft suppliers and seafood markets may also offer shells suitable for decorative projects.
Choosing quality shells helps create a more attractive finished product.
Best Paint for Oyster Shells
Acrylic paint is the most popular choice for painting oyster shells.
It adheres well to properly prepared shells, dries quickly, and comes in a wide variety of colors. Metallic acrylic paints are especially popular because they complement the natural texture and elegance of oyster shells.
Paint pens can be useful for adding intricate details, lettering, and fine lines. Combining different painting tools often produces the most interesting results.
Selecting quality paint contributes to better coverage and durability.
Popular Oyster Shell Painting Ideas
There are countless ways to decorate oyster shells.
Many crafters enjoy painting floral patterns, ocean scenes, seashell motifs, abstract artwork, monograms, inspirational quotes, and holiday-themed designs. Gold-rimmed oyster shells remain particularly popular because they create a sophisticated coastal look.
Some artists incorporate decoupage, gold leaf, or resin finishes to add extra visual interest.
Choosing a theme before starting can help guide the creative process.
Preparing Oyster Shells Properly
Preparation is one of the most important steps in the project.
Fresh oyster shells often contain dirt, salt, and organic residue that can interfere with paint adhesion. Thorough cleaning helps create a smoother surface and improves the durability of the finished design.
Skipping preparation may lead to peeling paint and uneven results.
Taking time to prepare the shells correctly helps ensure long-lasting artwork.
How To Paint An Oyster Shell Step by Step Guide
Step 1: Clean the Shell Thoroughly
Wash the oyster shell using warm water and mild dish soap.
Use a soft scrub brush to remove dirt, debris, and residue. If the shell was collected from a beach, spend extra time ensuring it is completely clean.
Rinse thoroughly and allow it to dry completely.
Step 2: Disinfect the Shell
Wipe the shell with rubbing alcohol.
This helps remove remaining oils and contaminants that could interfere with paint adhesion. Allow the alcohol to evaporate fully before proceeding.
A clean surface creates better painting conditions.
Step 3: Inspect the Shell
Examine the shell for cracks, rough spots, or damage.
Minor imperfections often add character, but major defects may affect the finished appearance or durability.
Choose the side of the shell that will serve as the primary painting surface.
Step 4: Apply Primer
Apply a thin coat of white primer to the interior surface of the shell.
Primer helps create a smooth painting base and allows colors to appear brighter and more vibrant.
Allow the primer to dry completely before moving on.
Step 5: Plan Your Design
Sketch your design lightly with a pencil if desired.
Simple guidelines can help maintain proportions and reduce mistakes during painting.
Planning ahead often leads to a more balanced and professional-looking result.
Step 6: Paint the Background
Apply the base color or background layer.
Use smooth, even brushstrokes and allow the paint to dry before adding additional colors. Multiple thin coats generally produce better coverage than one thick coat.
Take your time to achieve an even finish.
Step 7: Add Main Design Elements
Begin painting the primary features of your design.
Whether you’re creating flowers, landscapes, abstract patterns, or decorative motifs, work gradually and focus on the larger elements first.
Allow each section to dry before layering additional details.
Step 8: Add Fine Details
Use detail brushes or paint pens to add outlines, highlights, lettering, and decorative accents.
These finishing touches often elevate the overall appearance of the artwork and create visual interest.
Patience during this stage can make a significant difference.
Step 9: Paint the Edges
Many artists enjoy painting the shell’s outer rim with metallic paint.
Gold, silver, and rose gold are especially popular choices because they enhance the shell’s natural elegance.
Apply carefully for a clean, refined look.
Step 10: Allow the Paint to Dry
Let the painted shell dry thoroughly before handling.
Drying times vary depending on paint thickness and environmental conditions. Avoid touching the surface prematurely.
Proper drying helps prevent smudging and damage.
Step 11: Apply a Protective Sealer
Use a clear acrylic sealer or resin coating to protect the artwork.
A sealer helps preserve colors, prevent scratches, and improve durability. Apply according to the manufacturer’s instructions.
Allow the protective finish to cure fully.
Step 12: Display or Gift Your Creation
Once the sealer has cured, your painted oyster shell is ready to use.
Display it as home décor, use it as a jewelry dish, or present it as a thoughtful handmade gift.
Enjoy your unique artistic creation.
Creative Ways to Use Painted Oyster Shells
Painted oyster shells are incredibly versatile.
Many people use them as ring dishes, trinket trays, soap holders, holiday ornaments, wedding favors, and decorative accents. They also work beautifully as place card holders for special events.
Larger shells can become elegant catch-all dishes for keys, jewelry, and small accessories.
Their combination of natural texture and artistic customization makes them suitable for many decorative purposes.
Common Mistakes to Avoid
One common mistake is failing to clean the shell thoroughly before painting. Residue can prevent paint from adhering properly.
Another issue is applying paint too thickly, which may create uneven textures and longer drying times.
Many beginners also skip the primer, resulting in duller colors and reduced adhesion.
Finally, neglecting a protective sealer can shorten the lifespan of the finished artwork.
Tips for Professional-Looking Results
Use high-quality acrylic paints for better coverage and richer colors.
Work in thin layers and allow adequate drying time between coats. Keeping brushes clean helps maintain crisp lines and smooth details.
Experiment with metallic accents and gold leaf for a more luxurious appearance.
Most importantly, embrace the natural shape and texture of each shell rather than trying to make every piece perfectly uniform.
How to Care for Painted Oyster Shells
Handle painted oyster shells gently to preserve the artwork.
Dust them occasionally using a soft cloth and avoid harsh cleaning products. If used as decorative dishes, avoid exposing them to excessive moisture unless they have been sealed with a waterproof finish.
Proper care helps maintain the beauty of your painted shells for years.
A well-sealed oyster shell can remain a cherished decorative item for a long time.
FAQs
What paint works best on oyster shells?
Acrylic paint is the most commonly used option because it adheres well and offers excellent color variety.
Do I need to prime oyster shells before painting?
Priming is recommended because it improves paint adhesion and color vibrancy.
Can I use paint pens?
Yes. Paint pens are excellent for lettering, outlines, and detailed artwork.
How do I clean oyster shells before painting?
Wash them with warm water and soap, then disinfect with rubbing alcohol.
Should I seal painted oyster shells?
Yes. A clear sealer helps protect the artwork and improve durability.
Can painted oyster shells be used as jewelry dishes?
Absolutely. They are one of the most popular uses for painted oyster shells.
What designs work best?
Floral patterns, coastal themes, monograms, abstract art, and metallic accents are all popular choices.
How long does the paint take to dry?
Drying times vary, but most acrylic paints become dry to the touch within a few hours and fully cure over a longer period.
Final Words
Learning how to paint an oyster shell is a rewarding creative project that combines natural beauty with artistic expression. With proper cleaning, thoughtful design planning, quality materials, and a protective finish, you can transform ordinary shells into beautiful decorative pieces that reflect your personal style.
Whether you’re creating elegant jewelry dishes, handmade gifts, holiday decorations, or coastal-inspired home décor, painted oyster shells offer endless opportunities for creativity. Take your time, experiment with different techniques, and enjoy turning simple oyster shells into miniature works of art.