
Learning how to paint glass bottles is a creative way to transform ordinary bottles into beautiful home decorations, personalized gifts, flower vases, and festive centerpieces. With the right paints, preparation, and decorative techniques, you can turn recycled glass into something unique without spending much money.
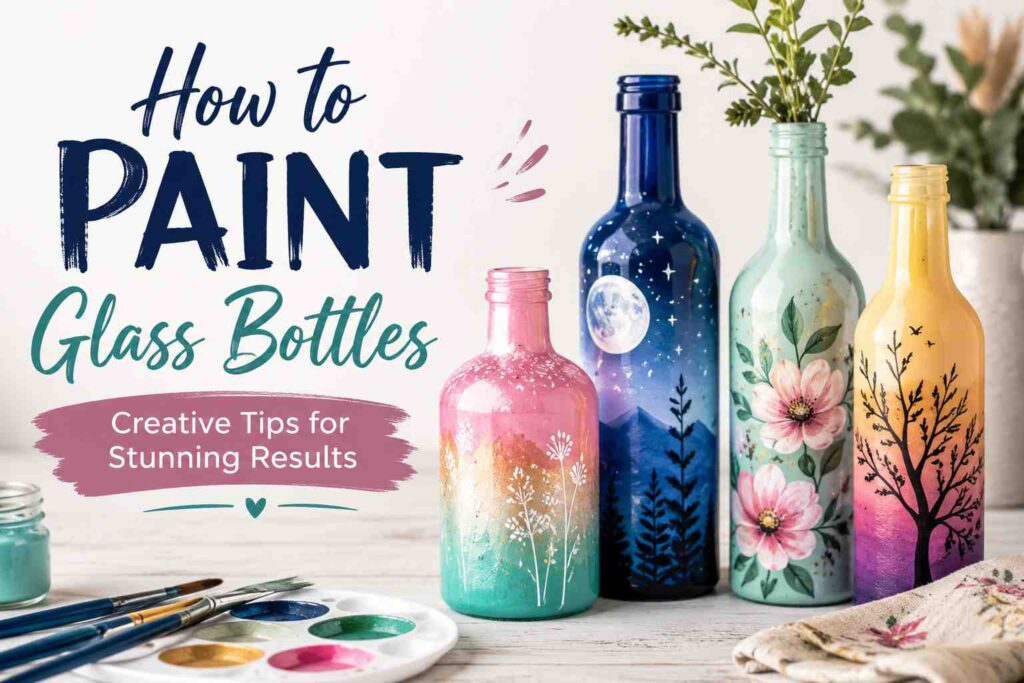
The secret to a lasting finish is cleaning the glass thoroughly, choosing compatible paint, and applying thin layers. Whether you prefer elegant metallic designs, colorful floral patterns, or rustic finishes, this guide will help you create stunning painted bottles at home.
Affiliate disclosure: As an Amazon Associate, I earn from qualifying purchases.
Items to Buy
- Empty Glass Bottles
- Glass Paint
- Multi-Surface Acrylic Paint
- Glass Primer
- Paintbrush Set
- Foam Brushes
- Paint Sponges
- Fine-Tip Paint Pens
- Painter’s Tape
- Glass Stencils
- Isopropyl Alcohol
- Microfiber Cloths
- Fine-Grit Sandpaper
- Clear Acrylic Sealer
- Gold and Silver Metallic Paint
- Craft Glitter
- Decorative Ribbons
- Protective Gloves
Why Paint Glass Bottles?
Glass bottles are versatile craft materials because they come in many shapes, sizes, and colors. Wine bottles, olive oil bottles, beverage bottles, and decorative jars can all become attractive objects with a little creativity.
Painting glass bottles offers several advantages:
- Affordable decorating: Reuse bottles you already have instead of purchasing new decorations.
- Personalized gifts: Add names, dates, initials, or meaningful designs.
- Custom home décor: Coordinate bottle colors with your room’s style.
- Seasonal decorating: Create decorations for Christmas, Halloween, weddings, and other occasions.
- Creative recycling: Give suitable empty bottles a second life.
- Flexible designs: Experiment with transparent, opaque, metallic, or textured finishes.
Painted bottles can serve as decorative vases, table centerpieces, shelf accents, or containers for artificial flowers. With suitable paint and careful preparation, they can become attractive keepsakes for many occasions.
Choosing the Best Paint for Glass
Glass has a smooth, nonporous surface, so ordinary craft paint may not adhere reliably without proper preparation. Selecting the right product helps reduce peeling, scratching, and flaking.
Glass Paint
Glass-specific paint is designed for decorative work on glass surfaces. Depending on the product, it may produce a transparent stained-glass effect or an opaque finish.
Some glass paints require air drying, while others need heat curing. Always follow the label instructions and check whether the product is suitable for your particular bottle.
Multi-Surface Acrylic Paint
Multi-surface acrylic paint is a convenient option for decorative bottles. It is available in many colors and works well for flowers, lettering, geometric patterns, and solid-color finishes when the product is compatible with glass.
A suitable primer may improve adhesion, particularly when the bottle will be handled regularly.
Acrylic Enamel Paint
Acrylic enamel can provide a durable decorative finish when formulated for glass or other smooth surfaces. It is useful for detailed artwork and designs that need stronger color coverage.
Check the manufacturer’s curing requirements before handling or sealing the finished bottle.
Chalk Paint
Chalk-style paint can create a soft, matte appearance that suits farmhouse, rustic, and vintage-inspired decorations.
Because ordinary chalk paint may not bond reliably to glass, use a compatible primer or choose a product specifically recommended for glass surfaces.
Metallic Paint
Gold, silver, copper, and rose-gold paints create an elegant finish. They work especially well for wedding centerpieces, holiday decorations, and modern home décor.
Use metallic paint for the entire bottle or apply it selectively around the neck, base, or decorative patterns.
Preparing Bottles Before Painting
Proper preparation is essential for achieving an attractive finish. Even small amounts of grease, adhesive, or dust can interfere with paint adhesion.
Choose a bottle that is intact and free from cracks or sharp chips. Wear protective gloves when handling glass, particularly around damaged edges.
Remove labels, wash the bottle, and allow it to dry completely. If the surface is glossy, use only the light abrasion or glass-compatible primer recommended by your chosen paint manufacturer. Avoid aggressive sanding that could damage the bottle.
Before painting the entire bottle, test your complete paint system on a small, inconspicuous area or a spare glass bottle.
How to Paint Glass Bottles Step by Step
Follow these steps to create a smooth, attractive finish suitable for a variety of decorative projects.
Step 1: Select the Right Bottle
Choose a bottle that suits your intended design.
Clear bottles are ideal for transparent effects, while colored glass can create interesting backgrounds for metallic or contrasting paint.
Consider the bottle’s shape as well. Tall bottles work well for floral arrangements, while short, wide bottles are useful for table decorations and small vases.
Step 2: Remove the Labels
Soak the bottle in warm water with a little dish soap to loosen paper labels.
Peel away the labels carefully, then remove remaining adhesive with a glass-safe adhesive remover. Follow the remover’s directions and ensure that no residue remains.
Avoid using sharp tools carelessly, as they can scratch the glass or cause injury.
Step 3: Wash the Bottle Thoroughly
Wash the bottle inside and outside with warm water and mild dish soap.
Remove dirt, fingerprints, oils, and any remaining adhesive. Rinse thoroughly so that no detergent remains on the surface.
Allow the bottle to dry completely, paying attention to the neck and base.
Step 4: Degrease the Glass
Once dry, wipe the outside with a suitable glass cleaner or isopropyl alcohol if compatible with your paint system.
Use a clean microfiber cloth and avoid touching the prepared surface with your bare hands afterward.
This step removes invisible oils that can cause paint to separate or form uneven patches.
Step 5: Protect Areas You Want to Leave Clear
Use painter’s tape to mask the bottle opening, base, or any sections you want to keep transparent.
You can also create stripes, geometric shapes, or color-blocked designs by placing tape around the bottle.
Press the tape down gently along the edges to reduce paint seepage.
Step 6: Apply Primer if Needed
If your chosen paint requires primer, apply a thin, even coat suitable for glass.
Use a foam brush or spray application according to the product instructions. Avoid heavy buildup around the neck and base.
Allow the primer to dry fully before adding color. Not every glass paint requires primer, so follow the recommended system rather than adding unnecessary layers.
Step 7: Apply the Base Color
Use a soft brush, foam brush, or compatible spray paint to apply the first thin coat.
Work slowly around the bottle, turning it as needed to maintain even coverage. If you’re painting a solid color, start with a light layer rather than trying to cover the glass completely in one pass.
Allow the first coat to dry according to the manufacturer’s instructions.
Step 8: Add Additional Coats
Apply further thin coats until you achieve the desired coverage.
Several light layers generally produce a more even appearance than one thick coat. Allow each layer to dry or reach its specified recoat stage before continuing.
Inspect the bottle from different angles to identify thin spots or uneven color.
Step 9: Add Decorative Designs
Once the base coat is ready, personalize your bottle using fine brushes, paint pens, or stencils.
You could create:
- Floral motifs
- Polka dots
- Leaves and vines
- Geometric shapes
- Stripes
- Personalized lettering
- Small stars or hearts
Plan the design before painting. Simple patterns often look more polished than designs with too many competing details.
Step 10: Create Texture and Special Effects
Try sponge painting, dry brushing, or layered metallic accents to add visual interest.
For a frosted appearance, use a suitable glass-effect coating. For an ombre design, blend neighboring colors gradually while the paint is workable, if the product allows blending.
Test these techniques on spare glass first to learn how the paint behaves.
Step 11: Correct Small Mistakes
Inspect the design under good lighting.
While the paint is still workable, remove small mistakes using a method compatible with the paint. Avoid using strong solvents unless the product instructions specifically recommend them.
For dried mistakes, allow the coating to cure as directed before carefully correcting the area.
Step 12: Apply a Protective Sealer if Appropriate
Some paints benefit from a compatible clear sealer, while others are designed to be used without one.
If sealing is recommended, apply thin, even coats and follow the manufacturer’s instructions. A clear coat can help protect decorative details from light handling, but it does not automatically make the bottle waterproof, food-safe, or dishwasher-safe.
Step 13: Allow the Finish to Cure
Let the bottle cure for the full period specified by the paint and sealer manufacturers.
A surface may feel dry before it has hardened sufficiently for handling. Avoid washing, soaking, or decorating the bottle further until the coating is ready.
Step 14: Display Your Finished Bottle
Once fully cured, use the bottle as a decorative centerpiece, shelf accent, artificial-flower vase, or personalized gift.
Handle it carefully and keep the painted exterior away from harsh cleaners and abrasive materials.
Creative Glass Bottle Painting Ideas
Different designs can completely change the appearance of a simple bottle. Here are several styles to try.
1. Elegant Gold and White Bottles
Paint the bottle with a white base coat, then add gold details around the neck, base, or center. Thin metallic lines and small geometric shapes create a refined look suitable for weddings, anniversaries, and formal table settings.
Pair several bottles of different heights for a coordinated centerpiece. Keep the design simple so the metallic details remain the focal point.
2. Rustic Farmhouse Bottles
Choose muted white, cream, sage green, or soft gray for a farmhouse-inspired finish. Apply the base color in thin layers, then add restrained dry-brushed accents for a gently aged appearance.
Tie natural twine or a ribbon around the neck after the paint has cured. These bottles work well with artificial greenery, dried flowers, or rustic seasonal decorations.
3. Floral-Painted Bottles
Use a light base color and paint small flowers, leaves, and vines with fine brushes. Start with simple petal shapes, then add darker centers and delicate leaf details.
You don’t need advanced painting skills to create an attractive floral pattern. Repeating a small group of colors throughout the design helps the finished bottle look coordinated.
4. Ombre Bottles
Choose two or three related colors, such as pale pink, rose, and burgundy. Apply the lightest color first, then blend the darker shades gradually toward the base or neck.
Ombre designs look especially attractive on tall bottles because the gradual color transition emphasizes their shape. Practice the blending technique on spare glass before painting the final bottle.
5. Frosted Glass Bottles
A frosted finish gives bottles a soft, understated appearance. Use a glass-effect coating designed to create a translucent finish, following its application instructions carefully.
Frosted bottles work well for minimalist décor and artificial flower arrangements. You can leave a clear window in the design or add a small painted motif for extra interest.
6. Colorful Geometric Bottles
Use painter’s tape to create triangles, stripes, blocks, or diagonal sections. Paint each section a different coordinated color, allowing each area to dry as needed before removing or repositioning the tape.
This style suits modern rooms, desks, and craft displays. Choose a limited palette of two to four colors to keep the finished design balanced.
7. Christmas-Themed Bottles
Paint bottles in festive shades such as green, red, white, or metallic gold. Add snowflakes, stars, tiny trees, or simple lettering using a detail brush or stencil.
Group the finished bottles with seasonal decorations to create a holiday centerpiece. Allow the paint to cure completely before wrapping the bottles or placing them in storage.
8. Beach-Inspired Bottles
Use pale blue, turquoise, sandy beige, and white to create an ocean-inspired design. Sponge on subtle color variations or paint gentle wave patterns around the bottle.
Decorative shells or twine can complement the theme, provided any adhesive is suitable for the materials. These bottles are attractive for summer décor and coastal-style rooms.
9. Metallic Modern Bottles
Choose copper, silver, bronze, or rose gold for a sleek metallic finish. Apply the paint evenly, then add a contrasting band or a few thin lines for a contemporary look.
Metallic bottles can stand alone as sculptural accents or be arranged in groups of different shapes. Test the paint under your room’s lighting because metallic finishes can look different depending on the angle.
10. Personalized Gift Bottles
Create a custom bottle with initials, a name, a date, or a short decorative message. Use a stencil or glass-compatible paint pen to keep the lettering neat and readable.
Personalized bottles make thoughtful keepsakes for birthdays, weddings, housewarmings, and anniversaries. Keep the lettering on the exterior and ensure that all paint is fully cured before gifting the bottle.
Common Mistakes to Avoid
Skipping Surface Preparation
Dust, grease, and adhesive residue can prevent paint from bonding properly. Always clean the glass thoroughly and allow it to dry before painting.
Applying Thick Coats
Heavy coats can drip, dry unevenly, or obscure fine details. Apply thin layers and follow the recommended drying time between coats.
Using Incompatible Products
Not every primer, paint, and sealer works well together. Check the product labels and test the complete system before painting the entire bottle.
Handling the Bottle Too Soon
Touching a soft coating can leave fingerprints or scratches. Wait until the paint has reached the recommended handling and curing stage.
Assuming the Finish Is Waterproof
A decorative coating may resist light handling but still be vulnerable to water or cleaning products. Follow the product’s care instructions and avoid soaking painted bottles unless the coating is specifically rated for that use.
Tips for a Professional Finish
For the best results:
- Clean and degrease the glass thoroughly.
- Choose paint specifically suitable for glass or multi-surface use.
- Apply thin, even coats.
- Use fine brushes for small details.
- Test colors and techniques on spare glass.
- Allow each layer to dry properly.
- Use a compatible sealer only when recommended.
- Protect the finished bottle from unnecessary abrasion.
Good preparation and patience will generally make a bigger difference than using a large number of decorative products.
How to Care for Painted Glass Bottles
Once the paint has fully cured, dust the bottle with a soft cloth. If the coating permits gentle cleaning, use a slightly damp cloth rather than soaking the entire bottle.
Avoid abrasive pads, harsh chemicals, and prolonged exposure to moisture unless the paint manufacturer specifically states that the finish can withstand them.
Store decorative bottles where they are less likely to be knocked over. If you use one as a vase, consider placing artificial flowers inside to avoid repeated water exposure.
FAQs
Can you paint directly on glass bottles?
Yes, but the glass must be clean and dry, and the paint should be formulated for glass or compatible multi-surface use.
What paint works best for glass bottles?
Glass paint and suitable multi-surface acrylic paints are popular choices. The best option depends on whether you want a transparent or opaque finish.
Do I need to prime glass before painting?
Not always. Some glass paints are designed for direct application, while other products benefit from a compatible primer.
How many coats of paint should I apply?
Two or more thin coats may be needed for solid coverage. The exact number depends on the paint, color, and desired finish.
Can I use spray paint on glass bottles?
Yes, if the spray paint is suitable for glass or the relevant multi-surface application. Work in a well-ventilated area and follow the label instructions.
Do painted glass bottles need a sealer?
Not every paint requires a sealer. If one is recommended, choose a compatible product and follow its instructions.
Can I use a painted bottle as a vase?
Yes, for decorative use, especially with artificial flowers. If using fresh flowers, avoid prolonged water contact with the painted exterior and follow the coating’s care instructions.
Are painted glass bottles safe for food or drinks?
Decorative paints and sealers should remain on the outside only. Do not use a painted bottle to store beverages for consumption unless every material used is specifically certified for that purpose.
Final Words
Learning how to paint glass bottles opens up an easy and affordable way to create personalized décor, thoughtful gifts, and colorful centerpieces. With thorough cleaning, compatible paint, thin layers, and proper curing, you can turn ordinary glass into a decorative piece that suits almost any style.
Start with a simple solid color or geometric design, then experiment with flowers, metallic details, frosted effects, or personalized lettering. Take your time, test your materials, and enjoy creating a bottle that feels uniquely yours.