
Learning how to remove paint from aluminum boat surfaces takes the right tools, careful preparation, and a method that will not damage the metal. Whether you are stripping peeling paint, removing an old coating, or preparing a fishing boat for repainting, protecting the aluminum is just as important as removing the finish.
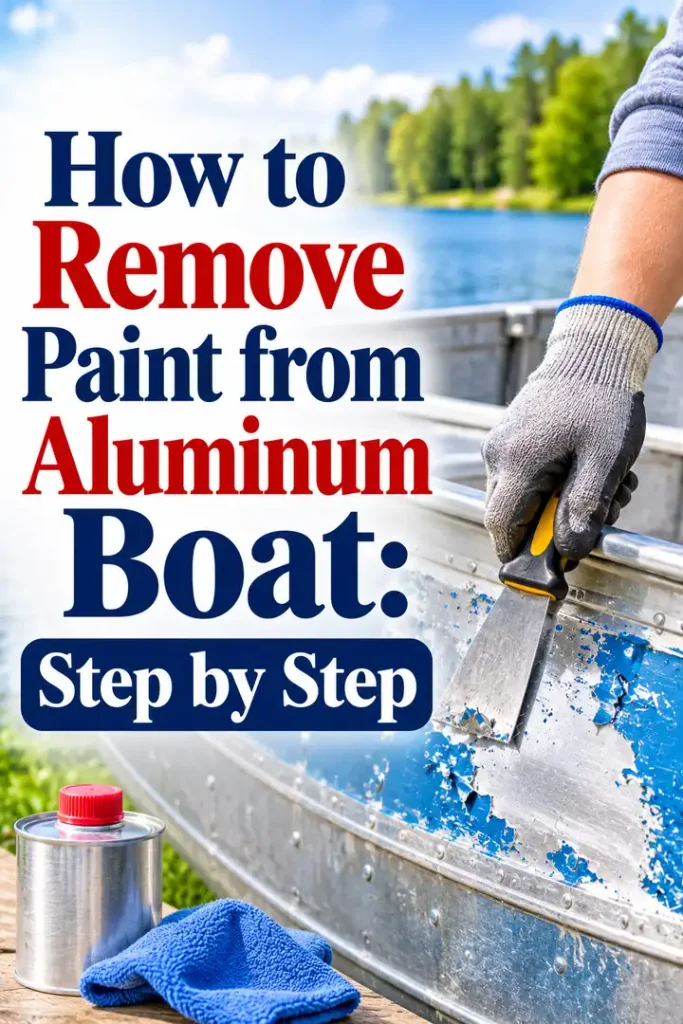
You may not need to strip the entire boat. Sound, firmly attached paint can often remain after proper preparation, while loose, blistered, or incompatible coatings should be removed. The best method depends on the paint type, the condition of the hull, and the coating system you plan to use next.
Affiliate disclosure: As an Amazon Associate I earn from qualifying purchases.
What to Buy for Removing Paint from an Aluminum Boat
Gather the necessary supplies before starting. Choose products specifically suitable for aluminum and marine applications. You may not need every item, depending on the boat’s condition and the removal method.
- Aluminum-safe marine paint remover – Helps soften compatible coatings without relying on a stripper intended for another hull material. Verify the manufacturer’s aluminum compatibility.
- Plastic paint scrapers – Useful for lifting loosened paint while reducing the risk of gouging the metal.
- Aluminum oxide sandpaper – Helps remove coating residue and prepare suitable surfaces for refinishing.
- Random orbital sander – Useful for controlled sanding on broad, accessible areas.
- Marine hull cleaner – Helps remove salt, dirt, and grime before paint removal.
- Marine-grade degreaser – Removes suitable oil and grease contamination when approved for aluminum.
- Microfiber cleaning cloths – Useful for wiping away cleaning residue and dust.
- Chemical-resistant gloves – Protect your hands when handling approved removers and cleaners.
- Safety goggles – Protect your eyes from dust, chips, and chemical splashes.
- Paint-removal respirator – Choose respiratory protection appropriate for the coating, dust, and product safety instructions.
- Heavy-duty protective sheeting – Helps collect paint chips and sanding residue.
- Aluminum-compatible marine primer – Useful if you intend to repaint exposed aluminum with a compatible coating system.
Read the safety data sheet and product label before using any chemical. A paint stripper suitable for fiberglass or wood is not automatically safe for aluminum.
Can You Remove Paint from an Aluminum Boat?
Yes. Paint can be removed from an aluminum boat using controlled mechanical methods or a chemical stripper specifically approved for aluminum. The important part is choosing a process that removes the coating without unnecessarily thinning, gouging, or chemically attacking the metal.
Before stripping, inspect the existing finish. If most of the paint is firmly bonded and you only want to apply another compatible coat, complete removal may be unnecessary. You may only need to clean the surface, remove loose areas, feather the edges, and prepare the remaining coating according to the new paint manufacturer’s instructions.
Full stripping is more appropriate when the paint is extensively peeling, blistering, poorly bonded, incompatible with the planned coating, or built up in multiple failing layers.
Aluminum also needs special attention because unsuitable chemicals and certain marine coatings can contribute to corrosion. Choose products designed for aluminum, and be particularly careful with paint below the waterline.
How to Remove Paint from Aluminum Boat: Step by Step
Follow these steps to remove unwanted paint while protecting the hull. Work slowly, collect the residue, and avoid aggressive methods that can damage the metal.
Step 1: Remove the Boat from the Water
Before beginning, place the boat in a suitable work area where you can reach the surfaces safely.
If you are removing paint from the bottom or sides, the boat should be hauled out and supported securely on appropriate stands or a trailer. Never work beneath a boat that is unstable or improperly supported.
Choose a well-ventilated location with enough room to move around the hull. If the boat is at a marina or boatyard, check its rules about sanding, chemical stripping, paint collection, and waste disposal.
Do not begin stripping while the boat is in the water. Paint chips, sanding dust, and chemical residue must be contained rather than released into the surrounding water.
Step 2: Inspect the Existing Paint
Examine the entire painted surface before choosing a removal method.
Look for:
- Peeling or flaking paint.
- Blisters and bubbles.
- Cracks or areas where the coating has lifted.
- Heavy layers of old paint.
- Scratches exposing bare aluminum.
- White or powdery corrosion deposits.
- Pitting around seams, rivets, and fittings.
Check whether the coating is topside paint, bottom paint, or an antifouling system. These products can have different ingredients and removal requirements.
If the existing paint is sound, consider keeping it rather than stripping the entire boat. Removing only failed areas can save time and reduce unnecessary work.
Step 3: Identify the Paint Type
Try to determine what coating is currently on the aluminum.
It may be an acrylic marine coating, polyurethane finish, epoxy coating, or antifouling paint. Different coatings respond differently to sanding and chemical removers.
If you have the original paint container, technical sheet, or maintenance records, check them for the coating name and removal recommendations.
Older marine coatings may contain hazardous ingredients, including lead or other substances requiring special handling. Some antifouling paints also contain biocides that can harm people and the environment.
If the coating is unknown, old, or potentially hazardous, have it assessed before sanding or scraping. Do not create dust until you understand the risks and the required containment and protective measures.
Step 4: Protect Yourself and the Surrounding Area
Paint removal can produce dust, chips, fumes, and chemical waste. Prepare the work area before opening a stripper or starting a sander.
Wear suitable gloves, eye protection, protective clothing, and a properly selected respirator. Respirator filters must match the hazards identified in the product safety information; a basic dust mask is not adequate protection for every paint-removal job.
Cover nearby equipment, boat components, and surfaces that could be contaminated. Place suitable sheeting beneath the hull to catch paint chips and residue.
Keep children, pets, and bystanders away. Avoid working in strong wind, which can spread contaminated dust beyond the work area.
Step 5: Wash the Aluminum Boat
Clean the boat before attempting to remove the paint.
Use fresh water and an aluminum-compatible marine cleaner to remove salt, dirt, mud, and surface grime. Pay attention to the waterline, corners, rivets, welds, and areas around fittings.
Use a suitable soft or medium brush according to the cleaner’s instructions. Avoid aggressive scrubbing that could damage an existing coating.
Rinse thoroughly and allow the surface to dry. Removing contamination first helps you inspect the paint accurately and prevents dirt from being worked into the surface during sanding.
Step 6: Remove Loose and Peeling Paint
Start with areas where the coating has already separated from the aluminum.
Use a suitable plastic scraper to lift loose flakes. Keep the tool at a shallow angle and work gently along the edges of the damaged paint.
Do not dig into the metal or force a scraper beneath paint that is still firmly attached. Aluminum can be scratched or gouged more easily than many people expect.
Collect the removed chips immediately. If the coating may contain hazardous substances, follow the appropriate containment and disposal requirements rather than sweeping or blowing the debris away.
Step 7: Choose a Suitable Paint-Removal Method
There are two common DIY approaches: mechanical removal and an aluminum-compatible chemical stripper.
Mechanical removal uses controlled scraping and sanding to remove paint. It offers direct control over the work but creates dust and requires care to avoid damaging thin aluminum panels.
Chemical removal uses a product designed to soften a coating so it can be lifted away. This can be useful for suitable paint systems, but the stripper must explicitly be approved for aluminum.
For extensive stripping, professional plastic-media blasting may be an option. It should be performed by an experienced marine specialist using equipment and media appropriate for the hull.
Do not use an aggressive blasting method simply because it removes paint quickly. The wrong media, pressure, or technique can damage aluminum.
Step 8: Test the Removal Method in a Small Area
Before treating the entire boat, test your chosen method on a small, inconspicuous section.
For a chemical remover, apply it according to the manufacturer’s directions and observe how it affects the coating and aluminum. Check for discoloration, unusual surface changes, or signs of damage.
For sanding, begin with controlled, light passes using an appropriate abrasive. Check that you are removing paint rather than unnecessarily cutting into the metal.
If the test produces an unexpected reaction, stop. Contact the product manufacturer or a marine coating specialist before proceeding.
Step 9: Apply an Aluminum-Compatible Paint Stripper if Needed
If a chemical method is appropriate, choose a paint remover whose manufacturer specifically confirms it is suitable for aluminum and the coating being removed.
Apply the product using the recommended tool and thickness. A brush or applicator specified on the label may help spread the remover evenly.
Work in manageable sections rather than coating the whole hull at once. Keep the product away from surfaces, fittings, sealants, and materials that the manufacturer does not approve.
Never assume that a stripper is safe because it is described as marine-grade. Some removers formulated for fiberglass can attack aluminum and should not be used on an aluminum hull.
Step 10: Allow the Stripper to Work
Follow the exact dwell time on the product label.
Some removers soften paint relatively quickly, while others need more time. The result depends on the coating, its thickness, temperature, and the product formulation.
Do not leave the remover on longer than directed. Excessive exposure can damage the substrate or create additional cleanup problems.
If the coating is not softening as expected, check the manufacturer’s guidance before applying more product or extending the treatment time.
Step 11: Lift the Softened Paint
Once the paint has softened, remove it using the scraper or tool recommended by the stripper manufacturer.
A plastic scraper is often useful for lifting softened paint without a sharp metal edge. Work gently and avoid gouging the aluminum.
Collect the softened coating and chemical residue as you go. Do not allow it to dry and become difficult to contain.
If thick layers remain, follow the product instructions for another application if permitted. Avoid combining different stripping products.
Step 12: Sand Remaining Paint Carefully
After loose and softened paint has been removed, some coating may remain around edges, corners, rivets, and other difficult areas.
Use a suitable aluminum-compatible abrasive and controlled pressure to remove the remaining paint where necessary. A random orbital sander can help with broad, accessible sections, while hand-sanding may offer better control around curved surfaces and fittings.
Avoid aggressive grinding, high-speed cutting, and excessive pressure. Thin aluminum panels can be damaged quickly, especially around edges and raised features.
Do not sand through sound protective coatings or remove more metal than necessary. If the hull has significant corrosion or structural damage, have it assessed before continuing.
Step 13: Clean Away Paint Residue and Dust
Once the paint has been removed, clean the surface according to the stripper and coating manufacturer’s instructions.
If you used a chemical remover, complete the specified rinsing or residue-removal process. Do not improvise with household acids, alkalis, or other chemicals to neutralize the product.
For sanding residue, use an appropriate collection system and cleaning method. Avoid blowing dust into the air with compressed air.
Pay particular attention to seams, rivets, corners, and other areas where residue can collect. The surface must be clean before applying a new coating.
Step 14: Inspect the Bare Aluminum
With the old paint removed, inspect the metal carefully.
Look for:
- Pitting or localized corrosion.
- Deep scratches or gouges.
- Damaged welds.
- Cracks or distorted panels.
- Corrosion around fasteners.
- Areas where the metal appears unusually thin.
Do not simply cover corrosion with primer or new paint. The underlying issue needs to be evaluated and corrected first.
Minor surface oxidation may be addressed through the preparation system recommended by the coating manufacturer. Significant pitting, cracks, or structural concerns should be examined by a qualified aluminum boat repair professional.
Step 15: Prepare the Aluminum for Repainting
If you plan to repaint the boat, prepare the bare aluminum promptly using the system specified by the selected marine coating manufacturer.
This may involve a particular sanding profile, an approved aluminum cleaner or etch treatment, and a compatible primer. The correct sequence varies by product, so do not assume that every aluminum primer uses the same preparation method.
Avoid touching the prepared surface with bare hands because oils and contamination can interfere with adhesion.
Apply the recommended primer within its specified preparation window. Follow the product’s instructions for temperature, humidity, application thickness, drying, and overcoating.
Step 16: Choose the Correct Marine Coating
Select a finish designed for the location and use of your boat.
For above-waterline surfaces, choose a marine coating specifically approved for aluminum. For areas below the waterline, use an antifouling system explicitly rated for aluminum hulls.
Many conventional copper-based antifouling paints are unsuitable for direct use on aluminum because they can contribute to galvanic corrosion. Do not choose a bottom paint simply because it is advertised for boats. Check the label and technical sheet for explicit aluminum compatibility and any required primer or tie coat.
Apply the complete coating system in the order specified by the manufacturer. Allow each layer to dry or cure as directed before launching the boat.
Mechanical Sanding vs. Chemical Paint Removal
Both methods can work, but neither is suitable for every aluminum boat or coating.
Mechanical Sanding
Mechanical removal is useful when paint is peeling, when localized areas need preparation, or when a coating is not suitable for chemical stripping.
Advantages:
- Gives you direct control over the amount of paint removed.
- Does not require applying a chemical stripper.
- Can help feather paint edges before repainting.
- Works for many common marine coating systems when performed correctly.
Disadvantages:
- Creates dust and paint debris.
- Requires suitable respiratory protection and containment.
- Can scratch or thin aluminum if used aggressively.
- Takes time on complex hull shapes and around fittings.
Chemical Paint Stripping
Chemical stripping can soften suitable coatings and make removal easier, particularly when several paint layers are present.
Advantages:
- Can reduce the amount of mechanical sanding required.
- May reach areas that are difficult to sand evenly.
- Can help loosen compatible coatings before scraping.
Disadvantages:
- Only certain products are safe for aluminum.
- Requires careful handling and protective equipment.
- Residue must be removed as directed.
- Can damage the hull or nearby materials if the wrong product is selected.
For large-scale stripping, complicated coatings, or uncertain paint chemistry, a professional boatyard may be the safer and more efficient choice.
Common Mistakes to Avoid When Removing Paint from an Aluminum Boat
Using a Fiberglass Paint Stripper
A stripper formulated for fiberglass is not automatically safe for aluminum. Some products can attack or etch the metal. Always check the manufacturer’s approved substrates.
Stripping Paint That Is Still in Good Condition
If the old paint is firmly attached and compatible with the new coating, complete removal may be unnecessary. Removing only failed areas can reduce labor and avoid unnecessary damage.
Using an Aggressive Grinder
Angle grinders and aggressive abrasive discs can remove aluminum quickly, leaving gouges or thinning the hull. Use controlled tools and suitable abrasives.
Ignoring Old Antifouling Paint Hazards
Antifouling coatings can contain harmful substances. Do not dry-sand or create dust from an unknown old coating without checking its hazards and arranging appropriate protection and containment.
Using Copper-Based Bottom Paint
Conventional copper-based antifouling products can cause galvanic corrosion when used directly on aluminum. Choose only a coating system explicitly approved for aluminum.
Leaving Chemical Residue Behind
Remaining stripper or cleaning chemicals can interfere with primer adhesion and may continue reacting with the surface. Follow the specified cleanup procedure completely.
Painting Over Corrosion
New paint will not repair pitting, cracks, or structural damage. Inspect and address the metal condition before applying a new coating.
Tips for Protecting an Aluminum Boat During Paint Removal
- Identify the existing paint before selecting a removal method.
- Check whether the coating is above or below the waterline.
- Keep sound, compatible paint wherever practical.
- Use only chemical removers specifically approved for aluminum.
- Test the selected method on a small area first.
- Avoid aggressive grinding and uncontrolled blasting.
- Wear appropriate respiratory, eye, and skin protection.
- Contain paint chips, dust, and chemical residue.
- Inspect welds, rivets, seams, and fittings after stripping.
- Use an aluminum-compatible primer and marine coating system.
- Keep conventional copper-based antifouling paint away from unprotected aluminum.
- Follow the coating manufacturer’s instructions for preparation and curing.
Frequently Asked Questions
What is the safest way to remove paint from an aluminum boat?
The safest method depends on the paint and hull condition. Controlled scraping and sanding can work for suitable coatings, while an aluminum-approved chemical stripper may help with other paint systems. Test the method first and consider professional help for extensive or hazardous coatings.
Can I use regular paint stripper on an aluminum boat?
No, you should not assume a regular paint stripper is safe. Some removers intended for fiberglass or other materials can attack aluminum. Choose a product whose manufacturer explicitly approves it for aluminum and the coating you are removing.
Can I sand paint off an aluminum boat?
Yes. Sanding can remove suitable coatings and prepare the surface for repainting. Use an appropriate abrasive, controlled pressure, dust collection, and suitable respiratory protection. Avoid removing unnecessary metal or damaging the hull.
Do I have to remove all the old paint before repainting?
Not always. Firmly bonded paint that is compatible with the new coating system may be cleaned and prepared without complete removal. Peeling, blistered, or incompatible paint should be removed before repainting.
Can I use a pressure washer to remove paint from an aluminum boat?
A pressure washer may help clean dirt and loose contamination, but it should not be treated as a complete paint-removal solution. High pressure can damage coatings, force water into vulnerable areas, or disturb hazardous paint. Follow the boat and coating manufacturer’s cleaning guidance.
Is chemical paint removal better than sanding?
Neither method is universally better. Chemical stripping may soften compatible coatings, while sanding provides direct control over removal. The best option depends on the paint type, aluminum condition, safety requirements, and the manufacturer’s recommendations.
Can I use a wire brush on an aluminum boat?
A wire brush can scratch or damage aluminum and may leave unwanted metal contamination. Use a suitable non-damaging tool or abrasive recommended for the specific surface preparation system.
What primer should I use after removing paint from aluminum?
Choose a marine primer specifically designed for aluminum and compatible with the intended topcoat or antifouling system. Some products require an etch treatment or particular preparation sequence, while others use a different system. Follow the technical sheet rather than mixing products from unrelated coating systems.
Can I use copper-based antifouling paint on an aluminum boat?
Do not use conventional copper-based antifouling paint directly on aluminum unless the product manufacturer explicitly confirms that the complete system is suitable. Many copper-based formulations can contribute to galvanic corrosion. Choose an aluminum-compatible antifouling system and follow its primer requirements.
How long should I wait before repainting the boat?
The waiting period depends on the cleaning method, surface condition, temperature, humidity, and primer instructions. The aluminum must be properly prepared and dry, and the selected primer should be applied within the manufacturer’s specified preparation window.
Final Words
Learning how to remove paint from aluminum boat surfaces is about more than getting rid of an old finish. You also need to protect the hull, avoid harmful chemicals, and prepare the metal correctly for its next coating.
Start by inspecting the existing paint and determining whether complete stripping is necessary. Remove loose coatings carefully, use only aluminum-compatible products, and collect all paint debris and chemical residue. After removal, inspect the bare metal and follow a compatible marine primer and paint system if you plan to refinish the boat.
When the coating is unknown, the hull has extensive corrosion, or the job involves large areas of old antifouling paint, professional assistance can help prevent costly damage and reduce exposure to hazardous materials.
Helpful Resources
- TotalBoat – How to Remove Paint on an Aluminum Boat – Explains mechanical removal and the importance of selecting a chemical stripper suitable for aluminum.
- West Marine – Bottom Paint Removal: When to Strip, How to Strip, and What Comes Next – Discusses when stripping is necessary, removal methods, aluminum-specific precautions, and preparation after removing old bottom paint.