One day you wake up and look at your car rims or wheels, and you don’t like the color on them anymore. Has that happened before? It’s quite normal since it happens to most of us.
But what do you do when you don’t know how to remove paint from rims all by yourself? Well, you can certainly take it to your nearest shop and take care of it.
That being said, DIY is always a good option which I prefer the most.
If you go towards the professional route, you’re most likely to get a good service. However, it’s going to cost you a lot compared to a DIY approach.
And if you also do paintwork, the labor cost for car painting can be steep in the case of professional work. The cost ranges from $1000 to $3500, according to customer reports.
If you want to save some bucks and get the satisfaction of doing paintwork on your wheels, let’s dig into it, shall we?
Contents
How to Remove Paint from Rims & Wheels: Step by Step
I wish it were as easy as peeling off paints. Removing spray paint from wheels takes a lot of work because it bonds extremely well with plastic due to its base formula.
If you use a paint stripper only, there’s a chance of causing damage. But in a small amount, it can help.
And that’s why a typical paint thinner or stripper is never a good option. We want to preserve the look of our tires.
Below, I’ll describe the best way to remove paint, in my opinion. So, gather some tools to prepare your wheels beforehand, and then you will start working on them.
What Are the Required Tools and Supplies?
Here are the tools you’ll need for removing paint from your wheels. There are alternatives to these tools that I won’t forget to mention.
- Used Clean Towels Or a Piece of Cloth: You’re going to use this to clean liquid off of the wheels. There will be excess paint remover and wet paint when the work is done. Using a cloth to clean will keep your job less messy. Use something that you won’t be using again since it will be left unusable.
- A Toothbrush: Any narrow brush will do the job if you don’t have a spare toothbrush. It is to scrape off the harder-to-reach stubborn paint.
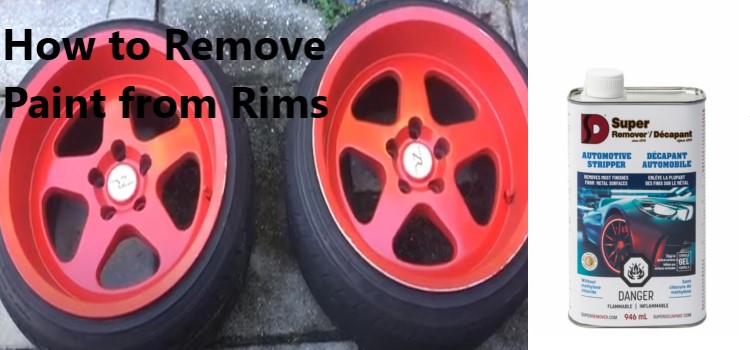
- Paint Stripper/Thinner: Previously I said that a paint thinner/stripper can damage the wheel surface. However, in small amounts, it can actually help to get the paint off.
- Water: Do the removal of paint near a tap or a water source. You’re going to need a lot of water during the whole process. It’s necessary for pre-washing the wheel as well as during the process and afterward.
- Sandpaper: The professionals use a brush attachment on a drilling machine to thin out the paint layer. Since we are not professionals, we have to make do with sandpapers. And it’s not a hard job to do.
- Pressure Washer: This is not a must-have tool. But it can be helpful if there’s too much dirt and debris on the wheels.
- Toolkit for Removing the Wheels: Any toolkit having screwdrivers and wrenches suitable for wheels is sufficient.
- Alternatives: You can use acetone or rubbing alcohol instead of paint thinner since these will work the same way. Some vehicle owners use clay bars with soapy water, which I bet, is a tiring process. It’ll be up to you if you want to take that road. If you are constantly changing the paint of your rim, you may want to get a drill machine with a brush attachment for yourself to make your life easy. It’s a handy machine to have.
Read Next: Guide for removing paint from aluminum boats
Step by Step Process for Removing Paint from wheels & Rims
It’s a pretty straightforward process. Here’s a step-by-step guide for the uninitiated.
Step 1– Remove the Wheels:
Do I have to speak it out loud? It’d be a hell of a lot easier to remove the paint if the wheel was taken off. So, just do it if you have the toolkit with you.
Step 2– Wash the Wheels Properly:
Use the water tap to clean the wheels and their corners thoroughly. It can really mess up the paint scraping. Proper use of paint thinner needs a clean surface.
Do you have access to a pressure washer? If you do have access, that’s your best option to get the wheel as clean as possible.
Step 3– Use the Paint Thinner:
Once you’re confirmed that your wheel is free from any dirt and grime, take your paint thinner/stripper spray can and spray.
Make sure to spray on only the places selected for paint removal. Otherwise, you’re going to mess up your beautiful paint job.
To do it properly, you can use covering tapes to cover the places around your selected area.
Leave it there for at least 15 minutes. After 15 minutes, you’ll notice that the paint will start to show bubbles on the surface.
Since you’re using it on the rims, you can use it a bit more. For wheels, the amount should be as little as possible to avoid causing damage.
Alternative solutions:
- If you’re an owner of chrome wheels, I have a bit suggestions for you. Leave the paint thinner on for a day if you have time. It’ll make it easier for you to scrape off the paint without harming the chrome surface shine if you just give it a day. You can use a soft cloth to remove the bubbly paint off of the rim surface.
- In case you’re using acetone or lacquer thinner to remove paint, you want to use a soft cloth. Apply the solution on a soft cloth and place it on the rim. It will soften it slowly. Yes, it will take time. But it’ll deliver a good result.
- Use a ball of steel wool to apply rubbing alcohol or chrome polish.
- If you’re using an oven cleaner, you can use it as you’re spraying the inside of your oven. Seal the paint with plastic wrap. And then clean it as you’d clean your oven.
Step 4– Wipe or Scrape off the Paint:
Whether you used paint thinner, acetone, rubbing alcohol, or oven cleaner, you are expecting to find bubbly paint on the rim surface. If you’ve done everything properly up to this point, the paint should be ready to come off.
Take a rag or a towel, and scrape it off. Using a nylon scraper is a good idea. You can apply a little bit more pressure with it and attack the stubborn spots even though there shouldn’t be any.
Assuming that there’s a bit of paint still remaining, you can use a ball of steel wool to light scrub it off.
If you’re also removing paint from the wheels, clean the wheel first. And then go to the rims.
There are quite a few narrow places where you can’t reach and clean properly with a cloth. That’s why you need a toothbrush. Clean every nook and cranny with it.
Step 5– Clean with Water:
Rinse and clean the rims thoroughly and make sure there is no piece of paint on the surface. You can use a pressure washer for this. And then, use a dry cloth to soak up the water.
Step 6– Buff and Polish the Wheels:
Now that you have thoroughly cleaned the rims and wheels, you have two options. Either you’re going to repaint the rims with your preferred color, or you’re going to show off the shine on your chrome wheels.
It doesn’t matter which one you’re opting for; you have to buff up the rims to make it ready for polishing or painting.
To buff the wheel and rim’s surface, use sandpaper with low grit numbers such as 200-300. If you’ve got a drill machine and a brush attachment, your job just became easier. You can also use it to polish the rim by using the polishing agent.
Last Piece of Advice:
DIY can be tough. So if you’re not ready for it, don’t take risks with your rims. Take professional assistance.
The most important thing you need for this project is time. Removing paint, especially spray paint, takes time, and it’s a tiring process.
So, do it when you’re not pressed for time. With the right tools, you can cut down the time. We’ve mentioned everything you need to make your life easy.
You should now know how to remove paint from Wheels & rims efficiently without spending a penny on it.
For those who’ll use pressure washers, please wash with care. Holding the pressure washer in one place for a long time can damage the surface and diminish its natural shine.