
The best trim paints can transform ordinary baseboards, door frames, window casings, and decorative molding with a smooth, attractive finish that holds up to everyday use. Unlike regular wall paint, trim enamel is designed for surfaces that are frequently touched, bumped, and cleaned. Whether you prefer a subtle satin appearance or reflective High Gloss Trim Paint, choosing a suitable formula is essential for a professional-looking result.
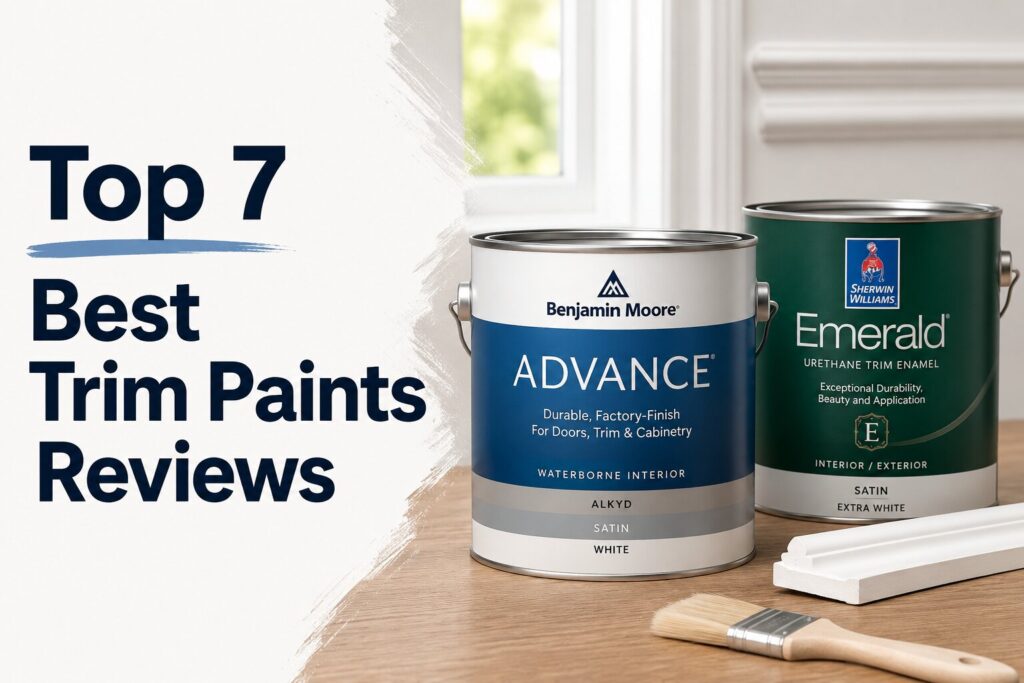
This guide compares seven trim paint options for different projects, budgets, and application preferences. You’ll find our top picks, a comparison table, individual product reviews, and practical advice on choosing the right sheen and tools. We’ll also cover how a quality Paint Brush for Trim and the right Spray Paint Trim method can help you achieve a cleaner finish.
Our Top Picks
- Best Overall: Sherwin-Williams Emerald Urethane Trim Enamel – A premium option for doors, windows, and frequently cleaned trim.
- Best Smooth Finish: Benjamin Moore ADVANCE Interior Paint – A waterborne alkyd paint valued for its flow and leveling.
- Best for Everyday DIY Projects: BEHR PREMIUM Cabinet, Door & Trim Enamel – A dedicated enamel for compatible doors, cabinets, and molding.
- Best for Spray Application: PPG BREAK-THROUGH! – A fast-drying coating that can be brushed, rolled, or sprayed.
- Best for Previously Finished Trim: INSL-X Cabinet Coat Enamel – A urethane acrylic enamel for suitable woodwork and other approved surfaces.
- Best Traditional Interior Enamel Alternative: Sherwin-Williams ProClassic Interior Waterbased Acrylic-Alkyd – Designed for interior doors, cabinets, and trim.
- Best for Cabinet and Trim Projects: Valspar Cabinet, Door & Trim Enamel – A dedicated enamel option for compatible household woodwork.
Best Paint for Trim Comparison Table
| Product Name | Best For | Check Price |
|---|---|---|
| Sherwin-Williams Emerald Urethane Trim Enamel | Overall durability and frequently used trim | Check on Amazon |
| Benjamin Moore ADVANCE Interior Paint | Smooth brushed finish | Check on Amazon |
| BEHR PREMIUM Cabinet, Door & Trim Enamel | Everyday trim and door projects | Check on Amazon |
| PPG BREAK-THROUGH! | Brushed, rolled, or spray applications | Check on Amazon |
| INSL-X Cabinet Coat Enamel | Previously finished compatible surfaces | Check on Amazon |
| Sherwin-Williams ProClassic Acrylic-Alkyd | Interior doors and woodwork | Check on Amazon |
| Valspar Cabinet, Door & Trim Enamel | Cabinet and trim projects | Check on Amazon |
Affiliate disclosure: As an Amazon Associate I earn from qualifying purchases.
Product note: These Amazon links lead to product searches using the affiliate tag. Some professional paint lines are primarily sold through manufacturer stores or authorized dealers. Check the exact product name, formula, sheen, size, and seller before purchasing.
Top 7 Best Trim Paints Reviews
1. Sherwin-Williams Emerald Urethane Trim Enamel – Best Overall
Sherwin-Williams Emerald Urethane Trim Enamel is a premium option for homeowners who want a smooth, durable finish on doors, windows, cabinets, and trim. Its water-based urethane-modified alkyd formula is designed to create a hard coating that withstands the wear associated with frequently used surfaces.
One advantage is its resistance to yellowing compared with traditional oil-based coatings. This can be particularly appealing when painting white baseboards, door frames, and decorative molding. The product is available in satin, semi-gloss, and gloss finishes, so you can choose the amount of shine that suits your room.
The gloss option is worth considering when you want a reflective finish, although it will make dents and surface imperfections more noticeable. Proper preparation and careful application remain important regardless of the selected sheen.
Pros:
- Designed for doors, windows, cabinets, and trim.
- Durable finish for frequently cleaned surfaces.
- Available in satin, semi-gloss, and gloss.
- Water-based cleanup.
- Suitable for approved interior and exterior projects.
Cons:
- More expensive than many standard paints.
- Requires proper surface preparation.
- Needs sufficient time to cure before heavy use.
Best For: Homeowners seeking a premium trim enamel for doors, baseboards, and frequently used woodwork.
2. Benjamin Moore ADVANCE Interior Paint – Best Smooth Finish
Benjamin Moore ADVANCE is a waterborne alkyd paint designed for interior doors, trim, cabinets, and other suitable woodwork. Its flow and leveling properties make it a strong option when achieving a smooth finish is more important than completing the project as quickly as possible.
When applied correctly, the coating can level out brush marks as it dries. This is particularly useful on decorative molding, door panels, and detailed baseboards where uneven application can be easy to notice.
ADVANCE is available in several sheen options, including satin, semi-gloss, and high gloss, depending on the product selection. If you specifically want High Gloss Trim Paint, confirm that the selected product and color are available in that finish.
One consideration is its longer recoat schedule compared with some fast-drying acrylic enamels. Allow the recommended time between coats rather than rushing the process.
Pros:
- Designed for interior trim, doors, and cabinetry.
- Good flow and leveling characteristics.
- Multiple sheen options.
- Water-based cleanup.
- Suitable for detailed woodwork.
Cons:
- Longer recoat time than many acrylic enamels.
- Requires patience during application.
- Premium pricing may not suit every budget.
Best For: Painters who want a smooth, refined finish on interior doors, molding, and baseboards.
3. BEHR PREMIUM Cabinet, Door & Trim Enamel – Best for Everyday DIY Projects
BEHR PREMIUM Cabinet, Door & Trim Enamel is a practical option for homeowners painting doors, cabinets, molding, and baseboards. Unlike ordinary wall paint, this product is specifically intended for compatible surfaces that need a durable finish.
Its flow and leveling properties help create a more even appearance, while its block resistance is useful on doors and other painted surfaces that may come into contact with one another. The manufacturer lists applications on properly prepared and primed substrates such as drywall, masonry, and metal in addition to trim and cabinetry.
The available satin and semi-gloss finishes offer flexibility. Satin creates a softer appearance, while semi-gloss produces more shine and is a popular choice for areas that need regular cleaning.
For the best results, clean the surface, repair imperfections, and use the primer recommended for the material. Do not assume that every substrate can be painted without preparation.
Pros:
- Specifically designed for cabinets, doors, and trim.
- Good flow and leveling.
- Satin and semi-gloss finish options.
- Suitable for several properly prepared substrates.
- Useful for household DIY projects.
Cons:
- Surface preparation is still necessary.
- Available finishes and colors may vary.
- Full curing takes longer than initial drying.
Best For: DIY homeowners who want a dedicated enamel for compatible doors, cabinets, and interior trim.
4. PPG BREAK-THROUGH! – Best for Spray Application
PPG BREAK-THROUGH! is a waterborne acrylic enamel designed for doors, windows, trim, cabinetry, shelving, and other approved surfaces. It stands out for its fast drying and flow and leveling characteristics.
The manufacturer describes the coating as suitable for brushing, rolling, and spraying. That makes it a useful option when a project involves detailed molding, several door panels, or extensive compatible trim. Spraying can help create an even appearance without obvious brush marks, provided the equipment and technique are appropriate.
Another useful feature is its range of sheen choices, including satin, semi-gloss, and gloss options depending on the product version. Check the exact specification before choosing it for a particular project.
Because it dries quickly, you should work in manageable sections and avoid repeatedly brushing or rolling areas that have begun to set. For spray application, follow the manufacturer’s instructions for equipment, tip selection, pressure, and thinning.
Pros:
- Designed for doors, windows, trim, and cabinetry.
- Can be brushed, rolled, or sprayed.
- Fast-drying formulation.
- Good flow and leveling properties.
- Available in several finishes.
Cons:
- Fast drying can make application less forgiving.
- Equipment settings matter when spraying.
- Product availability and specifications vary by version.
Best For: Homeowners and painters who need a versatile enamel for compatible trim and spray projects.
5. INSL-X Cabinet Coat Enamel – Best for Previously Finished Trim
INSL-X Cabinet Coat is a urethane acrylic enamel designed for cabinets, doors, furniture, woodwork, and trim. It is especially worth considering when refreshing compatible previously painted or finished surfaces.
Its flow and leveling properties help create a smooth finish, while the manufacturer describes the coating as resistant to chipping, scuffing, grease, and household stains. These characteristics make it useful for trim and other surfaces that receive regular handling.
Previously finished trim often has a glossy surface that can make repainting challenging. Cabinet Coat is formulated for adhesion to certain difficult surfaces, including some varnished and polyurethane finishes, but preparation instructions still matter. Clean thoroughly and check whether the existing coating needs sanding or other treatment.
The product is offered in different finishes, including satin and semi-gloss versions. Choose the exact version that suits your project.
Pros:
- Urethane acrylic enamel.
- Designed for trim, doors, cabinets, and woodwork.
- Smooth flow and leveling.
- Resists scuffing and household stains.
- Water-based formulation.
Cons:
- Not every old coating is automatically compatible.
- Proper cleaning and preparation remain important.
- Confirm the finish and product version before ordering.
Best For: Repainting compatible previously finished interior trim, doors, and cabinets.
6. Sherwin-Williams ProClassic Interior Waterbased Acrylic-Alkyd – Best Interior Enamel Alternative
Sherwin-Williams ProClassic Interior Waterbased Acrylic-Alkyd is designed for interior doors, trim, cabinets, and woodwork. It combines acrylic properties with alkyd-style performance characteristics, making it an option for projects where a smooth enamel finish is desired.
Its flow and leveling can help create an even appearance on decorative molding and door panels. This is especially helpful when painting white or light-colored trim, where visible application marks may stand out under bright lighting.
The product is intended for interior applications, so it should not be treated as an all-purpose exterior coating. Check the exact version, sheen, and substrate recommendations before buying.
For a successful finish, use a suitable brush or roller, apply even coats, and follow the stated recoat schedule.
Pros:
- Designed for interior trim, doors, and cabinets.
- Good flow and leveling characteristics.
- Suitable for properly prepared woodwork.
- Water-based formulation.
- Useful for detailed molding and door panels.
Cons:
- Intended for interior applications.
- Availability may depend on the local dealer.
- Requires appropriate preparation and curing time.
Best For: Homeowners who want a dedicated interior enamel for baseboards, doors, and decorative woodwork.
7. Valspar Cabinet, Door & Trim Enamel – Best for Cabinet and Trim Projects
Valspar Cabinet, Door & Trim Enamel is another product to consider when a project includes several compatible painted surfaces around the home. It is intended for applications such as cabinets, doors, and trim rather than ordinary wall painting.
A dedicated enamel can be useful on baseboards and door frames because these areas are more likely to experience scuffs, fingerprints, and repeated cleaning. The selected product version should be checked for its approved surfaces, sheen choices, and application instructions.
Before painting, clean the surface thoroughly and remove loose or peeling material. Bare wood, glossy finishes, and previously stained surfaces may require different preparation or a compatible primer.
For a coordinated appearance, select a sheen that works with the rest of the room. Satin provides a softer look, while semi-gloss is a familiar choice for traditional trim.
Pros:
- Intended for cabinet, door, and trim projects.
- Useful for compatible household woodwork.
- Dedicated enamel rather than standard wall paint.
- Different finish options may be available.
Cons:
- Product availability can vary.
- Check the exact formula and substrate compatibility.
- Proper preparation is still necessary.
Best For: Homeowners looking for a dedicated enamel for compatible cabinet, door, and trim projects.
How to Choose the Best Trim Paint
The right trim paint depends on the surface, room conditions, desired sheen, and application method. Consider these factors before making a purchase.
1. Choose the Right Paint Formula
Trim enamels come in several formulations, each with different application and performance characteristics.
- Waterborne alkyd: Designed to provide flow and leveling associated with traditional alkyd paint while allowing water cleanup.
- Urethane-modified acrylic or alkyd: Formulated for a durable finish on suitable high-use surfaces.
- Acrylic enamel: Often offers convenient cleanup and relatively quick drying.
- Traditional oil-based alkyd: Can provide a hard finish but may yellow over time, especially in low-light areas.
For many modern interior projects, a dedicated waterborne trim enamel is a convenient starting point.
2. Select the Right Sheen
The sheen affects how much light the painted surface reflects and how visible imperfections become.
| Sheen | Appearance | Suitable Applications |
|---|---|---|
| Satin | Soft, subtle shine | Modern interiors and understated molding |
| Semi-gloss | Noticeable shine | Doors, baseboards, and window trim |
| High-gloss | Very reflective | Decorative molding and statement trim |
Semi-gloss is a popular all-around choice for trim. High-gloss creates a dramatic appearance, but it also highlights dents, sanding scratches, and uneven surfaces. Prepare the trim carefully before choosing it.
3. Consider the Trim Material
Not all trim is made from solid wood. Your project may involve MDF, previously painted wood, PVC, composite material, or metal.
- Solid wood: Clean, sand, and prime bare areas as required.
- MDF: Seal exposed edges and use a compatible primer to help prevent excessive absorption.
- Previously painted trim: Remove loose paint and prepare glossy areas according to the new coating’s instructions.
- PVC or composite trim: Select a product specifically approved for that material.
- Metal trim: Use a compatible metal primer and finish coating.
Matching the primer and paint to the substrate is essential for reliable adhesion.
4. Think About Application Method
A quality paint can still produce a disappointing result when applied with unsuitable tools. An angled sash brush is useful for corners, profiles, and narrow molding. A compatible trim roller can help cover wider, flat sections.
For larger projects involving numerous doors or extensive molding, spraying may produce a consistent finish when performed correctly. Confirm that the paint is approved for spray application and follow its technical instructions.
High Gloss Trim Paint: Is It Worth Choosing?
High-gloss paint creates a reflective finish that can make decorative woodwork stand out. It is often used on interior doors, window frames, baseboards, and architectural details.
However, the shiny appearance comes with a disadvantage: surface defects become easier to notice. Brush marks, dents, uneven joints, and sanding scratches may stand out under strong lighting.
Before applying high-gloss paint:
- Fill small holes and dents with a suitable filler.
- Sand rough areas until they are smooth.
- Remove dust and surface contaminants.
- Apply the recommended primer.
- Use thin, even coats rather than one heavy coat.
- Allow each coat to dry according to the manufacturer’s instructions.
If your trim has many imperfections, satin or semi-gloss may be a more forgiving choice.
What Paint Brush for Trim Should You Use?
Choosing the right Paint Brush for Trim can help you achieve cleaner edges and a more even finish. A quality angled brush is particularly useful because it provides better control around corners, narrow profiles, and detailed molding.
Consider these common brush types:
- Angled sash brush: Useful for cutting in around edges and painting detailed profiles.
- Synthetic-bristle brush: Generally suitable for water-based acrylic and waterborne enamel paints.
- Natural-bristle brush: Typically used with compatible oil-based coatings rather than ordinary water-based paint.
- Small detail brush: Helpful for narrow molding, decorative corners, and difficult-to-reach areas.
For most water-based trim paints in this guide, a quality synthetic-bristle brush is a practical choice. Look for one that holds paint evenly without leaving excessive streaks.
Avoid repeatedly brushing over paint that has started to set. Overworking it can create visible marks instead of improving the finish.
Spray Paint Trim: When Should You Use It?
Spray Paint Trim can be useful when you need a consistent finish across many narrow surfaces, decorative profiles, or cabinet-style doors. Spraying can reduce visible brush marks, but it requires suitable equipment, preparation, and technique.
Before spraying, check that the selected paint is approved for the equipment you intend to use. Some products require specific spray tips, pressure settings, or thinning instructions, while others should not be thinned.
A successful spray project generally involves:
- Removing or protecting nearby furniture and flooring.
- Cleaning and sanding the trim.
- Masking walls, glass, and surrounding surfaces.
- Applying compatible primer where required.
- Testing the spray pattern on scrap material.
- Applying light, even passes.
- Allowing the correct drying and curing time.
Wear the protective equipment specified by the paint and sprayer manufacturers. Provide suitable ventilation and follow all label safety instructions.
For a small repair or isolated detail, an aerosol product specifically labeled for the trim material may be convenient. For long baseboards or extensive molding, a dedicated trim enamel applied with a brush or compatible sprayer is usually more practical than relying on general-purpose aerosol paint.
How to Paint Trim for a Professional-Looking Finish
Even the best paint needs proper preparation. Follow these steps to help achieve a smooth and durable result.
Step 1: Clean the Surface
Remove dust, grease, fingerprints, and other contaminants. Kitchen trim may need additional cleaning because cooking residue can affect adhesion.
Allow the surface to dry completely before sanding or painting.
Step 2: Repair Imperfections
Fill nail holes, dents, and small cracks with a suitable filler. Once dry, sand the repaired areas until they blend with the surrounding surface.
Replace damaged caulk where necessary using a product suitable for the location. Paintable caulk should be fully cured before painting.
Step 3: Sand the Trim
Lightly sand previously painted or glossy surfaces to improve adhesion, following the paint manufacturer’s recommendations. Remove loose or peeling paint.
If an older home has paint that may contain lead, do not dry-sand or disturb it without appropriate lead-safe assessment and precautions.
Step 4: Apply Primer
Use a compatible primer when painting bare wood, MDF, stained surfaces, or previously finished trim that needs better adhesion. A stain-blocking primer may be necessary for knots or discoloration.
Do not assume every trim enamel is self-priming on every material. Check the product instructions.
Step 5: Apply the First Coat
Use a suitable angled brush for detailed sections and a compatible roller or sprayer for larger areas. Work in manageable sections and maintain a wet edge.
Avoid applying too much paint at once, especially around corners and decorative profiles.
Step 6: Apply the Second Coat
Allow the first coat to dry for the full recommended time. Lightly sand between coats only when the manufacturer’s instructions recommend it, then remove sanding dust before applying another coat.
Step 7: Allow the Paint to Cure
Paint that feels dry to the touch is not necessarily fully cured. Avoid heavy cleaning, repeated handling, or allowing doors and trim to rub together until the coating has cured sufficiently.
Common Trim Painting Mistakes to Avoid
A few avoidable mistakes can reduce the quality and lifespan of your finished project.
- Skipping preparation: Dirt, grease, and loose paint can prevent proper adhesion.
- Using ordinary wall paint: Standard wall paint may not provide the same finish characteristics as a dedicated trim enamel.
- Choosing the wrong primer: Bare wood, glossy surfaces, and stained materials may need different primers.
- Applying thick coats: Heavy coats can sag, drip, and dry unevenly.
- Ignoring recoat times: Applying another coat too soon can affect the finish.
- Using unsuitable brushes: The wrong bristle type can leave streaks or poor coverage.
- Closing freshly painted doors too early: Paint can stick to door stops and frames before it has cured.
- Ignoring ventilation: Follow the label’s ventilation and protective-equipment instructions.
Frequently Asked Questions
1. What is the best paint for trim?
Sherwin-Williams Emerald Urethane Trim Enamel is a strong overall option for durable trim, doors, and baseboards. Benjamin Moore ADVANCE is worth considering when a smooth brushed finish is a priority. The best choice depends on your surface, budget, and application method.
2. Should trim paint be satin or semi-gloss?
Satin offers a softer appearance, while semi-gloss provides more noticeable shine and is a popular choice for doors, baseboards, and molding. Both can work well when the product is designed for trim.
3. Is high-gloss paint good for trim?
Yes. High-gloss paint can create an attractive, reflective finish on properly prepared trim. However, it highlights imperfections more than lower-sheen finishes, so sanding and surface repair are especially important.
4. Can I use wall paint on trim?
Some interior wall paints can be used on certain trim surfaces, but a dedicated trim enamel is generally a better option for frequently touched or bumped areas. Trim enamels are formulated with finish quality and durability in mind.
5. Do I need to prime trim before painting?
It depends on the surface and paint. Bare wood, MDF, stained wood, and glossy existing coatings may require a suitable primer. Follow the paint manufacturer’s preparation recommendations.
6. What is the best brush for painting trim?
A quality angled synthetic-bristle brush is a good choice for most water-based trim paints. It provides control around corners, edges, and decorative molding.
7. Can I spray trim paint?
Yes, if the product is approved for spray application and the equipment is compatible. Follow the manufacturer’s instructions for spray tips, pressure, thinning, and protective equipment.
8. How many coats of trim paint should I apply?
Two coats are commonly needed for a consistent finish, although the exact requirement depends on the product, color change, surface condition, and coverage. Follow the label instructions.
9. How long does trim paint take to dry?
Drying times vary considerably. Some acrylic enamels can be ready for another coat relatively quickly, while waterborne alkyd products may need a longer recoat interval. Always use the manufacturer’s stated drying times rather than relying on touch alone.
10. Can I paint over old glossy trim?
Yes, provided the existing coating is sound and compatible with the new paint. Clean it thoroughly, remove loose paint, and prepare the glossy surface as directed. A bonding primer may be needed.
11. Is oil-based paint better for trim?
Traditional oil-based paint can provide a hard, smooth finish, but it may yellow over time and requires solvent cleanup. Modern waterborne enamels offer useful alternatives with easier cleanup and different performance characteristics.
12. Can I use trim paint on cabinets?
Some trim enamels are also specifically approved for cabinets. Check the product label to confirm the intended application and follow the required preparation and curing instructions.
13. What is the best color for trim?
White is a popular choice because it creates a clean contrast with many wall colors. Warm white, cream, black, gray, and other coordinated shades can also work depending on the room’s design.
14. How do I prevent brush marks on trim?
Use a suitable high-quality brush, avoid overloading it, apply even coats, and maintain a wet edge. Choose a product with good flow and leveling properties, and avoid repeatedly brushing paint that has begun to set.
15. How long should I wait before cleaning painted trim?
Wait until the coating has cured according to the manufacturer’s instructions. Initial drying does not mean the finish has reached its full durability. Gentle cleaning after the recommended curing period helps protect the new paint.
Final Words
The best trim paints combine a smooth appearance with the durability needed for doors, baseboards, and decorative woodwork. Sherwin-Williams Emerald Urethane is a strong overall choice, Benjamin Moore ADVANCE is appealing for its leveling properties, and BEHR offers a practical option for many DIY projects. Consider the surface, sheen, preparation requirements, and drying schedule before making your final decision.
Whether you prefer satin, semi-gloss, or High Gloss Trim Paint, the right product and careful application can help your trim look cleaner and more polished.
Helpful Resources
- Sherwin-Williams Emerald Urethane Trim Enamel – Official product information about its intended uses, finish options, and features.
- PPG BREAK-THROUGH! Door, Trim and Cabinet Paint – Manufacturer information about application methods, finishes, and product features.