
Drawing a goose is a great way to practice smooth curves, proportions, and simple animal shapes. Its long neck and rounded body make it perfect for beginners.
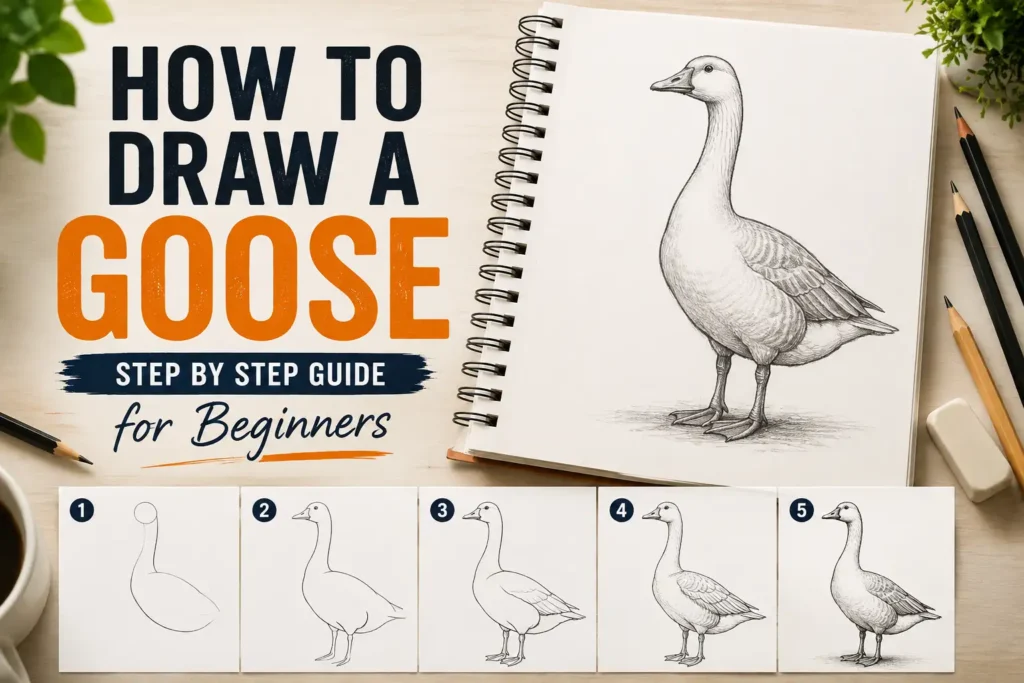
In this complete guide, you’ll learn how to draw a goose step by step in an easy and enjoyable way. With practice, you’ll be able to create clean and realistic drawings.
Essential Drawing Supplies You Should Have
Sketchbook
HB and 2B pencils
Eraser
Black fineliner pen
Colored pencils or markers
Simple Tips Before You Start Drawing
Before starting, practice drawing ovals and curved lines. A goose is mostly made from these shapes, so getting comfortable with them will help a lot.
Keep your strokes light and loose at first. This makes it easier to fix mistakes and build confidence as you move step by step.
How to Draw a Goose Step by Step Guide for Beginners
1. Understanding the Shape of a Goose
Learn the Basic Structure
A goose has a very recognizable form: a small head, a long curved neck, and a large oval body. Breaking it into simple shapes makes it easier to draw.
Most beginner tutorials suggest starting with an oval for the body and a smaller circle for the head to simplify the process .
The neck connects these two shapes with smooth curved lines. This flowing shape is what gives the goose its graceful appearance.
Thinking in simple shapes helps you focus on proportions instead of details. It also makes the drawing process less overwhelming.
Understanding this structure is the first step toward creating a balanced and realistic goose drawing.
2. Sketching the Head and Body
Build the Foundation
Start by drawing a small circle for the head. Then draw a larger oval below it for the body.
Make sure there is enough space between them for the neck. This helps maintain proper proportions.
Keep your lines light so you can adjust them later.
This step forms the basic framework of your drawing. Many tutorials recommend beginning with these simple shapes to make the process easier for beginners .
Take your time to position everything correctly. A good foundation makes the rest of the drawing much easier.
3. Drawing the Neck
Connect the Shapes Smoothly
Now draw two curved lines connecting the head and body. This forms the goose’s long neck.
The neck should curve gently, not straight. A slight bend adds a natural look.
Geese are known for their elegant neck movement, so try to keep the lines smooth and flowing.
This step is important because the neck defines the posture of the bird.
Practicing smooth curves here will improve your overall drawing skills.
4. Adding the Beak and Face
Define the Expression
Draw a triangular shape extending from the head to create the beak.
Then add a small circle for the eye. You can also draw a tiny line on the beak to show the mouth and a small mark for the nostril.
These simple details bring your drawing to life.
Keep the features clean and minimal. Overcomplicating them can make your drawing look messy.
This step gives your goose personality and expression.
5. Shaping the Body
Add Volume and Form
Refine the oval shape of the body by smoothing the lines. Add a slight curve underneath to show the belly.
You can also draw a small tail at the back using short curved lines.
The body should look rounded and slightly plump.
Adding these details makes your drawing look more complete and natural.
This step helps transform your basic shapes into a recognizable goose form.
6. Drawing the Wing
Add Feather Structure
Draw a long curved shape on the side of the body to represent the wing.
You can add simple feather lines inside the wing to create texture.
According to drawing guides, wings are often drawn with smooth outlines and light feather details for realism .
Keep the lines soft and flowing. Avoid sharp edges.
This step adds depth and makes your goose look more detailed.
7. Drawing the Legs and Feet
Create Stability
Draw two thin legs extending downward from the body.
At the bottom, add webbed feet by drawing small triangular shapes connected by curved lines.
Geese have distinctive webbed feet, which are important for swimming.
Keep the legs simple and slightly bent for a natural stance.
This step completes the basic structure of your goose.
8. Refining the Outline
Clean Up Your Sketch
Erase any unnecessary guidelines and refine your lines.
Make your outlines smoother and more confident.
You can go over your drawing with a darker pencil or pen for a clean finish.
This step transforms your rough sketch into a polished drawing.
Take your time and focus on clarity.
9. Adding Feathers and Details
Enhance Realism
Add small feather details along the wing and body.
You can use short, curved lines to suggest texture without overcrowding the drawing.
Some tutorials recommend keeping feather details simple to maintain a clean look .
You can also refine the eye and beak for better definition.
These details make your drawing more interesting and lifelike.
10. Shading and Depth
Make It Look 3D
Decide where your light source is coming from.
Add shading on the opposite side of the light, especially under the neck, belly, and wing.
Use soft strokes and blend gently.
Shading adds depth and makes your drawing more realistic.
Even simple shading techniques can greatly improve your artwork.
11. Coloring Your Goose
Bring Your Drawing to Life
Use white or light gray for the body, with orange or yellow for the beak and feet.
Add subtle shading to create depth and dimension.
You can also experiment with different colors for creative styles.
Coloring adds personality and makes your drawing more visually appealing.
Take your time and enjoy this step.
12. Practicing Different Styles
Explore Creativity
Once you’ve learned the basics, try drawing different types of geese.
You can create cartoon versions, realistic drawings, or even stylized designs.
Experiment with different poses, such as a walking or swimming goose.
Practicing different styles helps you improve faster and develop your own artistic voice.
The more you draw, the more confident you will become.
13. Common Mistakes to Avoid
Improve Faster
One common mistake is drawing the neck too stiff. Always keep it curved and natural.
Another mistake is incorrect proportions between the head and body.
Avoid adding too many details too early. Start simple and build gradually.
Skipping shading can make your drawing look flat.
Learning from these mistakes will help you improve quickly.
14. Practice Tips for Beginners
Build Your Skills
Practice drawing geese regularly using simple shapes.
Start with quick sketches to improve speed and confidence.
Observe real birds to understand their structure and movement.
Try different tools like pencils, pens, and markers.
Consistency is key to improvement.
Frequently Asked Questions
Is drawing a goose easy for beginners?
Yes, because it uses simple shapes like ovals and curves, making it beginner-friendly.
What is the first step in drawing a goose?
Start with basic shapes like a circle for the head and an oval for the body.
How can I make my goose look realistic?
Focus on smooth curves, proper proportions, and shading.
Should I draw feathers in detail?
Keep them simple at first. You can add more detail as you improve.
How long does it take to learn?
With regular practice, you can see improvement within a few days.
Final Words
Drawing a goose is a fun and rewarding way to practice shapes, curves, and shading. By following simple steps, you can create a clean and appealing drawing.
Keep practicing, stay patient, and enjoy the process. Every drawing you complete helps you grow as an artist.