
Drawing a paw print is a fun and simple way to practice shapes and symmetry. It’s perfect for beginners because it uses basic forms like circles and ovals.
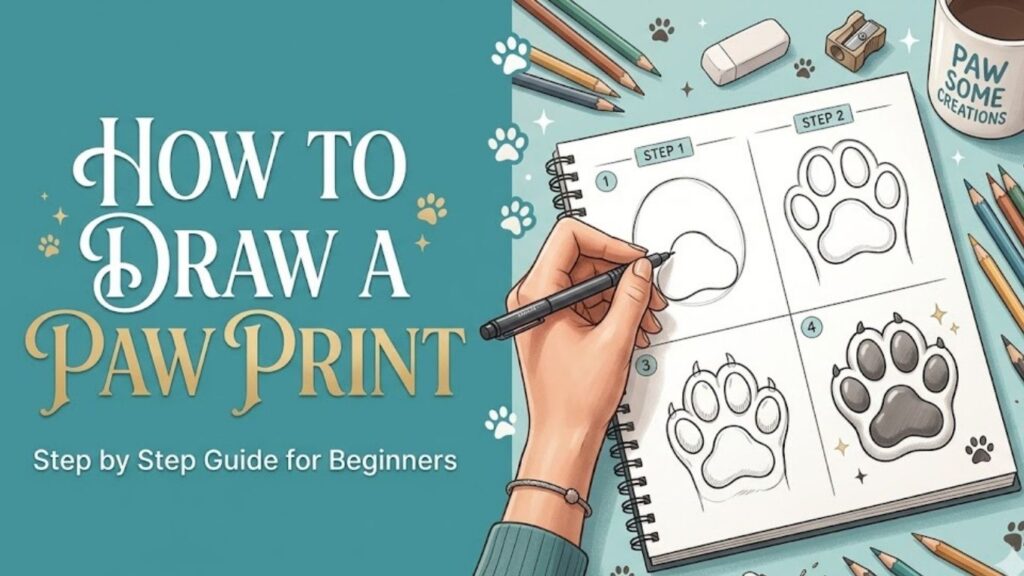
In this complete guide, you’ll learn how to draw a paw print step by step, along with helpful tips and creative ideas to improve your drawing skills.
Essential Drawing Supplies You Should Have
Sketchbook
HB and 2B pencils
Eraser
Black fineliner pen
Colored pencils or markers
Simple Tips Before You Start Drawing
Before you begin, take a moment to practice drawing circles and ovals. Paw prints are made from these simple shapes, and getting comfortable with them will make your drawing easier.
Keep your lines light at first so you can adjust mistakes easily. Focus on building your drawing step by step instead of trying to make it perfect right away.
How to Draw a Paw Print Step by Step Guide for Beginners
1. Understanding the Structure of a Paw Print
Learn the Basic Shape
A paw print is made up of one large pad at the bottom and four smaller toe pads above it. These shapes are usually rounded and slightly uneven.
Most drawing guides explain that starting with a simple base shape, like a circle or curved form, helps you build the paw print correctly .
Think of the paw as a combination of soft shapes rather than sharp lines. This will make your drawing look more natural.
Understanding this structure is important because it helps you place each part correctly and keeps your drawing balanced from the start.
2. Drawing the Base Pad
Start with the Main Shape
Begin by drawing a rounded shape at the bottom of your page. This is the main pad of the paw print.
Instead of a perfect circle, draw a slightly uneven shape with soft curves. The bottom pad often looks like a rounded triangle or a soft “M” shape.
Some tutorials suggest starting with a simple curved outline and refining it later .
Keep your strokes light and smooth. This is the foundation of your drawing, so take your time to get the shape right.
A well-drawn base pad will make the rest of your paw print easier to build.
3. Adding the Toe Pads
Draw Four Small Ovals
Above the main pad, draw four small oval shapes. These represent the toes.
Place them evenly across the top of the base pad. They should not touch the main pad directly—leave a small gap between them.
Each oval can be slightly different in size and shape. This makes your drawing look more realistic.
According to drawing guides, using simple oval shapes for toes is one of the easiest ways to create a paw print .
This step forms the recognizable structure of your paw print.
4. Adjusting Placement and Proportion
Make It Look Balanced
Now take a moment to check your drawing. Make sure the toe pads are evenly spaced and aligned properly.
The middle toes are usually slightly larger than the outer ones. Adjust your shapes if needed.
Using simple guidelines can help keep everything symmetrical. Many tutorials recommend building the paw print with basic shapes first to ensure balance .
Don’t worry if it’s not perfect. Small adjustments can make a big difference.
This step helps your drawing look clean and well-structured.
5. Refining the Shape
Smooth the Edges
Go over your shapes and refine them. Smooth out any rough lines and connect the shapes naturally.
Make the edges slightly irregular to give a more organic look. Paw prints are not perfectly shaped in real life.
Erase any unnecessary guidelines or overlapping lines.
This step transforms your rough sketch into a cleaner drawing.
Take your time to make the lines smooth and confident.
6. Adding Claws (Optional)
Create Extra Detail
If you want to add more detail, draw small triangular shapes above each toe pad to represent claws.
Keep them small and slightly curved. They should not touch the toe pads directly.
Some drawing guides include claws as an optional detail to make the paw print more realistic .
You can skip this step if you prefer a simple design.
Adding claws gives your drawing a sharper and more detailed look.
7. Cleaning Up Your Drawing
Finalize the Outline
Erase all extra lines and darken the final outline using a pen or darker pencil.
Make sure your lines are smooth and consistent.
Check for any uneven shapes and fix them carefully.
This step gives your drawing a polished and finished appearance.
Clean outlines make a big difference in how professional your artwork looks.
8. Adding Shading and Depth
Create a 3D Effect
Shading helps your paw print look more realistic. Decide where your light source is coming from.
Add light shading on one side of each pad and darker shading on the opposite side.
Focus on the edges and areas where the pads overlap.
Use soft pencil strokes and blend gently.
Even simple shading can make your drawing look more detailed and visually appealing.
9. Coloring Your Paw Print
Bring It to Life
You can color your paw print using shades of brown, black, or even creative colors.
Use darker tones for shadows and lighter tones for highlights.
Blending colors smoothly will give your drawing a more polished look.
Coloring adds personality and makes your artwork more engaging.
Take your time and enjoy this creative step.
10. Exploring Different Styles
Try New Ideas
Once you’re comfortable with the basic paw print, experiment with different styles.
Draw cartoon paw prints with exaggerated shapes or realistic ones with detailed textures.
You can also create patterns using multiple paw prints.
Some artists suggest practicing with simple shapes first and then adding details gradually to improve results .
Exploring different styles helps you develop your creativity and artistic confidence.
11. Common Mistakes to Avoid
Learn from Errors
One common mistake is drawing perfectly round shapes. Paw prints are slightly uneven and organic.
Another mistake is placing the toes too close to the main pad. Leave some space for a natural look.
Avoid making lines too dark in the early stages.
Skipping shading can also make your drawing look flat.
Being aware of these mistakes helps you improve faster.
12. Practice Tips for Beginners
Improve Your Skills
Practice drawing paw prints regularly using simple shapes.
Start with quick sketches to build confidence.
Observe real animal paw prints to understand their structure.
Try different tools like pencils, pens, and markers.
Consistency is key. The more you practice, the better your drawings will become.
Frequently Asked Questions
Is drawing a paw print easy for beginners?
Yes, it’s very beginner-friendly because it uses simple shapes like circles and ovals.
What is the easiest way to draw a paw print?
Start with a large base pad and then add four small oval shapes for the toes.
Why does my paw print look uneven?
This usually happens when you skip guidelines. Light sketching helps maintain balance.
Should I add claws to my drawing?
Claws are optional. They can add detail, but simple paw prints look great without them too.
How can I make my drawing look realistic?
Add shading, keep shapes slightly uneven, and focus on smooth curves.
Final Words
Drawing a paw print is a simple and enjoyable way to practice basic shapes and improve your skills. With a step-by-step approach, anyone can create a clean and appealing design.
Keep practicing, experiment with styles, and enjoy the process. Every drawing you make helps you grow as an artist.