
Learning how to draw a hummingbird is a wonderful way to practice delicate lines, organic shapes, proportions, and movement. Hummingbirds may look complicated because of their tiny bodies and rapidly moving wings, but you can simplify the subject into basic shapes and build the details gradually. With a pencil, eraser, and a little patience, beginners can create a beautiful hummingbird drawing.
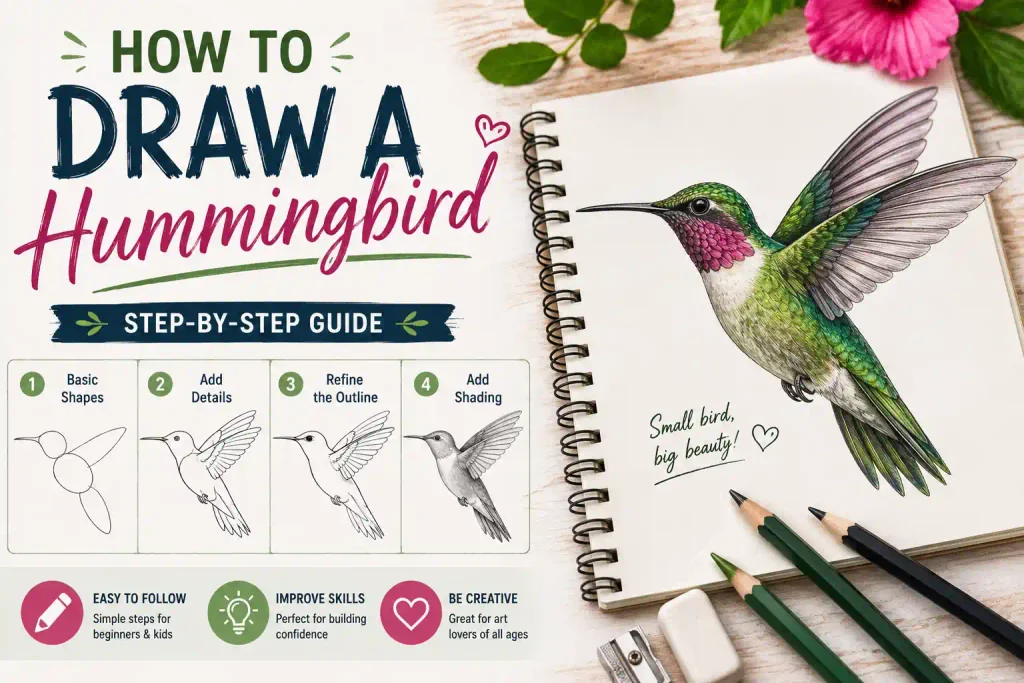
The key is to focus on the bird’s overall silhouette before worrying about feathers. Start with the body, add the head and long beak, then construct the wings and tail. Once the proportions look right, you can add layered feathers, shading, and color. This step-by-step method makes the process approachable while still allowing you to create a detailed final illustration.
Items to Buy
- Drawing paper
- HB pencil
- 2B pencil
- 4B pencil
- Kneaded eraser
- Regular eraser
- Sharpener
- Fine-tip drawing pen
- Colored pencils
- Watercolor pencils
- Blending stump
- Ruler, optional
Why Draw a Hummingbird?
Hummingbirds are excellent subjects for artists who want to practice both realism and movement.
Drawing one can help you improve:
- Basic bird anatomy
- Proportions
- Curved lines
- Feather patterns
- Wing shapes
- Shading
- Color blending
- Movement
- Fine details
You can also experiment with different poses, such as a hummingbird hovering beside a flower or sitting on a branch.
How to Draw a Hummingbird Step by Step
Step 1: Lightly Sketch the Body
Begin with an elongated oval for the hummingbird’s body.
Keep the oval slightly tilted rather than perfectly horizontal.
The body should be relatively small and compact because hummingbirds have short bodies compared with many other birds.
Use very light pencil pressure.
This is only your construction shape, so don’t worry about making it perfect.
Step 2: Add the Head
Draw a smaller rounded shape at the front of the body.
The head should overlap slightly with the body.
Keep it proportional.
A common beginner mistake is making the head too large.
Hummingbirds have relatively small heads and compact bodies.
Step 3: Sketch the Long Beak
One of the easiest ways to make your drawing recognizable as a hummingbird is to add its long, narrow beak.
Extend a thin pointed shape from the front of the head.
The beak should be relatively straight.
Keep it narrow rather than making it resemble a typical short bird beak.
Step 4: Add the Neck Transition
Hummingbirds don’t have a dramatically separated neck like some larger birds.
Instead, create a smooth transition between the head and body.
Use curved lines to connect the two forms.
This will make your hummingbird look more natural.
Step 5: Mark the Wing Position
Decide whether your hummingbird is:
- Hovering
- Flying forward
- Flying upward
- Landing
- Sitting on a branch
For a beginner-friendly drawing, try a hovering hummingbird.
Lightly mark where the wings will extend from the upper body.
Step 6: Draw the First Wing
Create a long, tapered wing shape extending backward or upward from the body.
The wing should have a pointed outer tip.
Don’t make it look like a simple leaf.
The wing should connect naturally to the shoulder area and widen before narrowing toward the tip.
Step 7: Add the Second Wing
Depending on the pose, the second wing may be partially hidden.
If you’re drawing the hummingbird from the side, you may only see part of the far wing.
For a more dynamic illustration, extend the wings in different positions.
This can make the bird appear to be actively hovering.
Step 8: Add the Tail
Hummingbird tails are relatively small compared with their bodies.
Draw several narrow feather shapes extending from the rear.
The tail can be:
- Slightly spread
- Pointed downward
- Angled backward
- Partially hidden
Avoid making it excessively large.
Step 9: Refine the Silhouette
Now look at the entire hummingbird.
Check the proportions before adding details.
Make sure:
- The body isn’t too large
- The head is proportional
- The beak is long and narrow
- The wings connect naturally
- The tail is relatively small
Erase construction lines that are no longer needed.
Step 10: Draw the Eye
Add a small dark eye to the head.
Because hummingbirds have relatively small heads, don’t make the eye oversized.
You can add a tiny highlight by leaving a small white spot within the dark eye.
This can make the bird look more lively.
Step 11: Add Feather Groups
Don’t draw every individual feather immediately.
Instead, divide the body into major feather areas.
Add curved lines around:
- Head
- Neck
- Chest
- Back
- Belly
- Wings
- Tail
These larger groups establish the direction of the feathers.
Step 12: Add Wing Feather Details
The wings need more structure.
Add long, narrow feather shapes that follow the direction of the wing.
Keep the lines flowing toward the wing tip.
Avoid drawing every feather as an identical shape.
Vary their length and spacing slightly.
Step 13: Add Chest Feathers
Use short, curved strokes across the chest.
Keep them relatively soft.
The feather direction should follow the body’s rounded shape.
Avoid using long straight lines because they can make the bird appear flat.
Step 14: Detail the Head and Neck
Hummingbirds are known for their beautiful neck and throat colors.
Add short overlapping feather strokes around the throat.
If you’re creating a male hummingbird, you can emphasize the colorful throat patch depending on the species you’re illustrating.
Keep the edges slightly irregular so the feathers feel natural.
Step 15: Add the Tail Feathers
Refine the tail using several long, narrow feather shapes.
Add darker lines between the feathers.
The outer feathers can be slightly different in length.
This creates a more natural appearance.
Step 16: Strengthen the Main Outline
Once you’re satisfied with the anatomy, strengthen selected parts of the outline.
Focus on:
- Head
- Beak
- Back
- Belly
- Wing edges
- Tail
Avoid making every line equally dark.
A varied line weight creates a more sophisticated drawing.
Step 17: Add Shading
Choose a light source.
Then add darker values on the opposite side.
Useful shadow areas include:
- Under the head
- Lower chest
- Belly
- Wing overlaps
- Tail base
- Between feather groups
Build the shading slowly.
It’s easier to darken an area than to remove excessive graphite.
Step 18: Add Highlights
Use a kneaded eraser to gently lift graphite from selected areas.
Highlights can work well on:
- Head
- Back
- Chest
- Wing edges
- Eye
Keep the brightest highlights relatively small.
How to Draw a Realistic Hummingbird
For a realistic result, focus on three things: proportion, feather direction, and value.
Start with accurate construction shapes.
Then divide the bird into feather groups rather than drawing random individual feathers.
Finally, use light and dark values to create depth.
Don’t outline every feather heavily.
Real feathers are defined more by overlapping shapes and changes in value than by black outlines.
How to Draw a Hummingbird in Flight
A flying hummingbird can be more dynamic than a perched bird.
Start by choosing the direction of movement.
Tilt the body slightly.
Extend the wings in different positions.
Then add subtle motion effects around the wings.
You can use very light, repeated curved lines to suggest rapid wing movement.
Avoid making these lines darker than the bird itself.
How to Draw a Hummingbird Hovering Over a Flower
This makes a beautiful composition.
Start with the hummingbird.
Position its long beak toward a flower.
Then add:
- Flower petals
- Stem
- Leaves
- Small background details
Keep the flower slightly larger than the bird if you want it to become part of the main composition.
You can also add subtle motion around the wings.
How to Draw a Hummingbird With Colored Pencils
Colored pencils are excellent for hummingbirds because they allow gradual layering.
Start with a light base color.
Then slowly add darker shades.
For the throat and head, you can experiment with vibrant colors such as:
- Emerald green
- Turquoise
- Deep blue
- Violet
- Ruby red
The exact colors depend on the species you’re drawing.
Use short feather-like strokes that follow the direction of the plumage.
How to Draw a Hummingbird With Watercolors
Watercolor can create beautiful soft feather effects.
Begin with a light pencil outline.
Apply the lightest colors first.
Allow each layer to dry before adding darker details.
Leave small areas of paper white for highlights.
Use a fine brush for the final feather details.
Avoid overworking the paper because excessive brushing can make delicate areas muddy.
How to Draw a Cute Hummingbird
For a cartoon hummingbird, simplify the anatomy.
Use:
- A rounded body
- Oversized expressive eyes
- A simplified long beak
- Short wings
- A small tail
You can exaggerate the head slightly for a playful appearance.
Add flowers, hearts, stars, or other decorative elements around the bird.
How to Draw a Hummingbird for Beginners
If you’re completely new to drawing birds, simplify the process into five shapes:
- Oval body
- Small head
- Long beak
- Two wings
- Small tail
Once those shapes look correct, add the eye and feather groups.
This approach is much easier than attempting to draw individual feathers from the beginning.
How to Draw a Hummingbird From Different Angles
Side View
This is one of the easiest views because the long beak and compact body are clearly visible.
Front View
The wings can extend outward while the body remains narrow.
Pay attention to symmetry.
Three-Quarter View
This creates a more dimensional appearance.
Show one side of the body slightly more than the other.
Perched Hummingbird
Place the feet around a thin branch.
Keep the wings folded against the body.
How to Make Your Hummingbird Look Three-Dimensional
Use overlapping shapes.
The wing should appear to sit over the body.
The head should connect naturally into the chest.
The tail should emerge from behind the body.
Then add shadows where forms overlap.
A darker value beneath a wing can make it appear lifted away from the body.
Common Mistakes to Avoid
Making the Beak Too Short
The long, narrow beak is an important characteristic.
Making the Body Too Large
Keep the body compact.
Drawing Every Feather Individually
Start with larger feather groups.
Making Both Wings Identical
Their appearance changes with perspective and movement.
Using Heavy Outlines Everywhere
Use varied line weight for a more natural result.
Forgetting the Tail
Even a small tail helps establish the bird’s silhouette.
Adding Random Feather Lines
Follow the direction of the body and wing structure.
Using Too Much Color Too Quickly
Build vibrant colors gradually.
Easy Hummingbird Drawing Ideas
Hummingbird and Flower
Draw the bird hovering beside a bright flower.
Hummingbird in a Garden
Add several flowers and leaves around the bird.
Hummingbird Sticker
Use bold outlines and simplified shapes.
Hummingbird Watercolor
Create soft color washes and delicate feather details.
Hummingbird on a Branch
Fold the wings and add tiny feet gripping a branch.
Flying Hummingbird
Extend the wings and add subtle motion lines.
FAQs
Is a hummingbird difficult to draw?
It can look complicated, but beginners can simplify it into a body, head, beak, wings, and tail before adding feather details.
What should I draw first?
Start with the body and head. Then add the long beak, wings, and tail before working on feathers.
How do I draw a hummingbird’s beak?
Draw a long, narrow, pointed shape extending directly from the front of the head.
How do I make the wings look realistic?
Give them a tapered shape and add long feather lines that follow the direction of the wing.
What colors should I use for a hummingbird?
Hummingbirds can feature vibrant greens, blues, reds, purples, and turquoise depending on the species.
Can beginners draw a realistic hummingbird?
Yes. Begin with basic shapes and gradually add proportions, feather groups, shading, and highlights.
How do I draw a hummingbird in flight?
Tilt the body slightly, extend the wings, and use subtle motion lines to suggest rapid movement.
How do I draw a cute hummingbird?
Simplify the body, enlarge the eyes slightly, and use rounded shapes while keeping the characteristic long beak.
What pencil is best for hummingbird drawings?
HB is useful for construction, while softer pencils such as 2B and 4B are useful for shading.
How do I make hummingbird feathers look realistic?
Use short, directional strokes and group the feathers into overlapping areas rather than outlining every feather individually.
Final Words
Learning how to draw a hummingbird becomes much easier when you break the bird into simple shapes before adding delicate details. Start with the compact body, small head, long beak, wings, and short tail. Once the silhouette is correct, gradually add feather groups, shading, highlights, and color.
Don’t worry about creating a perfect hummingbird on your first attempt. Practice the basic proportions several times, then experiment with hovering poses, flowers, branches, and different color combinations. With patience and repeated practice, you can turn a simple construction sketch into a detailed and graceful hummingbird illustration.