
Learning how to draw a microphone is a fun and easy project for beginners who want to practice drawing everyday objects. A microphone has simple parts, including a rounded head, a narrow handle, a grille, and small details that can be built gradually using basic shapes.
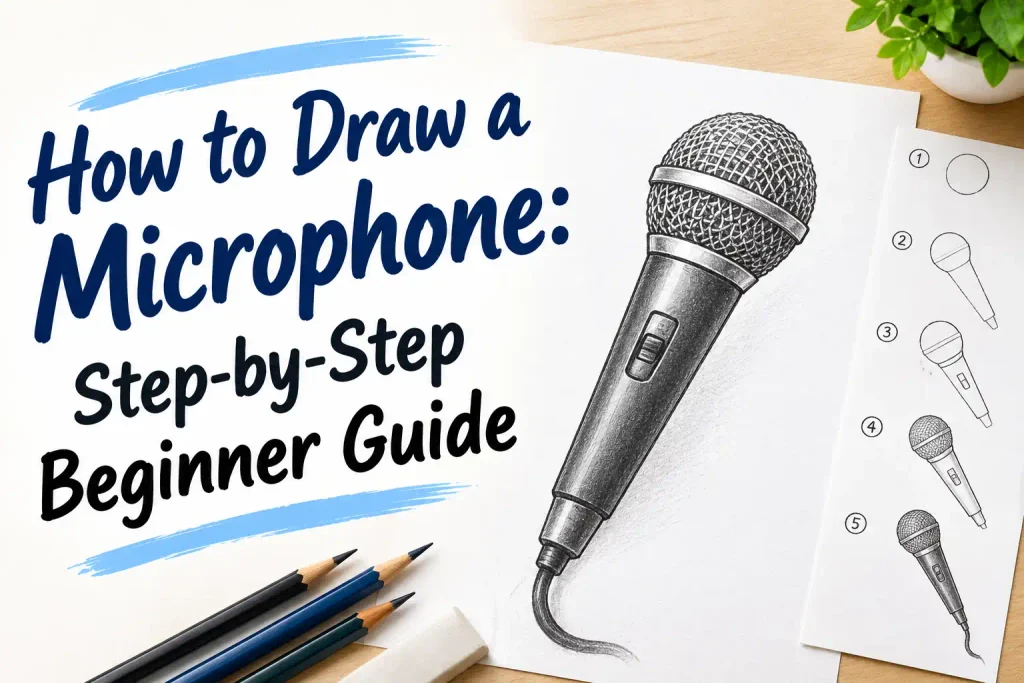
Whether you want to draw a classic handheld microphone, a cartoon microphone, a realistic stage microphone, or a microphone with musical notes, this guide will help you create it step by step. Begin with simple construction shapes, then add the details, shading, and color.
Items to Buy
- Drawing Pencil
- Eraser
- Sketchbook
- Ruler
- Fine-Line Pen
- Colored Pencils
- Markers
- Black Colored Pencil
- Gray Colored Pencil
- White Gel Pen
- Pencil Sharpener
Why Learn How to Draw a Microphone?
A microphone is a great drawing subject because it combines simple geometric shapes with small details and texture. You can practice drawing circles, cylinders, curved lines, and shading while creating an object that is easy to recognize.
Drawing a microphone can also be useful for music-themed artwork. Once you understand the basic shape, you can create concert scenes, singing illustrations, podcast artwork, recording studio designs, and other creative projects.
How to Draw a Microphone Step by Step
Step 1: Draw the Microphone Head
Start by drawing a rounded oval shape near the top of your page. This will become the main microphone head.
Make the shape slightly taller than it is wide. Keep your pencil lines light because you may want to adjust the size and proportions before adding details.
Step 2: Add the Bottom Edge of the Head
Draw a slightly curved line near the lower part of the oval. This separates the microphone grille from the lower section.
The bottom edge should follow the curve of the microphone head. Keep the line smooth and avoid making it completely flat.
Step 3: Draw the Handle
From the bottom of the microphone head, draw two long lines extending downward. Keep them slightly closer together near the bottom to create a realistic handle shape.
Connect the lower ends with a curved line. The handle can be long and narrow or slightly thicker depending on the style of microphone you want to draw.
Step 4: Refine the Handle Shape
Add another curved line near the top of the handle to create a small connection area between the microphone head and body.
Check that the handle is centered beneath the head. Adjust the width if necessary so the microphone looks balanced and proportional.
Step 5: Add the Grille Pattern
Draw several curved horizontal lines across the microphone head. These lines should follow the rounded shape of the grille.
Next, add a few vertical or slightly curved lines to create a mesh-like pattern. Keep the details subtle and evenly spaced.
Step 6: Add the Microphone Band
Draw a narrow band around the lower part of the microphone head. This section separates the grille from the handle.
Add a few small lines or details to make the band look metallic. The shape should follow the curved form of the microphone.
Step 7: Add Handle Details
Draw a few subtle lines along the handle to suggest texture and reflected light. You can also add a small switch if you want a more detailed handheld microphone.
Keep these details simple. Too many lines can make the smooth surface of the handle look cluttered.
Step 8: Refine the Outline
Go over the main outline using a darker pencil or fine-line pen. Strengthen the edges of the microphone head, handle, band, and selected grille lines.
Erase unnecessary construction marks. At this stage, the microphone should have a clean and recognizable shape.
Step 9: Add Shading
Choose an imaginary light source and add darker shading to one side of the microphone.
Shade the lower edges of the grille, the side of the handle, and areas beneath the microphone band. Leave lighter areas where the light would naturally reflect from the metal surface.
Step 10: Add Color and Final Highlights
Color the microphone using shades of gray, silver, black, or another color of your choice. Metallic microphones often look best with several tones rather than one flat color.
Use a white gel pen or light pencil to add small highlights along the grille and handle. Finish by adding musical notes, sound waves, or a simple background if desired.
How to Draw a Simple Microphone
A simple microphone can be created using an oval for the head and a long rectangle with rounded edges for the handle.
Add a few horizontal lines across the head to represent the grille. This simple version is perfect for beginners, cartoons, icons, and quick sketches.
How to Draw a Realistic Microphone
For a realistic microphone, pay close attention to proportions and texture. The grille should appear rounded and metallic, while the handle should look smooth and cylindrical.
Use shading to create depth. Add darker areas around the sides and underside while leaving bright highlights where the metal reflects light.
How to Draw a Cartoon Microphone
A cartoon microphone can use exaggerated shapes and bold outlines. Make the microphone head larger and rounder than usual.
You can add a smiling face, eyes, musical notes, or other playful details. Bright colors and simple shading can make the drawing look cheerful and fun.
How to Draw a Microphone with Musical Notes
Start by drawing the microphone using the basic steps. Then add several musical notes around the microphone.
Place the notes at different heights and angles. You can also draw curved lines or sound waves to suggest singing, music, or sound coming from the microphone.
How to Draw a Studio Microphone
A studio microphone usually has a larger body and may include a stand. Begin with the microphone shape and draw a support arm or stand underneath it.
Add extra details such as a mesh grille, mounting bracket, recording equipment, or headphones. These additions can help create a complete recording studio scene.
How to Draw a Microphone on a Stand
Draw the microphone first, then add a thin vertical line extending downward from the handle or mounting point.
Add a wider base at the bottom to support the stand. Use additional curved lines or small details to show the microphone holder and stand structure.
How to Draw a Singing Microphone
For a singing-themed drawing, position the microphone near a character or add musical notes around it.
You can also include sound waves, a stage, spotlights, or a concert background. This is a fun way to turn a simple object drawing into a larger music-themed illustration.
Easy Microphone Drawing Ideas
Once you understand the basic shape, try these variations:
- Simple microphone
- Handheld microphone
- Cartoon microphone
- Realistic microphone
- Studio microphone
- Microphone on a stand
- Vintage microphone
- Singing microphone
- Microphone with musical notes
- Podcast microphone
- Concert microphone
- Microphone with headphones
How to Make Your Microphone Drawing Look Better
Focus on the overall proportions before adding the small grille details. The microphone head and handle should feel balanced and aligned.
Use curved shading to make the object look round. Adding a highlight on one side and a darker shadow on the opposite side can help transform a flat drawing into a three-dimensional object.
Common Mistakes to Avoid
One common mistake is drawing the microphone grille as a completely flat pattern. The grille follows a rounded surface, so the lines should curve slightly around the head.
Another mistake is making the handle too wide or too short. Compare the handle size with the microphone head before adding final details.
Avoid using heavy outlines everywhere. Varying your line weight can make the metallic object look more natural and polished.
Tips for Better Object Drawings
Start with basic shapes before adding details. An oval, cylinder, and a few construction lines can help you establish the proportions of many everyday objects.
Pay attention to light and reflections. Smooth or metallic objects often have bright highlights beside darker shadowed areas, which can help create a realistic appearance.
Practice drawing the same object from different angles. This will improve your understanding of perspective and three-dimensional forms.
FAQs
Is drawing a microphone easy for beginners?
Yes. A microphone can be broken down into simple shapes, including an oval head and a long cylindrical handle. Beginners can start with a simple version before adding realistic details.
What shape is a microphone head?
Most handheld microphone heads can be simplified into an oval or rounded capsule shape.
How do I draw a microphone grille?
Draw several curved horizontal lines across the microphone head. Add a few vertical or curved lines to suggest the mesh texture.
How do I make a microphone look metallic?
Use several shades of gray or black and leave bright highlights where the light reflects. Strong contrast can help create a metallic appearance.
Can I draw a microphone with colored pencils?
Yes. Colored pencils are useful for creating smooth layers of gray, silver, black, and other colors while adding highlights and shadows.
How do I draw a microphone on a stand?
Draw the microphone first, then add a support section and a long vertical stand underneath it. Finish with a wider base for balance.
What should I draw after learning how to draw a microphone?
Try drawing headphones, speakers, guitars, pianos, musical notes, recording equipment, or a complete concert scene.
Final Words
Learning how to draw a microphone is an enjoyable way to practice simple shapes, object proportions, texture, shading, and metallic reflections. By starting with an oval head and cylindrical handle, you can gradually build a detailed microphone drawing that looks clean and realistic.
Keep practicing different styles and angles. Once you understand the basic structure, you can create handheld microphones, studio microphones, vintage designs, podcast setups, and complete music-themed artwork.