
Learning how to draw a pond is a fun way for beginners to practice landscapes, reflections, plants, rocks, water, and perspective. A pond may seem complicated because it contains many natural details, but you can create a beautiful scene by building it from simple shapes.
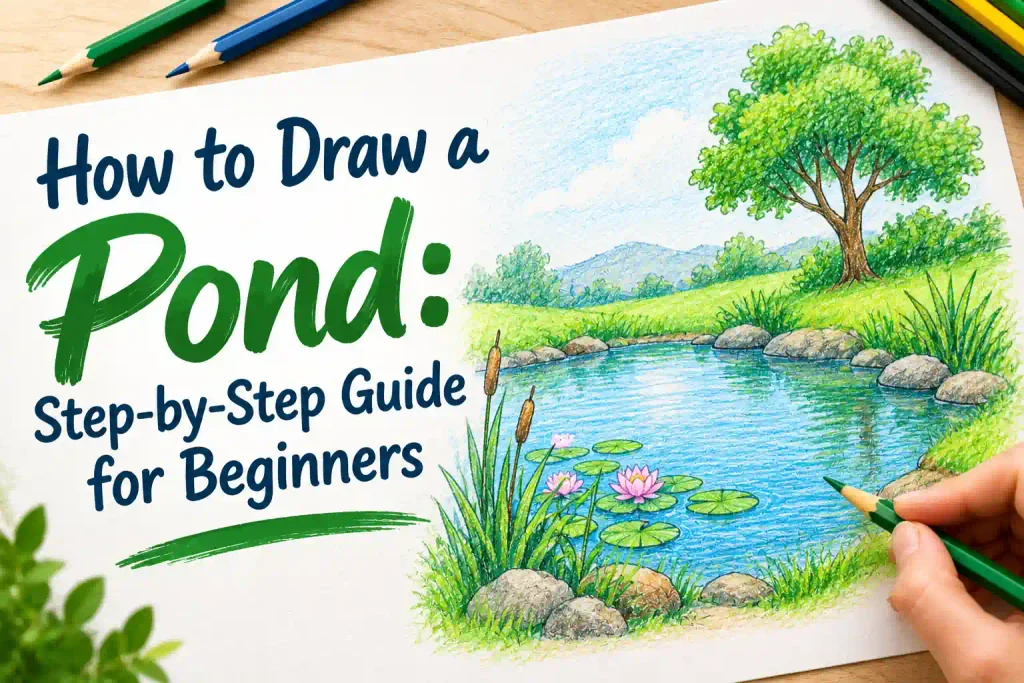
In this guide, you will start with the pond outline and surrounding landscape before adding water, reflections, plants, rocks, and finishing details. You can keep the drawing simple for an easy beginner project or add more texture and color for a realistic nature scene.
Items to Buy
- Drawing Pencil
- Eraser
- Sketchbook
- Ruler
- Fine-Line Pen
- Blue Colored Pencil
- Green Colored Pencil
- Brown Colored Pencil
- White Gel Pen
- Colored Pencils
- Markers
- Watercolor Paints
- Pencil Sharpener
Why Learn How to Draw a Pond?
Ponds are excellent subjects for learning landscape drawing because they combine several basic artistic skills. You can practice perspective with the shoreline, texture with rocks and plants, and shading with trees and reflections.
A pond scene is also easy to customize. You can draw a peaceful woodland pond, a small garden pond, a pond with ducks, or a magical fantasy landscape. Once you understand the basic structure, you can create many different scenes.
How to Draw a Pond Step by Step
Step 1: Sketch the Pond Outline
Begin by lightly sketching the basic shape of the pond. Use a long, irregular oval or curved shape rather than a perfect geometric oval.
The shoreline can curve inward and outward to make the pond feel natural. Leave enough space around it for grass, trees, rocks, flowers, or other landscape elements.
Step 2: Add the Shoreline
Refine the edges around the pond by adding uneven curves. The shoreline does not need to be identical on both sides.
Add a few small bumps and curves where grass or soil meets the water. These irregular edges will make the pond look more like a natural body of water.
Step 3: Draw the Background
Add a simple background behind the pond. You can sketch distant hills, trees, bushes, or a forest.
Keep background objects relatively simple and smaller than objects in the foreground. This creates a sense of distance and helps the pond remain the main focus of the drawing.
Step 4: Add Trees and Plants
Draw a few trees, bushes, reeds, or grasses around the pond. Place taller vegetation near the edges and vary the shapes so the scene does not look repetitive.
You can also add water plants such as lily pads or small flowers. Keep some open areas around the shoreline so the composition does not become overcrowded.
Step 5: Add Rocks and Stones
Sketch several rocks around the edge of the pond. Start with irregular rounded shapes and avoid making them perfect circles.
Place larger rocks in the foreground and smaller ones farther away. Add cracks, small lines, and shadows to give the stones texture and depth.
Step 6: Draw the Water Surface
Add horizontal and gently curved lines across the pond to represent ripples. Keep these lines irregular and vary their length.
Avoid covering the entire water surface with identical lines. Leave some smooth areas because still water naturally contains both calm sections and areas with subtle movement.
Step 7: Add Reflections
Reflect nearby trees, plants, hills, or clouds on the water. These reflections do not need to be exact copies of the objects above the pond.
Use softer, broken shapes and horizontal strokes to suggest reflections. Keep the reflection slightly distorted so the water feels natural.
Step 8: Add Shadows and Texture
Darken areas beneath trees, rocks, plants, and the shoreline. These shadows help connect the objects to the ground and make the landscape more dimensional.
Add small patches of grass, tiny stones, leaves, and natural marks around the pond. Use different line weights to prevent the landscape from looking flat.
Step 9: Add Color
Begin coloring the water with blue, blue-green, or another color that suits your scene. Use lighter shades in areas where the sky or sunlight is reflected.
Color the surrounding grass and plants using several green shades. Add brown or gray to rocks and tree trunks, then gradually layer darker colors into shaded areas.
Step 10: Add Final Highlights and Details
Finish the pond by adding small highlights across the water. A white pencil or gel pen can create bright reflections where sunlight touches the surface.
Erase unnecessary construction lines and strengthen a few important outlines. Add birds, butterflies, flowers, lily pads, or other small details if desired.
How to Draw a Simple Pond
For an easy pond drawing, begin with a curved oval shape and add a few trees and plants around it. Keep the background simple and focus on the water.
Use a few horizontal lines for ripples and add basic reflections. You do not need dozens of details to create a recognizable pond scene.
How to Draw a Pond with Trees
Start by placing several trees around the shoreline. Make the closest trees larger and more detailed while keeping distant trees smaller.
Once the trees are complete, add their reflections in the water. Use softer horizontal marks for the reflected branches and leaves rather than copying every detail exactly.
How to Draw a Pond with Ducks
Draw the pond first and then add small duck shapes floating on the water. A duck can be simplified into an oval body, small head, beak, and short neck.
Add gentle ripples around each duck to show that it is floating. You can also place one or two ducks closer to the shoreline for variety.
How to Draw a Pond with Lily Pads
Lily pads are easy to create using small rounded shapes with a narrow opening on one side. Place several pads across the surface of the pond.
Vary their sizes and positions. Add tiny flowers or short stems to some of them, and draw small ripples around a few pads to make them appear naturally positioned on the water.
How to Draw a Pond with a Waterfall
To create a waterfall feeding into the pond, draw rocks and vegetation around the upper edge. Then use long curved lines to show water flowing downward.
At the bottom, add a splash and several circular ripples where the waterfall meets the pond. Use lighter highlights along the moving water to make it stand out.
How to Draw a Peaceful Pond Landscape
A peaceful pond scene can include distant trees, gentle hills, grass, flowers, and a calm water surface.
Use soft lines and avoid excessive dark outlines. A simple reflection of the sky and surrounding vegetation can create a quiet atmosphere without requiring complicated details.
How to Draw a Realistic Pond
Realistic pond drawings depend on careful observation of water, reflections, vegetation, and light. Begin with the overall landscape before adding small textures.
Use broken horizontal strokes to represent water and vary their darkness. Reflections should usually be softer and more distorted than the objects above the water.
How to Draw a Pond in Perspective
Perspective helps determine how large the pond and surrounding objects appear. Objects closer to the viewer should generally be larger, while distant elements become smaller.
Use the shoreline to guide the viewer’s eye into the scene. Keep the distant edge of the pond higher on the page and the foreground edge lower to create depth.
Easy Pond Drawing Ideas
Once you finish the basic pond, try these variations:
- Simple pond
- Peaceful woodland pond
- Pond with ducks
- Pond with lily pads
- Pond with flowers
- Pond with frogs
- Pond with a waterfall
- Pond with a bridge
- Pond with trees
- Pond at sunset
- Pond in spring
- Magical fantasy pond
How to Make Your Pond Drawing Look Better
Create depth by changing the size and detail of objects. Large rocks, plants, and trees can be placed in the foreground, while distant vegetation should be smaller and less detailed.
Pay special attention to reflections. They can make an ordinary landscape look much more realistic. Keep reflections softer than the objects they represent and break them up with horizontal water ripples.
Common Mistakes to Avoid
One common mistake is drawing the pond as a perfect oval. Natural ponds usually have irregular shorelines, so use varied curves and uneven edges.
Another mistake is making the water completely flat and featureless. Even calm water can contain subtle ripples, reflections, and changes in tone.
Avoid making every tree, rock, and plant the same size. Variation creates depth and makes your landscape feel more natural.
Tips for Better Landscape Drawings
Start with large shapes before adding details. Establish the pond, horizon, shoreline, and major background objects first.
Use overlapping elements to create depth. A foreground plant partially covering the edge of the pond can make the scene feel closer to the viewer.
Experiment with different times of day. Morning light, afternoon sunlight, cloudy weather, and sunset colors can completely change the appearance of the same pond.
FAQs
Is drawing a pond easy for beginners?
Yes. A pond can be created from simple curved shapes, shoreline lines, plants, rocks, and water ripples. Beginners can start with a simple landscape before attempting a realistic scene.
What colors should I use for pond water?
Blue, blue-green, turquoise, and gray-blue can all work well. You can also mix colors depending on the surrounding landscape and sky.
How do I draw reflections in pond water?
Start with the objects around the pond, then suggest their reflections using softer, broken shapes and horizontal strokes. Reflections should generally appear slightly distorted.
How do I make my pond look realistic?
Pay attention to perspective, lighting, shoreline shapes, water ripples, reflections, and natural vegetation. Varying the size and detail of objects will also create depth.
How do I draw lily pads on a pond?
Draw small rounded shapes with a narrow cut or opening on one side. Vary their sizes and positions, then add flowers or small ripples around some of them.
Can I draw a pond with colored pencils?
Yes. Colored pencils are excellent for layering water, grass, trees, rocks, and reflections. Build the colors gradually rather than pressing heavily from the beginning.
How do I draw a pond at sunset?
Use warm colors such as yellow, orange, pink, and purple in the sky and reflect those colors softly across the water. Add darker silhouettes of trees and plants around the shoreline.
What should I draw after learning how to draw a pond?
Try drawing lakes, rivers, waterfalls, streams, gardens, forests, or complete landscape scenes. These subjects will help you continue practicing water, nature, perspective, and texture.
Final Words
Learning how to draw a pond is a wonderful way to practice landscape composition, water, reflections, plants, rocks, and perspective. Start with the basic pond shape, build the shoreline and background, then gradually add natural details and color.
Do not worry about making your first pond perfectly realistic. Focus on creating a clear scene and enjoying the process. With practice, you can experiment with waterfalls, ducks, lily pads, sunsets, forests, and magical landscapes to make each pond drawing unique.