
Learning how to draw a shark is an exciting way for beginners to practice animal proportions, curved shapes, fins, teeth, and underwater details. Sharks may look complicated because of their streamlined bodies and multiple fins, but you can simplify the process by starting with basic shapes. Once the main silhouette is correct, adding the eyes, gills, fins, teeth, and shading will make your drawing recognizable.
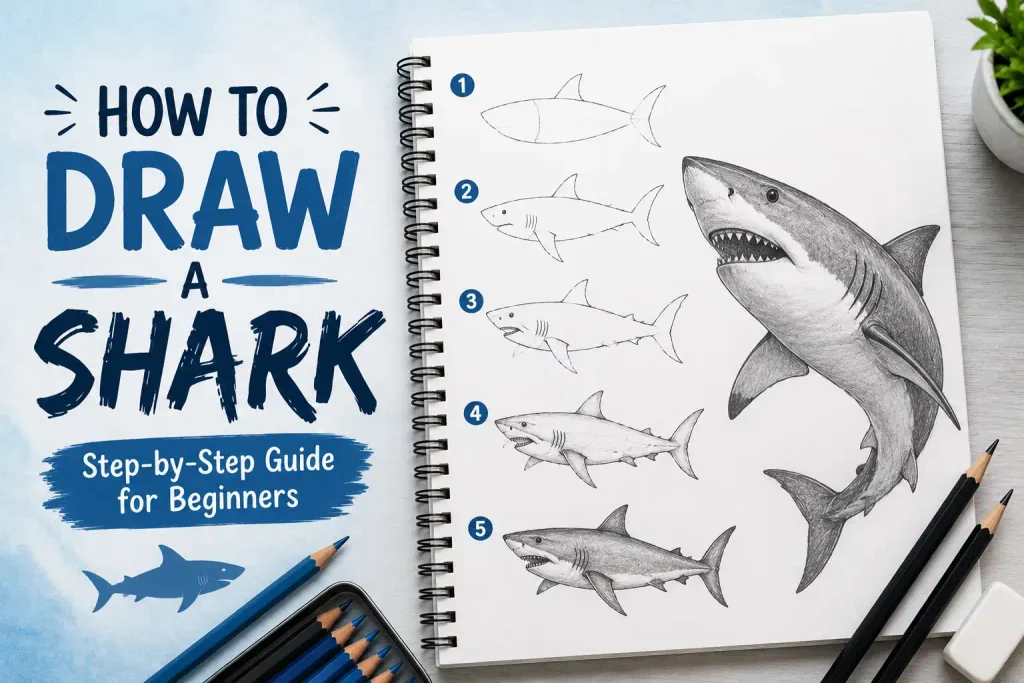
The easiest approach is to begin with a long body shape and gradually build the shark’s head, snout, tail, and fins. After the outline is complete, you can add texture and shadows to create depth. Whether you want a realistic great white shark or a cute cartoon shark, these simple steps can help you build confidence while drawing.
Items to Buy
- Drawing paper
- HB pencil
- 2B pencil
- 4B pencil
- Eraser
- Kneaded eraser
- Sharpener
- Fine-tip black pen
- Ruler, optional
- Colored pencils
- Gray colored pencil
- Blue colored pencil
- Black colored pencil
- White colored pencil
- Light blue colored pencil
- Blending stump
Why Draw a Shark?
Sharks are great subjects for learning how to combine simple shapes into an interesting animal illustration.
Drawing a shark can help you practice:
- Animal proportions
- Curved lines
- Symmetry
- Fins
- Teeth
- Facial features
- Body shading
- Texture
- Movement
- Underwater backgrounds
You can draw a shark swimming horizontally, approaching the viewer, turning sideways, or diving through deep water.
How to Draw a Shark Step by Step
Step 1: Choose the Shark’s Pose
First, decide how you want your shark to look.
For beginners, a side-facing swimming shark is one of the easiest options.
You can also draw a shark:
- Swimming upward
- Diving downward
- Facing forward
- Turning toward the viewer
- Jumping from water
- Swimming beneath a boat
A side view makes the shark’s long body and fins easier to understand.
Step 2: Draw the Main Body
Start with a long, slightly curved oval.
This will become the shark’s main body.
Make the front portion thicker and gradually taper the body toward the tail.
Keep your lines light because you’ll make adjustments later.
Step 3: Shape the Head
At the front of the body, create a wider, slightly flattened head.
The shape should transition smoothly from the torso.
For a great white shark, the head can have a relatively broad, pointed appearance.
Step 4: Draw the Snout
Extend the front of the head into a rounded or slightly pointed snout.
Avoid making it too sharp.
The snout should flow naturally into the upper jaw.
Step 5: Add the Mouth
Draw a curved line across the front portion of the head to establish the mouth.
For an open-mouth shark, create an upper and lower jaw.
Keep the mouth proportional to the head.
Step 6: Add the Teeth
If your shark has an open mouth, add rows of small triangular teeth.
Don’t make every tooth identical.
Keep the teeth relatively small and evenly spaced.
For a cartoon shark, you can exaggerate the teeth slightly.
Step 7: Draw the Eye
Place a small dark eye above the mouth.
Shark eyes are relatively small compared with the head.
Add a tiny highlight if you’re creating a stylized illustration.
Step 8: Add the Gill Slits
Draw several curved lines behind the head.
These represent the gill openings.
Keep them slightly curved to follow the shape of the body.
Don’t make them too thick.
Step 9: Draw the Dorsal Fin
Add the large dorsal fin on top of the shark.
It should rise from the upper body and taper toward a point.
The fin should connect smoothly to the back.
Step 10: Add the Side Fin
Draw the prominent pectoral fin on the side of the body.
It should extend outward and backward.
Keep the base thick where it connects to the body.
Then gradually taper the fin toward its tip.
Step 11: Add the Remaining Fins
Depending on your shark species and viewing angle, add:
- Second pectoral fin
- Pelvic fins
- Anal fin
Some fins may be partly hidden by the body.
Don’t overcrowd the drawing.
Step 12: Draw the Tail
At the rear of the body, narrow the shape into a tail base.
Then draw the upper and lower sections of the tail fin.
The upper lobe is usually more prominent.
Create a smooth transition between the body and tail.
Step 13: Refine the Body Shape
Now look at the entire silhouette.
Check that:
- The head is broad enough
- The body tapers toward the tail
- The fins are correctly positioned
- The tail is proportional
- The mouth follows the head shape
Erase unnecessary construction lines.
Step 14: Add the Shark’s Belly
Create a lighter underside along the lower part of the body.
You can separate the darker upper body from the lighter belly with a subtle curved boundary.
This is especially useful when drawing a great white shark.
Step 15: Add Skin Texture
Shark skin is not completely smooth.
Use very subtle short strokes to suggest texture.
Don’t cover the entire shark with heavy lines.
Keep most of the texture concentrated around the body.
Step 16: Add Shading
Choose a light source.
For an underwater shark, the upper body can be darker while the underside is lighter.
Add shadows:
- Beneath the body
- Under the fins
- Around the gills
- Inside the mouth
- Near the tail
- Around the pectoral fin
Build the shading gradually.
Step 17: Add Highlights
Use a kneaded eraser or white pencil to create subtle highlights.
Place them along the upper body, snout, and fins.
Highlights can help the shark appear wet and three-dimensional.
Step 18: Strengthen the Outline
Once the drawing is complete, selectively darken the outer silhouette.
Pay particular attention to:
- Snout
- Mouth
- Dorsal fin
- Pectoral fin
- Tail
- Eye
Keep the internal shading softer.
How to Draw a Great White Shark
Start with a thick, streamlined body.
Make the snout broad and slightly pointed.
Add a prominent dorsal fin and large pectoral fins.
Give the upper body a dark gray tone and the belly a much lighter tone.
Add several gill slits behind the head.
For an open-mouth pose, carefully layer triangular teeth along the upper and lower jaws.
How to Draw a Cute Shark
For a cartoon shark, simplify the anatomy.
Make the:
- Body rounder
- Eye larger
- Mouth wider
- Teeth smaller or exaggerated
- Fins softer
- Expression friendlier
You can add a smile and use bright colors for a playful illustration.
How to Draw a Shark From the Front
Start with the head as the main shape.
Add the eyes on both sides.
Draw the mouth in the center.
Add the teeth if the mouth is open.
Then extend the body behind the head.
The fins should be positioned symmetrically.
Use a center guideline to keep the face balanced.
How to Draw a Shark From the Side
A side view is the easiest option for beginners.
Start with a long body.
Add the head and snout.
Draw the eye and gills.
Then add the dorsal, pectoral, pelvic, and tail fins.
Finish with shading and subtle skin texture.
How to Draw a Shark Swimming
Create a gentle curve through the body.
Instead of drawing the shark as perfectly straight, bend the torso slightly.
Curve the tail in the opposite direction.
This makes the shark appear to be moving through the water.
Add small water lines around the fins and tail.
How to Draw a Shark Underwater
Once the shark is finished, create a simple ocean background.
You can add:
- Bubbles
- Seaweed
- Rocks
- Small fish
- Rays of light
- Ocean plants
Use lighter, softer details in the background so the shark remains the focal point.
How to Draw a Shark With Colored Pencils
Start with a light gray base.
Layer darker gray across the upper body.
Use white or very pale gray underneath the belly.
Add blue-gray around the fins.
Use black for the eye, mouth interior, and selected outlines.
Blend the colors gradually to create a smooth appearance.
How to Draw a Shark With Watercolors
Begin with a light pencil outline.
Apply a pale gray-blue wash over the body.
Add darker layers to the upper back.
Keep the underside light.
Use a darker mixture around the fins and gills.
For the ocean, use loose horizontal and diagonal strokes to suggest movement.
How to Make a Shark Look Realistic
Realism comes from proportions, shading, and subtle texture.
Pay attention to:
- Streamlined body shape
- Small eye
- Correct fin placement
- Tapered tail
- Gill structure
- Dark upper body
- Light underside
Avoid outlining every feature equally.
Use stronger contrast around the eye, mouth, and fins while keeping the body shading smooth.
Common Mistakes to Avoid
Making the Body Too Short
A shark should have a streamlined, elongated body.
Making the Eye Too Large
Keep the eye small for a realistic appearance.
Making Every Fin Identical
Fins differ in size and position.
Making the Teeth Huge
Unless you’re drawing a cartoon, keep them relatively small.
Forgetting the Gill Slits
The gills are an important identifying feature.
Making the Tail Too Small
The tail should be proportional to the body.
Using Heavy Texture Everywhere
Shark skin texture should remain subtle.
Easy Shark Drawing Ideas
Great White Shark
Draw a realistic shark with a dark back and light belly.
Cute Cartoon Shark
Use rounded shapes, large eyes, and a playful expression.
Shark Swimming Through Bubbles
Add bubbles and water movement around the body.
Shark Underwater
Create a deep-ocean scene with plants and rocks.
Shark Jumping From Water
Show the shark emerging above the ocean surface.
Shark With an Open Mouth
Focus on the teeth, jaws, eye, and gill details.
FAQs
Is a shark easy to draw?
Yes. Start with a long oval body and gradually add the head, fins, tail, eye, gills, and mouth.
What should I draw first?
Begin with the main body shape. Once the proportions are correct, add the head and tail before drawing the fins and smaller details.
How do I draw shark fins?
Start each fin with a broad base where it connects to the body, then taper it toward a pointed tip.
How do I draw shark teeth?
Use small triangular shapes arranged along the upper and lower jaws. Keep them relatively consistent in size for a realistic result.
How do I make a shark look realistic?
Focus on its streamlined body, accurate fin placement, small eye, gills, subtle skin texture, and gradual shading.
How do I draw a cute shark?
Make the body rounder, enlarge the eyes, simplify the fins, and give the shark a friendly expression.
What colors should I use?
Gray, blue-gray, white, black, and subtle blue tones work well for most shark illustrations.
How do I draw a shark swimming?
Curve the body slightly and angle the tail in the opposite direction. Add subtle water lines around the fins and tail to suggest movement.
Can beginners draw a realistic shark?
Absolutely. Break the shark into simple shapes and add details gradually rather than trying to draw the complete animal at once.
What pencil should I use?
Use an HB pencil for the initial construction and 2B or 4B pencils for darker outlines, shadows, and details.
Final Words
Learning how to draw a shark is much easier when you start with simple shapes and build the animal step by step. Begin with the long streamlined body, then add the head, snout, mouth, eye, gills, fins, and powerful tail. Once the silhouette looks correct, use shading and subtle texture to give your shark depth.
After mastering a basic side-view shark, experiment with different poses and species. Try a great white shark, a cute cartoon shark, or a shark swimming through an underwater scene. With regular practice, you’ll become more confident drawing fins, teeth, animal proportions, movement, and realistic underwater details.