
Painting ceramic figurines is a fun way to refresh old decorations, personalize collectibles, or turn plain ceramic pieces into beautiful handmade artwork. Learning how to paint ceramic figurines is easier when you choose the right paint, prepare the surface carefully, and use small brushes for delicate details.
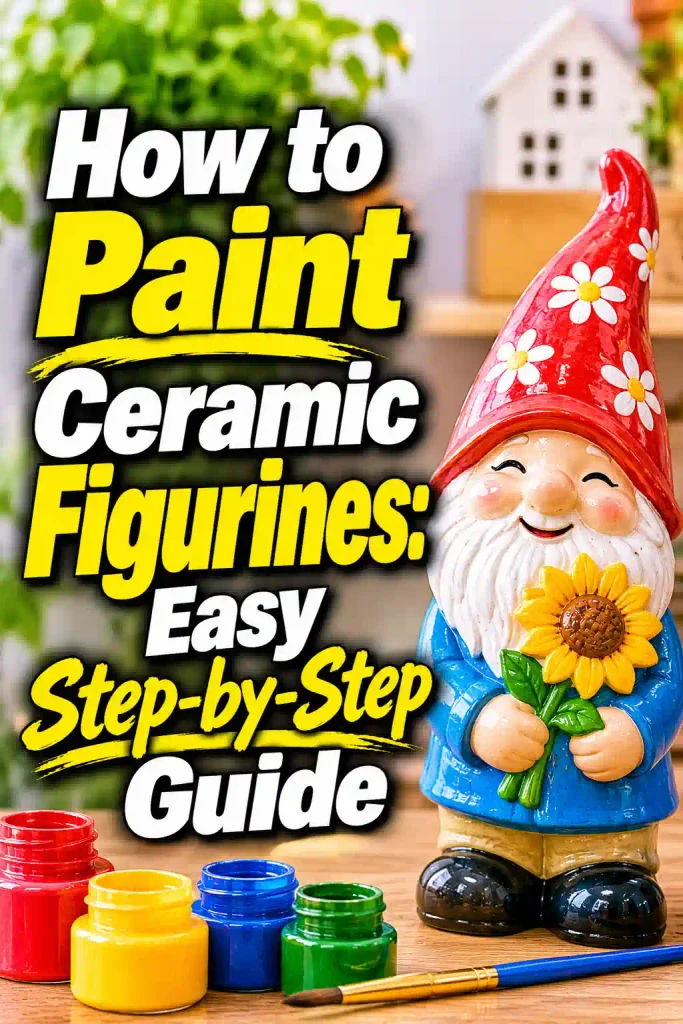
Whether you are decorating an unglazed bisque figurine or repainting a glossy ceramic statue, the right technique can help you achieve a neat, colorful finish. This guide covers everything from choosing supplies and preparing the ceramic to adding fine details and protecting your finished design.
Affiliate disclosure: As an Amazon Associate I earn from qualifying purchases.
What to Buy for Painting Ceramic Figurines
Before starting, gather the supplies you need. The best products depend on whether your figurine is unglazed, painted previously, or covered with a glossy ceramic glaze.
- Acrylic paint set – Offers a wide selection of colors for decorative figurines.
- Ceramic paint – A useful option for decorating ceramic surfaces when the product is compatible with your figurine.
- Fine detail paintbrush set – Helps paint faces, eyes, patterns, and small decorative features.
- Small round paintbrushes – Useful for curved lines, dots, and delicate details.
- Flat paintbrushes – Help apply smooth base coats to larger areas.
- Ceramic bonding primer – Helps prepare suitable glossy surfaces when required by the paint system.
- Acrylic gesso – Can provide an even base on suitable porous, unglazed ceramic.
- Paint palette – Makes it easier to mix and organize colors.
- Fine-grit sanding sponge – Optional for gentle surface preparation when permitted by the manufacturer.
- Clear acrylic sealer – Helps protect compatible decorative paint.
- Paint pens – Useful for tiny details, lettering, and decorative accents.
- Microfiber cleaning cloths – Help remove dust and fingerprints before painting.
Check product labels before purchasing. A primer, paint, or sealer suitable for porous bisque may not be appropriate for glossy glazed ceramic.
Can You Paint Ceramic Figurines?
Yes! Many ceramic figurines can be painted with acrylic or ceramic-specific decorative paints. The most important consideration is the surface.
There are two common types of ceramic figurines:
Unglazed ceramic bisque: This material has a matte, slightly rough, porous surface. It absorbs paint more readily and is generally a good starting point for beginners. Suitable acrylic paints can work well after dust removal and proper drying.
Glazed ceramic: These figurines have a smooth, shiny surface that can be difficult for ordinary acrylic paint to grip. They may require a compatible bonding primer or a paint specifically designed for glossy ceramic surfaces.
You should also consider the figurine’s intended use. Acrylic paint and ordinary craft sealers are suitable for many decorative projects, but they do not automatically create a food-safe, dishwasher-safe, or waterproof finish. If you want a durable fired ceramic finish, you need the appropriate ceramic color or glaze and a compatible kiln-firing process.
For ordinary decorative figurines, air-drying acrylic paint is usually the simpler option.
How to Paint Ceramic Figurines: Step-by-Step Guide
Painting ceramic figurines requires patience because their small shapes, raised patterns, and delicate features can be challenging to cover evenly. Follow these steps to create a clean and attractive finish.
Step 1: Choose the Right Figurine
Start by selecting a ceramic figurine that is in good condition. It might be an animal, angel, human figure, decorative statue, or collectible ornament.
Inspect the entire piece for cracks, chips, loose paint, and damaged details. Check narrow areas such as ears, fingers, tails, and decorative accessories because these can break easily.
Decide whether you want to repaint the entire figurine or add new details to an existing design. If the piece has sentimental or collectible value, test your products in a hidden area before making permanent changes.
Step 2: Clean the Ceramic Surface
Cleaning removes dust, fingerprints, grease, and other residue that could interfere with paint adhesion.
For an unglazed figurine, use a soft, dry brush to remove loose dust. If necessary, wipe it gently with a slightly damp cloth and allow it to dry completely.
For a glazed figurine, wash the surface with mild soap and water, using a soft cloth to reach small grooves and decorative details. Rinse away soap residue and dry thoroughly.
Avoid soaking fragile or repaired figurines. Water can enter cracks, damaged joints, or porous areas and create problems later.
Step 3: Identify Whether the Surface Is Glazed
Before selecting a primer, determine whether the figurine has a glossy or porous finish.
An unglazed bisque figurine usually has a matte appearance and a slightly rough texture. A glazed figurine typically feels smoother and may reflect light.
This distinction matters because the two surfaces need different preparation.
For unglazed bisque, a suitable acrylic paint may adhere directly after cleaning. For glossy ceramic, ordinary acrylic paint may scratch or peel unless you use a compatible preparation and coating system.
Step 4: Prepare the Surface Carefully
For unglazed ceramic, remove dust and make sure the figurine is completely dry. Avoid unnecessary sanding because the surface is already porous and small details can be damaged.
For glossy ceramic, check the paint manufacturer’s instructions before attempting to roughen the surface. Some products recommend gentle scuffing with fine-grit abrasive material, while others require a specific bonding primer.
Work carefully around thin features and raised decorations. Do not aggressively sand delicate edges, painted details, or valuable collectibles.
After preparation, remove all dust with a clean cloth and allow the figurine to dry.
Step 5: Apply the Appropriate Primer
Primer can help create a suitable base for decorative paint, but the correct type depends on the ceramic surface.
For unglazed bisque, a thin coat of acrylic gesso may help create a more uniform painting surface, especially when you want bright colors over a naturally dark or uneven base. Some acrylic paints can also be applied directly to clean bisque.
For glossy ceramic, use a bonding primer specifically designed for smooth, nonporous surfaces. Do not assume ordinary craft gesso will adhere to a shiny glaze.
Apply a thin layer with a small brush or another suitable applicator. Allow it to dry according to the manufacturer’s instructions before moving on.
Step 6: Choose Your Paint Colors
Color selection determines the overall appearance of your figurine. Think about the subject and the style you want to create.
Here are some combinations to consider:
- White and gold: Creates an elegant finish for angels, decorative statues, and ornaments.
- Brown and cream: Works well for bears, dogs, rabbits, and other animal figures.
- Blue and white: Gives a traditional decorative appearance.
- Sage green and beige: Creates a soft, natural look.
- Pink and lavender: Suitable for flowers, fairies, and whimsical figures.
- Black and silver: Adds a dramatic, modern appearance.
- Terracotta and warm brown: Creates an earthy finish.
- Pastel colors: Give small decorative figures a gentle, playful look.
Use a paint palette to mix your colors. Test each shade on a small area or spare ceramic piece before applying it to the entire figurine.
Step 7: Apply the Base Coat
The base coat creates the main color of your figurine.
Choose a flat or medium-sized brush for larger areas and apply a thin, even layer. Work around the body and larger features first, leaving tiny details for later.
For example, if you are painting a ceramic rabbit, start with the main body color before adding the ears, nose, eyes, and paws.
Use controlled brushstrokes and avoid applying too much paint. Thick layers can hide raised details and create uneven surfaces.
Allow the first coat to dry as directed by the paint manufacturer.
Step 8: Apply Additional Thin Coats
After the first layer is ready for recoating, examine the figurine for uneven coverage.
Apply another thin coat where necessary. Porous bisque may absorb some paint, so the first application might look less vibrant than expected.
Build up the color gradually rather than trying to achieve full coverage in one application. This approach helps preserve small details and produces a more consistent finish.
Allow each layer to dry before adding another.
Step 9: Paint Small Details
Once the base coat is ready, use fine-tipped brushes to add the figurine’s smaller features.
Depending on the design, these may include:
- Eyes and eyebrows.
- Noses and mouths.
- Flower petals and leaves.
- Clothing details.
- Hair and facial features.
- Animal spots or stripes.
- Decorative patterns and borders.
Rest your painting hand on a stable surface to improve control. Use a small amount of paint on the brush and work slowly.
For symmetrical details, such as eyes, lightly mark their positions before painting. This helps keep the design balanced.
Step 10: Add Shading and Highlights
Shading gives a figurine more depth and makes its details stand out.
Choose a slightly darker version of the base color and apply it gently to recessed areas. For example, darker brown can add depth around the folds of an animal’s fur, while a deeper blue can emphasize clothing creases.
Use a lighter shade on raised areas to create highlights. A small amount of cream or pale color can help emphasize cheeks, feathers, fabric folds, or decorative edges.
Keep the effect subtle. Too much shading can make a small figurine look messy rather than detailed.
Step 11: Correct Small Painting Mistakes
Inspect the figurine from different angles once the details have dried.
If a line is uneven or a color has spread into another area, correct it with a fine brush when the paint is ready for another layer. You can carefully paint over small mistakes using the surrounding base color.
Avoid scrubbing or using strong solvents to remove errors. These methods can damage the ceramic surface or any original decorative finish.
Take your time with corrections, particularly around the face and other important features.
Step 12: Apply a Compatible Clear Sealer
A clear sealer can help protect decorative paint from dust, light handling, and minor surface scratches.
Choose a non-yellowing clear acrylic sealer or another topcoat specifically compatible with your paint. Select matte, satin, or gloss according to the appearance you want.
Apply thin coats rather than one heavy layer. If you use a spray sealer, protect the surrounding area and work outdoors or in a properly ventilated space according to the product’s safety instructions.
Allow the sealer to dry and cure for the full period specified by its manufacturer before handling the figurine regularly.
Step 13: Let the Figurine Cure Completely
A surface that feels dry may not yet be fully cured.
Leave the figurine in a clean, protected area while the paint and sealer complete their recommended curing period. Avoid touching small details or placing the piece against other objects during this time.
Once the finish has cured, display the figurine on a stable shelf, table, or decorative stand.
What Is the Best Paint for Ceramic Figurines?
The best paint depends on the surface and the type of finish you want.
Acrylic Paint
Acrylic paint is a popular choice for decorative figurines because it is available in many colors, dries relatively quickly, and works well with small brushes.
It is particularly useful for unglazed bisque ceramic. On glossy ceramic, you may need a compatible primer or multi-surface paint designed for nonporous materials.
Ceramic-Specific Paint
Ceramic-specific decorative paints are designed for decorating ceramic surfaces. Some are intended for air-drying, while others require a particular curing or firing process.
Read the instructions carefully so you know whether the product is suitable for your figurine and whether it needs special equipment.
Acrylic Enamel Paint
Acrylic enamel can provide a durable decorative finish when it is compatible with the ceramic surface. It may be useful for figurines that will be handled more frequently.
Follow the manufacturer’s instructions for preparation, application, and curing.
Spray Paint
Spray paint can be useful for applying an even base color to larger figurines or pieces with complicated shapes.
Choose a spray coating suitable for ceramic and apply light, controlled passes. Protect nearby surfaces and use the ventilation and protective equipment required by the product label.
For small faces and intricate patterns, a brush usually offers better control.
Easy Ceramic Figurine Painting Ideas
You do not need advanced artistic skills to create attractive ceramic decorations. Start with simple colors and patterns before attempting more complicated designs.
1. Paint a Ceramic Animal Figurine
Animal figurines are excellent projects for beginners. Choose natural colors that match the animal or create a more imaginative design.
For example, paint a ceramic cat in cream, gray, or black. Use a fine brush for the eyes, nose, whiskers, and small markings. A little shading around the ears and paws can make the figure look more detailed.
2. Create a White and Gold Figurine
White and gold create an elegant combination for decorative angels, birds, and small statues.
Apply a white base coat and let it dry. Add gold accents to the wings, clothing, borders, or raised decorations using a fine brush.
Keep the gold details relatively simple so the overall design remains balanced.
3. Try a Pastel Ceramic Figurine
Pastel colors can give decorative figures a soft and cheerful appearance.
Choose pale pink, mint green, lavender, light blue, or butter yellow. Apply one main color and use complementary shades for smaller details.
This style works particularly well for fairy figures, rabbits, birds, and decorative ornaments.
4. Paint a Vintage-Style Figurine
For an aged appearance, use muted colors such as cream, dusty blue, sage green, and warm brown.
Apply the base color and add subtle darker shades to recessed areas. Avoid heavy distressing on delicate ceramic pieces.
A satin or matte decorative finish can complement this traditional style.
5. Add Floral Decorations
Flowers are a simple way to personalize a ceramic figurine.
Use a small round brush to create petals, leaves, and stems. You can add a floral pattern to clothing, a bird’s body, or the base of a decorative statue.
Choose two or three main colors to prevent the design from becoming too busy.
6. Create a Metallic Finish
Metallic paint can make a simple figurine look more decorative.
Gold, silver, bronze, and copper are popular options. Apply metallic accents to raised features, borders, accessories, or the entire figure if the paint is suitable for the surface.
Use a fine brush to avoid covering details unnecessarily.
7. Paint a Minimalist Figurine
A minimalist design uses a limited color palette and simple details.
Choose white, beige, gray, or charcoal. Apply a smooth base color and leave unnecessary patterns out of the design.
This approach works well for modern home decor and small decorative sculptures.
Tips for Painting Small Ceramic Figurines
Small figurines require extra control because their features are close together. These tips can make the process easier.
- Use fine brushes: Small round brushes help you reach eyes, facial features, and narrow spaces.
- Work from large areas to small details: Complete the main body color before adding tiny decorations.
- Use thin layers: Heavy paint can hide texture and raised details.
- Keep your brushes clean: Rinse them when changing colors and reshape the tips before setting them aside.
- Use a stable work surface: Place the figurine on a non-slip mat or protected table.
- Rotate the figurine: Check the back, sides, and underside so you do not miss small areas.
- Mix enough paint: Prepare sufficient color for each section to avoid noticeable differences between batches.
- Allow proper drying time: Wait between layers to prevent smudging and accidental color mixing.
Good lighting is also helpful. A desk lamp can make it easier to see small details, especially when painting dark colors or working on intricate patterns.
Common Mistakes to Avoid When Painting Ceramic Figurines
Even a small project can become frustrating if the wrong materials or techniques are used.
Using the Wrong Paint for the Surface
Ordinary acrylic paint may adhere well to unglazed bisque but can peel from glossy ceramic. Identify the surface before choosing paint and primer.
Skipping Cleaning
Dust, grease, and fingerprints can interfere with adhesion. Clean the figurine gently and allow it to dry completely before painting.
Applying Too Much Paint
Thick layers can cover carved details, create brush marks, and produce an uneven finish. Use several thin coats instead.
Rushing the Details
Painting tiny features before the base coat is ready can cause colors to mix or smear. Allow each layer to dry sufficiently.
Using an Incompatible Sealer
Not every clear coat works with every acrylic or ceramic paint. Check compatibility before applying sealer to the entire figurine.
Handling the Figurine Too Soon
Touching the piece before the coating has cured can leave fingerprints or damage delicate details. Follow the manufacturer’s curing instructions.
Using Household Oven Heat Without Checking the Paint Label
Some ceramic paints are designed for a specific heat-curing process, but ordinary acrylic paints and sealers are not necessarily suitable for baking. Never put a painted figurine in an oven unless the product instructions explicitly require and permit that process.
How to Care for Painted Ceramic Figurines
Once your project is complete, proper care can help preserve its appearance.
- Dust gently: Use a soft brush or microfiber cloth to remove dust.
- Avoid soaking: Do not leave decorative painted figurines in water.
- Keep away from harsh cleaners: Strong chemicals can damage decorative coatings.
- Handle carefully: Hold the main body rather than delicate features such as wings, ears, or fingers.
- Avoid abrasive materials: Rough sponges and scrubbing pads can scratch the finish.
- Protect from direct sunlight: Prolonged exposure may fade some paint colors.
- Display securely: Use a stable shelf away from edges where the figurine could fall.
- Inspect occasionally: Check for chips, peeling, or loose decorative details.
If you need to clean a painted figurine, use a lightly damp soft cloth only when the coating allows it. Avoid aggressive washing unless the paint manufacturer specifically confirms that the finish can tolerate it.
Frequently Asked Questions
What kind of paint do you use on ceramic figurines?
Acrylic paint is a common choice for decorative ceramic figurines, especially unglazed bisque pieces. Ceramic-specific decorative paints and compatible acrylic enamel products are other options. For glossy figurines, choose a coating system designed for nonporous surfaces.
Can you paint ceramic figurines with acrylic paint?
Yes. Acrylic paint works well on many unglazed ceramic figurines after cleaning and drying. On glossy glazed pieces, ordinary acrylic paint may not adhere reliably without appropriate surface preparation or a compatible bonding primer.
Do ceramic figurines need primer before painting?
Not always. Unglazed bisque may accept suitable acrylic paint directly, although gesso can help create an even base. Glossy ceramic often needs a primer specifically designed for smooth, nonporous surfaces.
How do you paint detailed ceramic figurines?
Start with a base coat using a medium or small brush. Once it is dry, use fine-tipped brushes for facial features, patterns, and decorative details. Work slowly and apply thin layers for better control.
Do you need to seal painted ceramic figurines?
A compatible clear sealer is useful for protecting many decorative acrylic finishes from dust, light handling, and minor scratches. Choose a topcoat designed for the paint you used and follow its curing instructions.
Can you paint over an already glazed ceramic figurine?
Yes, but glossy glaze can make paint adhesion difficult. Clean the surface thoroughly and follow the coating manufacturer’s recommendations for surface preparation and bonding primer. Test the complete paint system in a hidden area first.
Can you use spray paint on ceramic figurines?
Yes, when the spray paint is suitable for the ceramic surface. It can provide an even base coat, especially on larger or textured pieces. Use light passes, protect nearby objects, and follow the product’s ventilation and safety instructions.
How many coats of paint should ceramic figurines have?
Two or more thin coats are often useful for achieving even coverage, but the exact number depends on the paint and ceramic surface. Apply additional layers only when needed and follow the manufacturer’s recoat instructions.
Can painted ceramic figurines be displayed outdoors?
Some can, but the paint and sealer must be rated for outdoor exposure. Sunlight, rain, temperature changes, and moisture can damage decorative finishes. A coating suitable for indoor ornaments may not last outdoors.
How long should painted ceramic figurines dry?
Drying and curing times vary by product, humidity, temperature, and paint thickness. Allow each layer to dry according to its label, then give the completed paint and sealer their full recommended curing period before regular handling.
Final Words
Learning how to paint ceramic figurines gives you an easy way to refresh old decorations, personalize collectibles, and create beautiful handmade pieces. With suitable paint, careful preparation, and a few fine brushes, you can transform a plain ceramic figure into something special.
Start with a clean, dry surface, choose products that match the ceramic finish, and build your design using thin coats. Take your time with the small details and allow the paint to cure before displaying your finished work. Whether you prefer natural animal colors, elegant metallic accents, or cheerful pastel designs, your creativity can make each ceramic figurine unique.
Helpful Resources
- Derby Museums – Ram Learning Resource Pack – Includes information about paint-your-own ceramic bisque figurines, suitable paints, and protective finishes.
- Chrysanthos – Ceramic and Color Information Manual – Provides technical information about ceramic decoration, brush application, airbrushing, and adding color to textured surfaces.