
Want to give an old flowerpot a fresh look or turn a plain ceramic planter into a colorful decorative piece? Learning how to paint ceramic pots is an easy DIY project that lets you customize your planters with beautiful colors, patterns, and creative designs.
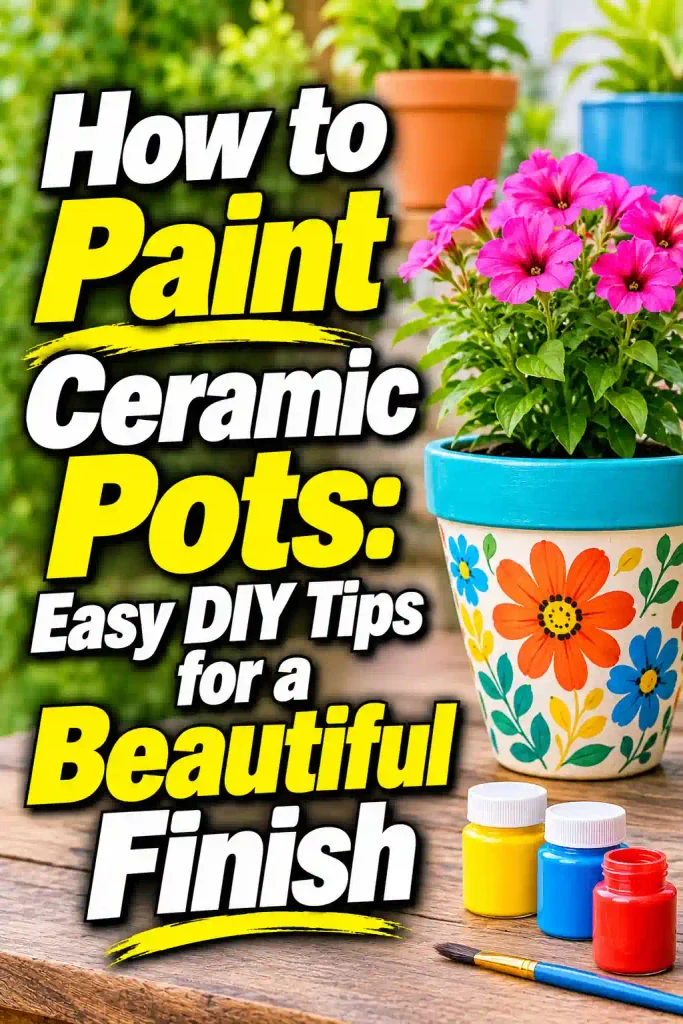
With the right paint and surface preparation, you can transform ordinary ceramic pots into attractive decorations for your home, balcony, or garden. This guide explains what supplies to use, how to prepare different ceramic surfaces, and how to protect your finished design.
Affiliate disclosure: As an Amazon Associate I earn from qualifying purchases.
What to Buy for Painting Ceramic Pots
Gather your supplies before starting. The best products depend on whether your ceramic pot has a glossy glaze or an unglazed, porous surface.
- Multi-surface acrylic paint – A practical option for decorative pots when the label confirms ceramic compatibility.
- Ceramic paint – Designed for decorating ceramic surfaces.
- Ceramic bonding primer – Helps prepare suitable glossy surfaces for painting.
- Clear acrylic sealer – Helps protect decorative paint when compatible with the paint underneath.
- Fine-grit sandpaper – For careful surface preparation when the coating manufacturer recommends it.
- Small paintbrush set – Useful for patterns, edges, and detailed designs.
- Foam paint brushes – Help apply smooth coats to larger areas.
- Painter’s tape – Helps create clean lines and protect areas you do not want to paint.
- Paint pens – Useful for lettering, dots, and small decorative details.
- Microfiber cleaning cloths – Help remove dust and fingerprints before painting.
- Protective gloves – Keep your hands clean while preparing and painting the pot.
Check the product labels before purchasing. Not every acrylic paint, primer, or sealer is suitable for every ceramic surface or outdoor condition.
Can You Paint Ceramic Pots?
Yes! You can paint many ceramic pots using paints designed for decorative ceramic surfaces. The important thing is to identify the type of finish before choosing your products.
Ceramic pots generally fall into two categories:
Glazed ceramic pots: These have a smooth, shiny, often water-resistant surface. Ordinary craft paint may struggle to adhere because the glaze is relatively nonporous. A compatible bonding primer or ceramic-specific paint may be needed.
Unglazed ceramic pots: These have a matte, slightly rough, porous surface. They generally accept decorative acrylic paint more readily, although they may absorb the first coat unevenly.
For either type, clean the pot thoroughly and test your paint system on a small, inconspicuous area.
One important distinction: ordinary craft acrylic paint and clear sealer do not turn a decorative pot into food-safe or permanently waterproof pottery. Keep painted surfaces away from food and drinking water, and follow the manufacturer’s instructions for planters that will be exposed to moisture.
How to Paint Ceramic Pots: Step-by-Step Guide
Painting ceramic pots is a manageable project for beginners. Follow these steps to create a neat finish that complements your home or garden.
Step 1: Choose the Right Ceramic Pot
Start with a pot that is structurally sound. Check the surface for cracks, chips, loose coatings, and damaged edges.
Decide whether you want to paint a small indoor planter, a large outdoor container, or a decorative pot for a shelf. The intended use will influence your choice of paint and protective finish.
If the pot has a glossy surface, choose a paint system specifically suitable for glazed ceramic. If it is unglazed, a suitable multi-surface acrylic paint may be easier to work with.
Step 2: Clean the Pot Thoroughly
A clean surface helps paint adhere more consistently.
Wash the pot with mild soap and water to remove soil, dust, grease, and other residue. Use a soft brush to clean grooves, decorative details, and the rim.
Rinse away any soap and allow the pot to dry completely. Pay particular attention to the bottom and drainage area, where moisture and dirt can collect.
Do not paint over damp ceramic. Moisture trapped beneath the coating can interfere with adhesion and affect the finished appearance.
Step 3: Prepare the Surface
Surface preparation depends on whether the pot is glazed or unglazed.
For an unglazed pot, remove loose dust and inspect for rough patches. You may lightly smooth small imperfections with suitable fine-grit sandpaper if needed.
For a glossy glazed pot, check the paint manufacturer’s instructions. Some coating systems recommend lightly scuffing the surface to improve adhesion. If sanding is permitted, work gently and avoid damaging the ceramic or creating unnecessary dust.
Wipe away all preparation residue and let the pot dry again.
Step 4: Apply a Suitable Primer
Primer is particularly useful when painting a smooth, glossy ceramic surface with a coating system that requires it.
Choose a bonding primer specifically labeled for ceramic or other suitable nonporous surfaces. Apply a thin, even coat according to the instructions.
Allow it to dry for the recommended time before painting.
Unglazed ceramic may not need the same primer, especially when using paint designed for porous surfaces. Always follow the requirements of the selected paint rather than applying primer automatically.
Step 5: Choose Your Paint Colors
Now comes the creative part! Choose colors that complement the space where you plan to display the pot.
Here are a few ideas:
- White: Creates a clean, timeless appearance.
- Sage green: Adds a soft, natural look that works beautifully with plants.
- Terracotta: Gives decorative planters a warm, earthy feel.
- Pale blue: Creates a fresh and calming appearance.
- Mustard yellow: Adds a cheerful pop of color.
- Charcoal gray: Offers a modern look with strong contrast.
- Dusty pink: Creates a gentle decorative finish.
- Cream: Works well with neutral and rustic interiors.
Before painting the entire pot, test your selected color on a small area. Allow it to dry so you can see its actual appearance.
Step 6: Apply the First Coat of Paint
Stir your paint thoroughly and prepare a clean brush or foam applicator.
Apply a thin, even coat to the outside of the pot. Start near the rim and work down toward the base, rotating the pot as needed.
Avoid loading the brush with too much paint. Heavy coats can create drips, uneven coverage, and visible brush marks.
If you are painting an unglazed pot, the first coat may look patchy because the surface absorbs some of the paint. This does not necessarily mean something has gone wrong. Allow it to dry and assess the coverage before applying another coat.
Step 7: Allow the First Coat to Dry
Follow the paint manufacturer’s recommended drying time. Temperature, humidity, paint thickness, and the ceramic surface can all affect drying.
Do not rush the next coat. Applying fresh paint over a layer that has not dried sufficiently can cause uneven coverage or disturb the finish.
Keep the pot in a clean area where dust, pets, and accidental contact will not affect the surface.
Step 8: Apply a Second Coat
Once the first coat is ready for recoating, apply another thin layer.
Use smooth, consistent brushstrokes and rotate the pot to check every side. Pay attention to the lower curves, rim, and decorative details.
A second coat often improves color depth and coverage. Some paints may need additional coats, so follow the product instructions instead of relying on a fixed number.
Allow each coat to dry as directed.
Step 9: Add Decorative Patterns and Details
When the base color is dry, you can personalize your ceramic pot with simple designs.
Try these beginner-friendly ideas:
- Polka dots: Use a small round brush or paint pen to create evenly spaced dots.
- Geometric shapes: Apply painter’s tape to create stripes, triangles, or color blocks.
- Floral patterns: Paint small flowers and leaves around the pot.
- Abstract designs: Combine curved lines, uneven shapes, and contrasting colors.
- Stripes: Use tape to create clean horizontal or vertical bands.
- Personalized lettering: Add a short word or plant name using a suitable paint pen.
For detailed work, use a fine brush and apply small amounts of paint. Let one color dry sufficiently before adding another color beside or over it.
Step 10: Remove Painter’s Tape Carefully
If you used painter’s tape, remove it according to the paint manufacturer’s guidance.
Pull it back slowly rather than yanking it away. This helps reduce the chance of lifting the fresh paint or damaging the edges of your design.
If you notice small imperfections, use a fine brush to make careful corrections once the coating is ready for touch-ups.
Step 11: Apply a Protective Sealer
A compatible clear sealer can help protect decorative paint from scratches, dust, and light moisture.
Choose a product that is approved for the type of paint and ceramic surface you used. It should also be suitable for the intended indoor or outdoor conditions.
Apply thin coats according to the label. If you are using a spray sealer, work in a well-ventilated area, protect nearby surfaces, and follow the required safety precautions.
Allow the sealer to dry and cure as directed. Remember that a decorative sealer does not necessarily make a planter waterproof, suitable for standing water, or resistant to prolonged outdoor exposure.
Step 12: Let the Pot Cure Before Using It
A painted pot may feel dry before the coating has reached its intended durability.
Give the paint and sealer the full curing time specified by their manufacturers. Avoid placing soil, plants, or water inside until the finish is ready for its intended use.
For a decorative cachepot, consider placing a separate plastic nursery pot inside. This keeps soil and watering moisture away from the painted ceramic surface and makes plant care easier.
Should You Use Acrylic Paint on Ceramic Pots?
Acrylic paint is a popular choice for decorative ceramic projects because it comes in many colors and is easy to apply with ordinary brushes.
However, the result depends on the ceramic surface.
On unglazed ceramic, suitable acrylic paint can adhere reasonably well after cleaning and drying. On glossy glazed ceramic, ordinary craft acrylic may peel or scratch unless the surface is prepared and the coating system is designed for that use.
For better results:
- Choose multi-surface acrylic paint labeled for ceramic.
- Use a compatible bonding primer if required.
- Apply several thin coats rather than one thick coat.
- Allow adequate drying time between coats.
- Use a compatible sealer when appropriate.
- Keep decorative paint away from food-contact surfaces.
If the pot will hold standing water or remain outdoors in demanding weather, choose a coating system specifically rated for those conditions. Even then, test the complete system before committing to a valuable pot.
Creative Ceramic Pot Painting Ideas
You do not need advanced artistic skills to create attractive ceramic planters. Simple patterns and thoughtful color combinations can make an ordinary pot look special.
1. Minimalist White Ceramic Pot
A white ceramic pot looks clean and elegant. Apply a smooth white base coat and keep the design simple.
You can leave it plain or add a thin black line around the rim. This style works especially well with green indoor plants and neutral home decor.
2. Two-Tone Ceramic Pot
Choose two colors that complement each other, such as cream and sage green or white and terracotta.
Use painter’s tape to divide the pot into two sections. Paint one section first, allow it to dry, and then complete the second color for a neat contrast.
3. Floral Ceramic Pot
Flowers can give your planter a cheerful, handmade appearance.
Start with a light background color. Use a small brush to create simple petals, leaves, and stems. You can repeat the same flower around the pot or create one larger design on the front.
4. Polka-Dot Ceramic Pot
Polka dots are easy to make and suitable for beginners.
Choose a solid base color and let it dry. Then use a round brush, sponge tip, or paint pen to add dots in a contrasting shade.
Keep the dots evenly spaced for a neat pattern or vary their sizes for a playful look.
5. Geometric Ceramic Pot
Geometric patterns create a modern decorative style.
Use painter’s tape to outline triangles, squares, or diagonal sections. Fill each area with a different color, allowing the paint to dry as needed before removing the tape.
6. Ombre Ceramic Pot
An ombre finish gradually blends one color into another.
Choose two or three compatible shades. Apply the first color near the top and the darker or lighter shade near the bottom. Blend the transition gently with a clean brush or sponge while the paint is workable.
Test the technique on a spare surface first because different acrylic formulas blend differently.
7. Rustic Neutral Ceramic Pot
For a natural look, use cream, warm beige, muted brown, or soft gray.
A simple matte finish can complement wooden furniture, woven baskets, and natural home accessories. Keep the design understated so the plant remains the main attraction.
Common Mistakes to Avoid When Painting Ceramic Pots
Even a simple DIY project can produce disappointing results if the surface or products are not suitable.
Skipping Surface Preparation
Dirt, grease, and dust can prevent paint from adhering properly. Always clean the pot and allow it to dry before starting.
Using Ordinary Paint on Glossy Ceramic
Glossy glaze is difficult for many ordinary paints to grip. Choose a ceramic-compatible coating and use the preparation system recommended by its manufacturer.
Applying Thick Coats
Heavy paint applications can drip, crack, or dry unevenly. Thin coats generally provide better control and a more consistent appearance.
Sealing Before the Paint Is Ready
Applying sealer too early can interfere with the paint film. Follow the recommended drying and curing times before applying the protective finish.
Painting the Drainage Hole Shut
A planter needs a working drainage hole when the plant requires drainage. Keep the opening clear of paint buildup and do not block it with sealer.
Using Decorative Paint on Food-Contact Surfaces
Craft acrylics and ordinary decorative sealers should not be assumed to be food-safe. Keep painted pots and pottery for decorative use unless the complete product system is specifically certified for the intended food-contact application.
Ignoring Outdoor Conditions
Sunlight, rain, temperature changes, and standing water can damage decorative coatings. Select products rated for the intended exposure and understand their limitations.
How to Care for Painted Ceramic Pots
A little care can help preserve the appearance of your finished planter.
- Clean gently: Use a soft damp cloth to remove dust and dirt.
- Avoid abrasive scrubbers: Rough cleaning tools can scratch the painted finish.
- Prevent standing water: Empty saucers after watering when appropriate.
- Protect indoor surfaces: Use a saucer or separate waterproof liner beneath the pot.
- Limit harsh weather exposure: Follow the coating’s outdoor-use rating.
- Inspect the finish: Check periodically for chips, peeling, or moisture damage.
- Touch up carefully: Use compatible paint and sealer if the decorative surface needs repair.
For outdoor planters, remember that even a well-sealed decorative finish may eventually fade or wear. Regular inspection helps you spot problems before they become extensive.
Frequently Asked Questions
What kind of paint do you use on ceramic pots?
Multi-surface acrylic paint and ceramic-specific decorative paint are common choices. For glossy glazed pots, you may need a compatible bonding primer or a paint specifically designed to adhere to glazed ceramic.
Do ceramic pots need to be primed before painting?
Not always. Unglazed ceramic may accept suitable acrylic paint without primer. Glossy ceramic often needs additional preparation, and some paint systems require a bonding primer. Follow the product instructions.
Can I paint ceramic pots with acrylic paint?
Yes, you can use suitable acrylic paint on ceramic pots intended for decorative use. Unglazed surfaces are generally easier to paint than glossy glazed ones. On glazed ceramic, check whether the paint requires scuffing or primer.
Do I need to seal painted ceramic pots?
A compatible sealer can help protect decorative paint from scratches and light moisture. It is particularly useful when the pot will be handled regularly. However, sealing does not automatically make the pot waterproof or suitable for standing water.
Can painted ceramic pots be used outdoors?
They can be, provided the paint and sealer are rated for the intended outdoor conditions. Sun exposure, rain, temperature changes, and moisture can shorten the life of decorative coatings. Test the complete system before using it on an important planter.
How many coats of paint should I apply?
Two or more thin coats are often used to achieve even coverage. The exact number depends on the paint, the original pot color, and whether the ceramic is porous or glazed. Follow the manufacturer’s recommendations.
Can I paint the inside of a ceramic flowerpot?
For a decorative planter, it is generally better to concentrate on the outside. Soil and repeated watering can expose interior coatings to prolonged moisture. Use an appropriate plastic nursery pot or liner if you want to protect the painted exterior.
How long should painted ceramic pots dry before planting?
The required time depends on the paint and sealer. Follow the full curing instructions for every coating rather than relying only on touch-dry time. Keep soil and water away until the finish is ready for its intended use.
Can I use spray paint on ceramic pots?
Yes, if the spray paint is specifically suitable for the ceramic surface and intended conditions. Apply light, even passes in a well-ventilated area and follow the label’s instructions for distance, recoat time, and protective equipment.
Is acrylic paint on ceramic pots waterproof?
Ordinary acrylic craft paint should not be considered waterproof simply because it has dried. A compatible sealer may improve moisture resistance, but the complete coating system must be suitable for the conditions in which the pot will be used.
Final Words
Learning how to paint ceramic pots is a fun way to refresh old planters and create decorations that match your personal style. With careful cleaning, suitable paint, thin coats, and a compatible protective finish, you can achieve a colorful and attractive result.
The most important step is choosing products that match your ceramic surface. Take your time with preparation, allow each layer to dry properly, and keep drainage openings clear. Whether you prefer a simple white finish, floral patterns, geometric designs, or bold colors, a little creativity can turn an ordinary ceramic pot into a beautiful decorative piece.
Helpful Resources
- The Joy of Creativity – Ceramic Pot Painting Activity – Provides a simple ceramic pot painting activity with preparation and decorating tips.
- Infopeople – Living in a Material World Toolkit – Includes a painted-pot craft activity with suggestions for acrylic paint, brushes, and clear sealer.